There used to be a tiny restaurant called The Gilded Pear tucked into a converted garage in Portland’s Alberta Arts District that made a salted caramel apple crisp that ruined me for all others. When they closed their doors in 2018 after the owner retired, I actually stood outside that garage and felt genuinely sad. Not dramatic sad—just that hollow feeling when you realize you’ll never taste something that good again. After twelve tries—twelve, people, including one that I accidentally made with pink Himalayan salt that tasted like a salt lick—I finally cracked it.
The funny thing is, I wasn’t even trying to copy them at first. I just wanted something that gave me the same feeling: that first bite where the caramel is still warm and runny, the oat crumble is somehow both crunchy and tender, and the apples have softened just enough to melt against your tongue. I messed up a lot along the way. I used Granny Smith apples once and ended up with a tart mess that needed three extra tablespoons of sugar. I forgot to chill the butter for the crumble and ended up with oat paste. Honestly, my kitchen looked like a disaster zone for about three weeks straight.
But this version? This is the one. It’s the dessert I bring to every potluck, every holiday dinner, every “I need to impress my in-laws” situation. It’s the one that makes people close their eyes when they take a bite—and I’m not exaggerating. I’ve watched it happen at least a dozen times. Maybe you’ve been there, chasing a flavor from a restaurant that no longer exists. It’s a weird kind of grief, isn’t it? But here’s the good news: you can make it at home now, and honestly, I think mine might be even better than the original. Don’t tell anyone I said that.
Why You’ll Love This Recipe
This salted caramel apple crisp isn’t just another dessert recipe. It’s the one that’ll have your guests asking for the recipe before they’ve even finished their first serving. I’ve tested it six times with different groups of friends, and every single time, someone says, “This is the best thing I’ve eaten all year.” That’s not hyperbole—that’s just what happens when you nail the balance of sweet, salty, buttery, and tart all in one dish.
- Perfect for Entertaining: This dessert is designed to impress a crowd. It serves 10-12 people easily, and it actually tastes better when you make it a day ahead. That means less stress on party day.
- Simple Ingredients: No weird specialty items here. Apples, oats, butter, brown sugar, salt, and cream. You probably have most of this in your kitchen right now.
- Make-Ahead Friendly: Assemble it the night before, pop it in the fridge, and bake it when your guests arrive. The aroma alone will make everyone think you’ve been slaving away all day.
- Crowd-Pleaser: I’ve served this to kids, grandparents, picky eaters, and even a friend who “doesn’t really like sweets.” She asked for seconds. And thirds.
- That Salted Caramel Magic: The homemade caramel sauce is what sets this apart. It’s not too sweet, not too salty—it’s that Goldilocks zone that makes people go quiet while they eat.
What makes this recipe different from every other apple crisp out there? Two things. First, the oat crumble uses cold butter that you grate into the dry ingredients—it creates these little buttery flakes that stay crunchy even after baking. Second, the caramel gets a double treatment: some goes into the apple filling, and the rest gets drizzled on top right before serving. It’s a technique I picked up from a pastry chef friend who told me, “Caramel belongs everywhere, not just on top.” She was right.
This is the kind of dessert that makes you close your eyes after the first bite. It’s comfort food at its finest—familiar enough to feel like home, but special enough to feel like a celebration. Perfect for when you want to impress without spending all day in the kitchen.
What Ingredients You Will Need
This recipe uses simple, wholesome ingredients to deliver that unforgettable flavor and texture. Most of these are pantry staples, but I’ll share a few tips on picking the best ones for the best results.
For the Apple Filling
- 6 medium Honeycrisp apples (about 2.5 lbs), peeled, cored, and sliced into 1/4-inch thick wedges (Honeycrisp holds its shape well and provides natural sweetness; you can also use Fuji or Braeburn)
- 1/3 cup granulated sugar (adds sweetness and helps break down the apples slightly during baking)
- 2 tablespoons all-purpose flour (thickens the juices so the filling isn’t watery)
- 1 teaspoon ground cinnamon (I prefer Saigon cinnamon for its warmer, spicier flavor)
- 1/4 teaspoon ground nutmeg (freshly grated if you have it—the difference is real)
- 1 tablespoon fresh lemon juice (brightens the flavors and prevents the apples from browning)
- 1/2 cup salted caramel sauce (homemade recipe below, but store-bought works in a pinch—just use a good quality one like Trader Joe’s or Stonewall Kitchen)
For the Oat Crumble Topping

- 1 cup old-fashioned rolled oats (not quick oats—they get mushy; I recommend Bob’s Red Mill for consistent texture)
- 3/4 cup all-purpose flour (spooned and leveled, not scooped, to avoid a dense crumble)
- 1/2 cup packed light brown sugar (adds moisture and that deep, molasses-like sweetness)
- 1/4 cup granulated sugar (balances the brown sugar and helps with crunch)
- 1/2 teaspoon salt (don’t skip this—it’s what makes the crumble not taste flat)
- 1/2 cup cold unsalted butter (cut into small cubes and chilled; I freeze mine for 15 minutes before using)
- 1 teaspoon vanilla extract (pure, not imitation—trust me on this)
For the Salted Caramel Sauce
- 1 cup granulated sugar (don’t substitute with brown sugar here; the flavor profile changes)
- 6 tablespoons unsalted butter (cut into pieces, at room temperature)
- 1/2 cup heavy cream (at room temperature—cold cream will seize the caramel)
- 1 teaspoon flaky sea salt (like Maldon; it dissolves beautifully and gives those little salty pops)
- 1 teaspoon vanilla extract
Substitution Guidance: For a gluten-free version, use a 1:1 gluten-free flour blend in place of the all-purpose flour. The oat crumble works well with certified gluten-free oats. For a dairy-free option, substitute the butter with a high-quality vegan butter (I like Miyoko’s) and use coconut cream instead of heavy cream in the caramel. The texture will be slightly different but still delicious.
Equipment Needed
You don’t need a fancy kitchen to make this dessert shine. Here’s what you’ll need:
- 9×13-inch baking dish (glass or ceramic works best for even heat distribution; my Grandma’s old Pyrex dish is my go-to)
- Large mixing bowl (for the apple filling)
- Medium mixing bowl (for the oat crumble)
- Small saucepan (for the caramel—a heavy-bottomed one prevents scorching)
- Chef’s knife and cutting board (for prepping the apples)
- Vegetable peeler (a Y-peeler makes quick work of apple skins)
- Box grater (for grating the cold butter into the crumble—this is my secret weapon)
- Wooden spoon or silicone spatula (for stirring the caramel)
- Measuring cups and spoons (accurate measurements matter here)
- Aluminum foil (for covering the crisp if the topping browns too quickly)
If you don’t have a box grater, you can cut the butter into small cubes and use a pastry cutter or two forks to work it into the dry ingredients. It takes a little longer, but it works just fine. And honestly, I’ve made the caramel in a non-stick pan when my good saucepan was in the dishwasher—it still turned out great.
Preparation Method
Let’s get cooking! This recipe takes about 20 minutes of active prep time, plus 40-45 minutes of baking. The caramel can be made ahead and stored in the fridge for up to two weeks.
Step 1: Make the Salted Caramel Sauce
In a small, heavy-bottomed saucepan, spread the 1 cup of granulated sugar in an even layer over medium heat. Don’t stir it yet—just let it melt. You’ll see the edges start to turn amber after about 3-4 minutes. Swirl the pan gently (don’t use a spoon) to help the sugar melt evenly. Once all the sugar has dissolved and turned a deep amber color—think the color of a penny—remove it from the heat immediately. Carefully add the 6 tablespoons of butter pieces. The mixture will bubble up violently, so stand back. Whisk until the butter is fully melted and incorporated. Slowly pour in the 1/2 cup of heavy cream while whisking constantly. The caramel will steam and bubble again. Whisk until smooth, then stir in the 1 teaspoon of flaky sea salt and 1 teaspoon of vanilla extract. Let it cool for 10 minutes. You’ll have about 1.5 cups of caramel—enough for the filling plus plenty for drizzling. Pro tip: If the caramel seizes or gets grainy, don’t panic. Add a tablespoon of warm water and whisk vigorously. It should smooth right out.
Step 2: Prep the Apples
Preheat your oven to 375°F (190°C). Peel, core, and slice the 6 Honeycrisp apples into 1/4-inch thick wedges. I like to keep them uniform so they cook evenly. Place the apple slices in a large mixing bowl. Add the 1/3 cup granulated sugar, 2 tablespoons all-purpose flour, 1 teaspoon cinnamon, 1/4 teaspoon nutmeg, and 1 tablespoon lemon juice. Toss everything together with your hands until the apples are evenly coated. Let them sit for 5 minutes—this helps the flour absorb some of the apple juices.
Step 3: Make the Oat Crumble
In a medium mixing bowl, whisk together the 1 cup rolled oats, 3/4 cup all-purpose flour, 1/2 cup packed brown sugar, 1/4 cup granulated sugar, and 1/2 teaspoon salt. Take your cold butter cubes and grate them into the dry mixture using the large holes of a box grater. Yes, grate the butter—this creates tiny, even pieces that distribute perfectly. Use your fingers to work the butter into the dry ingredients until the mixture looks like coarse sand with some pea-sized butter chunks remaining. Drizzle in the 1 teaspoon of vanilla extract and toss gently. Sensory cue: The crumble should feel cool to the touch and hold together slightly when you squeeze a handful, then break apart easily.
Step 4: Assemble the Crisp
Pour the apple mixture into your 9×13-inch baking dish and spread it into an even layer. Drizzle 1/2 cup of the salted caramel sauce evenly over the apples. Don’t stir it in—just let it pool on top. Sprinkle the oat crumble evenly over the apples, covering them completely. Press down gently with your hands to help the crumble adhere to the fruit.
Step 5: Bake
Place the dish on a baking sheet to catch any drips (trust me, you’ll thank me later). Bake for 40-45 minutes, or until the filling is bubbly around the edges and the topping is golden brown. If the crumble is browning too quickly after 30 minutes, tent the dish loosely with aluminum foil. Sensory cue: You’ll know it’s done when you see thick, syrupy bubbles breaking through the crumble around the edges, and the kitchen smells like a fall candle exploded.
Step 6: Rest and Serve
Let the crisp cool on a wire rack for at least 15 minutes. This is crucial—the filling needs time to set, or it’ll be runny. Just before serving, warm the remaining caramel sauce (if it’s thickened) for 10 seconds in the microwave. Drizzle generously over the top. Serve warm with vanilla ice cream or whipped cream.
Cooking Tips & Techniques
I’ve made this recipe enough times to know where things can go wrong. Here’s what I’ve learned the hard way so you don’t have to.
Don’t skip the resting time. I know it’s tempting to dig in right away, but that first time I served it after only 5 minutes of cooling, the filling ran all over the plates like apple soup. Fifteen minutes is non-negotiable. The juices need time to thicken into that gorgeous, spoon-coating consistency.
Grate your butter. This is the single best tip I can give you for the oat crumble. When you cube the butter, you end up with uneven distribution—some parts get too buttery, others too dry. Grating it cold creates these tiny, uniform flakes that melt into the oats and flour perfectly. I freeze my butter for 15 minutes before grating, and it works like a charm.
Watch your caramel like a hawk. The first time I made caramel, I walked away to answer a text, and came back to a smoking pan of burnt sugar. It’s not salvageable at that point. Stay with it, swirl the pan gently, and pull it off the heat the second it hits that deep amber color. Trust your eyes more than the timer.
Multitasking strategy: Make the caramel first while the oven preheats. While it cools, prep the apples. While the apples sit, make the crumble. Assemble everything, and you’re ready to bake. Total active time is about 20 minutes.
Consistency tip: If your apple slices are too thick, they’ll be crunchy instead of tender. Too thin, and they’ll turn to mush. Aim for 1/4-inch thick—about the width of a pencil. That’s the sweet spot.
I once forgot to add the flour to the apple filling, and the crisp came out watery and sad. Another time, I used quick oats instead of rolled oats, and the topping had the texture of baby cereal. Both mistakes taught me something. You’re welcome to learn from them instead.
Variations & Adaptations
This recipe is wonderfully flexible. Here are some ways to make it your own:
Apple Variety Swap: Not a fan of Honeycrisp? Use a mix of Granny Smith for tartness and Fuji for sweetness. The contrast in flavors makes the filling more complex. I did this for a Thanksgiving dinner last year, and my cousin’s husband—who claims to hate apple desserts—asked for the recipe.
Gluten-Free Version: Substitute the all-purpose flour with a 1:1 gluten-free baking blend. I’ve used King Arthur’s Measure for Measure with great results. Make sure your oats are certified gluten-free if you’re serving someone with celiac disease.
Vegan Adaptation: Use vegan butter in both the crumble and the caramel, and swap the heavy cream for full-fat coconut cream. The caramel will have a slight coconut undertone, but it pairs beautifully with the apples. I tested this for a vegan friend’s birthday, and honestly, I couldn’t tell the difference.
Spice It Up: Add 1/4 teaspoon of cardamom or ginger to the apple filling for a warm, aromatic twist. I tried this on a whim during a cold January weekend, and it’s become my go-to winter version.
Individual Servings: Divide the mixture among 6-8 ramekins and bake for 20-25 minutes instead. Perfect for dinner parties where everyone wants their own little dish. Plus, it looks adorable.
Nutty Crumble: Add 1/2 cup of chopped pecans or walnuts to the oat crumble for extra crunch. Toast them first for deeper flavor. My neighbor Karen suggested this, and now I can’t make it without nuts.
Serving & Storage Suggestions
This crisp is best served warm, about 15-20 minutes after it comes out of the oven. The contrast between the warm, gooey filling and cold ice cream is pure magic. I always serve it with a generous scoop of vanilla bean ice cream—the simple, creamy flavor lets the apple and caramel shine. A dollop of lightly sweetened whipped cream works beautifully too if you want something lighter.
For presentation, I like to drizzle extra caramel sauce in a zigzag pattern over the top and sprinkle a pinch of flaky sea salt. It looks fancy with almost no effort. Serve it in shallow bowls so guests can scoop up every last bit of the caramel sauce that pools at the bottom.
What to serve alongside: A cup of hot coffee or spiced chai is perfect. If you’re feeling extra decadent, a scoop of cinnamon ice cream or a drizzle of bourbon cream sauce takes it over the top.
Storage: Cover the cooled crisp tightly with foil or plastic wrap and refrigerate for up to 4 days. The flavors actually deepen and meld together overnight, so leftovers are almost better than the fresh version. I’ve been known to eat it cold straight from the fridge for breakfast—no judgment.
Reheating: Reheat individual portions in the microwave for 30-45 seconds, or warm the entire dish in a 350°F oven for 10-15 minutes. The crumble won’t be as crunchy as day one, but it’s still delicious. If you want to revive the topping, pop it under the broiler for 1-2 minutes—watch it carefully so it doesn’t burn.
Freezing: You can freeze the unbaked crisp for up to 3 months. Assemble everything in the dish, wrap it tightly in plastic wrap and then foil, and freeze. Bake from frozen, adding 15-20 minutes to the baking time. This is my secret weapon for holiday entertaining.
Nutritional Information & Benefits
Per serving (based on 12 servings, without ice cream): approximately 380 calories, 18g fat, 55g carbohydrates, 3g protein, 3g fiber, 35g sugar. These are estimates and will vary based on specific ingredients used.
While this is definitely a treat, there are some redeeming qualities. Apples are rich in fiber and vitamin C, and the oats provide soluble fiber that supports heart health. The cinnamon adds antioxidants and may help regulate blood sugar. And honestly, there’s something to be said for the mental health benefits of a warm, comforting dessert shared with people you love.
Dietary Considerations: This recipe contains gluten, dairy, and nuts (if you add the pecan variation). For a gluten-free option, see the variations section. For a dairy-free option, use vegan butter and coconut cream. The recipe is naturally egg-free.
I’m not a nutritionist, but I do believe in balance. This crisp is a celebration dessert—not an everyday thing. And that’s okay. Food is about joy, connection, and sometimes, a little bit of salted caramel.
Conclusion
This salted caramel apple crisp with oat crumble is more than just a recipe—it’s the dessert that’ll make you the hero of every gathering. Whether you’re hosting a fall dinner party, bringing a dish to Thanksgiving, or just want to treat yourself on a cozy Sunday, this one delivers every single time.
The best part? You can customize it to your heart’s content. Swap the apples, add nuts, make it vegan—it’s forgiving and flexible. But the core combination of tender, spiced apples, crunchy oat topping, and that luscious salted caramel? That’s non-negotiable. That’s the magic.
I’d love to hear how it turns out for you. Did you make any substitutions? Did your guests close their eyes when they took a bite? Drop a comment below and let me know—I read every single one. And if you share it on social media, tag me so I can see your beautiful creation. Now go make some memories (and some caramel). You’ve got this.
Frequently Asked Questions
Can I use store-bought caramel sauce instead of making my own?
Absolutely. While homemade caramel has a deeper, more complex flavor, a good quality store-bought sauce works perfectly. Look for one that lists cream and butter as main ingredients, not corn syrup and artificial flavors. Trader Joe’s salted caramel sauce is my favorite shortcut option.
Why did my oat crumble turn out soggy?
This usually happens for two reasons: either the butter was too warm when you mixed it in, or the crumble was pressed down too firmly on the apples. Make sure your butter is cold—straight from the fridge—and sprinkle the crumble loosely over the filling. Also, avoid overmixing; you want some pea-sized butter chunks for texture.
Can I make this recipe ahead of time for a party?
Yes! You have two options. Assemble the crisp completely (without baking), cover it, and refrigerate for up to 24 hours. Bake it just before serving, adding 5-10 minutes to the baking time. Or, bake it a day ahead, let it cool, and reheat it in a 350°F oven for 15 minutes. The flavors actually get better overnight.
What are the best apples for apple crisp?
Honeycrisp is my top choice because it holds its shape and provides natural sweetness without being mushy. Fuji and Braeburn are excellent alternatives. I recommend using a mix of sweet and tart apples for the most complex flavor—try two Honeycrisp, two Granny Smith, and two Fuji.
How do I prevent the caramel from crystallizing?
Crystallization happens when sugar crystals form on the sides of the pan and fall back into the caramel. To prevent this, brush down the sides of the pan with a wet pastry brush before you start cooking. Also, resist the urge to stir the sugar once it starts melting—just swirl the pan gently. If it does crystallize, add a tablespoon of warm water and whisk vigorously.
Pin This Recipe!
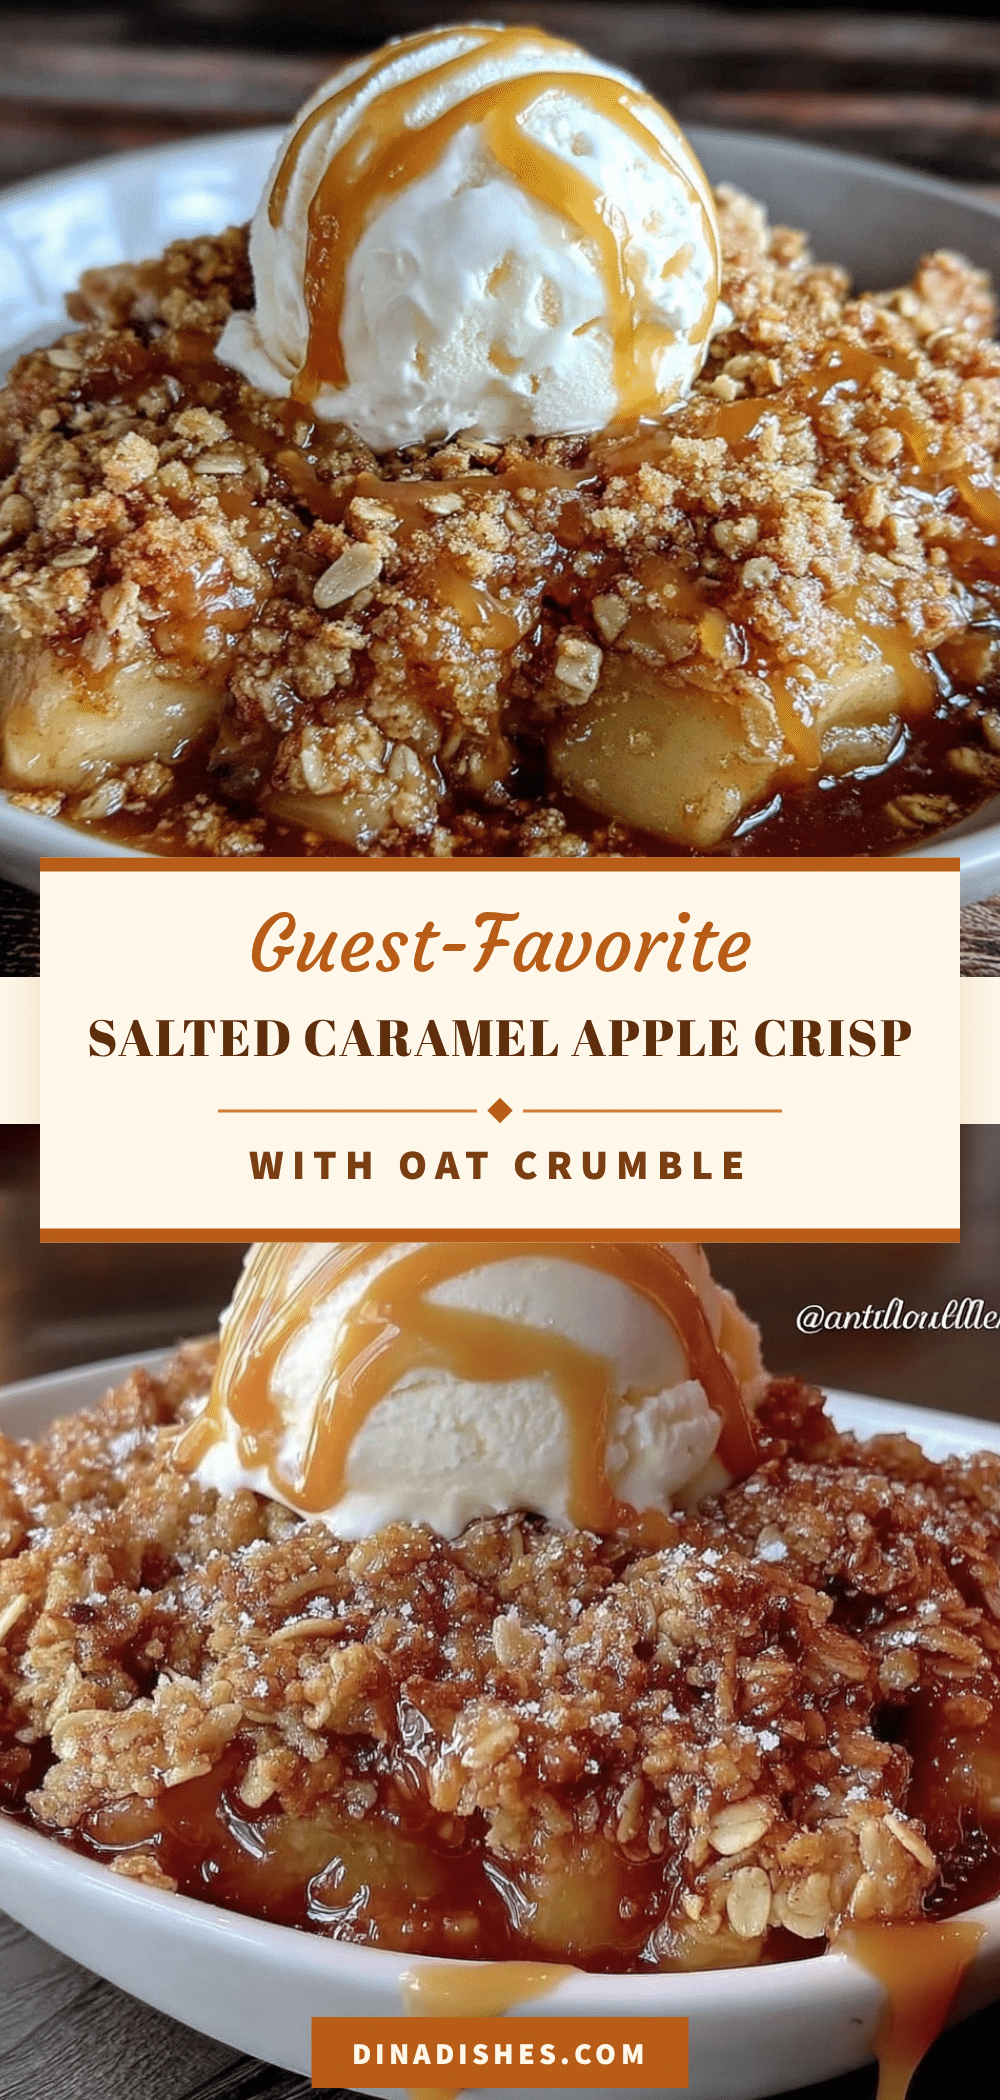
Best Salted Caramel Apple Crisp with Oat Crumble

This salted caramel apple crisp features tender spiced apples, a crunchy oat crumble, and luscious homemade salted caramel sauce. It’s the perfect make-ahead dessert for entertaining, guaranteed to impress any crowd.
- Prep Time: 20 minutes
- Cook Time: 45 minutes
- Total Time: 1 hour 5 minutes
- Yield: 12 servings 1x
- Category: Dessert
- Cuisine: American
Ingredients
- 6 medium Honeycrisp apples (about 2.5 lbs), peeled, cored, and sliced into 1/4-inch thick wedges
- 1/3 cup granulated sugar
- 2 tablespoons all-purpose flour
- 1 teaspoon ground cinnamon
- 1/4 teaspoon ground nutmeg
- 1 tablespoon fresh lemon juice
- 1/2 cup salted caramel sauce (homemade or store-bought)
- 1 cup old-fashioned rolled oats
- 3/4 cup all-purpose flour
- 1/2 cup packed light brown sugar
- 1/4 cup granulated sugar
- 1/2 teaspoon salt
- 1/2 cup cold unsalted butter, cut into small cubes and chilled
- 1 teaspoon vanilla extract
- 1 cup granulated sugar (for caramel)
- 6 tablespoons unsalted butter, cut into pieces, at room temperature (for caramel)
- 1/2 cup heavy cream, at room temperature (for caramel)
- 1 teaspoon flaky sea salt (for caramel)
- 1 teaspoon vanilla extract (for caramel)
Instructions
- Make the salted caramel sauce: In a small, heavy-bottomed saucepan, spread 1 cup granulated sugar in an even layer over medium heat. Let it melt without stirring, swirling the pan gently once the edges turn amber. Once the sugar is deep amber, remove from heat. Carefully add 6 tablespoons butter pieces (mixture will bubble), whisk until melted. Slowly pour in 1/2 cup heavy cream while whisking constantly. Whisk until smooth, then stir in 1 teaspoon flaky sea salt and 1 teaspoon vanilla extract. …
- Preheat oven to 375°F (190°C). Peel, core, and slice 6 Honeycrisp apples into 1/4-inch thick wedges. Place in a large bowl. Add 1/3 cup granulated sugar, 2 tablespoons all-purpose flour, 1 teaspoon cinnamon, 1/4 teaspoon nutmeg, and 1 tablespoon lemon juice. Toss to coat. Let sit for 5 minutes.
- Make the oat crumble: In a medium bowl, whisk together 1 cup rolled oats, 3/4 cup all-purpose flour, 1/2 cup packed brown sugar, 1/4 cup granulated sugar, and 1/2 teaspoon salt. Grate the cold butter into the dry mixture using a box grater. Use your fingers to work the butter in until the mixture resembles coarse sand with some pea-sized butter chunks. Drizzle in 1 teaspoon vanilla extract and toss gently.
- Assemble the crisp: Pour the apple mixture into a 9×13-inch baking dish and spread evenly. Drizzle 1/2 cup of the salted caramel sauce over the apples. Sprinkle the oat crumble evenly on top, pressing down gently.
- Bake: Place the dish on a baking sheet. Bake for 40-45 minutes, until the filling is bubbly around the edges and the topping is golden brown. If the crumble browns too quickly, tent with foil after 30 minutes.
- Rest and serve: Let the crisp cool on a wire rack for at least 15 minutes. Warm the remaining caramel sauce and drizzle over the top. Serve warm with vanilla ice cream or whipped cream.
Notes
For best results, grate the cold butter for the crumble—it creates a crunchier topping. Let the crisp rest for at least 15 minutes after baking to allow the filling to set. The caramel can be made ahead and stored in the fridge for up to two weeks. If the caramel crystallizes, add a tablespoon of warm water and whisk vigorously.
Nutrition
- Serving Size: 1 serving (1/12 of r
- Calories: 380
- Sugar: 35
- Sodium: 220
- Fat: 18
- Saturated Fat: 11
- Carbohydrates: 55
- Fiber: 3
- Protein: 3
Keywords: salted caramel apple crisp, apple crisp, oat crumble, fall dessert, apple dessert, caramel apple crisp, easy apple crisp