This was supposed to be a simple gingerbread cake. You know, the kind you throw together for a casual holiday gathering when you’re short on time but still want the house to smell like Christmas. I had my molasses out, my spices lined up, and I was feeling pretty good about myself. Then I reached into the fridge for the buttermilk and grabbed the block of cream cheese instead. Honestly, I didn’t even realize it until I had already dumped the cream cheese into the mixing bowl with the butter. I stood there for a solid ten seconds, spatula in hand, staring at this mess of butter and cream cheese that was definitely not supposed to be there. The oven was preheated, the guests were arriving in two hours, and I had already texted my sister-in-law, Maria, that I was bringing dessert. Panic doesn’t even begin to cover it.
I almost threw the whole thing out. But let me tell you, I have learned the hard way that wasting food feels worse than serving a kitchen disaster. So I did what any reasonable person would do—I added more cream cheese. I threw in some sugar, an egg, and a splash of vanilla, and I pretended this was the plan all along. I poured the gingerbread batter into the pan, dolloped my accidental cream cheese mixture on top, and swirled it around with a knife like I knew exactly what I was doing. When it came out of the oven, it looked… wrong. The top was cracked, the swirls had sunk into the batter, and I was already planning my apology text to Maria.
But then I let it cool. I cut into it, and that first slice revealed this beautiful, two-layer situation that I still can’t quite believe I stumbled into. The gingerbread was perfectly spiced and tender, and the cream cheese layer had baked into this rich, almost cheesecake-like ribbon running through the middle. I topped it with a quick cream cheese frosting because, honestly, why stop now? Maria asked for the recipe before she even finished her first bite. I told her it was a happy accident, but maybe you’ve been there—the kitchen chaos that somehow turns into your new signature dish. I’ve been making these Perfect Gingerbread Cheesecake Bars ever since, and every single time, I remember that moment of panic turning into pure relief. This recipe stayed with me because it taught me something: sometimes the best things happen when you stop trying to be perfect.
Why You’ll Love This Recipe
Let me be honest with you—I have tested this recipe more times than I care to count. I wanted to make sure that what happened in my kitchen that frantic afternoon could be recreated in yours, every single time. The first few attempts after the “accident” were a little inconsistent. Sometimes the cream cheese layer was too thin, other times the gingerbread was too dense. But after about six batches (and one very patient husband who ate every single one), I landed on the perfect ratio. These bars are the result of real trial and error, and I am so confident in them that I’ve brought them to every holiday party for the last three years.
- Two Desserts in One: You get the warm, spiced comfort of gingerbread and the rich, creamy indulgence of cheesecake in every single bite. It is the ultimate holiday hybrid.
- Made for Hosting: These bars are designed to feed a crowd. The recipe makes a full 9×13 pan, which means you can cut them into generous squares and still have plenty to go around. No portion anxiety.
- Prep Ahead Friendly: You can make these bars a full day before your gathering. The flavors actually get better overnight as the spices meld with the cream cheese. Less stress on party day.
- No Water Bath Needed: Traditional cheesecake can be fussy with its water baths and cracked tops. These bars are incredibly forgiving. No special equipment, no complicated techniques.
- Always Gets Rave Reviews: I have served these at Thanksgiving, Christmas Eve, and even a New Year’s brunch. People take one bite and their eyes go wide. It is the kind of dessert that makes you look like a hero in the kitchen.
What makes these bars different from every other gingerbread dessert out there is the texture. The gingerbread layer is incredibly moist thanks to the molasses and buttermilk, but it holds its structure perfectly against the cream cheese layer. The cream cheese swirl isn’t just a thin ribbon—it is a substantial, almost cheesecake-like layer that gives you that tangy, creamy contrast with every bite. And the cream cheese frosting on top? It is the finishing touch that ties everything together. This isn’t just another holiday bar recipe. It is the one that will have people asking you for the recipe before they even finish their plate.
What Ingredients You Will Need
This recipe uses simple, pantry-friendly ingredients to create something that tastes far more complicated than it actually is. Most of these are staples you probably already have in your kitchen, especially if you do any holiday baking. I have tested this with different brands and substitutions, so I will share what works best.
For the Gingerbread Layer
- All-purpose flour, 2 cups (240g): I use Gold Medal or King Arthur for consistent results. Spoon and level your flour—don’t scoop directly from the bag or you will end up with dry bars.
- Unsalted butter, ½ cup (113g), melted and slightly cooled: I prefer unsalted so I can control the salt level. Let it cool for about 5 minutes after melting so it doesn’t cook the eggs.
- Light brown sugar, 1 cup (200g), packed: Dark brown sugar works too and gives a deeper molasses flavor. Pack it firmly into the measuring cup.
- Molasses, ½ cup (170g): Use unsulphured molasses like Grandma’s or Brer Rabbit. Blackstrap molasses is too bitter and intense for this recipe.
- Large egg, 1: Room temperature is best. If you forgot to take it out of the fridge, place it in a bowl of warm water for 5 minutes.
- Buttermilk, ½ cup (120ml): The acidity in buttermilk tenderizes the gluten and keeps the gingerbread incredibly soft. No buttermilk? Add 1½ teaspoons of lemon juice or white vinegar to regular milk and let it sit for 5 minutes.
- Vanilla extract, 1 teaspoon: Pure vanilla extract makes a difference here. Imitation vanilla can taste artificial against the strong spices.
- Ground ginger, 2 teaspoons: This is the star spice. Make sure your ginger is fresh—if it has been sitting in your cabinet for over a year, replace it.
- Ground cinnamon, 1½ teaspoons: I prefer Ceylon cinnamon for its milder, sweeter flavor, but Cassia cinnamon works fine too.
- Ground cloves, ½ teaspoon: A little goes a long way. Cloves are potent, so measure carefully.
- Baking soda, 1 teaspoon: This helps the gingerbread rise and gives it a tender crumb.
- Salt, ½ teaspoon: Fine sea salt or table salt. Don’t skip it—salt balances the sweetness and enhances the spices.
For the Cheesecake Layer
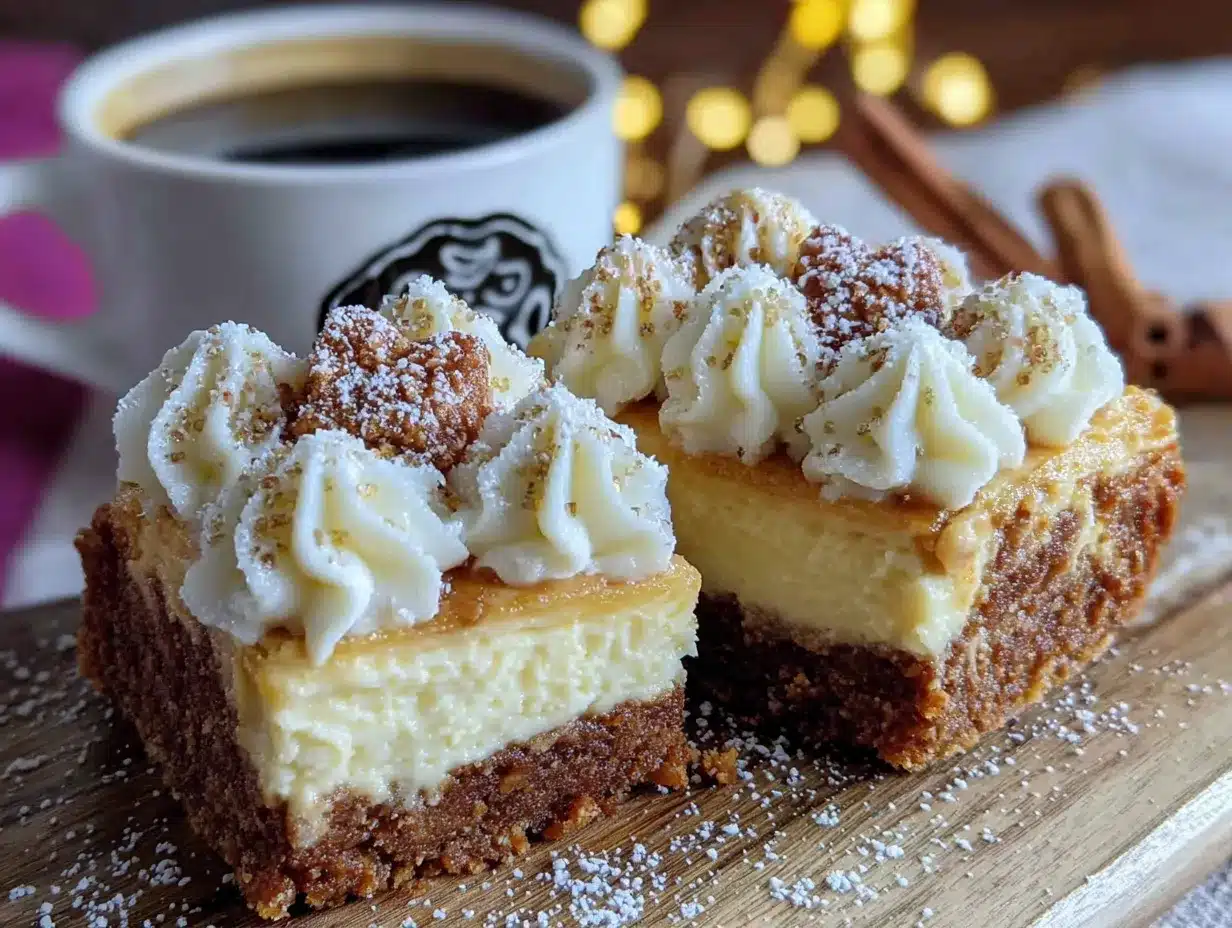
- Cream cheese, 16 oz (450g), softened: Use full-fat block cream cheese like Philadelphia. Do not use reduced-fat or spreadable cream cheese—they contain too much water and will make the layer runny.
- Granulated sugar, ½ cup (100g): Regular white sugar keeps the cream cheese layer light and not overly sweet.
- Large egg, 1: Room temperature. Cold egg will make the cream cheese mixture lumpy.
- Vanilla extract, 1 teaspoon: Pure vanilla again. It brightens the cream cheese flavor.
For the Cream Cheese Frosting
- Cream cheese, 4 oz (113g), softened: Same rules apply—full-fat block cream cheese only.
- Unsalted butter, ¼ cup (56g), softened: Let it sit at room temperature for at least 30 minutes so it blends smoothly.
- Powdered sugar, 1½ cups (180g): Sift it if you want an extra smooth frosting, but I usually skip this step and it turns out fine.
- Vanilla extract, 1 teaspoon: You know the drill by now.
- Pinch of salt: Just a tiny pinch to balance the sweetness.
Equipment Needed
One of the reasons I love making these bars for gatherings is that they don’t require any fancy equipment. Here is everything you will need:
- 9×13-inch baking pan: A metal pan works best for even baking. Glass pans can cause the edges to overbake. If you only have glass, reduce the oven temperature by 25°F.
- Electric hand mixer or stand mixer: You can mix the gingerbread batter by hand with a whisk, but the cream cheese layer and frosting will be much smoother with a mixer. I use my trusty KitchenAid hand mixer for this.
- Two mixing bowls: One large bowl for the gingerbread batter and one medium bowl for the cheesecake layer.
- Rubber spatula: For scraping down the sides of the bowl and spreading the batter evenly.
- Parchment paper: This is non-negotiable. Line your pan with parchment paper leaving an overhang on two sides. It makes lifting the bars out so much easier and prevents sticking.
- Offset spatula or butter knife: For swirling the cheesecake layer into the gingerbread batter.
- Cooling rack: A wire rack allows air to circulate around the pan so the bars cool evenly.
If you don’t have an electric mixer, you can absolutely make the cheesecake layer by hand. Just make sure your cream cheese is very soft—let it sit out for at least an hour—and whisk vigorously until smooth. It takes a little arm work but it gets the job done.
Preparation Method
Let me walk you through this step by step. I have made these bars so many times that I have the process memorized, but I still check my notes every time. Trust me, following these details will save you from my early mistakes.
Step 1: Preheat and Prepare the Pan
Preheat your oven to 350°F (175°C). Line your 9×13-inch baking pan with parchment paper, leaving about 2 inches of overhang on the long sides. Lightly spray the parchment with non-stick cooking spray. This double layer of protection ensures your bars will come out perfectly clean.
Step 2: Make the Gingerbread Batter
In a large mixing bowl, whisk together the melted butter and packed brown sugar until smooth and combined. It should look like wet sand. Add the molasses, egg, buttermilk, and vanilla extract, and whisk until everything is fully incorporated. The mixture will be thin and dark—that is exactly right. In a separate small bowl, whisk together the flour, ground ginger, cinnamon, cloves, baking soda, and salt. Gradually add the dry ingredients to the wet ingredients, stirring with a spatula until just combined. Do not overmix. A few small lumps are okay. Overmixing will make the gingerbread tough.
Step 3: Prepare the Cheesecake Layer
In a medium bowl using an electric hand mixer, beat the softened cream cheese on medium speed until completely smooth and fluffy, about 2 minutes. Scrape down the sides of the bowl with a spatula. Add the granulated sugar and beat for another minute until well combined. Add the egg and vanilla extract, and beat on low speed just until incorporated. Do not overbeat the egg—it can incorporate too much air and cause the cheesecake layer to puff up and crack during baking.
Step 4: Assemble the Bars
Pour the gingerbread batter into the prepared pan and spread it into an even layer using your spatula. It will be a relatively thin layer—that is normal. Drop spoonfuls of the cheesecake mixture evenly over the top of the gingerbread batter. You should have about 8 to 10 dollops. Using a butter knife or offset spatula, gently swirl the cheesecake into the gingerbread batter. Do not over-swirl. You want distinct ribbons of cheesecake and gingerbread, not one uniform mixture. I like to make figure-eight motions through the batter.
Step 5: Bake
Place the pan in the preheated oven and bake for 28 to 32 minutes. The edges should be set and slightly pulling away from the sides of the pan. The center will still look slightly jiggly—that is okay. A toothpick inserted into the center should come out with moist crumbs, not wet batter. If it comes out completely clean, you have overbaked it. I learned this the hard way when I made my first batch and ended up with dry edges. Let the bars cool completely in the pan on a wire rack. This takes about 1 to 1½ hours. Do not rush this step. Warm bars will fall apart when you try to cut them.
Step 6: Make the Cream Cheese Frosting
While the bars are cooling, make the frosting. In a medium bowl, beat the softened cream cheese and butter together on medium speed until smooth and creamy, about 2 minutes. Gradually add the powdered sugar, beating on low speed to prevent a sugar cloud. Add the vanilla extract and pinch of salt, then increase the speed to medium and beat for another minute until the frosting is light and fluffy. If the frosting seems too thick, add a teaspoon of milk. If it seems too thin, add a little more powdered sugar.
Step 7: Frost and Chill
Once the bars are completely cool, spread the cream cheese frosting evenly over the top using an offset spatula. Cover the pan with plastic wrap and refrigerate for at least 2 hours, or overnight. Chilling is essential—it sets the layers and makes cutting clean slices possible. I always chill mine overnight before serving.
Step 8: Cut and Serve
Using the parchment overhang, lift the entire block of bars out of the pan and place it on a cutting board. Use a sharp knife to cut into squares. For clean cuts, wipe the knife clean between each slice with a damp paper towel. I cut mine into 24 small squares for parties, but you can cut them larger if you want.
Cooking Tips & Techniques
I have made every mistake in the book with these bars, so let me save you some trouble. The biggest issue people run into is the cheesecake layer not setting properly. This almost always happens because the cream cheese wasn’t soft enough. Cold cream cheese creates lumps that never fully smooth out, and those lumps can cause the layer to separate during baking. Let your cream cheese sit on the counter for at least an hour before you start. If you are in a rush, cut it into small cubes and microwave it in 10-second bursts until it is just softened—not melted.
Another common mistake is over-swirling the cheesecake into the gingerbread. I know it is tempting to keep mixing until everything looks uniform, but resist that urge. You want distinct layers and ribbons. Over-swirling creates a muddy, one-note flavor instead of the beautiful contrast between spicy gingerbread and tangy cheesecake. I recommend no more than five or six figure-eight motions with your knife.
Timing is everything with this recipe. I like to bake the bars the day before my gathering. They cool overnight in the fridge, the flavors meld together beautifully, and all I have to do the next day is cut them and arrange them on a platter. If you are serving them the same day, make sure you give them at least 3 hours total—1 hour to cool, 2 hours to chill in the fridge after frosting. Do not skip the chilling step. Warm or room temperature bars will be soft and messy to cut.
For the most consistent results, use a kitchen scale to measure your flour and sugar. I know it is an extra step, but flour can vary wildly in volume depending on how it settles. A cup of fluffed flour can be 120 grams, while a packed cup can be 150 grams. That 30-gram difference will absolutely affect your bars. If you don’t have a scale, use the spoon-and-level method: fluff the flour with a spoon, spoon it into your measuring cup, and level it off with a knife.
Variations & Adaptations
One of the things I love about this recipe is how adaptable it is. I have experimented with several variations over the years, and here are my favorites.
Gluten-Free Version: Substitute the all-purpose flour with a good quality gluten-free flour blend like Bob’s Red Mill 1-to-1 or King Arthur Measure for Measure. I have tested this and it works perfectly. Do not use almond flour or coconut flour—they will change the texture completely. Add an extra tablespoon of buttermilk because gluten-free flours tend to absorb more liquid.
Spice It Up Variation: For a bolder gingerbread flavor, add ¼ teaspoon of ground black pepper and ¼ teaspoon of ground nutmeg to the spice mix. The black pepper sounds strange, I know, but it adds a subtle warmth that complements the ginger beautifully. I tried this on a whim one Christmas and it has become my go-to version.
Chocolate Gingerbread Bars: Fold ½ cup of mini chocolate chips into the gingerbread batter before adding the cheesecake layer. Use dark chocolate chips for the best contrast with the spices. My nephew requests this version every year for his birthday in December.
Dairy-Free Adaptation: Use vegan butter or coconut oil in place of the butter, and use a dairy-free cream cheese like Miyoko’s or Kite Hill. For the buttermilk, add 1½ teaspoons of lemon juice to ½ cup of unsweetened almond milk or oat milk. The texture will be slightly less tender, but the flavor is still fantastic.
Pumpkin Cheesecake Bars: Replace the molasses with ½ cup of pumpkin puree and add an extra teaspoon of pumpkin pie spice. This turns them into a perfect fall dessert. I made this version for a Friendsgiving last year and it was gone in twenty minutes.
Serving & Storage Suggestions
These bars are at their absolute best when served chilled. I like to take them out of the fridge about 15 minutes before serving so the frosting softens slightly but the bars are still firm. Arrange them on a white platter or a wooden cutting board for a beautiful presentation. A light dusting of ground cinnamon or a few fresh cranberries on top adds a festive touch that your guests will notice.
For a dinner party, I recommend serving these bars alongside a dollop of freshly whipped cream or a scoop of vanilla bean ice cream. The cold, creamy addition plays beautifully against the spiced gingerbread. If you are serving coffee, a warm mug of dark roast or a spiced chai latte is the perfect pairing. Honestly, these bars are also incredible with a glass of cold milk—sometimes the simplest pairing is the best.
Storage is easy. Place leftover bars in an airtight container and store them in the refrigerator for up to 5 days. I have never had them last that long in my house, but they will hold up well. The flavors actually deepen and improve after a day or two in the fridge. The gingerbread becomes even more moist, and the spices settle into something really lovely.
These bars freeze beautifully. Wrap individual squares tightly in plastic wrap, then place them in a freezer-safe bag or container. They will keep for up to 3 months. When you are ready to enjoy one, let it thaw in the refrigerator overnight. Do not microwave them to thaw—it will make the frosting runny and the gingerbread gummy. I always keep a stash in my freezer for unexpected guests or sudden holiday cravings.
Nutritional Information & Benefits
Here is the estimated nutritional breakdown for one bar based on cutting the pan into 24 servings. Please note these are approximations and will vary based on your specific ingredients and portion sizes.
| Nutrient | Amount Per Bar |
|---|---|
| Calories | 245 |
| Total Fat | 14g |
| Saturated Fat | 8g |
| Cholesterol | 55mg |
| Sodium | 180mg |
| Total Carbohydrates | 28g |
| Dietary Fiber | 1g |
| Sugars | 19g |
| Protein | 4g |
While these bars are certainly a treat, they do offer some surprising benefits. The ginger in this recipe is known for its anti-inflammatory properties and can aid in digestion—which is perfect after a heavy holiday meal. Molasses is a good source of iron, calcium, and magnesium. The cream cheese provides a small amount of protein and calcium. I like to remind myself that everything is about balance. These bars are meant to be enjoyed, not feared. One bar with your coffee or tea is a perfectly reasonable way to savor the season.
If you are watching your sugar intake, you can reduce the granulated sugar in the cheesecake layer to ⅓ cup without affecting the texture too much. The frosting can also be made with reduced-fat cream cheese, though the texture will be slightly less firm.
Conclusion
These Perfect Gingerbread Cheesecake Bars have become my signature holiday dessert, and I honestly cannot imagine a festive gathering without them. They started as a complete accident—a moment of panic that turned into something I am genuinely proud of. That is the thing about cooking, and about hosting, really. You can plan and prep and stress over every detail, but sometimes the best moments come from the unexpected. These bars remind me that it is okay to make mistakes in the kitchen. Some of them turn out to be the best recipes you will ever make.
I hope you give these bars a try for your next gathering. Whether it is a big holiday dinner, a cozy Friendsgiving, or just a weekend baking project, they are guaranteed to impress. Play around with the variations I shared, make them your own, and do not stress if your swirls are not perfect. Trust me, no one will care once they take a bite. If you do make them, I would love to hear how they turned out. Drop a comment below and let me know what you think—did you try a variation? Did your guests love them? Your feedback helps me and every other home baker who reads this.
Until next time, happy baking, and remember: the best recipes often start with a little bit of chaos.
Frequently Asked Questions
Can I make these bars without a mixer?
Absolutely. You can mix the gingerbread batter by hand with a whisk—it comes together very easily. For the cheesecake layer, make sure your cream cheese is very soft and whisk it vigorously until smooth. The frosting is easiest with a mixer, but you can also beat it by hand with a wooden spoon. It will just take a little more elbow grease.
Why did my cheesecake layer turn out runny?
This usually happens for one of two reasons. Either your cream cheese was not fully softened, or you used reduced-fat or spreadable cream cheese. Full-fat block cream cheese is essential for the right texture. Also, make sure you are not overbeating the egg into the cream cheese mixture—beat on low speed just until combined.
Can I freeze these bars with the frosting on top?
Yes, you can freeze them fully assembled. Wrap individual bars tightly in plastic wrap and then place them in a freezer bag. The frosting might lose a little bit of its fluffy texture, but it will still taste delicious. I recommend thawing them in the refrigerator overnight for the best results.
How do I get clean cuts without the frosting smearing?
Use a sharp knife and wipe it clean with a damp paper towel between each cut. For the cleanest slices, chill the bars for at least 2 hours after frosting—overnight is even better. If your knife is sticking, dip it in hot water, wipe it dry, and then slice. The heat helps the knife glide through the frosting.
Can I use dark brown sugar instead of light brown sugar?
Yes, dark brown sugar works beautifully in this recipe. It has a higher molasses content, which will give your gingerbread a deeper, richer flavor. If you use dark brown sugar, you might want to reduce the molasses by one tablespoon to keep the sweetness balanced. I have made this swap several times and it always turns out great.
Pin This Recipe!
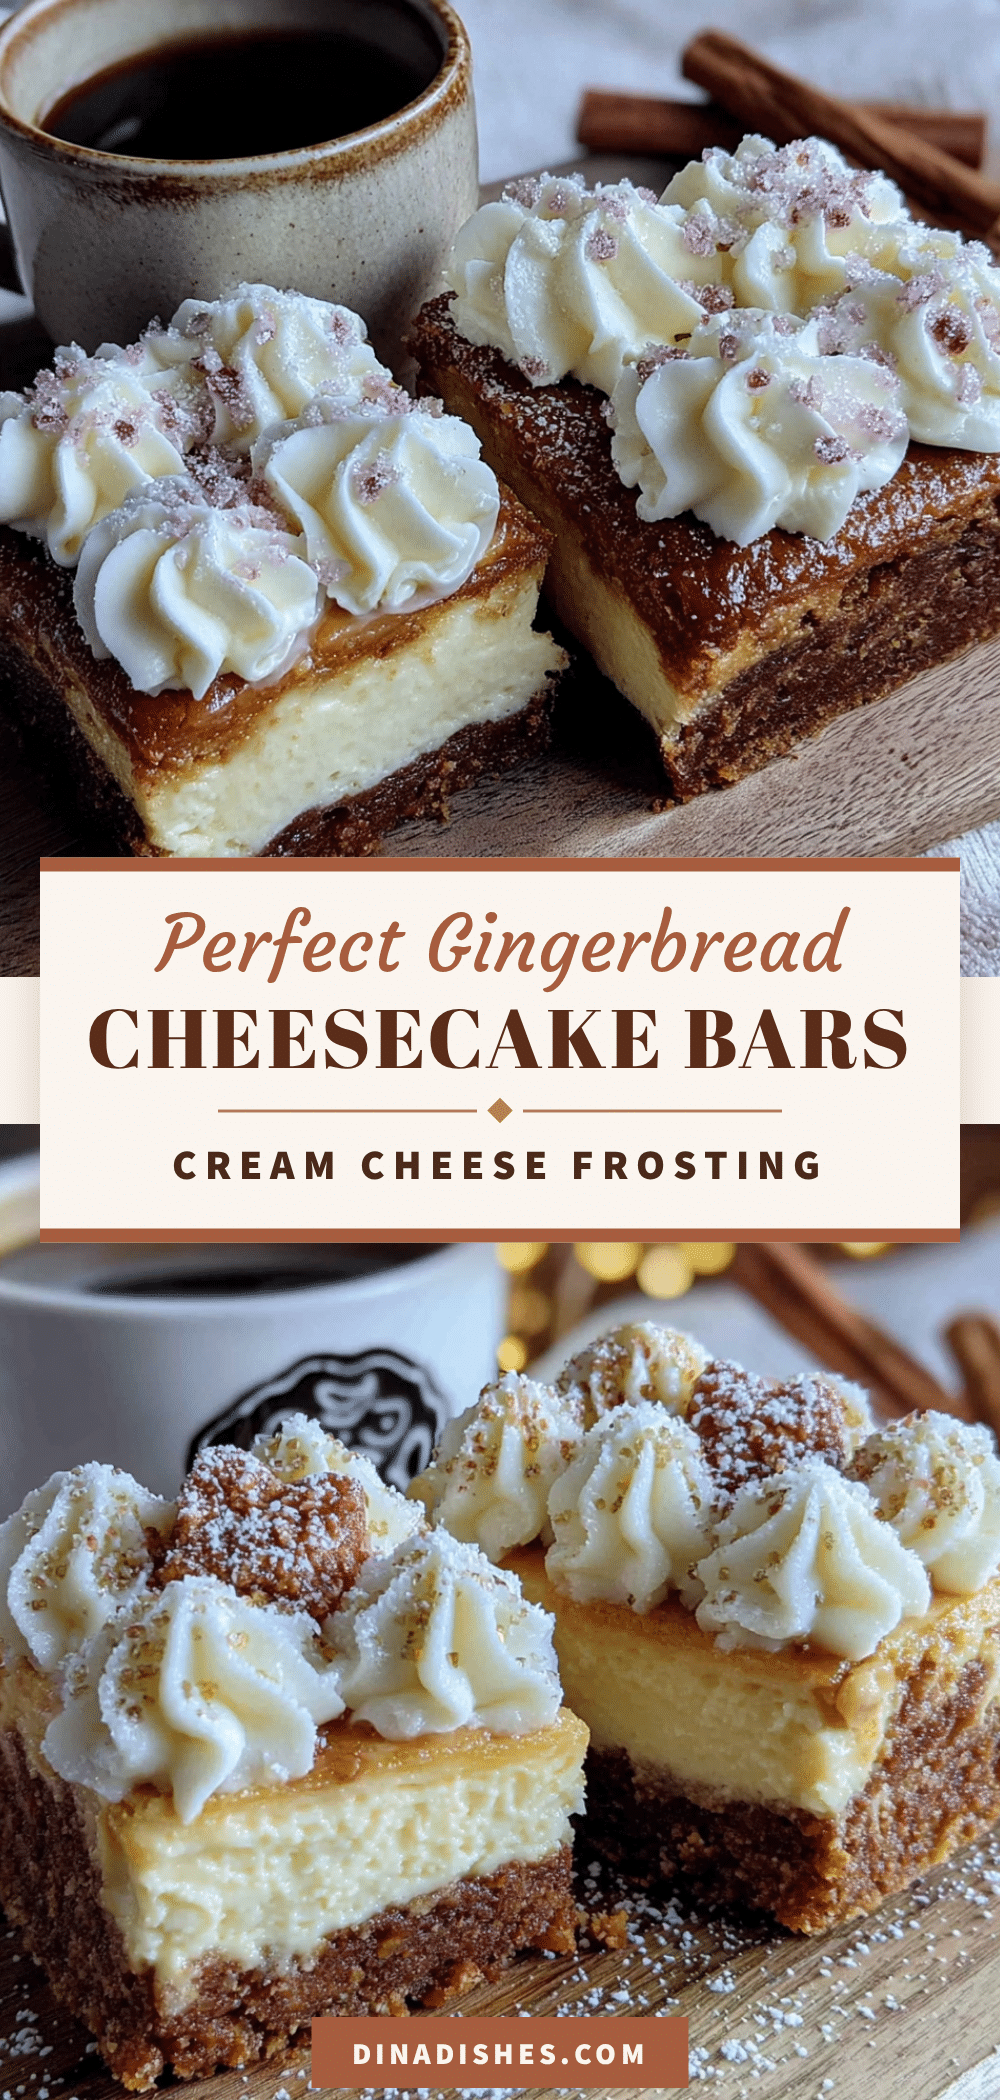
Perfect Gingerbread Cheesecake Bars with Cream Cheese Frosting
These gingerbread cheesecake bars combine the warm, spiced comfort of gingerbread with a rich, creamy cheesecake layer, all topped with a luscious cream cheese frosting. They are the ultimate holiday hybrid, perfect for feeding a crowd and can be made ahead.
- Prep Time: 30 minutes
- Cook Time: 30 minutes
- Total Time: 3 hours (includes cooling and chilling)
- Yield: 24 servings 1x
- Category: Dessert
- Cuisine: American
Ingredients
- 2 cups (240g) all-purpose flour
- ½ cup (113g) unsalted butter, melted and slightly cooled
- 1 cup (200g) light brown sugar, packed
- ½ cup (170g) unsulphured molasses
- 1 large egg, room temperature
- ½ cup (120ml) buttermilk
- 1 teaspoon vanilla extract
- 2 teaspoons ground ginger
- 1½ teaspoons ground cinnamon
- ½ teaspoon ground cloves
- 1 teaspoon baking soda
- ½ teaspoon salt
- 16 oz (450g) cream cheese, softened
- ½ cup (100g) granulated sugar
- 1 large egg, room temperature
- 1 teaspoon vanilla extract
- 4 oz (113g) cream cheese, softened
- ¼ cup (56g) unsalted butter, softened
- 1½ cups (180g) powdered sugar
- 1 teaspoon vanilla extract
- Pinch of salt
Instructions
- Preheat oven to 350°F (175°C). Line a 9×13-inch baking pan with parchment paper, leaving overhang on the long sides. Lightly spray with non-stick cooking spray.
- In a large bowl, whisk together melted butter and packed brown sugar until smooth. Add molasses, egg, buttermilk, and vanilla extract; whisk until fully incorporated.
- In a separate bowl, whisk together flour, ground ginger, cinnamon, cloves, baking soda, and salt. Gradually add dry ingredients to wet ingredients, stirring with a spatula until just combined. Do not overmix.
- In a medium bowl, beat softened cream cheese with an electric mixer on medium speed until smooth and fluffy, about 2 minutes. Add granulated sugar and beat for another minute. Add egg and vanilla extract; beat on low speed just until incorporated.
- Pour gingerbread batter into prepared pan and spread evenly. Drop spoonfuls of cheesecake mixture over the batter. Gently swirl with a butter knife or offset spatula using figure-eight motions—do not over-swirl.
- Bake for 28 to 32 minutes, until edges are set and center is slightly jiggly. Cool completely in the pan on a wire rack, about 1 to 1½ hours.
- For the frosting: In a medium bowl, beat softened cream cheese and butter on medium speed until smooth, about 2 minutes. Gradually add powdered sugar, beating on low speed. Add vanilla extract and pinch of salt; beat on medium speed until light and fluffy.
- Spread frosting evenly over cooled bars. Cover and refrigerate for at least 2 hours, or overnight.
- Using parchment overhang, lift bars out of pan. Cut into squares with a sharp knife, wiping knife clean between cuts.
Notes
Let cream cheese sit at room temperature for at least 1 hour before using. Do not over-swirl the cheesecake layer. Chill bars thoroughly before cutting for clean slices. Bars can be made a day ahead and stored in the refrigerator. Freeze individual bars wrapped tightly for up to 3 months.
Nutrition
- Serving Size: 1 bar
- Calories: 245
- Sugar: 19
- Sodium: 180
- Fat: 14
- Saturated Fat: 8
- Carbohydrates: 28
- Fiber: 1
- Protein: 4
Keywords: gingerbread cheesecake bars, holiday dessert, cream cheese frosting, gingerbread, cheesecake bars, Christmas dessert