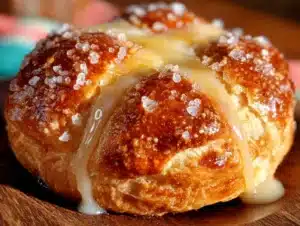
I used to think good bread required a special occasion. A dinner party, a holiday, something that justified the flour dusting your countertops and the hours of waiting. But then I watched my neighbor, Rosa, make pan de muerto one random Tuesday in October. She wasn’t preparing for Día de Muertos. She wasn’t trying to impress anyone. I’d stopped by to borrow a cup of sugar—cliché, I know—and the smell of orange blossom and warm yeast hit me before I even knocked on her screen door.
Rosa just shrugged when I asked what she was making. “Oh, it’s just bread,” she said, like it was nothing. But it wasn’t nothing. The kitchen was steamy, her hands were dusted with flour, and there was a little pile of dough scraps shaped like tiny bones sitting on a baking sheet. She let me sit on the stool by her counter and watch. She didn’t have a recipe written down. She just knew how the dough should feel—soft, a little tacky, alive. I tried to memorize everything, but honestly, I was too busy trying not to drool over that glaze she was brushing on top.
That bread, right there on a random Tuesday, was the most comforting thing I’d tasted in months. It was soft, almost pillowy, with that floral orange flavor that somehow felt like a hug. Rosa didn’t make a big deal about it, and maybe that’s why it stuck with me. She just made bread because she felt like it. And let me tell you, that’s the kind of energy we all need more of. So here we are—my version of her cozy pan de muerto, with an orange blossom glaze that’ll stop you in your tracks. Maybe you’ve been there, standing in someone else’s kitchen, watching them make magic look easy. This is that bread.
Why You’ll Love This Recipe
This isn’t just another bread recipe. This is the kind of bread that makes your kitchen smell like a warm bakery and your heart feel a little fuller. I’ve tested this version about six times to get it just right—soft, fluffy, with that signature orange blossom flavor that’s not too sweet, just right. Here’s why this one’s a keeper:
- Soft and Tender Texture : The dough is enriched with butter and eggs, giving it that delicate, brioche-like crumb that practically melts. No dry bread here.
- Simple Pantry Ingredients : You probably already have flour, sugar, butter, and eggs. The only special item is orange blossom water, and it’s totally worth finding—it makes the whole dish sing.
- Perfect for Cozy Evenings : Whether it’s a chilly autumn night or you just need something warm and comforting, this bread delivers. It’s like a blanket in food form.
- Impressive Without the Stress : The braided bone shapes on top look like you worked all day, but honestly, they’re pretty forgiving. Even if they’re lopsided, they look charming.
- Crowd-Pleaser : I’ve served this to friends who’d never heard of pan de muerto, and they devoured it. Kids love the sweet glaze, adults love the sophisticated orange flavor.
What makes this recipe different from other versions? It’s the balance. I’ve tweaked the yeast amount so the dough rises reliably without being too fussy. The orange blossom glaze is brushed on while the bread is still warm, so it soaks in just a little—not sticky, just perfectly fragrant. This is comfort food with a little bit of soul, and it’s the kind of bread you’ll want to make even when there’s no holiday on the calendar.
What Ingredients You Will Need
This recipe uses simple, wholesome ingredients to deliver that soft, aromatic bread without any complicated steps. Most of these are pantry staples, and the few special ones are easy to find at Latin grocery stores or online.
For the Dough
- All-purpose flour, 4 cups (500g) – Gives the bread structure without making it too dense. I prefer King Arthur Flour for consistent results.
- Active dry yeast, 2¼ teaspoons (one packet) – Make sure it’s fresh! Old yeast is the number one reason bread doesn’t rise.
- Warm milk, ½ cup (120ml), heated to about 110°F – Not too hot, or you’ll kill the yeast. Lukewarm is the goal.
- Granulated sugar, ½ cup (100g) – Adds sweetness and helps feed the yeast.
- Unsalted butter, ½ cup (113g), softened – Room temperature is key here. Cold butter won’t incorporate properly.
- Large eggs, 3, room temperature – I set mine out about 30 minutes before starting.
- Orange zest, from 1 large orange – Use a microplane for the best texture. Avoid the white pith—it’s bitter.
- Orange blossom water, 2 tablespoons – This is the star. Look for it in the international aisle or a Mexican market. A little goes a long way.
- Salt, 1 teaspoon – Balances the sweetness and strengthens the gluten.
- Vanilla extract, 1 teaspoon – Adds warmth and depth.
For the Orange Blossom Glaze
- Powdered sugar, 1 cup (120g) – Sift it first to avoid lumps.
- Orange blossom water, 2 tablespoons – For that floral, fragrant finish.
- Fresh orange juice, 1-2 tablespoons – Adds a little tang and thins the glaze to the right consistency.
- Pinch of salt – Just a tiny bit to balance the sweetness.
For the Decorative Bones (optional but traditional)
- Extra dough, reserved from the main batch – About a golf ball-sized piece.
- Melted butter, for brushing – Helps the bones stick to the loaf.
If you don’t have orange blossom water, you can substitute with orange extract mixed with a little water, but honestly, the real thing is worth tracking down. It has this delicate floral quality that extract just can’t replicate. For a dairy-free version, use plant-based butter and oat milk—I’ve tested it, and it works beautifully.
Equipment Needed
You don’t need a fancy kitchen to make this bread. Here’s what I use:
- Large mixing bowl – Glass or stainless steel works best. I use a ceramic bowl because it retains warmth nicely.
- Stand mixer with dough hook – Not required, but it makes kneading a breeze. If you’re kneading by hand, expect about 10 minutes of work.
- Baking sheet – A standard half-sheet pan lined with parchment paper. No greasing needed.
- Plastic wrap or a clean kitchen towel – For covering the dough while it rises.
- Microplane or fine grater – For zesting the orange without getting bitter pith.
- Pastry brush – For applying the glaze. A silicone one is easy to clean.
- Bench scraper – Helpful for dividing the dough and shaping the bones. A knife works too.
- Thermometer – Optional but helpful for checking milk temperature. I’ve killed yeast one too many times by guessing.
If you don’t have a stand mixer, just knead by hand on a floured surface. It’s a great arm workout, and honestly, I find it meditative. The dough should be smooth and elastic when you’re done.
Preparation Method
Let’s make some bread. This recipe takes about 3 hours total, but most of that is waiting for the dough to rise. The actual hands-on time is maybe 30 minutes.
- Activate the yeast : In a small bowl, combine the warm milk (110°F) with 1 tablespoon of the sugar and the active dry yeast. Stir gently and let it sit for 5-10 minutes until it’s frothy and smells like bread. If it doesn’t foam, your yeast is dead—start over with fresh yeast.
- Mix the dry ingredients : In a large mixing bowl, whisk together the flour, remaining sugar, orange zest, and salt. Make a well in the center.
- Combine wet ingredients : In a separate bowl, whisk the eggs, orange blossom water, and vanilla extract until smooth. Pour this mixture into the well of the dry ingredients, along with the frothy yeast mixture.
- Start mixing : Using a wooden spoon or the dough hook on low speed, combine everything until a shaggy dough forms. It’ll look messy at first—that’s normal.
- Add the butter : Add the softened butter, a tablespoon at a time, while mixing. The dough will look greasy and might separate a little. Keep mixing. It’ll come together into a smooth, soft dough after about 5-7 minutes in a stand mixer on medium speed, or about 10 minutes by hand.
- Knead until smooth : The dough should be soft, slightly tacky but not sticky. If it’s too sticky, add flour a tablespoon at a time. If it’s too dry, add a teaspoon of warm milk. You’re looking for a dough that springs back when you poke it.
- First rise : Shape the dough into a ball and place it in a lightly greased bowl. Cover with plastic wrap or a damp towel and let it rise in a warm spot for 1.5 to 2 hours, until doubled in size. I put mine in the oven with the light on—it’s the perfect cozy spot.
- Shape the loaf : Punch down the dough gently. Transfer it to a lightly floured surface. Reserve a small piece (about the size of a golf ball) for the decorative bones. Shape the remaining dough into a round loaf and place it on your parchment-lined baking sheet.
- Make the bone shapes : Roll the reserved dough into a long rope, about 12 inches long. Cut it into 4 equal pieces. Roll each piece into a thin rope, about 4-5 inches long. Press the ends to flatten them slightly—this creates the “bone” look. Place two bones on top of the loaf in an X shape, or arrange them however you like. Brush the bones with a little melted butter to help them stick.
- Second rise : Cover the shaped loaf loosely with plastic wrap and let it rise for another 45 minutes to 1 hour, until puffy and almost doubled. It should look soft and pillowy.
- Preheat and bake : About 20 minutes before the second rise is done, preheat your oven to 350°F (175°C). Bake the bread for 25-30 minutes, until the top is golden brown and the loaf sounds hollow when tapped on the bottom. If it’s browning too fast, tent it with foil after 15 minutes.
- Make the glaze : While the bread bakes, whisk together the powdered sugar, orange blossom water, orange juice, and a pinch of salt. The glaze should be thick but pourable—add more juice if needed.
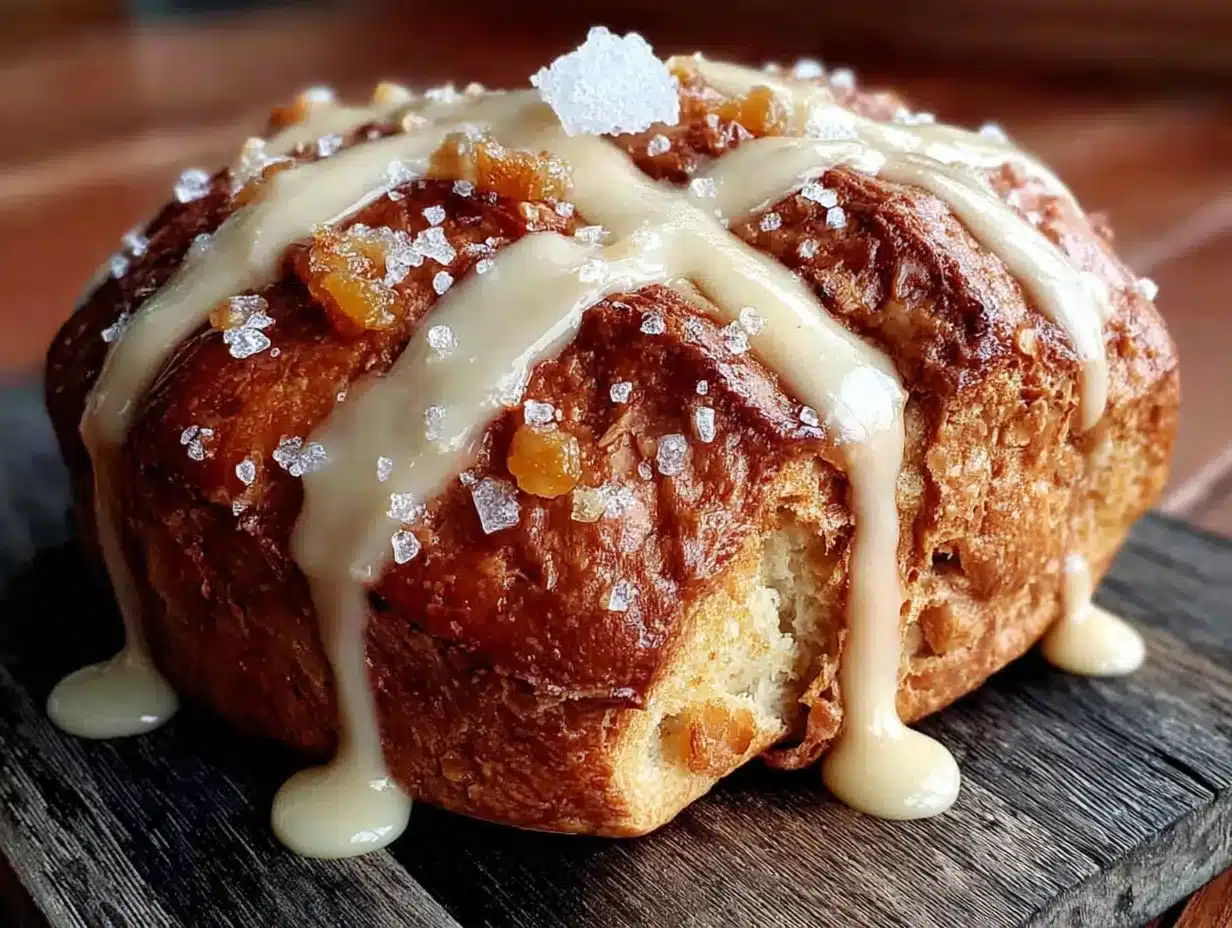
- Glaze while warm : As soon as the bread comes out of the oven, let it cool for 5 minutes on the baking sheet. Then brush the glaze generously over the top. The warmth will help it soak in just a little, creating that perfect delicate crust.
- Cool completely : Let the bread cool on a wire rack for at least 30 minutes before slicing. I know it’s hard to wait, but the texture is best when it’s fully cooled.
Cooking Tips & Techniques
I’ve made this bread more times than I can count, and I’ve definitely made some mistakes along the way. Here’s what I’ve learned:
Don’t rush the first rise. I know it’s tempting to cut it short, but the dough needs that full 1.5-2 hours to develop flavor and texture. If your kitchen is cold, put the bowl in the oven with just the light on—it creates the perfect warm environment. I once tried to speed things up by putting the bowl near a radiator, and the bottom of the dough cooked slightly. Not great.
Temperature matters with the milk. If your milk is too hot (above 120°F), it’ll kill the yeast and your bread won’t rise. Too cold, and the yeast won’t activate. I use a thermometer, but if you don’t have one, the milk should feel like warm bath water—comfortable on your wrist.
Kneading is about feel, not time. The dough is ready when it’s smooth, elastic, and springs back when you press it with a finger. If you’re using a stand mixer, watch for the dough to pull away from the sides of the bowl. By hand, you’ll feel it become less sticky and more supple.
Glaze timing is crucial. Brush the glaze on while the bread is still warm, but not piping hot. If it’s too hot, the glaze will run right off. Too cold, and it won’t soak in at all. About 5 minutes out of the oven is the sweet spot.
Variations & Adaptations
One of the best things about this bread is how adaptable it is. Here are a few ways I’ve played with it:
- Chocolate Orange Version : Add ¼ cup of cocoa powder to the flour mixture and reduce the flour by 2 tablespoons. The chocolate pairs beautifully with the orange blossom. I made this for a friend’s birthday and it was gone in 20 minutes.
- Vegan Adaptation : Use plant-based butter and replace each egg with a flax egg (1 tablespoon ground flaxseed mixed with 3 tablespoons water, let sit for 5 minutes). The texture is slightly denser but still delicious. Oat milk works best for the warm milk.
- Spiced Pan de Muerto : Add 1 teaspoon of ground cinnamon and ½ teaspoon of ground anise to the flour. It gives the bread a warm, almost chai-like flavor that’s perfect for fall. I tried this on a whim and now I can’t go back.
- Gluten-Free Option : Use a 1:1 gluten-free flour blend that contains xanthan gum. The dough will be stickier, so wet your hands when shaping. The texture won’t be as fluffy, but the flavor is still incredible.
- Citrus Swap : No orange blossom water? Use lemon zest and a little lemon extract instead. It’s not traditional, but it’s bright and lovely.
Serving & Storage Suggestions
This bread is best enjoyed the day it’s made, but it keeps surprisingly well. Here’s how I serve and store it:
Serving: Pan de muerto is traditionally served with hot chocolate or coffee, and I fully endorse that pairing. The warm, slightly sweet bread with a rich, dark cup of Mexican hot chocolate is pure comfort. You can also serve it with a side of fresh fruit or a dollop of whipped cream for a simple dessert. I like to tear off pieces and dip them in my coffee—it’s a little messy, but honestly, that’s part of the charm.
Storage: Store leftover bread in an airtight container at room temperature for up to 3 days. The glaze might soften a bit, but it’s still delicious. Do not refrigerate—it’ll dry out the bread. If you need to keep it longer, wrap it tightly in plastic wrap and freeze for up to 2 months. Thaw at room temperature and reheat in a 300°F oven for 5-10 minutes.
Reheating: The best way to revive day-old pan de muerto is to pop it in a 350°F oven for 5 minutes. It’ll bring back that just-baked warmth and soften the crumb. Avoid the microwave—it makes the bread rubbery.
Flavor development: Honestly, the bread is even better the next day. The orange blossom flavor mellows and melds with the bread, creating a more subtle, rounded taste. So if you can resist eating it all in one sitting, you’re in for a treat.
Nutritional Information & Benefits
Let’s be real—this is a treat, not a health food. But it does have some redeeming qualities. Here’s the estimated nutrition per serving (one slice, about 1/12 of the loaf):
- Calories: 280
- Fat: 10g
- Carbohydrates: 42g
- Protein: 6g
- Fiber: 1g
- Sugar: 18g
Health highlights: The orange zest provides a small amount of vitamin C and antioxidants. The eggs add protein and healthy fats. And honestly, there’s something to be said for the mental health benefits of baking—the process itself is soothing, and sharing warm bread with loved ones is good for the soul.
Dietary considerations: This recipe contains gluten, dairy, and eggs. For gluten-free and vegan options, check the variations section above. The sugar content is moderate for a sweet bread, but you can reduce the glaze if you prefer less sweetness.
Allergen note: If you’re serving this at a gathering, let guests know it contains common allergens. I always mention it when I bring it to a potluck.
Conclusion
This pan de muerto is more than just bread. It’s the kind of recipe that makes you slow down, get your hands in the dough, and remember why baking is so satisfying. It’s soft, fragrant, and covered in that orange blossom glaze that makes everything feel a little more special. Whether you’re making it for Día de Muertos, a cozy weekend, or just because you want your kitchen to smell amazing, this recipe delivers.
I love that this bread doesn’t require perfection. The bone shapes on top can be a little wonky. The glaze might drip. That’s all part of its charm. So go ahead—make a mess, get flour on your counter, and enjoy every bite. And when you do, I’d love to hear about it. Leave a comment below and tell me how yours turned out, or share a photo on Pinterest with your own twist. Happy baking, friends!
Frequently Asked Questions
Can I make this bread ahead of time?
Yes! You can prepare the dough through the first rise, then punch it down, wrap it tightly in plastic wrap, and refrigerate for up to 24 hours. When you’re ready to bake, let it come to room temperature (about 1 hour), then shape and proceed with the second rise.
My dough isn’t rising. What went wrong?
Most likely, the yeast was too old or the milk was too hot. Check the expiration date on your yeast, and make sure your milk is around 110°F—warm but not hot. If your kitchen is cold, find a warmer spot for the dough to rise, like the oven with the light on.
Can I skip the orange blossom water?
You can, but the flavor won’t be the same. Orange blossom water gives this bread its signature floral aroma. If you can’t find it, use orange extract mixed with a little water, or just increase the orange zest. It’ll still be delicious, just different.
How do I know when the bread is fully baked?
The top should be golden brown, and the loaf should sound hollow when you tap the bottom. If you have an instant-read thermometer, the internal temperature should be about 190°F. Don’t underbake it, or the center will be doughy.
Can I freeze this bread?
Absolutely. Let the bread cool completely, then wrap it tightly in plastic wrap and foil. Freeze for up to 2 months. Thaw at room temperature and reheat in a 350°F oven for 5-10 minutes. The glaze might soften a bit, but it’s still wonderful.
Pin This Recipe!

Cozy Pan de Muerto with Orange Blossom Glaze

This soft, pillowy pan de muerto is enriched with butter and eggs, flavored with orange blossom water, and topped with a fragrant orange blossom glaze. It’s the perfect comforting bread for any occasion, not just Día de Muertos.
- Prep Time: 30 minutes
- Cook Time: 30 minutes
- Total Time: 3 hours (including rising time)
- Yield: 12 servings 1x
- Category: Bread
- Cuisine: Mexican
Ingredients
- 4 cups (500g) all-purpose flour
- 2 1/4 teaspoons active dry yeast (one packet)
- 1/2 cup (120ml) warm milk (about 110°F)
- 1/2 cup (100g) granulated sugar
- 1/2 cup (113g) unsalted butter, softened
- 3 large eggs, room temperature
- Zest of 1 large orange
- 2 tablespoons orange blossom water
- 1 teaspoon salt
- 1 teaspoon vanilla extract
- 1 cup (120g) powdered sugar
- 2 tablespoons orange blossom water (for glaze)
- 1–2 tablespoons fresh orange juice
- Pinch of salt (for glaze)
- Extra dough for decorative bones (optional)
- Melted butter for brushing bones (optional)
Instructions
- Activate the yeast: In a small bowl, combine warm milk (110°F) with 1 tablespoon of sugar and the active dry yeast. Stir gently and let sit for 5-10 minutes until frothy.
- Mix dry ingredients: In a large bowl, whisk together flour, remaining sugar, orange zest, and salt. Make a well in the center.
- Combine wet ingredients: In a separate bowl, whisk eggs, orange blossom water, and vanilla extract until smooth. Pour into the well of dry ingredients along with the yeast mixture.
- Start mixing: Using a wooden spoon or dough hook on low speed, combine until a shaggy dough forms.
- Add butter: Add softened butter a tablespoon at a time while mixing. Continue mixing until dough is smooth and soft (5-7 minutes in stand mixer on medium, or 10 minutes by hand).
- Knead until smooth: Dough should be soft, slightly tacky but not sticky. Add flour or warm milk as needed. It should spring back when poked.
- First rise: Shape dough into a ball and place in a lightly greased bowl. Cover and let rise in a warm spot for 1.5 to 2 hours until doubled.
- Shape the loaf: Punch down dough. Transfer to a floured surface. Reserve a golf ball-sized piece for bones. Shape remaining dough into a round loaf and place on a parchment-lined baking sheet.
- Make bone shapes: Roll reserved dough into a 12-inch rope. Cut into 4 equal pieces. Roll each into a 4-5 inch rope, flatten ends slightly. Place two bones on top of loaf in an X shape. Brush with melted butter.
- Second rise: Cover shaped loaf loosely and let rise for 45 minutes to 1 hour until puffy.
- Preheat and bake: Preheat oven to 350°F (175°C). Bake for 25-30 minutes until golden brown and hollow-sounding when tapped. Tent with foil if browning too fast.
- Make glaze: Whisk together powdered sugar, orange blossom water, orange juice, and a pinch of salt until thick but pourable.
- Glaze while warm: Let bread cool for 5 minutes, then brush glaze generously over top.
- Cool completely: Let bread cool on a wire rack for at least 30 minutes before slicing.
Notes
Don’t rush the first rise; the dough needs full 1.5-2 hours. Milk should be around 110°F—too hot kills yeast, too cold won’t activate it. Glaze while bread is warm but not piping hot (about 5 minutes out of oven). Bread is even better the next day as flavors meld.
Nutrition
- Serving Size: 1 slice (1/12 of loa
- Calories: 280
- Sugar: 18
- Fat: 10
- Carbohydrates: 42
- Fiber: 1
- Protein: 6
Keywords: pan de muerto, orange blossom, Mexican bread, Día de Muertos, sweet bread, brioche, orange glaze