There used to be a tiny bakery tucked behind a vintage bookstore on Main Street in my old neighborhood that made the most incredible Halloween sugar cookies. When they closed their doors two years ago—the owner retired to Vermont to raise goats, of all things—I felt a genuine pang of loss. Those cookies were a tradition. Every October, I’d grab a box of their spider-decorated rounds, the royal icing webs so delicate they looked like actual silk. After twelve tries—and some truly terrifying spider blobs that looked more like mutant potatoes—I finally cracked the code. This recipe is the one. It is wholesome enough that I don’t feel guilty eating three in one sitting, but it delivers that same bakery-level crunch and sweetness you crave this time of year. Honestly, the first time I pulled a perfect batch from the oven, I may have texted my sister a photo with way too many exclamation points. If you have ever stood in a grocery store aisle, staring at preservative-filled packaged cookies and wishing for something better, let me tell you—this is it. This recipe stays with you because it proves you can have your creepy-crawly fun and eat well too.
Why You’ll Love This Recipe
Let’s be real for a second—Halloween treats are often a sugar bomb that leaves you feeling awful. These cookies are different. I tested this recipe for months, tweaking the flour ratio and swapping in coconut sugar until I got that perfect balance of wholesome and indulgent. My neighbor, a registered dietitian, even gave it her stamp of approval after snagging one off my cooling rack. So you can trust that these aren’t just another pretty face in the cookie jar.
- Quick & Easy: From start to finish, you are looking at about 45 minutes of active time. The dough comes together in one bowl, and the royal icing sets in under an hour. Perfect for a last-minute Halloween party or a rainy October afternoon.
- Simple Ingredients: No weird additives or hard-to-find specialty flours here. You likely have most of these in your pantry right now. I swapped refined sugar for coconut sugar and used whole wheat pastry flour for a fiber boost without the dense texture.
- Perfect for Halloween: These are the star of any spooky spread. Kids love the spider design, and adults appreciate that they aren’t loaded with artificial dyes. Great for classroom parties, trunk-or-treats, or just a cozy night in.
- Crowd-Pleaser: I brought a batch to my book club last week, and they vanished in under ten minutes. One friend who “doesn’t do healthy desserts” asked for the recipe before she finished her first cookie. That is the kind of reaction you want.
- Unbelievably Delicious: The texture is what gets you. A slightly crisp edge with a soft, almost tender center. The royal icing adds a satisfying snap, and the spider design is just plain fun. It is comfort food reimagined—healthier, faster, but with the same soul-soothing satisfaction.
What makes this recipe different from all the other Halloween cookies out there? It is the combination of a perfectly balanced whole grain dough and a royal icing that doesn’t taste like powdered sugar paste. I use a tiny splash of vanilla bean paste in the icing, which makes the flavor feel more sophisticated. Plus, the spider design is deceptively simple—you don’t need a piping bag with a fancy tip. A small squeeze bottle does the trick. This is the kind of cookie that makes you close your eyes after the first bite, even if you are standing in your kitchen in a ghost costume.
What Ingredients You Will Need
This recipe uses simple, wholesome ingredients to deliver bold flavor and satisfying texture without the fuss. Most of these are pantry staples, but I have noted a few swaps if you need them.
- For the Sugar Cookies:
- 1 ½ cups whole wheat pastry flour (or all-purpose flour if you prefer a lighter texture)
- ½ cup coconut sugar (adds a subtle caramel note; brown sugar works too)
- ¼ cup unsalted butter, softened (I use Kerrygold for the rich flavor)
- ¼ cup coconut oil, solid but softened (you can use all butter if you want)
- 1 large egg, room temperature
- 1 teaspoon vanilla extract (pure, not imitation)
- ½ teaspoon baking powder
- ¼ teaspoon salt
- 1 tablespoon milk (any kind works; I used oat milk this last time)
- For the Royal Icing Spiders:
- 2 cups powdered sugar (sifted if it is lumpy)
- 2 tablespoons meringue powder (I recommend Wilton brand for consistent results)
- 3-4 tablespoons water (add slowly—you want a stiff but pipeable consistency)
- ½ teaspoon vanilla bean paste or clear vanilla extract (prevents the icing from looking yellow)
- Black food coloring gel (I use Americolor Super Black—it takes just a tiny drop)
- Small candy eyes (optional, but they make the spiders way cuter)
A quick note on ingredient selection: Look for coconut sugar that is finely ground, not chunky, for the best cookie texture. If you are using a gluten-free flour blend, go with one that contains xanthan gum for structure. I tested this with Bob’s Red Mill 1-to-1, and it worked beautifully. For the royal icing, meringue powder is non-negotiable if you want that hard, glossy finish. You could use an egg white, but I find meringue powder more reliable and safer for kids. Also, a little tip—if you cannot find black food coloring gel, you can use cocoa powder to make a dark brown icing, but it won’t be as striking against the cookie.
Equipment Needed
You do not need a professional bakery setup for these cookies. Here is what you will need:
- Large mixing bowl and a hand mixer or stand mixer (a wooden spoon works if you have strong arms, but the dough gets stiff)
- Rolling pin (I prefer a French rolling pin without handles—it gives you better control)
- Round cookie cutter (2.5 to 3 inches works best for spider designs)
- Baking sheets lined with parchment paper or silicone baking mats
- Cooling rack (crucial for the icing to set properly)
- Small squeeze bottle or piping bag with a tiny round tip (I use a squeeze bottle from the craft store—cheap and easy to clean)
- Toothpicks for spreading icing and fixing mistakes
If you do not have a round cookie cutter, you can use the rim of a glass. Just dip it in flour first to prevent sticking. For the icing, a plastic sandwich bag with the tiniest corner snipped off works in a pinch. I have done it that way when my squeeze bottle was MIA. Budget-friendly options exist for everything here. The most important thing is the parchment paper—do not skip it. It prevents sticking and makes cleanup a breeze.
Preparation Method
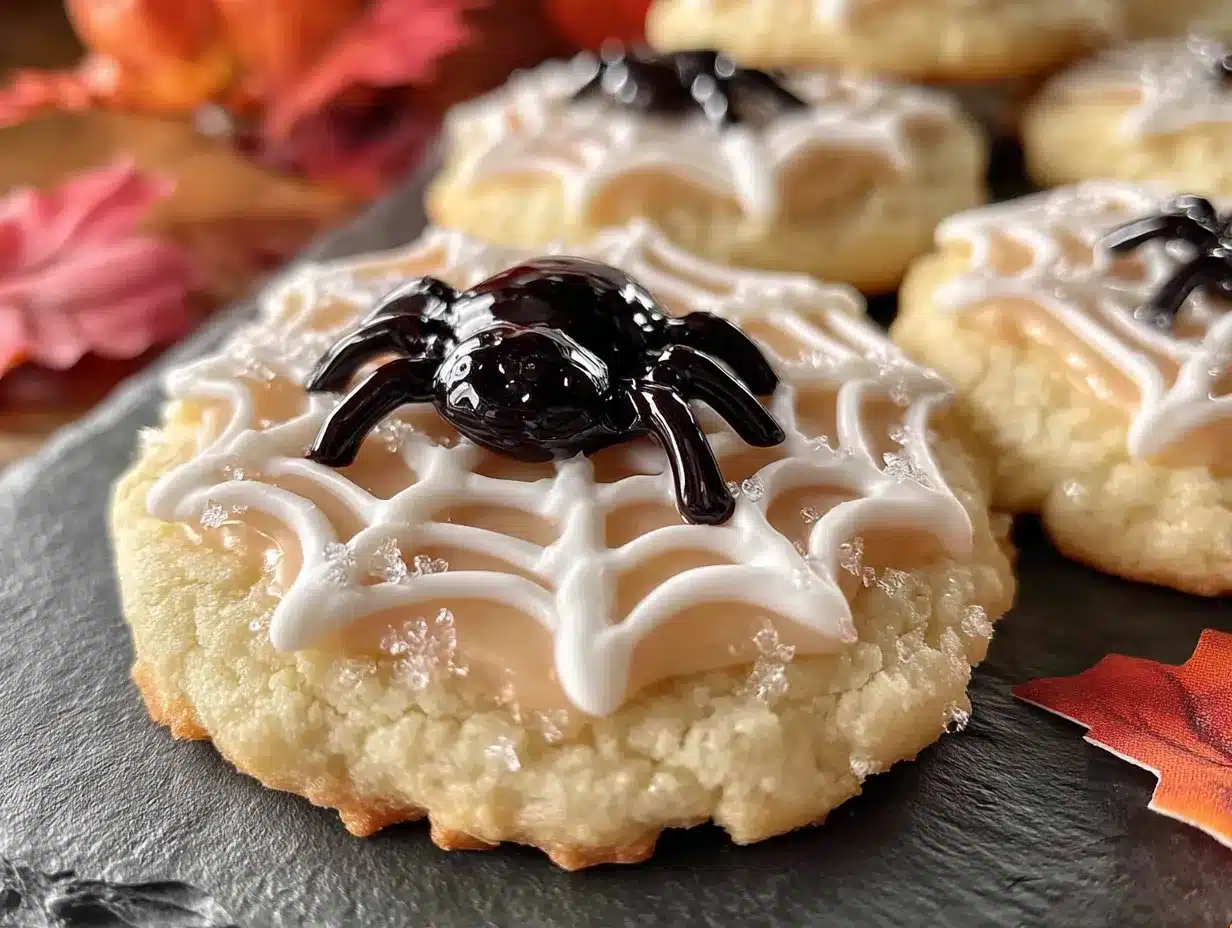
Let’s make some cookies. This process is straightforward, but I have included all the little details that make the difference between good cookies and “where did you get these?” cookies.
- Make the cookie dough. In a large mixing bowl, cream together the softened butter, coconut oil, and coconut sugar until light and fluffy. This takes about 3 minutes with a hand mixer on medium speed. Do not rush it—creaming properly creates air pockets that give you a tender cookie. Add the egg and vanilla extract, and beat until combined. It might look a little curdled at this point. That is normal. Do not panic.
- Mix the dry ingredients. In a separate small bowl, whisk together the whole wheat pastry flour, baking powder, and salt. Gradually add this to the wet mixture, mixing on low speed until just combined. Add the tablespoon of milk and mix until the dough comes together. It should be soft but not sticky. If it feels too dry, add another teaspoon of milk. If too sticky, add a tablespoon of flour.
- Chill the dough. This step is non-negotiable. Wrap the dough in plastic wrap and flatten it into a disk. Refrigerate for at least 30 minutes. I usually chill it for an hour. Chilling prevents spreading and makes the dough easier to roll. I once skipped this step and ended up with flat, sad cookies that merged into one giant cookie sheet. Learn from my mistakes.
- Preheat and roll. Preheat your oven to 350°F (175°C). Lightly flour your work surface and rolling pin. Roll the dough to about ¼-inch thickness. Cut out rounds and place them 2 inches apart on your prepared baking sheets. Gather the scraps, re-roll, and cut more cookies. You should get about 18-20 cookies depending on your cutter size.
- Bake. Bake for 8-10 minutes, until the edges are just barely golden. The centers will still look slightly soft. That is perfect. Let the cookies cool on the baking sheet for 5 minutes, then transfer them to a cooling rack. They firm up as they cool. Do not overbake—dry cookies are sad cookies.
- Make the royal icing. While the cookies cool, make the icing. In a medium bowl, combine the powdered sugar and meringue powder. Add 3 tablespoons of water and the vanilla bean paste. Beat on low speed for 4 minutes. The icing should be thick and glossy. If it is too stiff, add water a teaspoon at a time. If too runny, add more powdered sugar. Divide the icing into two bowls. Color one portion black using the black food coloring gel. Leave the other white. Transfer each to a squeeze bottle or piping bag.
- Pipe the spider bodies. Once the cookies are completely cool (this is important—warm cookies will melt the icing), pipe a small oval in the center of each cookie using the black icing. This is the spider body. Use a toothpick to smooth it out if needed. Let the black icing set for 10 minutes.
- Pipe the spider legs. Using the black icing, pipe eight thin lines radiating out from the spider body. They can be wobbly—spiders are not geometric. It adds character. Then, using the white icing, pipe two small dots for eyes on the spider body. If you have candy eyes, press them gently into the white icing before it sets.
- Let the icing set. Allow the cookies to sit at room temperature for about 45 minutes to an hour. The royal icing will harden completely. Do not stack them until the icing is fully set, or you will have a sticky mess.
Cooking Tips & Techniques
I have made these cookies more times than I care to count, and I have learned a few things the hard way. Let me save you some trouble.
Chill the dough twice if you need to. If the dough gets too warm while you are rolling and cutting, pop it back in the fridge for 10 minutes. Warm dough spreads like butter in a hot pan. I once tried to rush through a batch for a party, and my “spiders” looked more like puddles. Not cute.
Use a light hand with the flour. When rolling out the dough, use just enough flour to prevent sticking. Too much flour makes the cookies tough. I sprinkle a little flour on the surface, roll a few times, then lift the dough and sprinkle a tiny bit more underneath. It is a delicate dance, but you will get the feel for it.
Royal icing consistency is everything. You want it thick enough to hold its shape but thin enough to pipe smoothly. The test I use: lift the beaters and let the icing fall back into the bowl. It should form a ribbon that holds its shape for a few seconds before melting back in. If it disappears immediately, it is too thin. Add more powdered sugar a tablespoon at a time.
Work in batches. Do not try to ice all the cookies at once. Pipe the spider bodies on half the batch, let them set, then do the legs. If you try to do everything at once, the icing will be a runny mess. Trust me, I have been there. It is not a good look.
Multitask strategically. While the dough is chilling, make your royal icing. While the cookies are baking, clean up your workspace. This recipe moves quickly once you start, so having everything ready makes the process smooth and enjoyable.
Variations & Adaptations
One of the best things about this recipe is how flexible it is. Here are some variations I have tried and loved.
Gluten-Free Version: Swap the whole wheat pastry flour for a 1-to-1 gluten-free baking flour. I have tested this with Bob’s Red Mill, and the texture is remarkably close to the original. Add an extra tablespoon of milk to compensate for the grittiness of gluten-free flours.
Vegan Adaptation: Use a flax egg (1 tablespoon ground flaxseed mixed with 3 tablespoons water) and vegan butter or coconut oil instead of butter. For the royal icing, use aquafaba (the liquid from a can of chickpeas) instead of meringue powder. Whip it until frothy before adding the powdered sugar. The texture is slightly different but still delicious.
Flavor Twists: Add a teaspoon of cinnamon or pumpkin pie spice to the dough for a fall twist. I made a batch with orange zest last week, and it was incredible. You could also swap the vanilla extract for almond extract—it gives the cookies a marzipan-like flavor that pairs beautifully with the royal icing.
Different Designs: Not into spiders? No problem. Pipe simple ghosts using white icing, or make pumpkins with orange icing and green stems. The royal icing technique works for any design. I once made a batch of bats using a bat-shaped cookie cutter, and they were a hit at a Halloween potluck.
Serving & Storage Suggestions
These cookies are best served at room temperature, which is when the royal icing has that perfect snap and the cookie is tender. I like to arrange them on a platter with a few fake spider webs from the dollar store for a fun presentation. They also look amazing in a clear jar tied with a black ribbon—great for gifting.
For storage, keep the cookies in an airtight container at room temperature. They will stay fresh for up to a week. Do not refrigerate them—the moisture from the fridge can make the royal icing sticky. If you need to stack them, place a sheet of parchment paper between the layers.
These cookies also freeze beautifully. Place them in a single layer in a freezer-safe container with parchment between each layer. They will keep for up to three months. When you are ready to serve, let them thaw at room temperature for about 30 minutes. The icing stays perfect. I always keep a batch in the freezer for unexpected Halloween guests or late-night cravings.
One thing I have noticed—the flavors actually develop over time. The coconut sugar gets a little deeper, and the vanilla mellows out. Day two cookies are somehow even better than day one. So do not feel bad if you make them a day ahead. They will be fantastic.
Nutritional Information & Benefits
I am not a nutritionist, but I do pay attention to what goes into my body. Here is a rough estimate per cookie (based on 20 cookies):
- Calories: 145
- Fat: 6g
- Carbohydrates: 22g
- Fiber: 2g
- Sugar: 12g
- Protein: 2g
The whole wheat pastry flour adds fiber and a dose of B vitamins, which you do not get from all-purpose flour. Coconut sugar has a lower glycemic index than regular sugar, so you avoid that blood sugar spike and crash. Plus, these cookies are free from artificial dyes and preservatives. That is a win in my book.
If you are watching your sugar intake, you can reduce the coconut sugar to ⅓ cup. The cookies will be slightly less sweet, but the royal icing provides plenty of sweetness to balance it out. For a lower-fat option, swap the butter for applesauce. The texture will be cakier, but still delicious.
Conclusion
These wholesome Halloween sugar cookies with royal icing spiders are proof that you can have your spooky fun and eat well too. They bring back that bakery magic I thought I had lost, but now I get to share it with you. The dough is forgiving, the icing is forgiving, and the spiders are supposed to look a little messy—that is part of their charm. I love making these cookies every October because they remind me that the best treats are the ones made with real ingredients and a little bit of patience. So go ahead, preheat your oven, and give these a try. I promise you will not regret it. And when you make them, I want to hear about it. Leave a comment below and tell me how your spiders turned out. Did your kids help? Did you add a twist? Drop your photos on Pinterest and tag me. Let’s make Halloween a little more wholesome, one cookie at a time.
Frequently Asked Questions
Can I use all-purpose flour instead of whole wheat pastry flour?
Absolutely. Just swap it 1:1. The cookies will be a little lighter in texture and slightly less nutty in flavor, but they will still be delicious. If you want to keep some of the whole grain benefits, use half whole wheat pastry flour and half all-purpose.
How far in advance can I make these cookies?
You can make the dough up to three days ahead and keep it wrapped in the fridge. You can also bake the cookies and freeze them undecorated for up to three months. Just thaw, ice, and serve. The royal icing is best applied fresh, but decorated cookies will keep for a week in an airtight container.
My royal icing is too runny. What do I do?
Add more powdered sugar, one tablespoon at a time, and beat well. The icing should be thick enough to hold a ribbon on the surface for a few seconds before disappearing. If it is runny, it will slide right off your cookies. Do not be shy with the powdered sugar—it is the backbone of royal icing.
Can I use natural food coloring instead of gel?
You can, but natural colors often result in a more muted shade. For a true black, gel coloring is your best bet. If you want to avoid artificial colors, use cocoa powder to make a dark brown spider. It will not be black, but it will still look great and taste like chocolate.
My cookies spread too much in the oven. What went wrong?
Most likely, the dough was not chilled enough. Pop it back in the fridge for at least 30 minutes before baking. Also, make sure your butter and coconut oil are softened but not melted. Melted fat causes spreading. Finally, check your baking powder—old baking powder loses its oomph and can affect the structure.
Pin This Recipe!
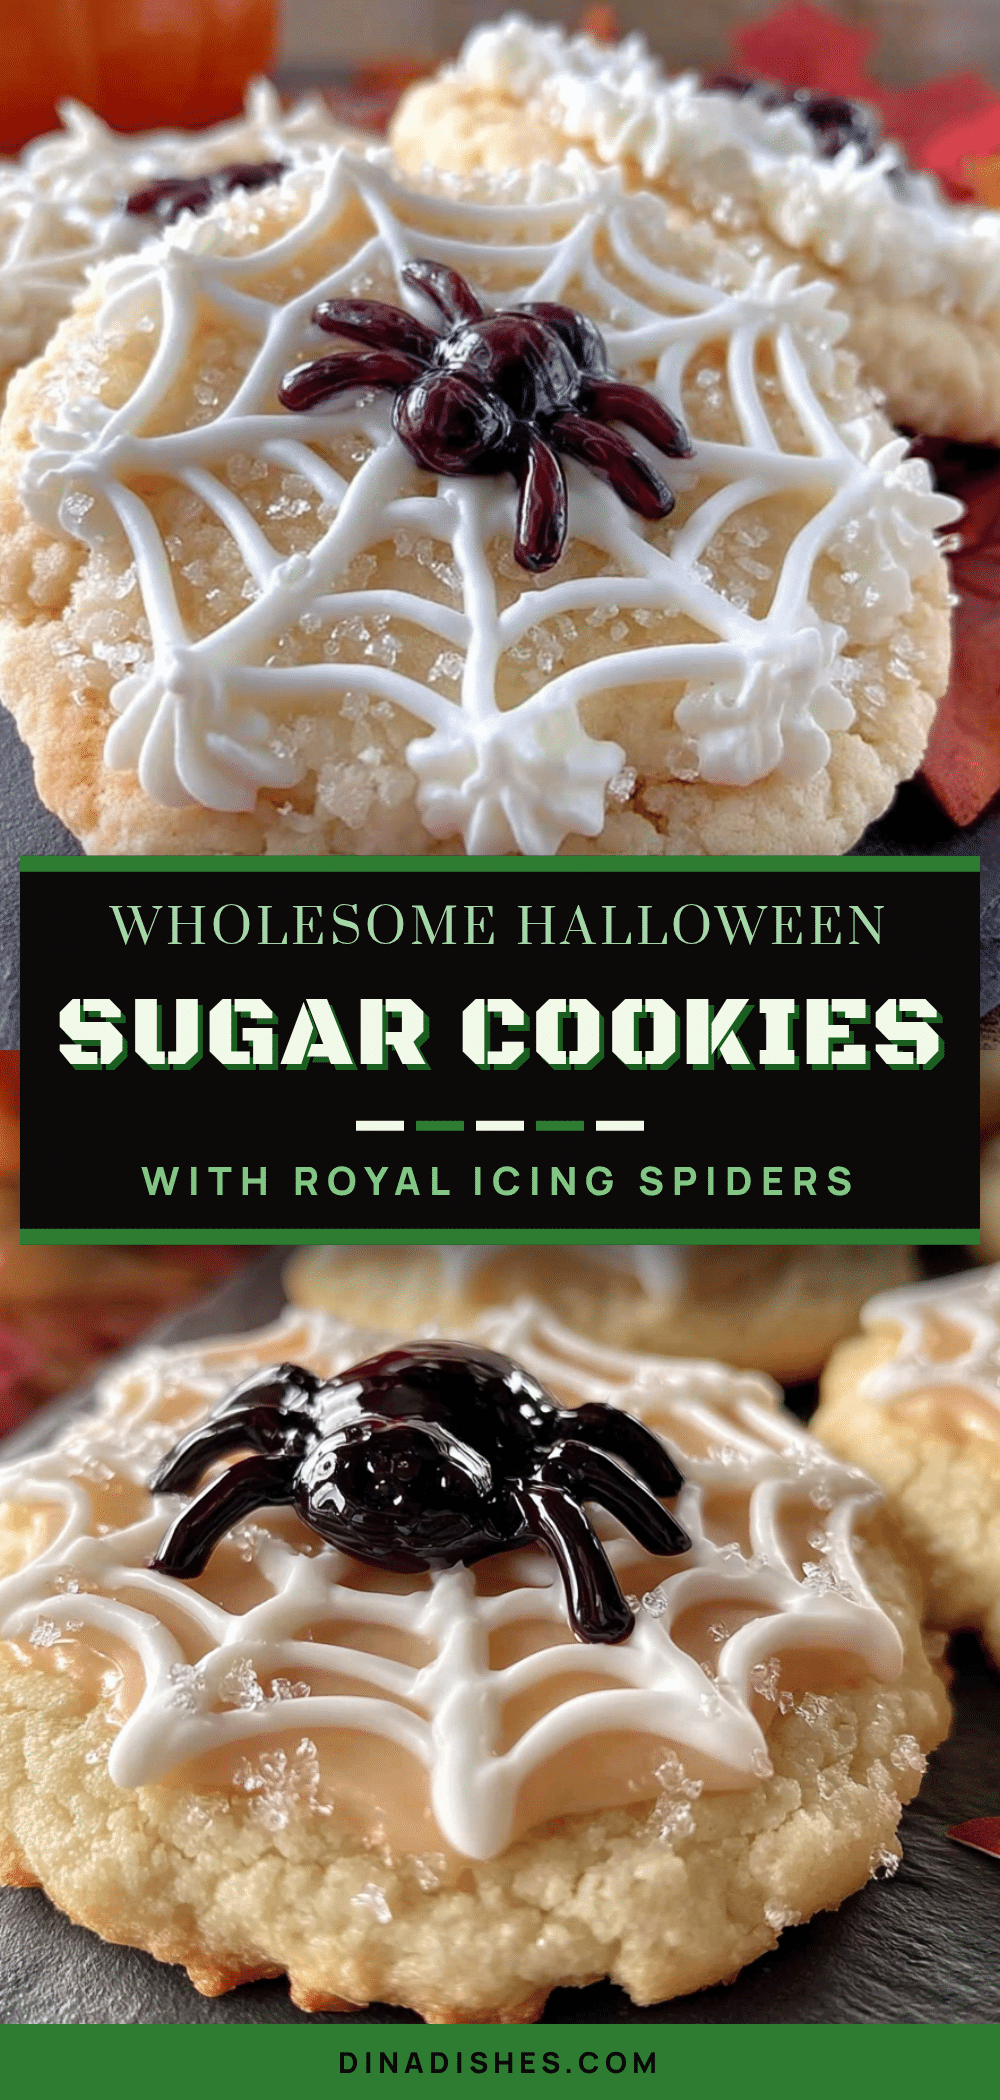
Wholesome Halloween Sugar Cookies with Royal Icing Spiders
These wholesome Halloween sugar cookies with royal icing spiders are proof that you can have your spooky fun and eat well too. They bring back that bakery magic with a perfectly balanced whole grain dough and a royal icing that doesn’t taste like powdered sugar paste.
- Prep Time: 45 minutes
- Cook Time: 10 minutes
- Total Time: 1 hour 55 minutes
- Yield: 18-20 cookies 1x
- Category: Dessert
- Cuisine: American
Ingredients
- 1 ½ cups whole wheat pastry flour (or all-purpose flour)
- ½ cup coconut sugar (or brown sugar)
- ¼ cup unsalted butter, softened
- ¼ cup coconut oil, solid but softened
- 1 large egg, room temperature
- 1 teaspoon vanilla extract
- ½ teaspoon baking powder
- ¼ teaspoon salt
- 1 tablespoon milk (any kind)
- 2 cups powdered sugar, sifted if lumpy
- 2 tablespoons meringue powder
- 3–4 tablespoons water
- ½ teaspoon vanilla bean paste or clear vanilla extract
- Black food coloring gel
- Small candy eyes (optional)
Instructions
- Make the cookie dough: In a large mixing bowl, cream together the softened butter, coconut oil, and coconut sugar until light and fluffy, about 3 minutes with a hand mixer on medium speed. Add the egg and vanilla extract, and beat until combined.
- Mix the dry ingredients: In a separate small bowl, whisk together the whole wheat pastry flour, baking powder, and salt. Gradually add this to the wet mixture, mixing on low speed until just combined. Add the tablespoon of milk and mix until the dough comes together. It should be soft but not sticky.
- Chill the dough: Wrap the dough in plastic wrap and flatten it into a disk. Refrigerate for at least 30 minutes (preferably 1 hour).
- Preheat and roll: Preheat oven to 350°F (175°C). Lightly flour your work surface and rolling pin. Roll the dough to about ¼-inch thickness. Cut out rounds and place them 2 inches apart on prepared baking sheets. Gather scraps, re-roll, and cut more cookies. You should get about 18-20 cookies.
- Bake: Bake for 8-10 minutes, until the edges are just barely golden. Let cookies cool on the baking sheet for 5 minutes, then transfer to a cooling rack.
- Make the royal icing: In a medium bowl, combine powdered sugar and meringue powder. Add 3 tablespoons of water and vanilla bean paste. Beat on low speed for 4 minutes. The icing should be thick and glossy. Divide into two bowls. Color one portion black using black food coloring gel. Leave the other white. Transfer each to a squeeze bottle or piping bag.
- Pipe the spider bodies: Once cookies are completely cool, pipe a small oval in the center of each cookie using black icing. Use a toothpick to smooth if needed. Let set for 10 minutes.
- Pipe the spider legs: Using black icing, pipe eight thin lines radiating out from the spider body. Then, using white icing, pipe two small dots for eyes on the spider body. If using candy eyes, press them gently into the white icing before it sets.
- Let the icing set: Allow cookies to sit at room temperature for about 45 minutes to 1 hour until royal icing hardens completely.
Notes
Chill the dough twice if needed to prevent spreading. Use a light hand with flour when rolling. Royal icing consistency should be thick enough to hold its shape but thin enough to pipe smoothly. Work in batches when icing. Cookies can be stored in an airtight container at room temperature for up to a week. They freeze well for up to three months.
Nutrition
- Serving Size: 1 cookie
- Calories: 145
- Sugar: 12
- Sodium: 85
- Fat: 6
- Saturated Fat: 3
- Carbohydrates: 22
- Fiber: 2
- Protein: 2
Keywords: Halloween sugar cookies, royal icing spiders, wholesome cookies, whole wheat pastry flour, coconut sugar, no artificial dyes, easy Halloween treat