My nephew Leo asked why I couldn’t just trace his hand on the cookie dough instead of rolling it out and using cutters. I started to explain why that wouldn’t work—then stopped. Honestly, I had no good reason. I was about to launch into some speech about even thickness and structural integrity, but the look on his face said he was already bored. So I handed him a butter knife and told him to go for it.
That first cookie was a lopsided, five-fingered mess with a thumb that looked more like a potato. And you know what? It was the best sugar cookie I’d ever made. Not because it was perfect, but because it was his. The kitchen was a disaster zone of flour and sprinkles, and I’m pretty sure there’s still some royal icing stuck to my ceiling fan. But watching him outline each finger with orange icing, carefully placing candy corn “feathers”—that moment changed how I think about baking with kids.
These Fall Hand Turkey Sugar Cookies are less about precision and more about the messy, joyful process of making something together. They’re the kind of recipe that lets kids take the lead while you just handle the hot oven. Maybe you’ve been there—trying to get that perfect Pinterest-worthy bake while your little one just wants to get their hands in the dough. Let me tell you, letting go of control was the best thing I ever did in the kitchen. These cookies have become our November tradition, and I keep making them because they capture that fleeting magic of childhood creativity.
Why You’ll Love This Recipe
These aren’t your average sugar cookies. They’re a full sensory experience that turns a simple baking project into a cherished memory. Here’s why they’ve become a staple in my kitchen and why they’ll earn a spot in yours too.
- Kid-Approved from Start to Finish : Kids get to trace their own hands, press their fingers into the dough, and decorate their very own turkey. It gives them ownership over the project and keeps them engaged for way longer than a standard cookie.
- Simple Pantry Ingredients : You probably have everything you need already. Butter, sugar, flour, eggs, vanilla—no fancy extracts or hard-to-find decorations. I use King Arthur Flour for consistent results, but any all-purpose flour works perfectly.
- Perfect for Thanksgiving Prep : These cookies are a lifesaver when you need to keep little hands busy while you’re wrestling with the turkey. Set them up at the kitchen table and you’ve got an hour of focused creativity.
- Naturally Customizable : Every cookie will be different because every hand is different. That’s the whole point. No two turkeys look alike, which makes each one special.
- Unbelievably Soft and Buttery : The texture is everything. These cookies stay soft for days thanks to a touch of cream cheese in the dough. I stumbled onto this trick after a failed batch of cream cheese frosting, and it was a happy accident I’ll never forget.
What makes this recipe different from every other sugar cookie out there? It’s the combination of that ultra-soft, cream cheese-enriched dough with the hand-tracing technique. You’re not fighting with sticky dough or worrying about perfect shapes. You’re just letting kids be kids. And honestly, that first bite of a cookie shaped like your own hand? It hits different. It’s comfort food reimagined—simpler, messier, but with the same soul-soothing satisfaction. Perfect for impressing grandparents without the stress, or turning a rainy November afternoon into something truly memorable.
What Ingredients You Will Need
This recipe uses simple, wholesome ingredients to deliver big flavor and a soft, tender texture. Most of these are pantry staples, so you probably don’t need a special trip to the store. The cream cheese is the secret weapon here—it adds a subtle tang and keeps the cookies from drying out.
- Unsalted butter, softened (1 cup / 226g) – Make sure it’s truly at room temperature. Cold butter won’t cream properly and will leave you with dense cookies. I use Kerrygold for its rich flavor, but any good-quality butter works.
- Cream cheese, softened (4 oz / 113g) – This is the game-changer. It adds tenderness and a slight tang that balances the sweetness. Use full-fat for best results; low-fat can make the dough sticky.
- Granulated sugar (1 cup / 200g) – Regular white sugar gives these cookies their classic sweetness and helps with spreading.
- Large egg (1, room temperature) – Bring it to room temp by placing it in warm water for 5 minutes if you forgot to take it out earlier.
- Vanilla extract (2 teaspoons) – Pure vanilla makes a difference here. Imitation works, but the flavor won’t be as warm and rich.
- All-purpose flour (2 ½ cups / 300g) – Spoon and level your flour. Scooping directly from the bag packs in too much and makes cookies tough. I recommend Gold Medal or King Arthur.
- Baking powder (1 teaspoon) – This gives the cookies a gentle lift. Make sure it’s fresh—test it by dropping a bit in hot water; it should fizz.
- Salt (½ teaspoon) – Don’t skip this. Salt balances the sweetness and enhances the buttery flavor. Fine sea salt is best.
For the Royal Icing:
- Powdered sugar (2 cups / 240g) – Sift it to avoid lumps. Trust me, lumpy icing is a nightmare to pipe.
- Meringue powder (2 tablespoons) – This gives the icing that perfect hard shell. You can substitute with 2 egg whites if you prefer, but meringue powder is safer for kids eating raw icing.
- Water (3-4 tablespoons) – Add slowly. You want a consistency that holds a ribbon for 10 seconds when you lift the spoon.
- Food coloring – Gel colors work best. I use Wilton’s orange for the feathers and Americolor’s brown for the turkey body. Liquid colors can thin the icing too much.
For Decorating:
- Candy corn (1 cup) – These become the feathers. Get the classic autumn mix if you want variety.
- Candy eyes (24-30 pieces) – Found in the baking aisle. They add instant personality.
- Orange sprinkles or jimmies (for the beak) – You can also use small orange candies or cut up fruit leather.
- Red decorating gel (for the snood/wattle) – That little red dangly bit on the turkey’s beak. It’s optional but adds character.
Equipment Needed
You don’t need a bakery-grade setup for these cookies. Most of this stuff you probably already have. Here’s what you’ll need:
- Stand mixer or hand mixer – A hand mixer works fine, but a stand mixer makes creaming the butter and cream cheese effortless. I’ve used my KitchenAid Artisan for years, but my old $30 hand mixer did the job for a decade.
- Baking sheets (2-3) – Light-colored, rimmed baking sheets work best. Dark sheets can cause the bottoms to brown too quickly. I use Nordic Ware half-sheet pans.
- Parchment paper or silicone baking mats – Silicone mats are worth the investment. They prevent sticking without extra grease and clean up easily. Silpat is my go-to brand.
- Rolling pin – Any rolling pin works. I prefer a French-style tapered pin because it gives me more control, but a standard one with handles is fine too.
- Butter knife or small paring knife – For tracing hands. A butter knife is safer for kids to handle.
- Piping bags or zip-top bags – For the royal icing. Snip a tiny corner off a zip-top bag if you don’t have piping bags. Works like a charm.
- Cooling rack – Essential for letting cookies cool completely before decorating. Stacking warm cookies creates a sticky mess.
- Small offset spatula – Helpful for transferring cut cookies to the baking sheet without distorting their shape.
Maintenance tip: Wash your piping bags immediately after use. Dried royal icing is a nightmare to remove. And replace your parchment paper between batches—reusing burnt paper affects baking time.
Preparation Method
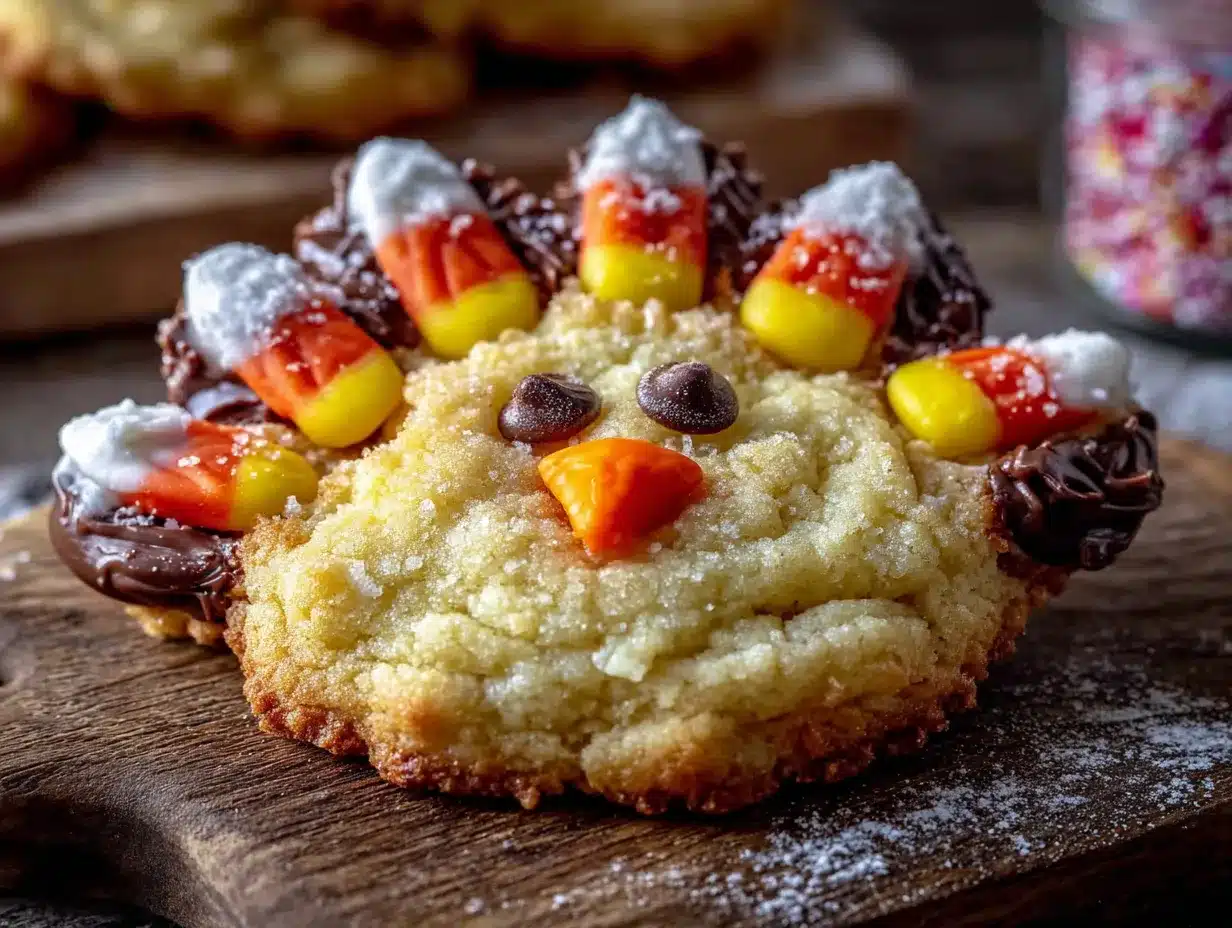
Let’s get into the nitty-gritty. This recipe makes about 24 cookies, depending on hand sizes. Plan for about 30 minutes of active prep, plus 1 hour for chilling and 2 hours for decorating.
- Make the dough. In a large mixing bowl, beat the softened butter and cream cheese together until smooth and fluffy—about 2 minutes on medium speed. Add the granulated sugar and beat for another 2 minutes until light and airy. Scrape down the sides of the bowl. Add the egg and vanilla extract, then beat until fully incorporated. The mixture should look pale and creamy.
- Combine dry ingredients. In a separate bowl, whisk together the flour, baking powder, and salt. Gradually add this to the wet mixture, mixing on low speed. Stop as soon as the flour disappears. Overmixing develops gluten and makes cookies tough. The dough will be soft but not sticky. If it feels too sticky, add 1 tablespoon more flour.
- Chill the dough. Divide the dough in half, flatten each half into a disk, wrap tightly in plastic wrap, and refrigerate for at least 1 hour. This step is non-negotiable. Chilled dough is much easier to roll and trace. I once skipped this step and ended up with blobs instead of hands. Learn from my mistake.
- Preheat and prep. Preheat your oven to 350°F (175°C). Line your baking sheets with parchment paper or silicone mats. Take one disk of dough out of the fridge and let it sit at room temperature for 5 minutes—just enough to make it rollable without cracking.
- Roll the dough. On a lightly floured surface, roll the dough to about ¼-inch thickness. Don’t go thinner or your cookies will be too delicate. Use a light hand with the flour—too much and the cookies will be dry.
- Trace the hands. Here’s the fun part. Have your child place their hand flat on the rolled dough. Using a butter knife, gently trace around their hand, cutting through the dough. Lift the hand-shaped dough carefully with an offset spatula and place it on the prepared baking sheet, spacing cookies about 2 inches apart. Repeat with the remaining dough, gathering scraps and re-rolling as needed. Scraps can be rerolled once; after that, the dough gets tough.
- Bake. Bake for 8-10 minutes, or until the edges are just barely golden. The centers should look set but not brown. Rotate the baking sheet halfway through for even baking. Let the cookies cool on the sheet for 5 minutes, then transfer to a wire rack to cool completely. This is crucial—warm cookies will crumble under icing.
- Make the royal icing. While cookies cool, make the icing. In a medium bowl, whisk together powdered sugar and meringue powder. Add water 1 tablespoon at a time, whisking until smooth. The icing should be thick but flow slowly. Divide into bowls and tint with gel food coloring. For the feathers, use orange. For the body, use brown. Keep a small amount white for the eyes if you’re not using candy eyes.
- Decorate the turkeys. Once cookies are completely cool, it’s decorating time. Pipe a thin outline of brown icing on the palm area—this is the turkey body. Fill it in with more brown icing using a toothpick to spread it evenly. Let the body set for 10 minutes. Then pipe orange feathers on each finger—or let the kids go wild with candy corn placed directly on the fingers. Add candy eyes, an orange sprinkle beak, and a tiny red gel snood. Let the icing set completely, about 1-2 hours.
Sensory cue: When the cookies are done, they should smell like butter and vanilla, and the edges should be a pale golden color. The centers will still feel soft—that’s normal. They firm up as they cool.
Cooking Tips & Techniques
I’ve made these cookies more times than I can count, and I’ve learned a few things the hard way. Here’s what I wish someone had told me.
Don’t skip the chill. I cannot stress this enough. Warm dough is impossible to trace without it sticking to the knife and losing its shape. I once tried to rush the process and ended up with hand-shaped blobs that looked more like mutant starfish. Chilling for at least an hour makes the dough firm enough to hold those finger outlines perfectly.
Flour your knife. Dip the butter knife in flour before each trace. This prevents the dough from sticking to the blade and pulling the shape out of alignment. It’s a small step that makes a huge difference.
Work in batches. Keep the second disk of dough in the fridge while you work with the first. If the dough gets too soft while you’re rolling, pop it back in the fridge for 10 minutes. Patience here pays off in clean, defined cookies.
Use a toothpick for details. When filling in the icing, a toothpick is your best friend. It lets you nudge the icing into tight corners without making a mess. I learned this after a disastrous attempt with a piping tip that was too big.
Let kids own the decorating. This is the part where you step back. Yes, the icing might be a little messy. Yes, the candy corn might be placed upside down. But that’s the charm. My niece once made a turkey with three eyes, and it was the cutest thing I’ve ever seen. Perfection is overrated; personality is forever.
Time your multitasking. Make the dough the night before. Chilling overnight actually improves the flavor. Then all you have to do the next day is roll, trace, bake, and decorate. It breaks the process into manageable chunks and keeps kids from getting overwhelmed.
Variations & Adaptations
One of the best things about this recipe is how flexible it is. Here are some ways to switch it up depending on what you have on hand or who you’re baking for.
- Gluten-Free Version : Substitute the all-purpose flour with a 1:1 gluten-free baking flour blend. I’ve tested this with Bob’s Red Mill 1:1, and the cookies come out slightly more crumbly but still delicious. Add an extra tablespoon of cream cheese to help with binding.
- Dairy-Free Adaptation : Use vegan butter and dairy-free cream cheese. Miyoko’s makes an excellent vegan butter that performs almost identically to dairy butter. The texture will be slightly less tender, but the flavor is still spot-on.
- No Royal Icing Option : If you’re short on time or patience, skip the icing entirely. Bake the cookies, let them cool, and let kids decorate with just candy corn, candy eyes, and a dollop of store-bought frosting. It’s faster and just as fun.
- Spiced Sugar Cookie : Add 1 teaspoon of cinnamon and ½ teaspoon of nutmeg to the dry ingredients. This gives the cookies a warm fall flavor that pairs beautifully with the cream cheese tang. I tried this last year and it was a hit.
- Mini Hand Cookies : For younger kids with smaller hands, trace just the palm and thumb. You get adorable little turkey bodies without the long fingers that can break off during baking. Plus, they’re the perfect size for little appetites.
- Chocolate Version : Replace ¼ cup of the flour with unsweetened cocoa powder. The chocolate dough makes for a fun twist, and it pairs surprisingly well with the orange candy corn feathers. My nephew called them “chocolate turkeys” and demanded we make them every year now.
Serving & Storage Suggestions
These cookies are best enjoyed at room temperature, ideally within a day or two of decorating. The royal icing needs a couple of hours to fully harden, so plan accordingly.
Serving: Arrange the cookies on a platter with the fingers pointing outward like a fan. It creates a beautiful, festive display that looks like a flock of turkeys. Serve them at room temperature alongside a glass of cold milk or a warm cup of apple cider for the adults. They’re perfect for Thanksgiving gatherings, classroom parties, or just a cozy afternoon snack.
Storage: Store undecorated cookies in an airtight container at room temperature for up to 5 days. Once decorated, layer them between sheets of parchment paper in a single layer. The royal icing can get sticky if stacked too high. For longer storage, freeze undecorated cookies for up to 3 months. Place them in a freezer-safe bag with parchment between layers. Thaw at room temperature before decorating.
Reheating: These cookies don’t need reheating, but if you want that just-baked warmth, pop them in a 300°F (150°C) oven for 3-4 minutes. Don’t microwave them—the icing will melt and the cookies will get soggy.
Flavor development: The cookies actually taste better the next day. The cream cheese flavor mellows out and blends with the vanilla. If you can resist eating them all on day one, you’re in for a treat on day two.
Nutritional Information & Benefits
Let’s be real—these are sugar cookies. They’re a treat, not a health food. But that doesn’t mean they’re without merit. Here’s a rough breakdown per cookie (based on 24 cookies with royal icing and candy corn):
- Calories : 210
- Fat : 10g (6g saturated)
- Carbohydrates : 29g (18g sugar)
- Protein : 3g
- Fiber : 0.5g
- Sodium : 95mg
Health highlights: The cream cheese adds a small amount of protein and calcium. The butter provides vitamin A. And honestly, the biggest benefit here is the joy of making something with your hands. Baking with kids has been shown to improve fine motor skills, teach patience, and create positive food memories. That’s a win in my book.
Dietary considerations: These cookies contain gluten, dairy, and eggs. They are not suitable for vegans or those with celiac disease without the substitutions listed above. The royal icing contains meringue powder, which is pasteurized and safe for kids.
My wellness perspective: I believe in balance. These cookies are a once-a-year tradition in my house, and the memories we make while baking them are worth every calorie. Life is too short to skip the candy corn.
Conclusion
These Fall Hand Turkey Sugar Cookies are more than just a recipe—they’re a time capsule. Every lopsided finger, every smudge of orange icing, every giggle over a three-eyed turkey is a moment you’ll look back on and smile. They’re messy, they’re imperfect, and they’re absolutely wonderful.
I hope you give this recipe a try, not because it’s the most elegant cookie you’ll ever make, but because it’s the most fun. Let your kids take the lead. Let them make mistakes. Let them create something that’s uniquely theirs. And when you bite into that soft, buttery cookie shaped like a tiny hand, I promise you’ll understand why this tradition has stuck with me.
I’d love to hear about your hand turkey creations! Drop a comment below with your kids’ funniest decorating moments or tag me in your photos on Pinterest. Happy baking, and here’s to making memories that taste as sweet as they feel.
Frequently Asked Questions
Can I make the dough ahead of time?
Absolutely. The dough can be refrigerated for up to 3 days or frozen for up to 3 months. Just wrap it tightly in plastic wrap and then in foil. Thaw overnight in the fridge before rolling.
My dough is too sticky. What did I do wrong?
Either your butter and cream cheese were too soft, or you didn’t measure the flour correctly. Try chilling the dough for an extra 30 minutes. If it’s still sticky, add flour 1 tablespoon at a time until it feels manageable.
Can I use store-bought frosting instead of royal icing?
Yes, but it won’t harden the same way. Store-bought frosting stays soft and can smudge. If you’re okay with that, go for it. Just be careful when stacking the cookies.
How do I prevent the fingers from breaking off?
Make sure your dough is thoroughly chilled before tracing. Also, don’t make the fingers too thin—keep them at least ¼ inch thick. When transferring the cookies to the baking sheet, use a thin spatula and support the fingers with your other hand.
My kids have food allergies. Can I still make these?
Yes! Check the variations section for gluten-free and dairy-free options. For egg allergies, use an egg substitute like flax eggs (1 tablespoon ground flaxseed mixed with 3 tablespoons water per egg). The texture will be slightly different, but still delicious.
Pin This Recipe!

Easy Fall Hand Turkey Sugar Cookies for Kids

These soft, buttery sugar cookies are shaped like little hands and decorated as turkeys, making them a fun and messy baking project for kids. Perfect for Thanksgiving or a cozy fall afternoon.
- Prep Time: 30 minutes
- Cook Time: 10 minutes
- Total Time: 1 hour 40 minutes (plus 1 hour chilling and 2 hours decorating)
- Yield: 24 servings 1x
- Category: Dessert
- Cuisine: American
Ingredients
- 1 cup (226g) unsalted butter, softened
- 4 oz (113g) cream cheese, softened
- 1 cup (200g) granulated sugar
- 1 large egg, room temperature
- 2 teaspoons vanilla extract
- 2 ½ cups (300g) all-purpose flour
- 1 teaspoon baking powder
- ½ teaspoon salt
- 2 cups (240g) powdered sugar
- 2 tablespoons meringue powder
- 3–4 tablespoons water
- Gel food coloring (orange and brown)
- 1 cup candy corn
- 24–30 candy eyes
- Orange sprinkles or jimmies
- Red decorating gel
Instructions
- Make the dough: In a large mixing bowl, beat the softened butter and cream cheese together until smooth and fluffy—about 2 minutes on medium speed. Add the granulated sugar and beat for another 2 minutes until light and airy. Scrape down the sides of the bowl. Add the egg and vanilla extract, then beat until fully incorporated.
- Combine dry ingredients: In a separate bowl, whisk together the flour, baking powder, and salt. Gradually add this to the wet mixture, mixing on low speed. Stop as soon as the flour disappears. The dough will be soft but not sticky.
- Chill the dough: Divide the dough in half, flatten each half into a disk, wrap tightly in plastic wrap, and refrigerate for at least 1 hour.
- Preheat and prep: Preheat your oven to 350°F (175°C). Line your baking sheets with parchment paper or silicone mats. Take one disk of dough out of the fridge and let it sit at room temperature for 5 minutes.
- Roll the dough: On a lightly floured surface, roll the dough to about ¼-inch thickness.
- Trace the hands: Have your child place their hand flat on the rolled dough. Using a butter knife, gently trace around their hand, cutting through the dough. Lift the hand-shaped dough carefully with an offset spatula and place it on the prepared baking sheet, spacing cookies about 2 inches apart. Repeat with the remaining dough, gathering scraps and re-rolling as needed.
- Bake: Bake for 8-10 minutes, or until the edges are just barely golden. Rotate the baking sheet halfway through for even baking. Let the cookies cool on the sheet for 5 minutes, then transfer to a wire rack to cool completely.
- Make the royal icing: In a medium bowl, whisk together powdered sugar and meringue powder. Add water 1 tablespoon at a time, whisking until smooth. Divide into bowls and tint with gel food coloring.
- Decorate the turkeys: Once cookies are completely cool, pipe a thin outline of brown icing on the palm area—this is the turkey body. Fill it in with more brown icing using a toothpick to spread it evenly. Let the body set for 10 minutes. Then pipe orange feathers on each finger or place candy corn directly on the fingers. Add candy eyes, an orange sprinkle beak, and a tiny red gel snood. Let the icing set completely, about 1-2 hours.
Notes
Don’t skip chilling the dough—it makes tracing much easier. Flour the knife before each trace to prevent sticking. Let kids own the decorating; imperfections add charm. Cookies taste even better the next day.
Nutrition
- Serving Size: 1 cookie
- Calories: 210
- Sugar: 18
- Sodium: 95
- Fat: 10
- Saturated Fat: 6
- Carbohydrates: 29
- Fiber: 0.5
- Protein: 3
Keywords: hand turkey cookies, sugar cookies, fall cookies, Thanksgiving cookies, kids baking, easy sugar cookies, cream cheese sugar cookies