There used to be a little bakery on the corner of Elm and 3rd—right next to the dry cleaners—that made the most incredible Christmas sugar cookie bark I have ever tasted. When they closed three years ago, I honestly thought I’d never get to enjoy that perfect combination of buttery cookie, creamy frosting, and festive sprinkles again. I mean, I actually stood outside their locked door one December afternoon, holding my empty tin, feeling a little ridiculous and a lot disappointed.
After twelve tries—twelve, people, including one batch that looked like a crime scene and another that tasted more like salt than sugar—I finally cracked the code. And here’s the thing: my version is actually better than the original. Not just because I figured out the exact ratio of butter to sugar, but because I made it something my kids could help with without me losing my mind. Plus, it costs about a third of what that bakery used to charge, which honestly matters a lot when you’re feeding a family on a budget during the holidays.
This budget-friendly kid-approved Christmas sugar cookie bark has become our family’s official holiday tradition. It’s the recipe my six-year-old asks for by name starting November 1st, and the one I bring to every cookie exchange without worrying about anyone guessing it didn’t cost me a fortune. The way the candy coating cracks when you bite into it, the way the sprinkles catch the Christmas tree lights—it’s pure December magic, and you don’t need fancy ingredients or professional skills to pull it off. Maybe you’ve been there, staring at bakery prices and wondering how they justify charging fifteen dollars for what is essentially cookies and frosting? Well, this one’s for you.
Why You’ll Love This Recipe
Let me tell you why this recipe has earned a permanent spot in our holiday rotation. First off, it’s genuinely easy enough that my seven-year-old can handle most of it with minimal supervision. I’m not saying that to brag—I’m saying it because I’ve tested it with actual children, and the only thing that went wrong was a few sprinkles on the floor, which honestly just adds to the festive vibe.
- Budget-Friendly: This whole recipe costs around eight dollars to make, depending on what you already have in your pantry. That’s less than a single slice of fancy bakery bark, and you get an entire cookie sheet full.
- Kid-Approved: My kids have declared this “the best thing I’ve ever made” three years running. The combination of soft cookie base, creamy frosting, and crunchy candy coating is basically everything a child could want in a dessert.
- Quick & Easy: From start to finish, you’re looking at about 45 minutes of active time. The hardest part is waiting for the chocolate to set, and even that only takes about an hour in the fridge.
- Perfect for Christmas: This bark looks like a million bucks on a holiday platter. The red and green sprinkles against the white frosting—it’s like a winter wonderland you can eat.
- Crowd-Pleaser: I’ve brought this to school parties, office potlucks, and family gatherings. It disappears every single time, and nobody believes me when I tell them how little effort it took.
What makes this recipe different from the other sugar cookie bark recipes out there is the technique. I spent three Decembers perfecting the balance between a cookie base that’s sturdy enough to hold its shape but soft enough to be enjoyable. Most recipes either come out too hard—like you’re eating a cookie that forgot it’s supposed to be chewy—or too crumbly, and you end up with a plate of cookie dust. This one hits that sweet spot where the base is tender but holds together, the frosting is creamy without being overwhelming, and the candy coating adds that satisfying snap.
This isn’t just good holiday baking—it’s the kind of recipe that makes you feel like you’ve got your act together. You know that feeling when you walk into a party with a platter of something beautiful, and people ask where you bought it? That’s this recipe. And the best part? You get to smile and say, “Oh, I just whipped it up this morning.”
What Ingredients You Will Need
This recipe uses simple, budget-friendly ingredients that you probably already have in your kitchen or can pick up without breaking the bank. I’ve tested this with both name-brand and store-brand ingredients, and honestly, the store-brand versions work perfectly fine. Here’s what you’ll need:
For the Cookie Base
- 1 cup unsalted butter, softened (I use Kerrygold when I’m feeling fancy, but store-brand works great—just make sure it’s unsalted so you control the salt level)
- 1 cup granulated sugar (adds sweetness and helps create that tender crumb)
- 1 large egg, room temperature (cold eggs can make the dough seize up, so let it sit out for 30 minutes)
- 2 teaspoons vanilla extract (pure vanilla extract makes a difference here, but imitation works in a pinch)
- 2 ½ cups all-purpose flour (spoon and level it—don’t scoop directly from the bag or you’ll end up with dry dough)
- ½ teaspoon baking powder (helps the cookie rise just enough without becoming puffy)
- ¼ teaspoon salt (balances the sweetness and brings out the vanilla flavor)
For the Frosting Layer
- 2 cups powdered sugar (sift it if you want extra smooth frosting, but I’ve skipped this step many times without disaster)
- ¼ cup unsalted butter, softened (gives the frosting that creamy texture that makes this bark so addictive)
- 2-3 tablespoons milk (start with 2 and add more if needed—whole milk gives the richest result, but 2% works fine)
- 1 teaspoon vanilla extract (I told you, vanilla is important here)
- Pinch of salt (trust me on this—it keeps the frosting from being cloyingly sweet)
For the Topping
- 1 cup white chocolate chips or melting wafers (I prefer Ghirardelli for the smoothest melt, but store-brand white chips work if you add a teaspoon of coconut oil to help them melt smoothly)
- ½ cup red and green Christmas sprinkles (the mix from the baking aisle works perfectly—I like the ones with different shapes for visual interest)
- Optional: ¼ cup crushed candy canes (adds a nice peppermint crunch if you’re feeling festive)
A few ingredient notes from my years of testing: if you only have salted butter, just reduce the added salt to ⅛ teaspoon. For the frosting, I’ve used both heavy cream and regular milk, and honestly, the difference is minimal enough that I just use whatever I have. And here’s a tip about the sprinkles—buy the ones in the baking aisle, not the fancy gourmet ones. The cheaper sprinkles actually adhere better to the frosting, and they’re way more budget-friendly.
Equipment Needed
You don’t need any fancy equipment for this recipe, which is part of why I love it. Here’s what you’ll need:
- Mixing bowls: One large bowl for the cookie dough and one medium bowl for the frosting. I use my grandmother’s Pyrex bowls, but any mixing bowls work.
- Electric mixer: A hand mixer works perfectly for this. I’ve made it with a stand mixer too, but honestly, the dough is stiff enough that a hand mixer gives you more control. If you’re mixing by hand, be prepared for a forearm workout.
- Baking sheet: A standard 12×17 inch rimmed baking sheet is ideal. If you only have a smaller one, you can make two batches or just have thicker bark—which honestly isn’t a problem.
- Parchment paper: This is non-negotiable. The bark will stick to the pan without it, and you’ll spend forever scraping. I buy the pre-cut sheets from Costco, but any parchment works.
- Rolling pin: For pressing the dough into the pan. A flat-bottomed glass works in a pinch, but a rolling pin gives you more even pressure.
- Spatula: Both a rubber spatula for scraping bowls and an offset spatula for spreading the frosting evenly.
- Small saucepan or microwave-safe bowl: For melting the white chocolate. I prefer the microwave method because it’s faster and involves fewer dishes.
If you don’t have an offset spatula, don’t stress. A butter knife works fine for spreading the frosting—it just takes a little more patience. And if you’re wondering about the parchment paper, yes, you can use aluminum foil, but the bark is more likely to stick. I learned that one the hard way and spent twenty minutes chipping cookie off a foil-lined pan.
Preparation Method
Alright, let’s get to the good part. Here’s exactly how to make this budget-friendly kid-approved Christmas sugar cookie bark, with all the little details I’ve learned from making it about thirty times over the past three years.
Step 1: Make the Cookie Base
Preheat your oven to 350°F (175°C). Line your baking sheet with parchment paper, leaving a little overhang on the sides—this makes it way easier to lift the bark out later. In a large mixing bowl, beat the softened butter and granulated sugar together until light and fluffy, about 3-4 minutes. You want it to look pale and airy, like the color of a buttercup. Scrape down the sides of the bowl with your spatula halfway through.
Add the egg and vanilla extract, then beat until combined. It might look a little separated at this point—that’s normal. Don’t panic. In a separate bowl, whisk together the flour, baking powder, and salt. Gradually add the dry ingredients to the wet mixture, mixing on low speed until just combined. The dough will be stiff—that’s what you want. If it’s too dry to come together, add a teaspoon of milk. If it’s too sticky, add a tablespoon of flour.
Step 2: Press and Bake
Transfer the dough to your prepared baking sheet. Using your hands or a rolling pin, press the dough into an even layer that covers the entire sheet. I find that putting a piece of plastic wrap over the dough before rolling helps prevent sticking and gives you a smoother surface. Aim for about ¼ inch thickness. Don’t worry if it’s not perfectly even—the bark will still taste amazing.
Bake for 12-15 minutes, or until the edges are just starting to turn golden brown. The center should look set but not dark. Here’s the thing: you want to pull it out when it’s still slightly pale because it will continue to bake on the hot pan. I’ve made the mistake of overbaking this, and the result is a cookie that’s too hard to enjoy. Trust me, underbaked is better than overbaked here. Let the cookie base cool completely on the pan—about 30 minutes. Don’t rush this step, or your frosting will melt into a mess.
Step 3: Make the Frosting
While the cookie base is cooling, make the frosting. In a medium bowl, beat the softened butter until smooth. Gradually add the powdered sugar, beating on low speed to avoid a sugar cloud explosion. Add the vanilla extract and a pinch of salt, then add the milk one tablespoon at a time until the frosting reaches a spreadable consistency. You want it thick enough to hold its shape but thin enough to spread easily. If you accidentally make it too thin, add more powdered sugar. Too thick? Add more milk. Easy fix.
Step 4: Frost and Decorate
Once the cookie base is completely cool, spread the frosting evenly over the surface. An offset spatula works best here, but a butter knife does the job. Make it as smooth or as rustic as you like—I prefer a slightly textured surface because it catches the sprinkles better. Immediately sprinkle the Christmas sprinkles over the frosting while it’s still soft. This is the step where kids can really help—my daughter loves creating patterns with the sprinkles, and my son just dumps them on and calls it modern art.
Step 5: Add the White Chocolate Drizzle
Melt the white chocolate chips in a microwave-safe bowl in 30-second intervals, stirring between each interval, until smooth. Be careful not to overheat—white chocolate burns easily and gets grainy. If it seems too thick, add a teaspoon of coconut oil or vegetable shortening to thin it out. Drizzle the melted white chocolate over the frosted and sprinkled cookie base. I use a fork for this, flicking it back and forth to create thin ribbons. You can also put the melted chocolate in a small zip-top bag, snip off a corner, and pipe it on for more control.
Step 6: Set and Break
Place the baking sheet in the refrigerator for at least 1 hour, or until the white chocolate is completely set. The bark should feel firm to the touch. Once set, lift the parchment paper to remove the bark from the pan. Place it on a cutting board and break it into irregular pieces with your hands or cut it into squares with a sharp knife. I prefer breaking it by hand because the irregular edges look more rustic and homemade. Store in an airtight container at room temperature for up to a week—if it lasts that long.
Cooking Tips & Techniques
After making this budget-friendly kid-approved Christmas sugar cookie bark more times than I care to count, I’ve collected a few tips that make the process smoother and the results more consistent. Let me share what I’ve learned the hard way so you don’t have to.
Don’t overmix the dough. I know it’s tempting to keep beating until everything looks perfectly smooth, but overmixing develops the gluten and makes the cookie base tough. Mix just until the flour disappears, then stop. A few streaks of flour are better than a tough cookie.
Use room temperature ingredients. This is one of those baking rules that actually matters. Cold butter won’t cream properly with the sugar, and cold egg can make the dough seize up. Take everything out of the fridge 30 minutes before you start. I learned this lesson when I made a batch with cold butter and ended up with lumpy dough that baked unevenly.
Watch the baking time like a hawk. Every oven runs differently. My old oven would overbake this in 12 minutes flat, but my current oven needs the full 15. Start checking at 12 minutes and look for the edges to be just barely golden. The center should still look pale. Remember, it continues baking on the hot pan.
Let the cookie base cool completely. I cannot stress this enough. If you spread frosting on a warm cookie base, you’ll end up with a melty, sticky mess. I’ve done this twice—once because I was impatient, and once because I got distracted by a phone call. Both times, the frosting slid right off the cookie and pooled on the parchment paper. Not cute.
Work quickly with the sprinkles. Once the frosting starts to set, the sprinkles won’t stick as well. Have your sprinkles ready before you start frosting, and sprinkle them on immediately. If you’re making this with kids, have them stand by with the sprinkle shakers while you spread the frosting.
For the smoothest white chocolate drizzle, add a little fat. White chocolate chips contain less cocoa butter than real white chocolate, so they can be stubborn about melting smoothly. Adding a teaspoon of coconut oil or vegetable shortening helps them melt into a silky, drizzle-able consistency. This tip saved my white chocolate game completely.
Variations & Adaptations
One of the best things about this budget-friendly kid-approved Christmas sugar cookie bark is how adaptable it is. Over the years, I’ve tried several variations, and here are my favorites:
Peppermint Bark Version: Crush about ½ cup of candy canes and sprinkle them over the frosting along with the regular sprinkles. The peppermint adds a refreshing crunch that cuts through the sweetness. I made this version for a holiday party last year, and it was the first thing to disappear from the dessert table.
Chocolate Lover’s Twist: Swap the white chocolate drizzle for dark or milk chocolate. I use semi-sweet chocolate chips melted with a teaspoon of coconut oil. The bitterness of the dark chocolate balances the sweet frosting beautifully. My husband, who claims he doesn’t like white chocolate, devours this version.
Gluten-Free Adaptation: Substitute the all-purpose flour with a 1:1 gluten-free baking flour blend. I’ve tested this with Bob’s Red Mill 1:1 Baking Flour, and the texture is remarkably similar to the original. Just note that gluten-free dough can be a bit more crumbly, so be gentle when pressing it into the pan.
Dairy-Free Option: Use vegan butter sticks (I like Earth Balance) and dairy-free white chocolate chips. For the frosting, use dairy-free milk like oat or almond milk. The texture will be slightly different—the frosting might be a bit softer—but the flavor is still fantastic.
Funfetti Celebration Bark: Add rainbow sprinkles to the cookie dough before pressing it into the pan. This turns the cookie base into a funfetti-style treat that’s perfect for birthdays or New Year’s Eve. Just fold in ¼ cup of rainbow sprinkles gently at the end of mixing the dough.
Serving & Storage Suggestions
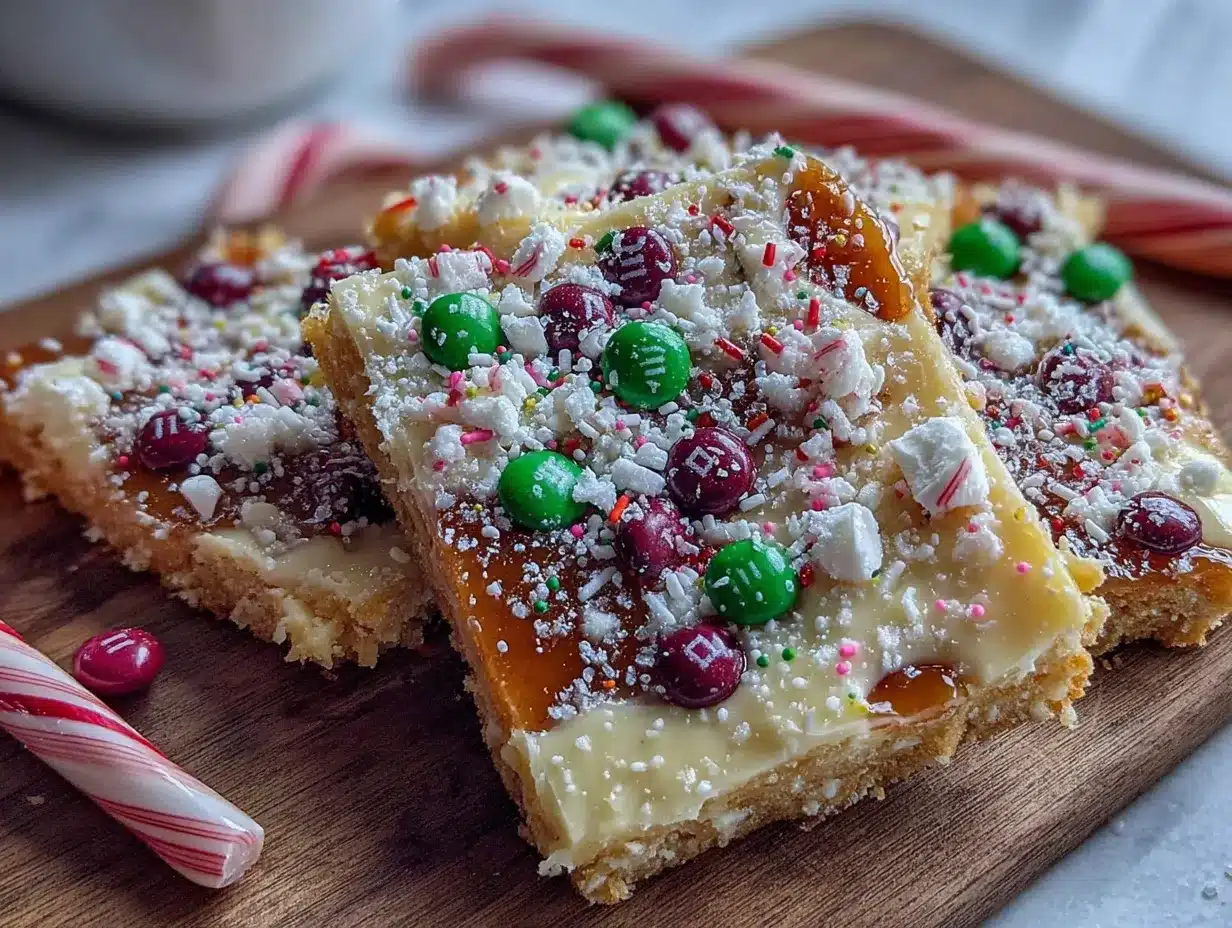
This bark is incredibly versatile when it comes to serving. I like to arrange the pieces on a festive platter or in a decorative tin for gift-giving. The red and green sprinkles against the white frosting make it look like you spent hours on presentation, even though it’s one of the easiest recipes you’ll make all season.
For serving temperature, I actually prefer this bark at room temperature. The cookie base is softer, the frosting is creamier, and the white chocolate drizzle has just the right amount of snap. If you’ve stored it in the fridge, let it sit out for about 15 minutes before serving. That said, some people in my house (my husband) prefer it straight from the fridge because they like the firmer texture. To each their own.
Storage is simple: keep the bark in an airtight container at room temperature for up to a week. If your kitchen runs warm, you can store it in the refrigerator, but let it come to room temperature before serving for the best texture. I’ve also frozen this bark successfully—just layer the pieces between sheets of parchment paper in a freezer-safe container, and it will keep for up to 3 months. Thaw overnight in the refrigerator, then bring to room temperature before serving.
One thing I love about this recipe is how the flavors develop over time. The second day, the cookie base softens slightly and the flavors meld together beautifully. It’s actually better the day after you make it, which is perfect for make-ahead holiday prep. Just don’t tell anyone I said that—they’ll think you spent even more time on it.
Nutritional Information & Benefits
Let’s be real—this is a treat, not a health food. But I believe in being transparent about what we’re eating, especially when feeding kids. Here’s the estimated nutritional breakdown per serving (based on 24 pieces):
| Nutrient | Amount Per Serving |
|---|---|
| Calories | 185 |
| Total Fat | 9g |
| Saturated Fat | 5g |
| Cholesterol | 25mg |
| Sodium | 55mg |
| Total Carbohydrates | 25g |
| Sugars | 16g |
| Protein | 2g |
Now, let’s talk about what’s actually in this recipe. The butter provides vitamin A, and the egg adds a small amount of protein. The white chocolate contains calcium from the milk solids. Are these health foods? No. But in the context of holiday treats, this bark is actually less indulgent than many alternatives—it doesn’t have the heavy cream or excessive butter that some cookie recipes call for.
If you’re watching sugar intake, you can reduce the frosting sugar by a quarter cup without affecting the texture too much. And if you have nut allergies in your family, rest assured that this recipe is naturally nut-free as written—just check your white chocolate chips to make sure they’re processed in a nut-free facility if that’s a concern.
My personal philosophy? The holidays are about joy and connection, and sometimes that comes in the form of a sugar cookie bark. I’d rather serve my kids something homemade with real ingredients than something processed from a box. And the memories of making this together? Those are worth every calorie.
Conclusion
This budget-friendly kid-approved Christmas sugar cookie bark has become so much more than a recipe in our house. It’s the thing we make on the first snow day of winter. It’s what I bring to the school holiday party when I forget to sign up and need something quick. It’s the gift my kids give their teachers, packed in little tins with bows that are always slightly crooked.
The beauty of this recipe is that it meets you where you are. If you’ve got a kitchen full of kids who want to help, it’s forgiving enough to survive enthusiastic sprinkle application and less-than-perfect frosting spreading. If you’re baking solo late at night while everyone sleeps, it’s simple enough that you can do it on autopilot while watching your favorite Christmas movie. And if you’re on a tight budget, it delivers bakery-quality results for pocket-change prices.
I’d love to hear how this recipe turns out for you. Did your kids add their own creative touches? Did you try one of the variations? Drop a comment below and let me know—I read every single one, and I genuinely love hearing about your kitchen adventures. And if you’re looking for more holiday baking ideas that won’t break the bank, check out my easy Christmas cookie recipes for more family-friendly treats.
Until next time, happy baking—and remember, the cookies don’t have to be perfect. They just have to be made with love. And sprinkles. Lots of sprinkles.
Frequently Asked Questions
Can I use a different type of chocolate for the drizzle?
Absolutely! Milk chocolate, dark chocolate, or even colored candy melts all work beautifully. Just remember that darker chocolates will be less sweet and will create a stronger flavor contrast with the frosting.
Why did my white chocolate seize up when I melted it?
White chocolate is sensitive to heat and moisture. If even a drop of water gets into the melting chocolate, it can seize and become grainy. Make sure your bowl is completely dry, and heat in short intervals, stirring frequently. Adding a teaspoon of coconut oil can help if it starts to look thick.
Can I make this recipe ahead of time?
Yes! This bark actually tastes better the next day. You can make it up to 3 days ahead and store it in an airtight container at room temperature. For longer storage, freeze for up to 3 months.
My cookie base came out too hard. What went wrong?
Most likely, it was overbaked. The cookie base should be baked just until the edges are golden and the center looks set but pale. Remember, it continues baking on the hot pan after you take it out of the oven. If your oven runs hot, try reducing the baking time by a minute or two next time.
Can I double this recipe?
Definitely! If you have a large enough baking sheet, you can double the ingredients and bake it in one big batch. Just make sure your pan is rimmed so the dough doesn’t spread over the edges. You’ll need to bake it a few minutes longer—start checking at 15 minutes.
Pin This Recipe!
Budget-Friendly Kid-Approved Christmas Sugar Cookie Bark

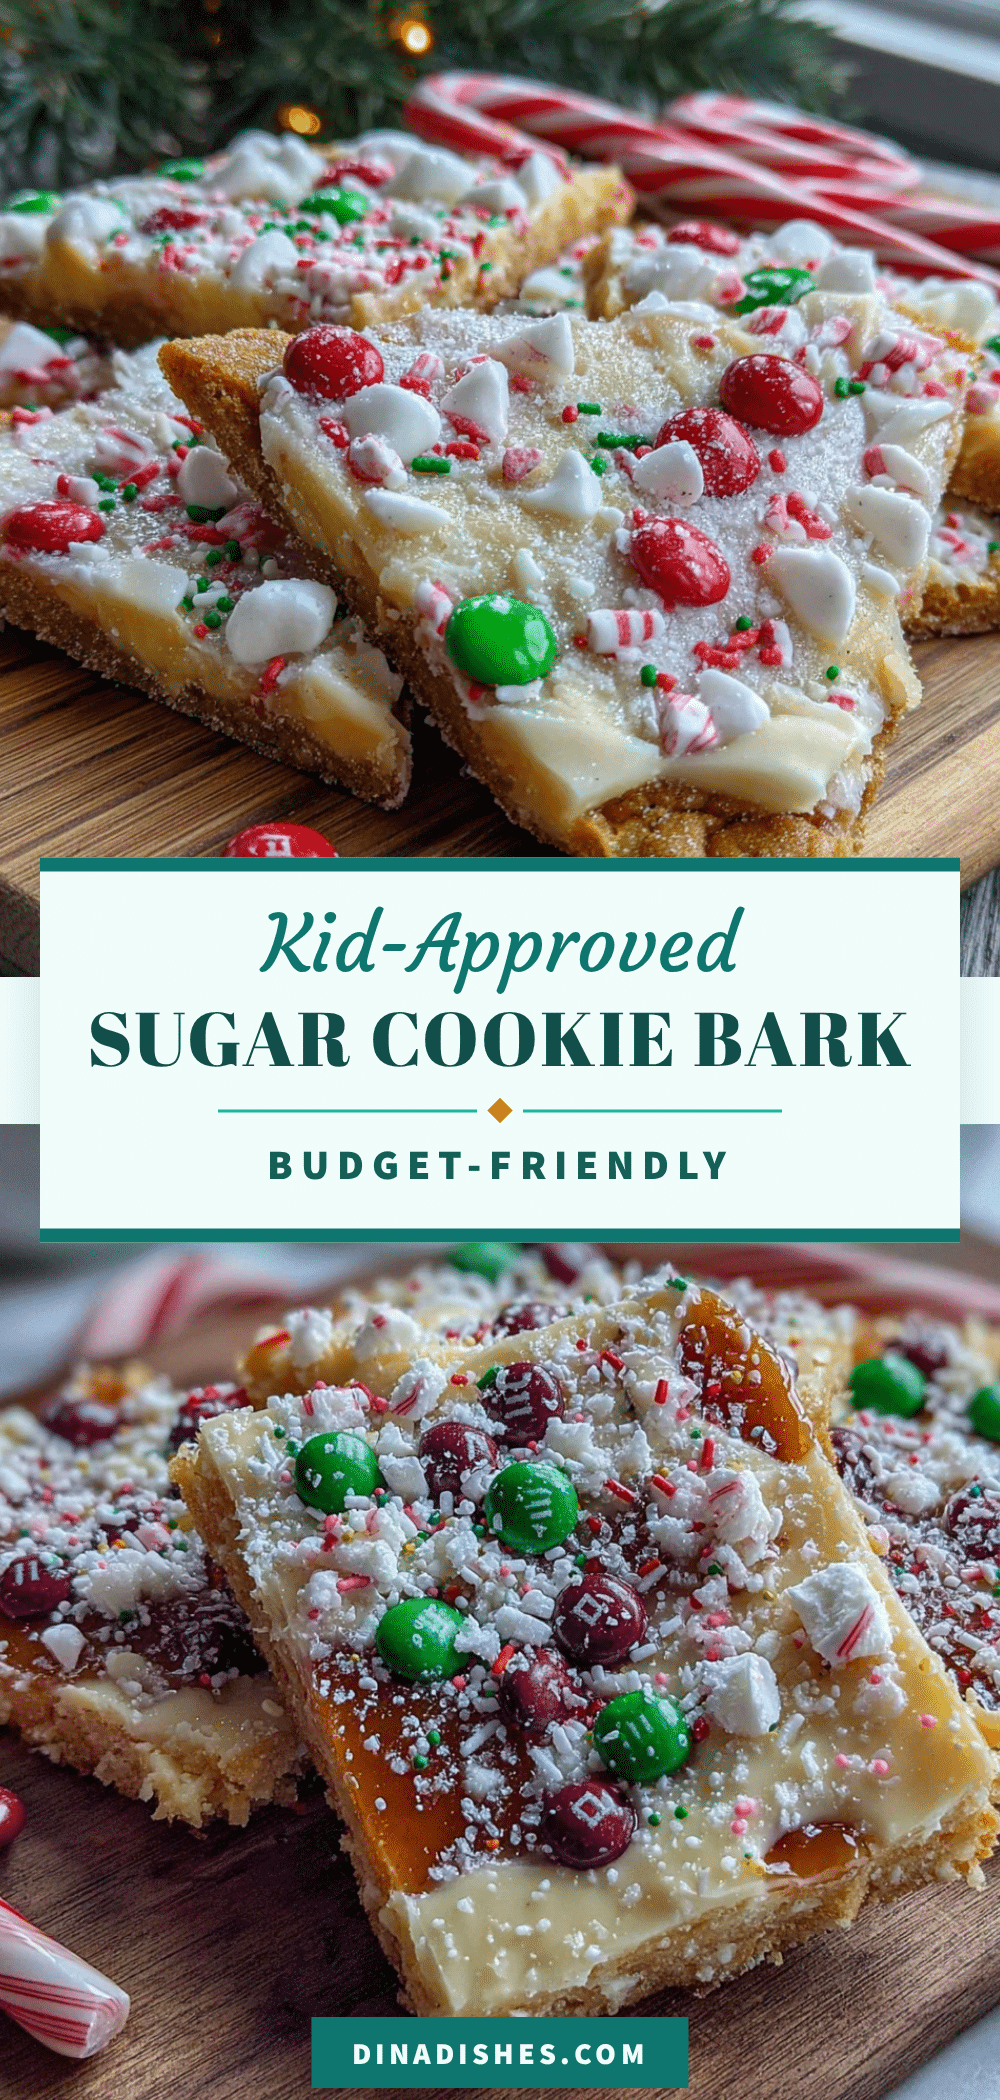
This budget-friendly kid-approved Christmas sugar cookie bark has become our family’s official holiday tradition. It’s the recipe my six-year-old asks for by name starting November 1st, and the one I bring to every cookie exchange without worrying about anyone guessing it didn’t cost me a fortune.
- Prep Time: 15 minutes
- Cook Time: 15 minutes
- Total Time: 1 hour 30 minutes
- Yield: 24 servings 1x
- Category: Dessert
- Cuisine: American
Ingredients
- 1 cup unsalted butter, softened
- 1 cup granulated sugar
- 1 large egg, room temperature
- 2 teaspoons vanilla extract
- 2 ½ cups all-purpose flour
- ½ teaspoon baking powder
- ¼ teaspoon salt
- 2 cups powdered sugar
- ¼ cup unsalted butter, softened
- 2–3 tablespoons milk
- 1 teaspoon vanilla extract
- Pinch of salt
- 1 cup white chocolate chips or melting wafers
- ½ cup red and green Christmas sprinkles
- Optional: ¼ cup crushed candy canes
Instructions
- Preheat your oven to 350°F (175°C). Line your baking sheet with parchment paper, leaving a little overhang on the sides.
- In a large mixing bowl, beat the softened butter and granulated sugar together until light and fluffy, about 3-4 minutes. Scrape down the sides of the bowl halfway through.
- Add the egg and vanilla extract, then beat until combined.
- In a separate bowl, whisk together the flour, baking powder, and salt. Gradually add the dry ingredients to the wet mixture, mixing on low speed until just combined. The dough will be stiff.
- Transfer the dough to your prepared baking sheet. Using your hands or a rolling pin, press the dough into an even layer that covers the entire sheet, about ¼ inch thickness.
- Bake for 12-15 minutes, or until the edges are just starting to turn golden brown. The center should look set but not dark. Let the cookie base cool completely on the pan—about 30 minutes.
- While the cookie base is cooling, make the frosting. In a medium bowl, beat the softened butter until smooth. Gradually add the powdered sugar, beating on low speed. Add the vanilla extract and a pinch of salt, then add the milk one tablespoon at a time until the frosting reaches a spreadable consistency.
- Once the cookie base is completely cool, spread the frosting evenly over the surface. Immediately sprinkle the Christmas sprinkles over the frosting while it’s still soft.
- Melt the white chocolate chips in a microwave-safe bowl in 30-second intervals, stirring between each interval, until smooth. Drizzle the melted white chocolate over the frosted and sprinkled cookie base using a fork.
- Place the baking sheet in the refrigerator for at least 1 hour, or until the white chocolate is completely set. Once set, lift the parchment paper to remove the bark from the pan. Break it into irregular pieces with your hands or cut it into squares with a sharp knife.
Notes
Don’t overmix the dough. Use room temperature ingredients. Watch the baking time carefully. Let the cookie base cool completely before frosting. Work quickly with the sprinkles. For the smoothest white chocolate drizzle, add a little fat like coconut oil or vegetable shortening.
Nutrition
- Serving Size: 1 piece
- Calories: 185
- Sugar: 16
- Sodium: 55
- Fat: 9
- Saturated Fat: 5
- Carbohydrates: 25
- Protein: 2
Keywords: Christmas sugar cookie bark, budget-friendly, kid-approved, holiday baking, easy cookie recipe