I was digging through my kitchen junk drawer last October, looking for a working pair of scissors, when my hand brushed against something sticky and forgotten. A lollipop from some long-ago parade, maybe, or a melted candy I’d meant to throw away. But when I pulled my hand out, there it was—a tiny plastic spider ring, still clinging to my finger like it had been waiting all year to be found. And suddenly I was seven years old at my babysitter Mrs. Kowalski’s house, sitting at her scratched wooden table while she pulled a pan of something golden and beautiful out of the oven. She’d let me press chocolate chips into the warm dough, and then—this part I’d almost forgotten—she’d let me drag a toothpick through melted white chocolate to make webs. I must have made a hundred crooked little webs that afternoon, and she never once told me to stop or to make them neater.
Mrs. Kowalski is gone now, and I haven’t thought about that afternoon in probably twenty years. But that spider ring—still there, still clinging—brought it all back. The way her kitchen smelled like butter and brown sugar. The way she said “perfect” even when my webs looked more like tangled string. The way that first bite of warm, gooey cookie bar felt like the best thing in the world.
Honestly, I sat on my kitchen floor for a full minute just holding that stupid plastic ring. And then I got up, preheated the oven, and started pulling out ingredients. Maybe you’ve had a moment like that—where a random object or a certain smell just grabs you by the collar and drags you back to someone who mattered. These Wholesome Spider Web Chocolate Chip Cookie Bars are my attempt to hold onto that afternoon, one slightly wonky web at a time.
Why You’ll Love This Recipe
These aren’t your average Halloween cookies. I’ve tested this recipe about six times now—yes, six—because I wanted something that felt special enough for a party but simple enough for a Tuesday night when you just need to make cookie bars with your kids. Or by yourself, no judgment here. Here’s why these stand out:
- Quick & Easy: From start to finish, you’re looking at about 35 minutes. No chilling the dough, no fancy equipment, no stress.
- Simple Ingredients: Everything here is a pantry staple. You probably have all of it right now, except maybe the white chocolate for the webs.
- Perfect for Halloween: These show up at every Halloween party I bring them to, and they always get the same reaction—people stop, smile, and say “wait, you can MAKE those?”
- Crowd-Pleaser: Kids love the spider web design, adults love that they’re not overwhelmingly sweet or loaded with weird ingredients.
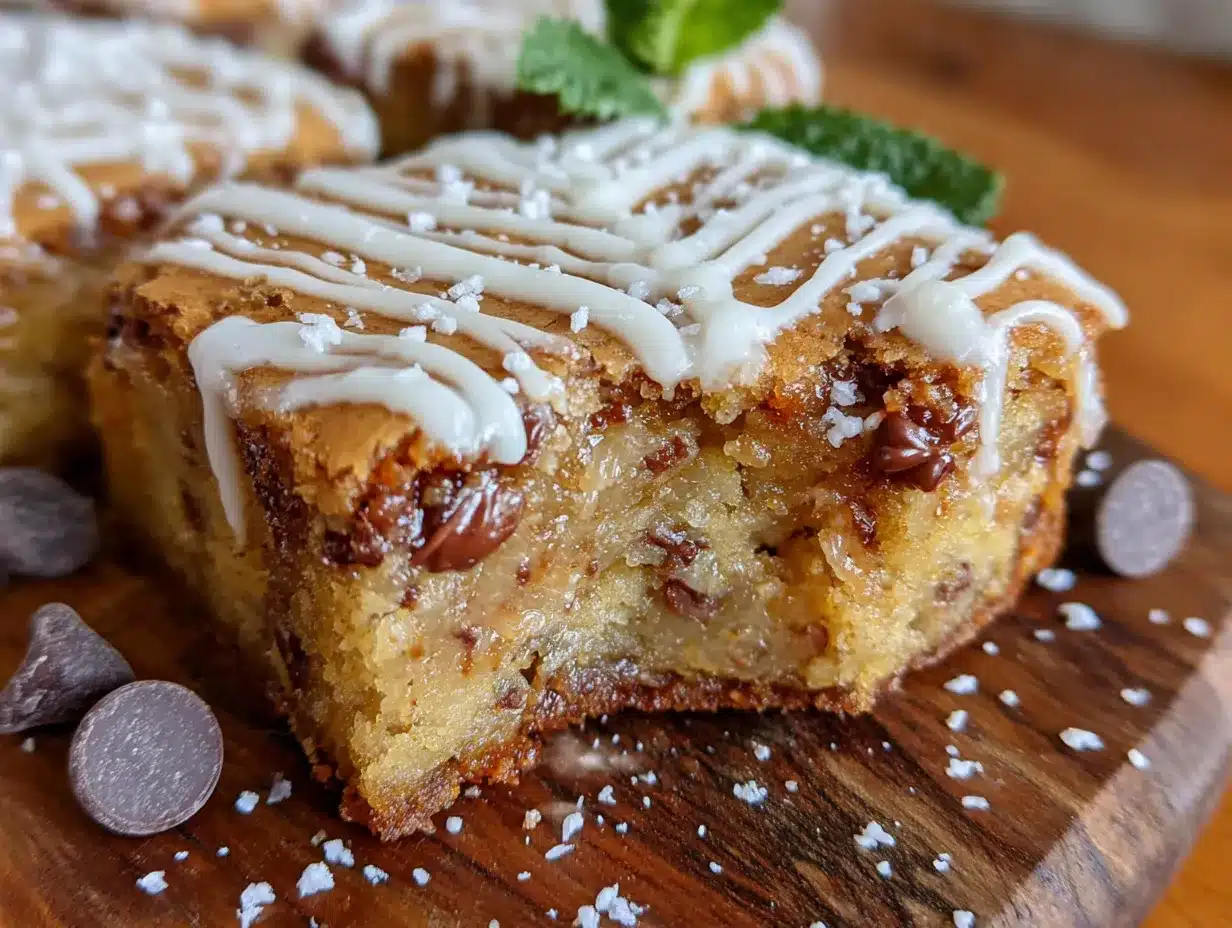
- Unbelievably Delicious: The edges get slightly crispy, the center stays soft and chewy, and the white chocolate webs add just the right amount of extra sweetness without being too much.
What makes these different from every other chocolate chip cookie bar recipe? It’s the texture, honestly. I use a mix of melted butter and a tiny bit of coconut oil (trust me on this), which gives them this incredible chewiness that lasts for days. Plus, the whole wheat pastry flour adds a subtle nuttiness that makes the chocolate taste even richer. This isn’t just another Halloween treat—it’s the one you’ll actually want to eat year-round.
What Ingredients You Will Need
This recipe uses simple, wholesome ingredients to deliver that classic cookie bar experience without the refined flour overload. Most of these are probably in your kitchen right now, which is exactly how I like it.
For the Cookie Bars:
- 1/2 cup unsalted butter, melted (I use Kerrygold for the flavor, but any good butter works)
- 1 tablespoon coconut oil, melted (this is my secret for the perfect chewy texture—don’t skip it!)
- 3/4 cup light brown sugar, packed
- 1/4 cup granulated sugar
- 1 large egg, room temperature
- 1 teaspoon vanilla extract
- 1 1/2 cups whole wheat pastry flour (or all-purpose if that’s what you have)
- 1/2 teaspoon baking soda
- 1/2 teaspoon salt
- 1 cup semi-sweet chocolate chips (I like Guittard, but any good brand works)
For the Spider Web Design:
- 1/2 cup white chocolate chips (look for real white chocolate, not candy melts—the flavor is much better)
- 1 teaspoon coconut oil (for thinning the chocolate)
- Optional: a few dark chocolate chips for the spider bodies
A few notes on ingredients: If you don’t have whole wheat pastry flour, all-purpose works perfectly fine—the bars will just be slightly less tender. For a dairy-free version, use vegan butter and dairy-free chocolate chips. And if you can’t find coconut oil, you can substitute with more butter, but the texture will be slightly different—still good, just not as chewy.
Equipment Needed
Nothing fancy here. You probably already own everything you need:
- 8×8 inch baking pan (a 9×9 works too, the bars will just be slightly thinner)
- Parchment paper (seriously, don’t skip this—it makes lifting the bars out so much easier)
- Mixing bowls (one medium, one small)
- Whisk and spatula
- Toothpick (for making the spider web design—this is the most important tool!)
- Small piping bag or a zip-top bag (for the white chocolate)
- Measuring cups and spoons
If you don’t have an 8×8 pan, you can use a 9-inch round cake pan or even a small cast iron skillet. Just adjust the baking time slightly—check at 18 minutes instead of 20. And if you don’t have a piping bag, a simple zip-top bag with the corner snipped off works perfectly. I’ve done it that way more times than I can count.
Preparation Method
Let me walk you through this step by step. I’ve made these bars so many times now that I could do it in my sleep, but I still remember the first time I tried and ended up with a melted chocolate mess. You’ll do better than I did, I promise.
- Preheat your oven to 350°F (175°C). Line your 8×8 pan with parchment paper, leaving some overhang on two sides. This is your lifeline for getting the bars out later. Trust me on this—I’ve had bars crumble apart because I got lazy with the parchment.
- Melt the butter and coconut oil together. I do this in a microwave-safe bowl in 30-second bursts, stirring between each. You want it just melted, not hot. Let it cool for a minute while you get the other ingredients ready.
- Whisk in both sugars. This should look like wet sand when you’re done. Make sure there are no lumps of brown sugar hiding at the bottom. I learned this the hard way when I bit into a pocket of raw sugar in my first batch—not great.
- Add the egg and vanilla. Whisk vigorously until the mixture looks smooth and glossy, about 30 seconds. This is where the magic starts to happen—the mixture should look almost like caramel.
- Fold in the dry ingredients. Add the flour, baking soda, and salt. Stir with a spatula until just combined. A few streaks of flour are fine—overmixing makes the bars tough, and nobody wants tough cookie bars.
- Fold in the chocolate chips. Reserve about 2 tablespoons to press on top later if you want a prettier presentation. This is optional, but it makes the bars look more intentional, you know?
- Press the dough into the pan. It will be thick and slightly sticky. Use a spatula or slightly wet fingers to press it evenly into the corners. The dough should be about 1/2 inch thick.
- Bake for 20-22 minutes. The edges should be golden brown and the center should look set but still soft. A toothpick inserted in the center should come out with a few moist crumbs, not wet batter. If it comes out clean, you’ve overbaked them slightly—still good, just less gooey.
- Cool completely in the pan. This is crucial. If you try to add the spider web design while the bars are warm, the white chocolate will melt into a puddle. I learned this the impatient way. Set a timer if you have to—20 minutes minimum.
- Make the spider web design. Melt the white chocolate chips with 1 teaspoon of coconut oil in 30-second bursts, stirring until smooth. Transfer to a small piping bag or zip-top bag. Cut a tiny corner off—smaller than you think you need. You can always make the hole bigger, but you can’t undo a giant gash.
- Pipe the webs. Start by piping a small circle in the center of each bar. Then pipe 4-5 lines radiating outward from the center. Finally, drag a toothpick from the center outward through each line to create the web effect. Wipe the toothpick clean between each web for the cleanest lines. Make as many or as few as you want—I usually do about 9 bars with webs and leave a few plain for the purists.
- Let the chocolate set. About 15 minutes at room temperature, or 5 minutes in the fridge if you’re impatient like me. Add a tiny dark chocolate chip in the center of each web if you want a spider sitting in the middle.
Cooking Tips & Techniques
I’ve made every mistake in the book with these bars, so you don’t have to. Here’s what I’ve learned:
The dough texture matters. If your dough seems too dry, you might have measured your flour by scooping directly from the bag. Spoon it into your measuring cup and level it off for the most accurate measurement. Too much flour makes the bars cakey instead of chewy.
Don’t overbake. I cannot stress this enough. The bars will continue to cook in the pan after you pull them out of the oven. If they look perfectly done in the oven, they’ll be overdone by the time they cool. Pull them when the center still looks slightly underdone—that’s the sweet spot.
Temperature matters for the white chocolate. If your white chocolate is too thick to pipe, add another 1/2 teaspoon of coconut oil. If it’s too thin, let it cool for a minute. The perfect consistency is like thick honey—it should flow smoothly but hold its shape when piped.
Practice the web technique on parchment first. I ruined my first batch of bars by making a mess of the webs. Now I always pipe a few practice webs on a piece of parchment paper before I touch the actual bars. It takes 30 seconds and saves so much frustration.
Work in batches. If you’re making a full pan of bars, pipe the webs on half of them first, then move on to the other half. The white chocolate can start to set while you’re working, and you don’t want to rush the design.
Variations & Adaptations
One of the best things about this recipe is how easy it is to tweak. Here are a few ways I’ve changed it up:
Gluten-Free Version: Substitute the whole wheat pastry flour with a 1:1 gluten-free baking flour. I’ve used Bob’s Red Mill with great results. The texture is slightly more delicate, so let them cool completely before cutting.
Dairy-Free Version: Use vegan butter and dairy-free chocolate chips. The coconut oil is already dairy-free, so that part works perfectly. I’ve made these for a friend with dairy allergies and she said they were the best cookie bars she’d had in years.
Flavor Variations: Try adding 1/2 teaspoon of cinnamon or pumpkin pie spice to the dough for a fall twist. Or swap the semi-sweet chips for dark chocolate and add some flaky sea salt on top before baking. I did this once by accident and it was honestly better than the original.
Halloween Party Version: Instead of spider webs, pipe little ghosts or pumpkins on top. Or use orange and black sprinkles mixed into the dough before baking. The possibilities are endless, and kids love helping with this part.
Healthier Twist: Reduce the sugar to 1/2 cup total (use all brown sugar) and add 1/4 cup of unsweetened applesauce. The bars will be slightly more cake-like but still delicious. I’ve made this version for my own breakfast more times than I’d like to admit.
Serving & Storage Suggestions
These bars are best served at room temperature or slightly warm, but here’s the thing—they’re actually even better the next day. The flavors meld together overnight, and the texture becomes perfectly chewy. I know this because I’ve eaten them for breakfast more times than I care to count.
For serving: Cut into 9 or 16 squares depending on how generous you’re feeling. Arrange on a platter with the spider web side facing up. If you’re bringing them to a party, I like to arrange them in a single layer in a decorative tin with parchment paper between layers.
Storage: Keep in an airtight container at room temperature for up to 5 days. They’ll stay soft and chewy the whole time. If you live in a humid climate, add a piece of bread to the container to absorb excess moisture—it sounds weird but it works.
Freezing: These freeze beautifully for up to 3 months. Wrap individual bars in plastic wrap, then place in a freezer bag. Thaw at room temperature for about 30 minutes before serving. The spider web design might fade slightly, but the flavor will be just as good.
Reheating: Pop a bar in the microwave for 10-15 seconds for that fresh-from-the-oven experience. Or warm them in a 300°F oven for 5 minutes if you’re serving a crowd.
One thing I’ve noticed—the white chocolate webs tend to bloom or fade slightly after a day or two. If you’re making these for an event, I recommend adding the webs the day you plan to serve them for the most dramatic effect. The bars themselves can be made up to 3 days ahead.
Nutritional Information & Benefits
Let’s be real—these are still a treat. But they’re a treat made with better ingredients, which counts for something. Here’s the approximate breakdown per bar (based on 9 servings):
- Calories: 320
- Total Fat: 18g
- Saturated Fat: 11g
- Cholesterol: 45mg
- Sodium: 210mg
- Total Carbohydrates: 40g
- Dietary Fiber: 3g
- Sugars: 26g
- Protein: 4g
The whole wheat pastry flour adds fiber and nutrients that regular all-purpose flour doesn’t have. And using coconut oil gives you a small dose of healthy medium-chain triglycerides. The dark chocolate chips are rich in antioxidants and can help with heart health in moderation. Are these a health food? No. But they’re a better-for-you version of a classic treat, and that’s a win in my book.
If you’re watching your sugar intake, you can reduce the sugar by 1/4 cup without significantly affecting the texture. I’ve done it, and the bars are still plenty sweet—especially with the white chocolate web on top.
Conclusion
These Wholesome Spider Web Chocolate Chip Cookie Bars have become my go-to Halloween treat, and honestly, I make them year-round now. There’s something about that spider web design that makes people smile—it’s simple enough for kids to help with, but impressive enough to bring to any party. And the fact that they’re made with better ingredients? That’s just a bonus.
I’d love to hear how yours turn out. Did you make the full spider web design? Did you try a variation? Did your kids help with the toothpick part (mine made a glorious mess and I loved every second of it)? Drop a comment below and let me know. And if you share them on social media, tag me—I want to see your webs, even the crooked ones. Especially the crooked ones, honestly. Those are the ones that remind me of Mrs. Kowalski.
Happy Halloween, friends. Go make something that tastes like a memory.
Frequently Asked Questions
Can I make these bars ahead of time?
Absolutely. You can make the bars up to 3 days ahead and add the spider web design the day you plan to serve them. The bars themselves stay soft and chewy for days in an airtight container.
Can I use all-purpose flour instead of whole wheat pastry flour?
Yes, you can substitute all-purpose flour 1:1. The texture will be slightly less tender, but they’ll still be delicious. If you want to keep some whole grain goodness, try using half all-purpose and half whole wheat pastry flour.
My white chocolate is too thick to pipe. What should I do?
Add another 1/2 teaspoon of coconut oil and microwave for 10 seconds, then stir. The white chocolate should be smooth and slightly runny—like thick honey. If it’s still too thick, add a tiny bit more oil until it reaches the right consistency.
Can I freeze these bars with the spider web design?
Yes, but the white chocolate web might fade or bloom slightly after freezing. For the best presentation, freeze the bars without the design and add the webs after thawing. The bars themselves freeze beautifully for up to 3 months.
How do I get clean cuts when slicing the bars?
Use a sharp knife and wipe it clean between each cut. For the cleanest edges, chill the bars in the refrigerator for 15 minutes before cutting. This helps the white chocolate web stay intact and prevents the bars from crumbling.
Pin This Recipe!
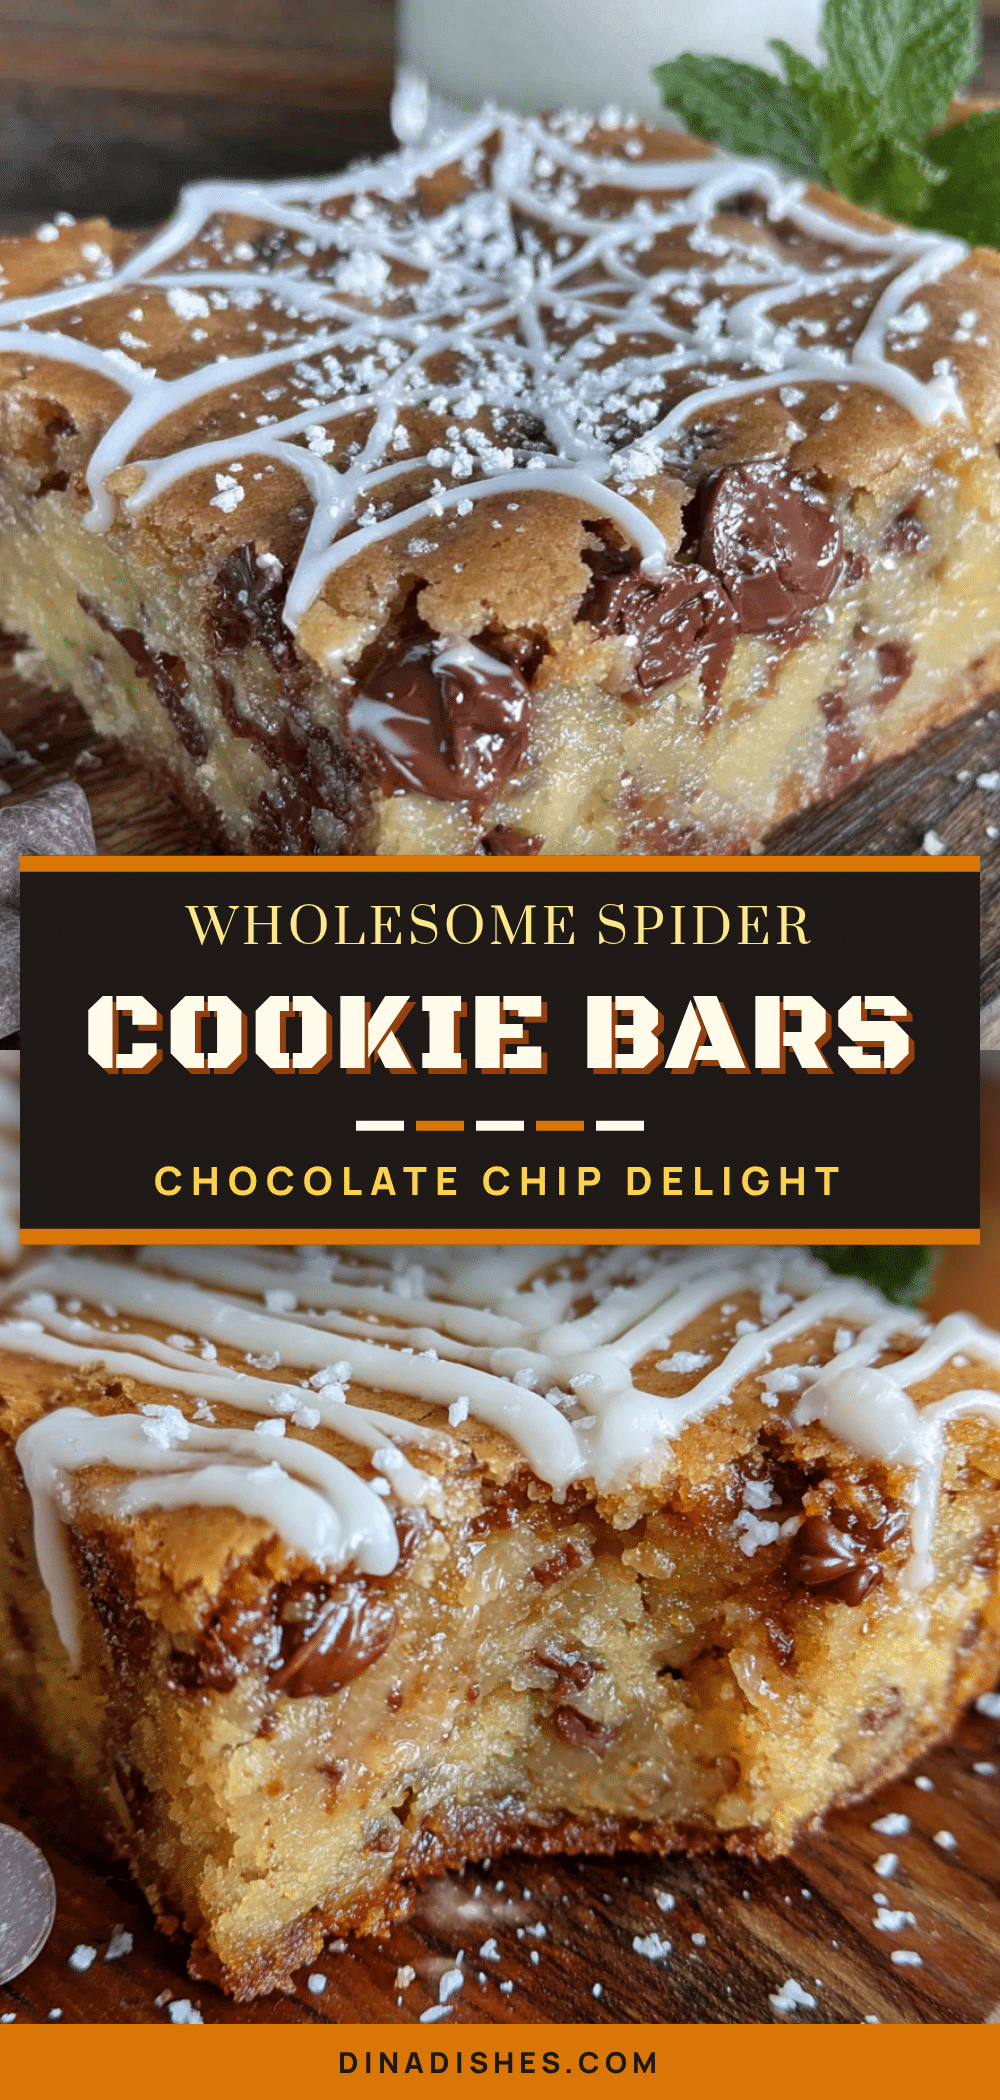
Wholesome Spider Web Chocolate Chip Cookie Bars: Easy Halloween Treat
These Wholesome Spider Web Chocolate Chip Cookie Bars are a nostalgic Halloween treat made with better ingredients. They’re quick, easy, and perfect for parties, with a soft, chewy texture and a fun spider web design that kids and adults love.
- Prep Time: 15 minutes
- Cook Time: 20 minutes
- Total Time: 35 minutes
- Yield: 9 servings 1x
- Category: Dessert
- Cuisine: American
Ingredients
- 1/2 cup unsalted butter, melted
- 1 tablespoon coconut oil, melted
- 3/4 cup light brown sugar, packed
- 1/4 cup granulated sugar
- 1 large egg, room temperature
- 1 teaspoon vanilla extract
- 1 1/2 cups whole wheat pastry flour
- 1/2 teaspoon baking soda
- 1/2 teaspoon salt
- 1 cup semi-sweet chocolate chips
- 1/2 cup white chocolate chips
- 1 teaspoon coconut oil (for thinning white chocolate)
- Optional: a few dark chocolate chips for spider bodies
Instructions
- Preheat your oven to 350°F (175°C). Line your 8×8 pan with parchment paper, leaving some overhang on two sides.
- Melt the butter and coconut oil together in a microwave-safe bowl in 30-second bursts, stirring between each. Let cool for a minute.
- Whisk in both sugars until the mixture looks like wet sand with no lumps.
- Add the egg and vanilla. Whisk vigorously until smooth and glossy, about 30 seconds.
- Fold in the flour, baking soda, and salt with a spatula until just combined. A few streaks of flour are fine.
- Fold in the chocolate chips, reserving about 2 tablespoons to press on top later if desired.
- Press the dough evenly into the prepared pan. It will be thick and slightly sticky.
- Bake for 20-22 minutes. The edges should be golden brown and the center should look set but still soft. A toothpick inserted in the center should come out with a few moist crumbs.
- Cool completely in the pan. This is crucial before adding the spider web design.
- Melt the white chocolate chips with 1 teaspoon of coconut oil in 30-second bursts, stirring until smooth. Transfer to a small piping bag or zip-top bag and cut a tiny corner off.
- Pipe the webs: Start by piping a small circle in the center of each bar. Pipe 4-5 lines radiating outward from the center. Drag a toothpick from the center outward through each line to create the web effect. Wipe the toothpick clean between each web.
- Let the chocolate set for about 15 minutes at room temperature, or 5 minutes in the fridge. Add a tiny dark chocolate chip in the center of each web if desired.
Notes
Don’t overbake—pull the bars when the center still looks slightly underdone. For the cleanest spider web design, practice on parchment paper first. The white chocolate should be like thick honey for piping. For best presentation, add the webs the day you plan to serve.
Nutrition
- Serving Size: 1 bar
- Calories: 320
- Sugar: 26
- Sodium: 210
- Fat: 18
- Saturated Fat: 11
- Carbohydrates: 40
- Fiber: 3
- Protein: 4
Keywords: Halloween treats, chocolate chip cookie bars, spider web cookies, easy Halloween dessert, wholesome cookies, cookie bars, fall baking