I was standing in line at the hardware store—honestly, a place I try to spend as little time as possible—when the woman ahead of me turned around and said, “You look like someone who bakes.” I was holding a single lightbulb and a bag of birdseed. Not exactly my finest culinary moment. But she was the accountant from two blocks over, the one who always has a perfectly manicured lawn and never seems to rush. She told me her secret to getting her kids to actually eat cake on a school night without a meltdown. It wasn’t a box mix. It wasn’t from some fancy bakery. It was this quick birthday confetti cake with vanilla buttercream, and she scribbled it on the back of a receipt while the cashier rang up my stuff. I almost didn’t try it. I mean, a recipe from an accountant at the hardware store? But let me tell you, that first bite was a revelation. It was fluffy, it was fast, and it had those happy little sprinkles that make you feel like you’re celebrating something even on a random Tuesday. I’ve tweaked it over the years, but the soul of it is still hers—a cake that respects your time and delivers pure joy. Maybe you’ve been there, staring at the clock and wondering how you’ll pull off a birthday moment without spending the whole evening in the kitchen. This one’s for you.
Why You’ll Love This Recipe
This isn’t just another birthday cake recipe. It’s the one that actually works on a Tuesday night when you’re already tired and the kids are asking for something special. I’ve tested this more times than I care to admit, and I can tell you with confidence that it delivers every single time without any drama.
- Quick & Easy: From start to finish, this cake is ready in under 45 minutes. No complicated steps, no waiting for butter to soften—just straightforward baking that fits into your evening routine.
- Simple Ingredients: You probably already have everything in your pantry. Butter, sugar, eggs, flour, milk, and sprinkles. That’s it. No fancy extracts or specialty flours required.
- Perfect for Weeknight Celebrations: Whether it’s an actual birthday or just a “we made it through Wednesday” moment, this cake turns an ordinary evening into something special without a huge time commitment.
- Crowd-Pleaser: I’ve brought this to potlucks, school events, and family dinners. It gets devoured by kids and adults alike. The vanilla buttercream is the kind of frosting people scrape off the plate with their fingers.
- Unbelievably Delicious: The texture is soft and tender, the crumb is delicate, and that buttercream is silky without being cloying. It’s comfort food that feels celebratory.
What makes this recipe different? It’s the method. I use a reverse-creaming technique that gives you a more tender crumb without overworking the gluten. It’s a little trick I picked up from a pastry chef friend, and it makes all the difference in a cake that comes together this quickly. The result is a confetti cake that tastes like you spent hours on it when you really didn’t.
This is the cake you make when you want to show someone you care but you also want to be done with dishes before the kids finish their homework. It’s soul-soothing satisfaction in less than an hour, and that’s something worth celebrating.
What Ingredients You Will Need
This recipe uses simple, everyday ingredients to create a birthday cake that’s anything but ordinary. The magic is in how they come together, not in hunting down rare items. Here’s what you’ll need:
For the Cake
- 2 ½ cups (312g) all-purpose flour – Spoon and level it for the best results. I prefer Gold Medal for consistent texture, but any brand works.
- 1 ½ cups (300g) granulated sugar – Regular white sugar gives the cake its sweetness and helps with browning.
- 1 tablespoon baking powder – Make sure it’s fresh. Old baking powder is the number one reason cakes don’t rise properly.
- ½ teaspoon salt – Fine sea salt is best. It balances the sweetness and enhances the vanilla flavor.
- ½ cup (113g) unsalted butter, cold and cut into small cubes – This is key for the reverse-creaming method. Don’t let it soften. Cold butter gives you a more tender crumb.
- 1 cup (240ml) whole milk, room temperature – Whole milk adds richness. If you only have 2% or skim, it will still work, but the cake won’t be as tender.
- 2 large eggs, room temperature – Cold eggs can seize the batter. Let them sit on the counter for 15 minutes or place them in a bowl of warm water for 5 minutes.
- 2 teaspoons pure vanilla extract – Don’t use imitation vanilla here. The real stuff makes a noticeable difference in flavor.
- ½ cup (80g) rainbow sprinkles (jimmies, not nonpareils) – Jimmies are the long, cylindrical sprinkles. They hold their color better and don’t bleed into the batter. Nonpareils (the tiny round ones) will turn your cake gray.
For the Vanilla Buttercream
- 1 cup (226g) unsalted butter, softened to room temperature – It should be soft enough to leave a dent when you press it, but not melty.
- 4 cups (480g) powdered sugar – Sift it if it’s lumpy. Nobody wants grainy frosting.
- ¼ cup (60ml) heavy cream – Heavy cream makes the frosting silky. You can use whole milk in a pinch, but the texture won’t be as luxurious.
- 2 teaspoons pure vanilla extract – Again, go with the good stuff.
- ½ teaspoon salt – A little salt cuts the sweetness and makes the buttercream taste more like actual butter.
Ingredient Tips: I recommend using Nielsen-Massey vanilla extract if you can find it. It’s pricier, but the flavor is noticeably richer. For the sprinkles, look for the rainbow jimmies from a brand like Wilton or Sweetapolita. They’re more vibrant and less likely to fade into the batter. If you’re dairy-free, you can substitute the butter with a high-quality plant-based butter and use oat milk instead of whole milk. The texture will be slightly different, but it still makes a lovely cake.
Equipment Needed
You don’t need a fancy kitchen to make this cake. Here’s what you’ll need:
- Two 8-inch round cake pans – I prefer light-colored metal pans for even baking. Dark pans can cause the edges to brown too quickly.
- Parchment paper – Cut circles to line the bottom of the pans. This ensures your cakes release cleanly every time.
- Electric hand mixer or stand mixer – A hand mixer works perfectly fine. I used one for years before upgrading to a KitchenAid. Both get the job done.
- Mixing bowls – You’ll need a medium bowl for dry ingredients and a large bowl for the batter.
- Rubber spatula – For folding in the sprinkles and scraping down the bowl. A silicone one is best.
- Cooling rack – Wire racks allow air to circulate around the cakes so they cool evenly. If you don’t have one, you can use the overturned pans, but it’s not ideal.
- Offset spatula – This makes frosting the cake so much easier. You can use a butter knife in a pinch, but an offset spatula is worth the few dollars it costs.
- Measuring cups and spoons – Accurate measurements matter in baking. Use the dry measuring cups for flour and sugar, and a liquid measuring cup for the milk.
Budget-Friendly Alternative: If you don’t have two 8-inch pans, you can bake the batter in a 9×13-inch pan. The baking time will be slightly different—start checking at 25 minutes. You can also make this as a single-layer sheet cake and just double the frosting. No one will complain about extra buttercream.
Preparation Method
- Preheat and Prep: Preheat your oven to 350°F (175°C). Grease two 8-inch round cake pans with butter or non-stick spray. Cut circles of parchment paper to fit the bottom of each pan and place them inside. This step is non-negotiable if you want clean releases. Grease the parchment too, just to be safe.
- Mix Dry Ingredients: In a medium bowl, whisk together the flour, sugar, baking powder, and salt. Make sure everything is evenly distributed. I usually whisk for about 30 seconds to aerate the flour a bit.
- Incorporate the Cold Butter: Add the cold butter cubes to the dry ingredients. Using your mixer on low speed, beat the butter into the flour mixture until it looks like coarse sand with some pea-sized butter pieces remaining. This should take about 2-3 minutes. Don’t overmix here—you want those little butter bits because they create steam pockets in the oven that make the cake tender. This is the reverse-creaming method at work.
- Add the Wet Ingredients: In a separate bowl or liquid measuring cup, whisk together the milk, eggs, and vanilla extract. Pour this mixture into the flour-butter mixture all at once. Mix on medium speed for about 1-2 minutes until the batter is smooth and well-combined. Scrape down the sides and bottom of the bowl with a spatula to make sure everything is incorporated. The batter will be thick and fluffy.
- Fold in the Sprinkles: Gently fold the rainbow sprinkles into the batter using a rubber spatula. Do this by hand—don’t use the mixer or you’ll risk breaking the sprinkles and having the color bleed. Fold just until the sprinkles are evenly distributed. A few streaks are fine.
- Divide and Bake: Divide the batter evenly between the two prepared pans. I like to use a kitchen scale to make sure each pan gets exactly the same amount, but you can eyeball it too. Smooth the tops with a spatula. Bake for 25-30 minutes, or until a toothpick inserted into the center comes out clean or with a few moist crumbs. The cakes should be golden brown and pulling away slightly from the edges of the pan.
- Cool the Cakes: Let the cakes cool in the pans for 10 minutes. Then run a knife around the edges and turn them out onto a wire cooling rack. Peel off the parchment paper and let them cool completely. This is important—if you try to frost warm cakes, the buttercream will melt into a sad, greasy mess. Give them at least an hour.
- Make the Buttercream: While the cakes are cooling, make the frosting. In a large bowl, beat the softened butter on medium speed until it’s smooth and creamy, about 2 minutes. Add the powdered sugar one cup at a time, beating on low speed after each addition to keep the sugar from flying everywhere. Once all the sugar is incorporated, add the heavy cream, vanilla extract, and salt. Beat on medium-high speed for 3-4 minutes until the frosting is light, fluffy, and spreadable. If it’s too thick, add another tablespoon of cream. If it’s too thin, add a little more powdered sugar.
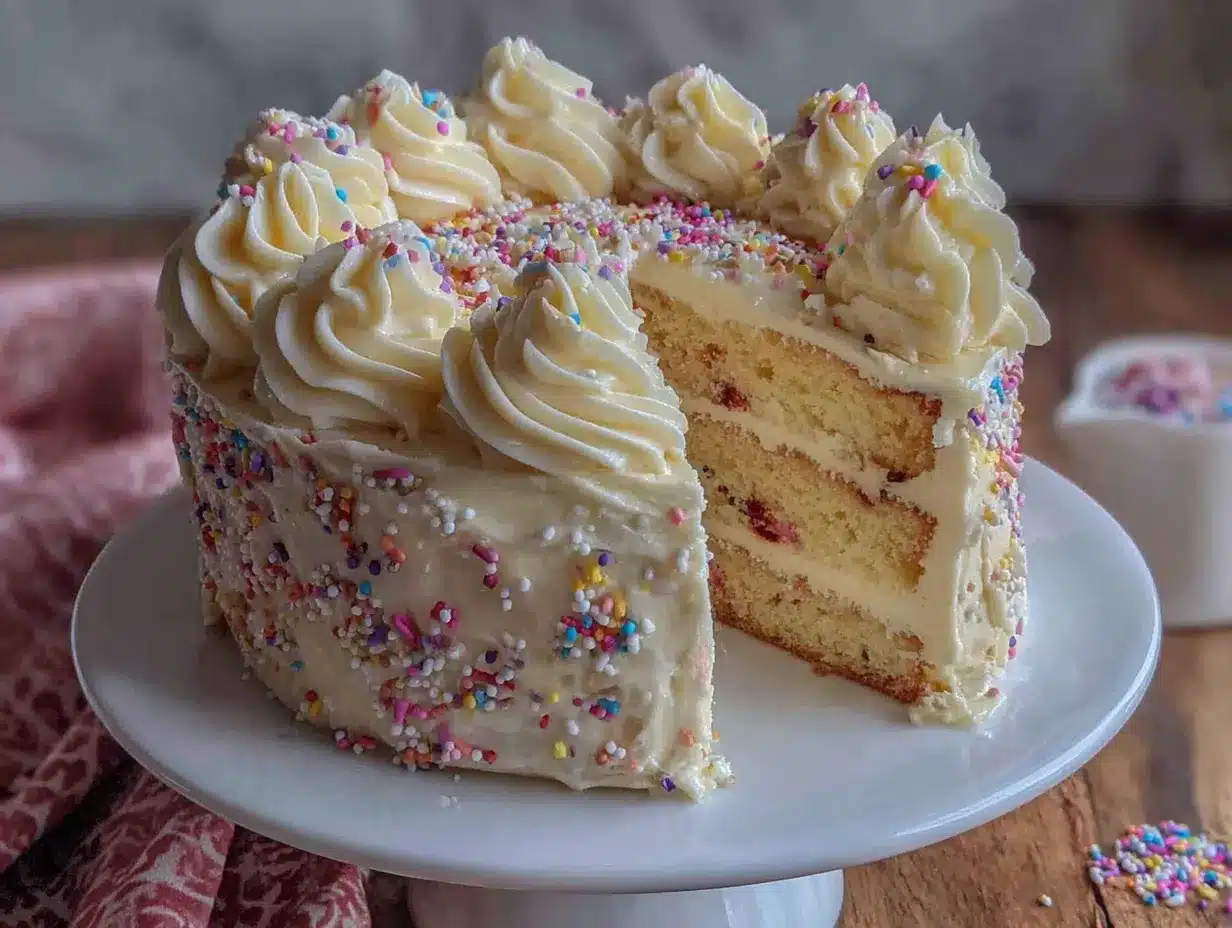
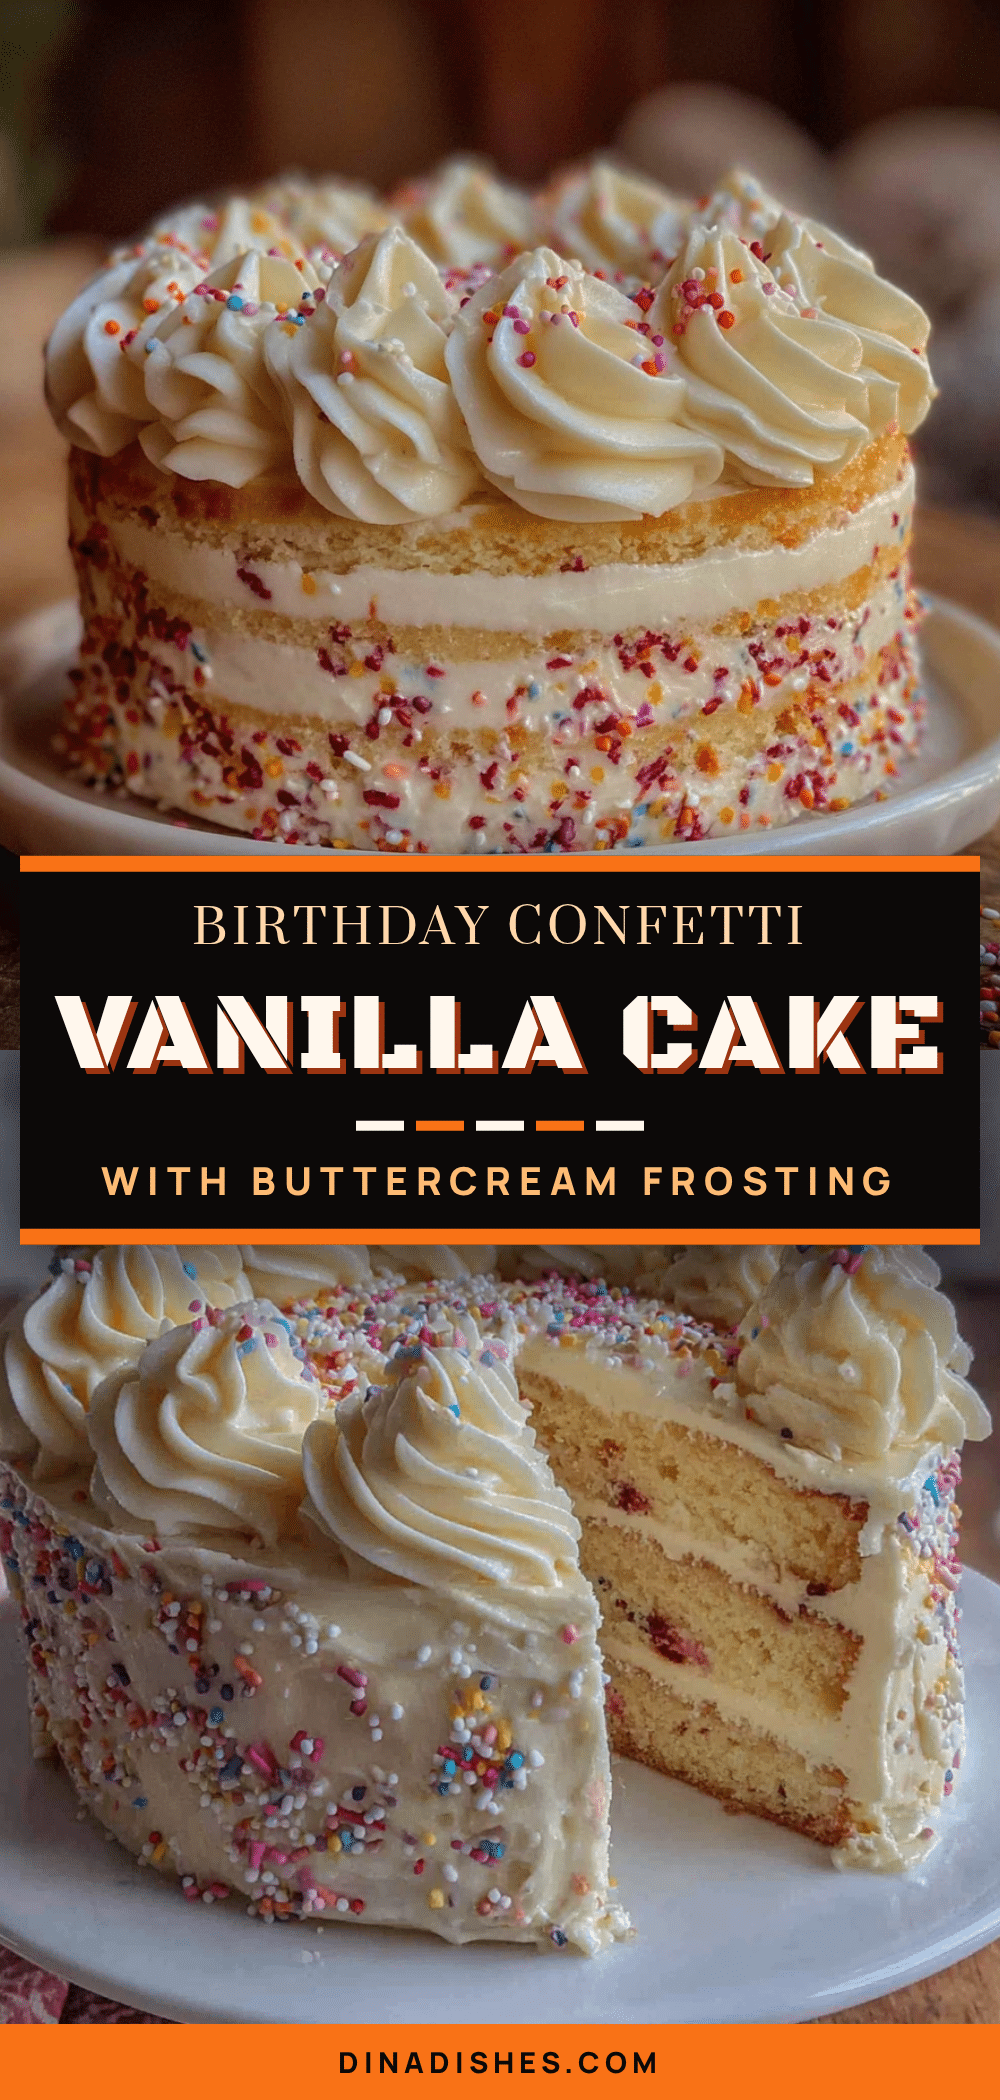
- Assemble the Cake: Place one cake layer on your serving plate or cake stand. Spread about ¾ cup of buttercream on top, spreading it evenly to the edges. Place the second cake layer on top. Apply a thin layer of frosting all over the cake (this is the crumb coat). It doesn’t have to be perfect—you just want to trap any loose crumbs. Refrigerate the cake for 15-20 minutes to set the crumb coat. Then apply the final layer of frosting, using your offset spatula to create swirls or smooth edges. Top with extra sprinkles if you’re feeling festive.
Sensory Cue: When you fold the sprinkles in, you should see bright pops of color against the pale batter. The batter itself should be thick enough to hold a ribbon trail when you lift the spatula. When the cakes are done, the kitchen will smell like vanilla and butter, and the tops will be a warm golden brown. Press gently on the center—it should spring back.
Troubleshooting Tip: If your cake domes too much in the center, your oven might be running hot. Use an oven thermometer to check. You can also wrap the outside of your cake pans with damp baking strips, which help the cakes bake more evenly. If you don’t have those, just trim the domes off with a serrated knife once the cakes are cool.
Cooking Tips & Techniques
I’ve made this cake more times than I can count, and I’ve learned a few things the hard way. Here are my best tips for success:
Don’t Overmix the Batter. Once you add the wet ingredients, mix just until everything comes together. Overmixing develops the gluten and makes the cake tough. You want a tender crumb, not a rubbery one. I once got distracted and left the mixer running while I answered the phone. The cake came out dense and chewy. Learn from my mistake.
Room Temperature Ingredients Matter. I know it’s tempting to use cold eggs straight from the fridge, but room temperature ingredients emulsify better, which gives you a smoother batter and a more even crumb. If you’re short on time, place the eggs in a bowl of warm water for 5 minutes and microwave the milk for 15-20 seconds. It makes a real difference.
Use Jimmies, Not Nonpareils. I cannot stress this enough. Nonpareils are those tiny round sprinkles that look pretty on top of cookies but turn cake batter into a sad, gray mess. They bleed their color instantly. Jimmies—the long, cylindrical ones—hold their shape and color much better. I learned this the hard way when I made a confetti cake for my niece’s birthday and it looked like a muddy rainbow. She ate it anyway, but I was mortified.
Multitasking Strategy. While the cakes are baking, wash your mixing bowls and get your frosting ingredients ready. While the cakes are cooling, make the buttercream. This way, by the time the cakes are cool enough to frost, you’re ready to go. The whole process feels smoother when you work in stages.
Consistency is Key. For the best results, measure your flour correctly. Spoon it into the measuring cup and level it off with a knife. Scooping directly from the bag can pack the flour and give you up to 25% more than you need. That extra flour will make your cake dry. A kitchen scale is the most accurate way to measure, but spooning and leveling works great too.
Variations & Adaptations
This recipe is wonderfully adaptable. Here are some of my favorite variations:
Chocolate Confetti Cake: Replace ⅓ cup of the all-purpose flour with ⅓ cup of unsweetened cocoa powder. The chocolate flavor pairs beautifully with the vanilla buttercream and the sprinkles give it a funfetti feel. I made this for a friend’s birthday and she said it was the best cake she’d ever had. High praise.
Lemon Confetti Cake: Add the zest of one lemon to the sugar before mixing the dry ingredients. Rub the zest into the sugar with your fingers until it’s fragrant—this releases the oils and gives you a more intense lemon flavor. Swap 2 tablespoons of the milk for fresh lemon juice. The tangy lemon and sweet buttercream are a match made in heaven.
Gluten-Free Version: Substitute the all-purpose flour with a good quality 1:1 gluten-free baking flour that contains xanthan gum. I’ve had great results with Bob’s Red Mill. The texture will be slightly more delicate, so handle the cakes gently when turning them out of the pans. Everything else stays the same.
Dairy-Free Version: Use a plant-based butter like Miyoko’s or Country Crock Plant Butter in both the cake and the frosting. Substitute the whole milk with oat milk or almond milk. For the buttercream, you can use canned coconut cream instead of heavy cream, but make sure it’s the thick part from the top of the can. The flavor will be slightly different, but it’s still delicious.
Cupcake Version: This batter makes about 24 cupcakes. Bake them at 350°F (175°C) for 18-20 minutes. The frosting recipe will be plenty for piping a generous swirl on each one. I’ve brought these to school parties and they disappear faster than anything else on the table.
My Personal Variation: My favorite way to make this cake is with a layer of strawberry jam between the cake and the frosting. It adds a fruity pop that cuts through the sweetness of the buttercream. Just spread a thin layer of good quality jam on top of the first cake layer before adding the frosting. Trust me on this one.
Serving & Storage Suggestions
Serving: This cake is best served at room temperature. If you’ve refrigerated it, let it sit out for about 30 minutes before slicing. The buttercream softens and the cake becomes more tender. I like to serve it with a glass of cold milk or a cup of coffee. For a more decadent presentation, add a scoop of vanilla ice cream on the side.
Presentation: I’m a fan of the rustic look—swirls of buttercream with extra sprinkles scattered on top and around the plate. You don’t need perfect smooth sides for this cake to look beautiful. In fact, the homemade look is part of its charm. If you want to get fancy, you can pipe rosettes around the top edge using a star tip.
Storage: Store the cake in an airtight container at room temperature for up to 3 days. If your kitchen is warm, refrigerate it to keep the frosting from getting too soft. Bring it back to room temperature before serving. The cake actually gets better on day two—the flavors meld together and the texture becomes even more moist.
Freezing: You can freeze the unfrosted cake layers for up to 3 months. Wrap each layer tightly in plastic wrap, then in aluminum foil. When you’re ready to use them, thaw them in the refrigerator overnight and bring them to room temperature before frosting. The frosting itself can also be frozen in an airtight container for up to 2 months. Thaw it in the refrigerator and re-whip it before using.
Reheating: If you want a warm slice of cake, microwave individual slices for about 10-15 seconds. The buttercream will get slightly melty and the cake will be soft and comforting. It’s not the prettiest way to eat it, but it’s definitely one of the most satisfying.
Flavor Development: The sprinkles will soften slightly overnight, which I actually love. They become little pockets of sweetness that blend into the cake. The vanilla flavor also becomes more pronounced. This is one of those cakes that tastes even better the next day, if you can resist eating it all in one sitting.
Nutritional Information & Benefits
Let’s be real—this is a celebration cake, not a health food. But it’s made with real ingredients, and there’s something to be said for that. Here’s the estimated nutritional breakdown per slice (based on 12 servings):
- Calories: Approximately 480 per slice
- Fat: 24g
- Carbohydrates: 65g
- Protein: 5g
- Sugar: 48g
Health Benefits: While this cake isn’t packed with superfoods, the butter provides fat-soluble vitamins A, D, E, and K. The eggs contribute high-quality protein and choline, which is important for brain health. And honestly, there’s a mental health benefit to enjoying a slice of birthday cake with people you love. Food is about more than nutrients—it’s about connection and joy.
Dietary Considerations: This recipe contains gluten, dairy, and eggs. I’ve included gluten-free and dairy-free variations above for those with dietary restrictions. The cake is nut-free as written, making it a safe option for school parties where nut allergies are a concern.
Potential Allergens: Wheat, dairy, eggs. The sprinkles may also contain artificial colors, which some people prefer to avoid. You can find natural sprinkles made with vegetable-based colors if that’s a concern.
My Personal Wellness Perspective: I believe in balance. This cake is for celebrations, not everyday eating. When you do make it, enjoy every single bite without guilt. That’s what birthdays—and Tuesday nights—are for.
Conclusion
This quick birthday confetti cake with vanilla buttercream is the kind of recipe that becomes a family tradition. It’s the cake you make when you want to say “I love you” but you don’t have all day. It’s the cake that turns an ordinary evening into a celebration, whether there’s a birthday or not. I’ve made it for last-minute school bake sales, for friends who needed cheering up, and for my own birthday when I just wanted something simple and good.
What I love most about this recipe is how forgiving it is. You don’t need to be a pastry chef to pull it off. You just need some basic ingredients, a little patience, and the willingness to get sprinkles everywhere. Because honestly, a kitchen with sprinkles on the counter is a happy kitchen.
I encourage you to make this cake your own. Add a layer of jam, swap in some lemon zest, or leave it exactly as written. It’s going to be delicious either way. When you make it—and I hope you do—come back and tell me how it turned out. Leave a comment, tag me in your photos, or share your own twist on the recipe. I love hearing about the cakes that make people smile.
Now go preheat that oven. You’ve got a cake to bake.
Frequently Asked Questions
Can I use salted butter instead of unsalted?
You can, but reduce or omit the added salt in the recipe. Unsalted butter gives you more control over the final salt level, which is why I recommend it. If you only have salted butter, skip the ½ teaspoon of salt in both the cake and the frosting.
Why did my cake stick to the pan?
This usually happens when the pan isn’t greased well enough or when you skip the parchment paper. Make sure you grease every surface, including the sides, and always use parchment circles on the bottom. Let the cakes cool in the pan for exactly 10 minutes—any longer and they can start to stick as they cool.
Can I make this cake ahead of time?
Absolutely. You can bake the cake layers up to two days in advance. Wrap them tightly in plastic wrap and store them at room temperature. You can also make the frosting up to three days ahead and keep it in the refrigerator. Let it come to room temperature and re-whip it before using.
My buttercream turned out too runny. What went wrong?
This usually happens when the butter is too soft or when you’ve added too much liquid. If your butter was melty rather than just soft, the frosting won’t hold its shape. Try refrigerating it for 15-20 minutes and then re-whipping it. If that doesn’t work, beat in a little more powdered sugar, one tablespoon at a time, until it thickens up.
Can I use a different type of sprinkles?
I recommend sticking with rainbow jimmies for the batter. You can use other sprinkles for decorating the top of the cake—confetti sprinkles, star shapes, or even sanding sugar all work great for that. Just don’t mix nonpareils into the batter unless you want a gray cake.
Pin This Recipe!
The Best Quick Confetti Birthday Cake with Buttercream
This quick confetti birthday cake with vanilla buttercream is fluffy, fast, and full of happy sprinkles. It’s the perfect weeknight celebration cake that comes together in under 45 minutes with simple pantry ingredients.
- Prep Time: 15 minutes
- Cook Time: 30 minutes
- Total Time: 45 minutes
- Yield: 12 servings 1x
- Category: Dessert
- Cuisine: American
Ingredients
- 2 ½ cups (312g) all-purpose flour
- 1 ½ cups (300g) granulated sugar
- 1 tablespoon baking powder
- ½ teaspoon fine sea salt
- ½ cup (113g) unsalted butter, cold and cut into small cubes
- 1 cup (240ml) whole milk, room temperature
- 2 large eggs, room temperature
- 2 teaspoons pure vanilla extract
- ½ cup (80g) rainbow sprinkles (jimmies)
- 1 cup (226g) unsalted butter, softened to room temperature
- 4 cups (480g) powdered sugar
- ¼ cup (60ml) heavy cream
- 2 teaspoons pure vanilla extract
- ½ teaspoon salt
Instructions
- Preheat oven to 350°F (175°C). Grease two 8-inch round cake pans and line bottoms with parchment paper.
- In a medium bowl, whisk together flour, sugar, baking powder, and salt.
- Add cold butter cubes to dry ingredients. Beat on low speed until mixture resembles coarse sand with some pea-sized butter pieces, about 2-3 minutes.
- In a separate bowl, whisk together milk, eggs, and vanilla extract. Pour into flour-butter mixture and mix on medium speed until smooth and well-combined, about 1-2 minutes.
- Gently fold in rainbow sprinkles with a rubber spatula until evenly distributed.
- Divide batter evenly between prepared pans. Bake for 25-30 minutes, until a toothpick inserted in center comes out clean or with a few moist crumbs.
- Cool cakes in pans for 10 minutes, then turn out onto wire rack. Remove parchment and cool completely.
- For buttercream: Beat softened butter on medium speed until smooth and creamy, about 2 minutes. Add powdered sugar one cup at a time, beating on low. Add heavy cream, vanilla, and salt. Beat on medium-high for 3-4 minutes until light and fluffy.
- Place one cake layer on serving plate. Spread about ¾ cup buttercream on top. Place second layer on top. Apply thin crumb coat, refrigerate 15-20 minutes, then apply final frosting layer. Top with extra sprinkles if desired.
Notes
Use jimmies (long cylindrical sprinkles) not nonpareils to avoid color bleeding. Room temperature ingredients are key for best texture. For a dairy-free version, use plant-based butter and oat milk. For gluten-free, use a 1:1 gluten-free flour blend with xanthan gum.
Nutrition
- Serving Size: 1 slice
- Calories: 480
- Sugar: 48
- Sodium: 320
- Fat: 24
- Saturated Fat: 14
- Carbohydrates: 65
- Fiber: 1
- Protein: 5
Keywords: confetti cake, birthday cake, vanilla buttercream, quick cake, weeknight dessert, funfetti cake