It was 10:47 PM on a Tuesday in late October, and I had a very specific craving for a big, meaty, stick-to-your-ribs chili. The kind you eat on the couch with a spoon and maybe some shredded cheese. I didn’t have any beans in the pantry—honestly, I’d used the last can in a desperate lunchtime soup experiment—but I had three pounds of ground beef that was on a manager’s special at the grocery store and a bag of frozen bell peppers I’d chopped myself during a particularly productive Sunday. The idea that arrived, fully formed and slightly unhinged, was a no-bean chili that relied entirely on the texture of the meat and the depth of the spices. I figured, if I browned the beef hard enough and let it simmer until it was almost falling apart, who would miss the beans? My husband came downstairs to grab water and just stared at me stirring a giant pot at 11 PM. “You okay?” he asked. “Making chili,” I said, like it was the most normal thing in the world. That pot of chili became the most-requested meal in our house, and the reason I now buy ground beef in bulk. This is that recipe, and it’s built for feeding a crowd without breaking the bank.
Why You’ll Love This Recipe
Let’s be honest—feeding a family on a budget is a constant juggling act. You want something hearty, something that everyone will actually eat, and something that doesn’t require a second mortgage to buy the ingredients. This kid-approved no-bean chili for a crowd checks every single box, and then some.
- Budget-Friendly & Filling: This recipe relies on affordable ground beef and pantry staples. No fancy cuts of meat or expensive specialty ingredients needed. It stretches beautifully, feeding eight to ten people for under twenty dollars.
- Kid-Approved (No Bean Drama!): If you have picky eaters who side-eye beans, this is your secret weapon. The texture is smooth, meaty, and completely bean-free. My own kids, who once declared chili “gross,” now ask for this at least once a week.
- Perfect for a Crowd: Whether it’s a game day gathering, a family reunion, or a busy weeknight where you need leftovers for lunches, this recipe scales up effortlessly. It’s the kind of meal you can make on a Sunday and eat all week.
- Simple Ingredients, Big Flavor: The secret is in the technique—browning the meat deeply and letting the spices bloom. You don’t need a dozen obscure spices to make this taste incredible. Just good chili powder, cumin, and a little patience.
- Leftovers That Get Better: This is one of those magical recipes where the flavors meld and deepen overnight. The chili is fantastic fresh, but it’s absolutely transcendent the next day. It’s the ultimate meal prep win.
This isn’t just another chili recipe. It’s the one you’ll turn to when you need a guaranteed crowd-pleaser that doesn’t stress your wallet or your schedule. It’s comfort food, simplified and perfected.
What Ingredients You Will Need
This recipe uses simple, wholesome ingredients to deliver bold flavor and satisfying texture without the fuss. Most of these are pantry and fridge staples, which makes this a perfect last-minute meal.
For the Chili Base
- 3 pounds (1.36 kg) ground beef (80/20 blend is ideal for flavor; you can also use ground turkey or a mix)
- 2 tablespoons (30 ml) olive oil (or any neutral cooking oil)
- 1 large yellow onion, diced (about 2 cups)
- 1 large green bell pepper, diced (about 1.5 cups)
- 4 cloves garlic, minced (or 1 tablespoon pre-minced garlic)
- 2 jalapeños, seeded and minced (optional, for a little heat; leave them out for a milder chili)
For the Seasoning
- ¼ cup (30 g) chili powder (I prefer a blend like McCormick or my own mix of ancho and chipotle)
- 1 tablespoon (7 g) ground cumin
- 1 tablespoon (8 g) smoked paprika (adds a lovely depth)
- 2 teaspoons (4 g) dried oregano
- 1 teaspoon (2 g) garlic powder
- 1 teaspoon (2 g) onion powder
- ½ teaspoon (1 g) cayenne pepper (optional, for extra heat)
- 2 teaspoons (12 g) salt (adjust to taste)
- 1 teaspoon (2 g) black pepper
For the Liquid & Body
- 1 can (28 ounces / 794 g) crushed tomatoes (fire-roasted adds great flavor)
- 1 can (15 ounces / 425 g) tomato sauce
- 2 tablespoons (30 g) tomato paste (adds richness and thickens the chili)
- 2 cups (480 ml) beef broth (use low-sodium to control salt levels)
- 1 tablespoon (15 ml) Worcestershire sauce (adds umami depth)
- 1 tablespoon (15 g) brown sugar (balances acidity and brings out sweetness)
Optional Toppings (But Highly Recommended)
- Shredded cheddar cheese
- Sour cream or Greek yogurt
- Chopped green onions
- Crushed tortilla chips or oyster crackers
- Fresh cilantro
Ingredient Tip: For the best texture, I recommend using 80/20 ground beef. The fat renders during cooking and creates a rich, flavorful base. If you use leaner meat, you may need to add a tablespoon of oil or butter to keep the chili from feeling dry.
Equipment Needed
You don’t need a professional kitchen to make this chili. Here’s what you’ll need, along with a few alternatives if you’re working with limited tools.
- Large Dutch oven or heavy-bottomed pot (6 to 8 quarts / 5.7 to 7.6 liters). A cast-iron Dutch oven is ideal for even heat distribution, but a large stockpot works perfectly too.
- Wooden spoon or spatula for breaking up the meat and stirring.
- Sharp chef’s knife and cutting board for dicing vegetables.
- Measuring cups and spoons.
- Can opener.
Budget-Friendly Alternative: If you don’t have a Dutch oven, a large non-stick skillet can work for browning the meat in batches, then transfer everything to a regular pot for simmering. I’ve done this many times, and it works just fine. Just be careful not to overcrowd the pan when browning.
Preparation Method
This recipe comes together in about an hour, but most of that time is hands-off simmering. Let’s break it down step by step.
- Brown the beef (10 minutes): Heat the olive oil in your large pot over medium-high heat. Add the ground beef, breaking it apart with your spoon. Cook, stirring occasionally, until the beef is deeply browned and no longer pink. This should take about 8-10 minutes. Don’t rush this step—the browning is where all the flavor lives. If you have a lot of fat in the pot, you can drain off all but about 2 tablespoons. (I usually leave a little in for flavor.)
- Sauté the aromatics (5 minutes): Add the diced onion, bell pepper, and jalapeños (if using) to the pot with the browned beef. Cook for 4-5 minutes, stirring frequently, until the vegetables have softened and the onion is translucent. The smell at this point is incredible—your kitchen will start to smell like a chili cook-off.
- Bloom the spices (1 minute): Add the minced garlic and all the dried spices (chili powder, cumin, smoked paprika, oregano, garlic powder, onion powder, cayenne, salt, and pepper). Stir constantly for about 1 minute. This step wakes up the spices and makes them more aromatic. You’ll notice the fragrance change immediately. Be careful not to let the garlic burn.
- Build the sauce (5 minutes): Add the tomato paste and stir it into the meat and spice mixture. Cook for 2 minutes, stirring constantly. The paste will darken slightly and smell richer. Then, pour in the crushed tomatoes, tomato sauce, beef broth, Worcestershire sauce, and brown sugar. Stir everything together, scraping the bottom of the pot to release any browned bits (that’s pure flavor).
- Simmer (30-45 minutes): Bring the chili to a boil, then reduce the heat to low. Cover the pot with a lid slightly ajar to allow some steam to escape. Let it simmer gently for at least 30 minutes, but 45 minutes is even better. Stir occasionally to prevent sticking. The chili will thicken and the flavors will meld. If it looks too thick for your liking, add a splash more broth or water.
- Taste and adjust (2 minutes): After simmering, taste the chili. This is your moment to adjust. Need more salt? Add a pinch. Want more heat? Stir in a little extra cayenne or a dash of hot sauce. The brown sugar can be increased if you prefer a slightly sweeter chili.
- Rest and serve (5 minutes): Remove the pot from the heat and let the chili rest for 5 minutes before serving. This allows the flavors to settle. Ladle into bowls and top with your favorite toppings.
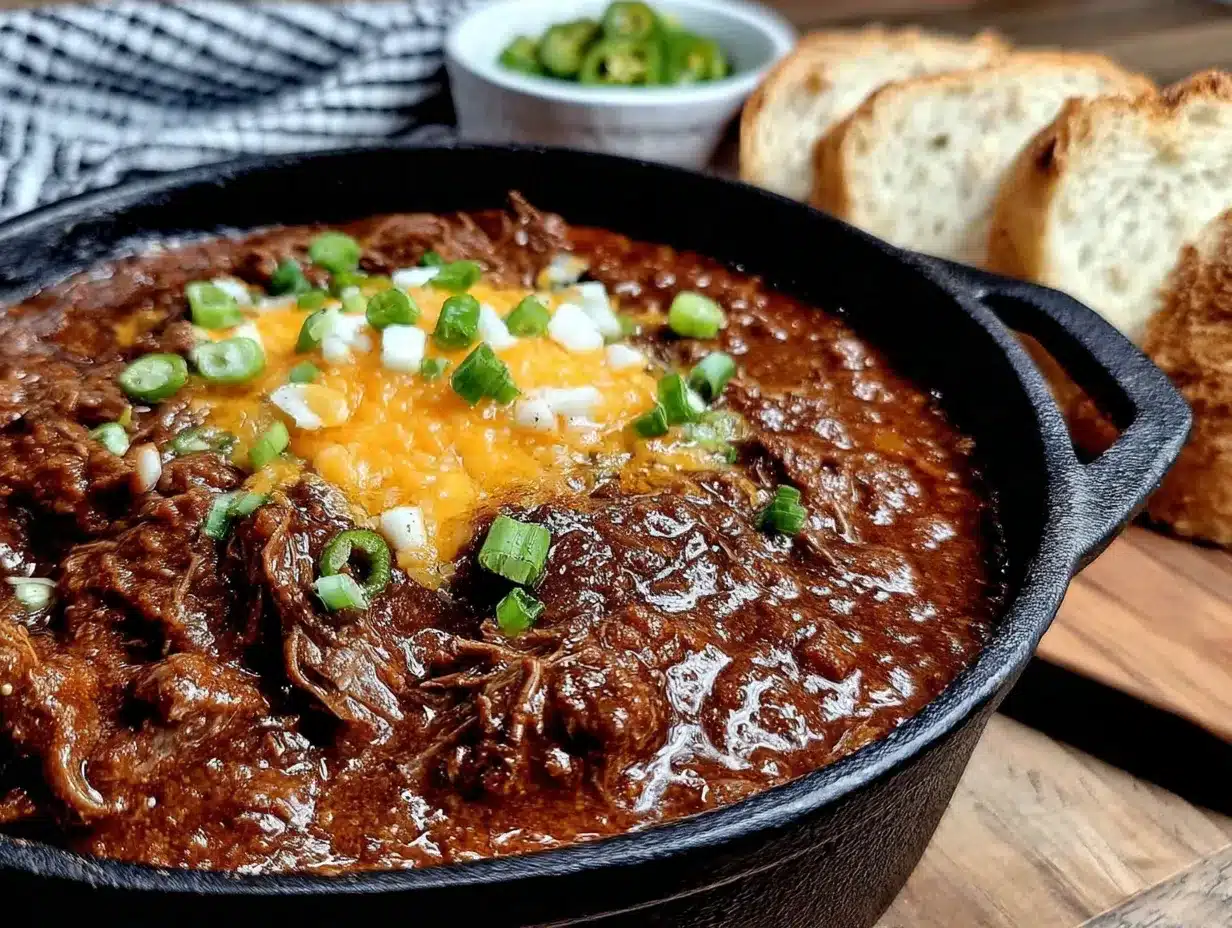
Sensory Cue: At the end of simmering, the chili should be thick enough to coat the back of a spoon. The color should be a deep, rich mahogany red, and the aroma should be smoky, savory, and slightly sweet. If you dip a spoon in and it’s watery, let it simmer uncovered for another 10 minutes.
Cooking Tips & Techniques
I’ve made this chili more times than I can count, and I’ve learned a few things along the way. Here are my best tips to guarantee success.
Don’t skip the browning. This is the single most important step. If you just cook the beef until it’s no longer pink, you miss out on the deep, savory flavor that only comes from the Maillard reaction. Let it sit in the pan for a few minutes without stirring to develop a nice crust. Trust me, it’s worth the extra few minutes.
Bloom your spices in fat, not water. Adding the spices to the pot after the meat is browned and the vegetables are softened ensures they release their essential oils into the fat. If you add them to a watery liquid, they won’t be as potent. This is a classic technique used by professional cooks.
Low and slow is your friend. Chili is a forgiving dish, but it rewards patience. A gentle simmer allows the connective tissues in the meat to break down, making the chili more tender and flavorful. Rushing it on high heat can lead to a burnt bottom and unevenly cooked meat.
My biggest failure: The first time I made this, I added all the spices directly to the raw meat and then added the liquid. The chili was bland and the spices tasted dusty. Now I always bloom them in the fat after browning. It’s a game-changer.
Make it ahead. This chili is even better the next day. The flavors have time to meld and deepen. I often make it a day before I plan to serve it, let it cool, and refrigerate it overnight. Reheat gently on the stovetop, adding a splash of broth if it’s too thick.
Variations & Adaptations
This recipe is incredibly versatile. Here are a few ways to make it your own.
Dietary Adaptations: For a lower-fat version, use ground turkey or chicken instead of beef. Add an extra tablespoon of oil to compensate for the leanness. For a gluten-free option, ensure your Worcestershire sauce and broth are certified gluten-free. Most are, but it’s worth checking the label.
Vegetarian/Vegan Option: Replace the ground beef with 3 cups of cooked lentils or a plant-based ground meat substitute. Use vegetable broth instead of beef broth. The texture will be different, but the spice blend works beautifully with lentils.
Flavor Twists: Add a can of diced green chiles for a subtle heat. Stir in a cup of frozen corn kernels during the last 10 minutes of simmering for a touch of sweetness. For a smoky version, use chipotle peppers in adobo sauce—add one minced chipotle with a teaspoon of the adobo sauce.
Different Cooking Methods: This chili works great in a slow cooker. Brown the meat and sauté the vegetables on the stovetop first, then transfer everything to a slow cooker. Cook on low for 6-8 hours or on high for 3-4 hours. For an Instant Pot, use the sauté function for browning, then pressure cook on high for 15 minutes with a natural release.
Personal Variation: I once added a tablespoon of unsweetened cocoa powder to the spice mix on a whim. It added an incredible depth and richness without making the chili taste like chocolate. It’s now my secret ingredient when I’m feeling fancy.
Serving & Storage Suggestions
This chili is a meal in itself, but it pairs beautifully with a few simple sides.
Serving Temperature: Serve the chili hot, straight from the pot. Ladle it into deep bowls and let everyone customize their toppings. A classic combination is shredded cheddar, a dollop of sour cream, and a handful of crushed tortilla chips for crunch.
Complementary Dishes: A side of cornbread or crusty bread is perfect for sopping up every last drop. A simple green salad with a tangy vinaigrette cuts through the richness of the chili. For a fun twist, serve the chili over a baked potato or with a side of rice.
Storage Instructions: Cool the chili completely before storing. Transfer it to airtight containers and refrigerate for up to 5 days. The chili also freezes beautifully for up to 3 months. I like to freeze it in individual portions for quick lunches.
Reheating Methods: Reheat on the stovetop over medium-low heat, stirring occasionally. Add a splash of broth or water if the chili has thickened too much. You can also reheat individual portions in the microwave for 2-3 minutes, stirring halfway through.
Flavor Development: As I mentioned, this chili gets better with time. The spices mellow and meld, and the flavors become more cohesive. If you can, make it a day ahead. Your future self will thank you.
Nutritional Information & Benefits
While this is comfort food, it also packs some nutritional punches. Here’s a rough estimate per serving (based on 8 servings, without toppings).
| Nutrient | Amount per Serving |
|---|---|
| Calories | 380 |
| Protein | 32g |
| Fat | 22g |
| Carbohydrates | 15g |
| Fiber | 4g |
| Sugar | 8g |
| Sodium | 780mg |
Kid-Approved No-Bean Chili for a Crowd (Easy & Budget-Friendly)

A hearty, meaty, and budget-friendly chili made without beans, perfect for feeding a crowd. This recipe relies on deeply browned ground beef and a rich blend of spices for incredible flavor that even picky eaters will love.
- Prep Time: 15 minutes
- Cook Time: 45 minutes
- Total Time: 1 hour
- Yield: 8 servings 1x
- Category: Main Course
- Cuisine: American
Ingredients
- 3 pounds (1.36 kg) ground beef (80/20 blend)
- 2 tablespoons (30 ml) olive oil
- 1 large yellow onion, diced (about 2 cups)
- 1 large green bell pepper, diced (about 1.5 cups)
- 4 cloves garlic, minced (or 1 tablespoon pre-minced garlic)
- 2 jalapeños, seeded and minced (optional)
- ¼ cup (30 g) chili powder
- 1 tablespoon (7 g) ground cumin
- 1 tablespoon (8 g) smoked paprika
- 2 teaspoons (4 g) dried oregano
- 1 teaspoon (2 g) garlic powder
- 1 teaspoon (2 g) onion powder
- ½ teaspoon (1 g) cayenne pepper (optional)
- 2 teaspoons (12 g) salt
- 1 teaspoon (2 g) black pepper
- 1 can (28 ounces / 794 g) crushed tomatoes (fire-roasted preferred)
- 1 can (15 ounces / 425 g) tomato sauce
- 2 tablespoons (30 g) tomato paste
- 2 cups (480 ml) beef broth (low-sodium)
- 1 tablespoon (15 ml) Worcestershire sauce
- 1 tablespoon (15 g) brown sugar
- Shredded cheddar cheese (for topping)
- Sour cream or Greek yogurt (for topping)
- Chopped green onions (for topping)
- Crushed tortilla chips or oyster crackers (for topping)
- Fresh cilantro (for topping)
Instructions
- Brown the beef: Heat olive oil in a large pot over medium-high heat. Add ground beef and cook, breaking it apart, until deeply browned and no longer pink, about 8-10 minutes. Drain all but 2 tablespoons of fat.
- Sauté the aromatics: Add diced onion, bell pepper, and jalapeños (if using) to the pot. Cook for 4-5 minutes until softened and onion is translucent.
- Bloom the spices: Add minced garlic and all dried spices (chili powder, cumin, smoked paprika, oregano, garlic powder, onion powder, cayenne, salt, pepper). Stir constantly for 1 minute until fragrant.
- Build the sauce: Add tomato paste and cook for 2 minutes, stirring constantly. Pour in crushed tomatoes, tomato sauce, beef broth, Worcestershire sauce, and brown sugar. Stir well, scraping the bottom of the pot.
- Simmer: Bring to a boil, then reduce heat to low. Cover with lid slightly ajar and simmer gently for 30-45 minutes, stirring occasionally, until thickened.
- Taste and adjust: Taste the chili and adjust seasoning with more salt, cayenne, or brown sugar as desired.
- Rest and serve: Remove from heat and let rest for 5 minutes. Ladle into bowls and top with desired toppings.
Notes
For best flavor, use 80/20 ground beef and don’t skip browning the meat. Bloom spices in fat for maximum aroma. Chili tastes even better the next day. For a thicker chili, simmer uncovered for an additional 10-15 minutes. For slow cooker: brown meat and sauté vegetables first, then cook on low for 6-8 hours or high for 3-4 hours. For Instant Pot: use sauté function for browning, then pressure cook on high for 15 minutes with natural release.
Nutrition
- Serving Size: 1 bowl (about 1.5 cu
- Calories: 380
- Sugar: 8
- Sodium: 780
- Fat: 22
- Saturated Fat: 8
- Carbohydrates: 15
- Fiber: 4
- Protein: 32
Keywords: no-bean chili, kid-friendly chili, budget chili, ground beef chili, crowd-pleasing chili, easy chili recipe