There used to be a tiny bakery tucked between a vintage shop and a laundromat in my old neighborhood that made the most ridiculous Halloween treats. When they closed three years ago—just packed up and vanished one October—I literally stood outside their window like a confused ghost. Their white chocolate witch finger pretzels were the stuff of legend, and honestly, I got a little obsessed with figuring them out.
After seven tries—seven, people, including one batch that looked more like zombie thumbs than elegant witch fingers—I finally got it. The trick wasn’t in some fancy technique. It was in the almond placement and the chocolate temperature. Let me tell you, my kitchen looked like a crime scene during those experiments. Green sprinkles everywhere, melted white chocolate on the cabinets, and my cat giving me that judgmental “what are you doing” stare.
These Spooky White Chocolate Witch Finger Pretzel Rods are everything I wanted them to be. They have that satisfying snap when you bite into them, the creamy sweetness of white chocolate, and just the right amount of creepy-cute factor. Maybe you’ve been there—searching for that one Halloween treat that looks impressive but doesn’t require a culinary degree? These are it.
What makes them special is the contrast. The salty pretzel against the sweet white chocolate, the bumpy almond “nail” against the smooth chocolate finger, the way they look genuinely spooky but taste absolutely delightful. They’re the kind of treat that makes people do a double-take before grinning and grabbing three. And honestly? That’s exactly what Halloween should be about.
Why You’ll Love This Recipe
Let me be real with you for a second. I’ve tested this recipe more times than I care to admit, and every single batch taught me something new. The version I’m sharing today? It’s the one that finally made me stop tweaking and start celebrating.
- Quick & Easy: You can have these done in under 30 minutes, start to finish. Perfect for last-minute Halloween parties or when you realize tomorrow is the school bake sale.
- Simple Ingredients: Five ingredients. That’s it. No weird extracts, no specialty stores, no spending twenty bucks on something you’ll use once.
- Perfect for Halloween: These are the star of any spooky spread. Kids love them, adults sneak them, and everyone asks how you made them look so creepy.
- Crowd-Pleaser: I’ve brought these to three different Halloween gatherings now, and they disappear faster than anything else on the table. People can’t resist the combination of salty and sweet.
- Unbelievably Delicious: The texture is what gets me every time. That initial crunch of white chocolate, then the chewy-snappy pretzel, then the subtle nuttiness from the almond. It’s a party in your mouth, and everyone’s invited.
What makes this recipe different from all the other witch finger tutorials out there? Temperature control, my friend. I figured out exactly how warm the white chocolate needs to be for perfect dipping without cracking. I also learned the hard way that almond placement matters—too far down and they look like weird knuckles, too far up and they fall off. This recipe gives you the sweet spot.
These aren’t just another Halloween treat. They’re the kind that makes you close your eyes after the first bite. The kind your coworkers will text you about in January asking if you still have the recipe. The kind that turns a simple pretzel rod into something genuinely magical.
What Ingredients You Will Need
This recipe uses simple ingredients to create something that looks complicated. That’s my favorite kind of cooking—maximum impact with minimum fuss. Here’s what you’ll need to gather:
For the Witch Fingers:
- Pretzel rods, 12 ounces (about 24 rods): Look for thick, sturdy pretzel rods, not the thin sticks. I prefer the Utz brand for their consistent shape and satisfying crunch. They hold up better during dipping and don’t break as easily.
- White chocolate melting wafers, 16 ounces: This is where quality matters. I’ve tried cheap white chips, and they seize up something terrible. Ghirardelli white chocolate melting wafers are my go-to—they melt smoothly, set firmly, and have that creamy vanilla flavor that makes these addictive. You can also use white almond bark in a pinch.
- Coconut oil, 1 tablespoon: This is my secret weapon. A tiny bit of coconut oil thins the white chocolate just enough for smooth dipping without making it greasy. It also gives the finished fingers a subtle sheen that looks more realistic.
- Whole raw almonds, 24 pieces: You want whole almonds with the skin on for that realistic fingernail look. I’ve tried sliced almonds, and they just don’t have the same effect. Look for almonds that are relatively uniform in size—nobody wants one finger with a giant nail and another with a tiny one.
- Green sanding sugar or sprinkles, ¼ cup: This creates that witchy, otherworldly look. You can use any shade of green—neon for dramatic, mossy for more natural-looking fingers. I like Wilton’s green sanding sugar for its fine texture and vibrant color.
Optional but Recommended:
- Red gel food coloring: A tiny dab at the base of the almond creates a bloody cuticle effect that takes these from cute to genuinely creepy. Totally optional, but highly recommended for maximum spook factor.
- Edible glitter: Because everything is better with a little sparkle, even witch fingers.
Ingredient Selection Tips:
I cannot stress this enough—do not use white chocolate chips straight from the bag for melting. They contain stabilizers that prevent smooth melting. If melting wafers aren’t available, chop a high-quality white chocolate bar into small, even pieces. Your future self will thank you when you’re not dealing with a clumpy, seized-up mess.
For the pretzel rods, give them a quick inspection before starting. Sometimes you’ll get a broken one in the bag, and it’s better to know now than when you’re elbow-deep in white chocolate. Have a few extra on hand just in case.
Equipment Needed
You don’t need a professional pastry kitchen for these, but having the right tools makes the process so much smoother. Here’s what I use:
- Baking sheet, 2: One for dipping, one for the finished fingers. Line them with parchment paper or wax paper for easy cleanup.
- Microwave-safe bowl: For melting the white chocolate. Glass or ceramic works best—plastic can sometimes hold onto odors.
- Small spatula or spoon: For stirring the chocolate and helping with dipping.
- Piping bag or small zip-top bag: For drizzling extra chocolate or adding details. I just use a sandwich bag with the corner snipped off.
- Tweezers: This sounds fancy, but it’s a game-changer for placing those almonds exactly where you want them without getting chocolate all over your fingers.
- Parchment paper or wax paper: For lining the baking sheets so the finished fingers don’t stick.
Budget-Friendly Alternatives:
Don’t have a piping bag? Neither do I half the time. A sturdy zip-top bag works perfectly. No tweezers? Clean fingers work fine—just wipe them off between each almond placement. The key is working quickly before the chocolate sets.
Personal Note: I learned the hard way that wax paper works better than parchment for this specific recipe. The white chocolate releases more easily from wax paper, and you won’t end up with torn chocolate bottoms. Just a little tip from someone who’s peeled a lot of stuck chocolate in her day.
Preparation Method
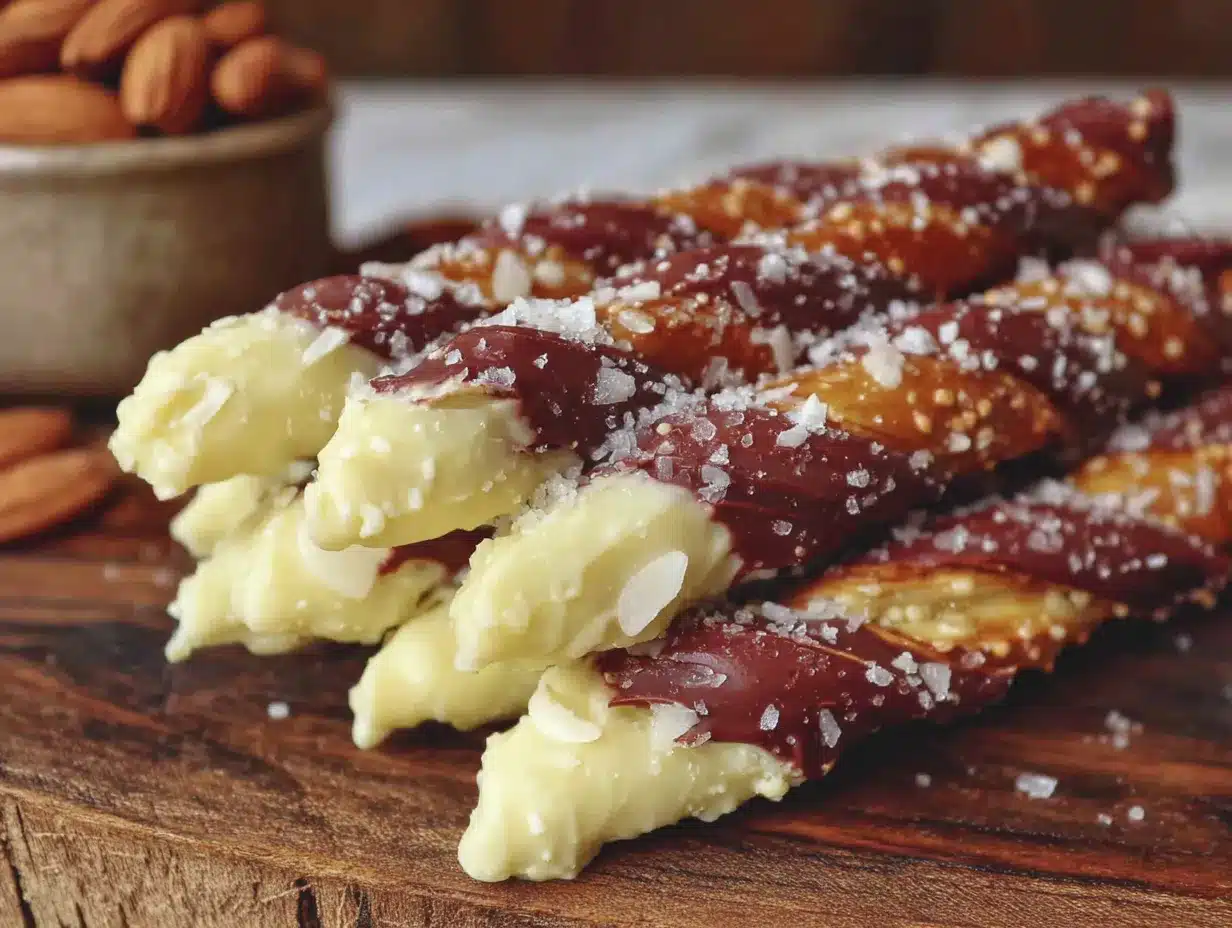
Alright, let’s make some magic happen. Here’s exactly how to create these spooky treats:
- Prep your workspace (5 minutes): Line two baking sheets with wax paper. Count out 24 pretzel rods and 24 whole almonds. Make sure your almonds are dry—any moisture will cause the white chocolate to seize.
- Melt the white chocolate (3-4 minutes): Place the white chocolate melting wafers in a microwave-safe bowl. Microwave in 30-second intervals, stirring thoroughly between each, until completely smooth. This usually takes about 2-3 minutes total. Add the coconut oil and stir until fully incorporated. The chocolate should be smooth, glossy, and thin enough to coat the back of a spoon.
- Test the temperature (30 seconds): Dip one pretzel rod about two-thirds of the way into the white chocolate. If the chocolate runs off too quickly, let it cool for a minute. If it clumps or looks thick, add another tiny splash of coconut oil. You want a coating that’s thick enough to cover but thin enough to drip slightly.
- Dip the pretzels (10-12 minutes): Working one at a time, dip each pretzel rod into the white chocolate, holding it at an angle and rotating to coat about two-thirds of the rod. Let the excess chocolate drip back into the bowl for a few seconds. Place the dipped pretzel on the prepared baking sheet. Repeat with all 24 pretzels, spacing them about an inch apart.
- Add the fingernails (5-7 minutes): This step requires speed and precision. While the white chocolate is still wet, place one whole almond at the tip of each pretzel rod, pressing gently so it adheres. The almond should cover the very end of the pretzel, with the pointed tip extending slightly beyond. If you’re using tweezers, now’s the time. Work in batches of 4-5 pretzels at a time so the chocolate doesn’t set before you add the almonds.
- Create the knuckle lines (5 minutes): Once all almonds are placed, use the tip of a toothpick or the end of a small skewer to create 2-3 horizontal lines on each finger, about halfway between the almond and the undipped portion of the pretzel. These are the knuckle lines. Don’t press too deep—you just want to see the pretzel peeking through.
- Add the green magic (3-4 minutes): While the white chocolate is still tacky (not completely set, but not liquid), sprinkle the green sanding sugar over the dipped portions. I like to hold the pretzel over a small bowl and sprinkle with my fingers, catching the excess. Work in batches of 4-5 to ensure the sugar sticks.
- Optional blood effect (2 minutes): If you’re using red gel food coloring, dip a toothpick into the color and gently dab a tiny dot at the base of each almond, where it meets the white chocolate. This creates a “bloody cuticle” effect that’s delightfully disturbing.
- Set and harden (15-20 minutes): Let the finished witch fingers sit at room temperature until the white chocolate is completely set and firm. Do not refrigerate—condensation will make the chocolate bloom and lose its shine. If you’re in a hurry, you can pop them in the fridge for 10 minutes, but let them come to room temperature before serving.
- Final touch (2 minutes): Once set, you can drizzle a little extra melted white chocolate over the fingers for a more textured, witchy look. I like to add a few random drips and swirls to make them look more organic and less perfect.
Sensory Cues: When the white chocolate is ready, it should smell sweet and creamy, not burnt or scorched. When you dip the pretzel, you should hear a soft sizzle as the warm chocolate hits the cool pretzel. The finished fingers should have a slight sheen, not a dull matte finish. When you bite into one, you should hear a clean snap—that’s how you know the chocolate set properly.
Cooking Tips & Techniques
I’ve made every mistake in the book with these, so you don’t have to. Here’s what I’ve learned:
The Temperature Trap: White chocolate is finicky. It burns easily and seizes when it meets water. If your chocolate starts looking grainy or clumpy, you’ve overheated it. Start over—it’s not salvageable. Keep your microwave times short and stir, stir, stir.
The Almond Angle: The position of the almond matters more than you’d think. Too far down and it looks like a weird knuckle. Too far up and it falls off during setting. The perfect placement is covering the very tip of the pretzel, with about ¼ inch of almond extending beyond. Practice on a few before committing.
The Speed Factor: White chocolate sets quickly, especially if your kitchen is cool. Work in small batches of 4-5 pretzels at a time. Dip them all, add the almonds, then move to the next batch. Don’t try to do all 24 at once unless you’re a professional chocolatier.
The Broken Pretzel Problem: Sometimes pretzel rods break during dipping. It happens. Don’t panic—just dip the broken piece and call it a “severed finger.” Trust me, people will love it even more. I’ve had guests specifically request the broken ones.
My Biggest Failure: The time I tried to speed things up by refrigerating the dipped pretzels immediately. The white chocolate bloomed into an ugly grayish-white mess, and the moisture made the pretzels soggy. Never again. Room temperature setting is non-negotiable.
Multitasking Strategy: While the white chocolate is melting, have your almonds counted and your baking sheets ready. The actual dipping goes fast, but the prep needs to be done. I like to set up an assembly line: pretzels on the left, melted chocolate in the middle, baking sheet on the right, almonds within reach.
Variations & Adaptations
Once you’ve mastered the basic witch finger, the possibilities are endless. Here are some of my favorite variations:
Dark Chocolate Witch Fingers: Swap the white chocolate for dark or milk chocolate. The dark chocolate version looks more like weathered, ancient witch fingers. Add orange sprinkles for a Halloween color scheme that’s less creepy and more festive.
Gluten-Free Version: Use gluten-free pretzel rods. They’re available at most grocery stores now, and they work exactly the same way. Just be aware that gluten-free pretzels tend to be a bit more brittle, so handle them gently during dipping.
Vegan Witch Fingers: Use dairy-free white chocolate and coconut oil. Many white chocolate alternatives are available now that melt and set beautifully. Check the ingredients to ensure they’re vegan-friendly.
Color Variations: Instead of green, try purple sanding sugar for a more magical, fairy-tale witch vibe. Or go with black sprinkles for a gothic, elegant look. I once made a batch with rainbow sprinkles for a “friendly witch” theme, and my niece absolutely lost her mind over them.
Spicy Witch Fingers: Add a pinch of cayenne pepper or chili powder to the melted white chocolate before dipping. The heat builds slowly and pairs surprisingly well with the sweet chocolate and salty pretzel. These are for the adventurous eaters in your life.
Personal Variation: My favorite twist is adding a drop of peppermint extract to the white chocolate and using crushed candy canes instead of green sprinkles. They look like icy, frostbitten witch fingers—perfect for a winter-themed Halloween party or a spooky Christmas gathering.
Serving & Storage Suggestions
These witch fingers are best served at room temperature, arranged on a platter like a hand reaching up from the grave. I like to place them in a cluster, with the almond-tipped ends pointing outward, as if they’re clawing their way out of the dish.
Complementary Dishes: These pair beautifully with other Halloween treats. Serve them alongside a bowl of blood-red punch, some chocolate-covered pretzels, and maybe a plate of ghost-shaped cookies. For a savory balance, add some cheese straws shaped like broomsticks or a veggie platter with “witches’ warts” (cherry tomatoes).
Beverage Pairings: A warm mug of spiced apple cider is perfect for balancing the sweetness. For adults, a dark stout or a pumpkin ale complements the white chocolate beautifully. Kids love them with cold milk or hot cocoa.
Storage Instructions: Store the finished witch fingers in an airtight container at room temperature for up to 5 days. Do not refrigerate—the moisture will ruin the texture. If you need to store them longer, freeze them in a single layer on a baking sheet, then transfer to a freezer bag. They’ll keep for up to 3 months.
Reheating Tips: These don’t need reheating, but if you’ve frozen them, let them thaw at room temperature for about 30 minutes before serving. The texture improves as they come to room temperature.
Flavor Development: Honestly, these taste best the day they’re made. The pretzel stays crunchy, the chocolate is perfectly set, and the almond is fresh. By day two, the pretzel starts absorbing moisture from the chocolate and loses some of its snap. They’re still delicious, just not as texturally perfect.
Nutritional Information & Benefits
Let’s be real—these are a treat, not a health food. But here’s the breakdown so you can plan accordingly:
Per serving (1 witch finger):
- Calories: approximately 165
- Fat: 9g
- Carbohydrates: 20g
- Sugar: 14g
- Protein: 3g
- Sodium: 210mg
Health Highlights: The almonds provide healthy fats, vitamin E, and magnesium. White chocolate contains calcium from the milk solids. And hey, pretzels are lower in fat than many other snack options. It’s not a health food, but it’s not the worst thing you could eat either.
Dietary Considerations: These contain dairy (white chocolate), gluten (pretzels), and tree nuts (almonds). They are not suitable for vegan, dairy-free, gluten-free, or nut-free diets in their standard form—though variations exist for most of these restrictions.
Personal Wellness Perspective: I believe in balance. Halloween comes once a year, and these witch fingers are part of the celebration. Enjoy them mindfully, share them generously, and don’t stress about the calories. Life is too short not to eat spooky pretzels.
Conclusion
These Spooky White Chocolate Witch Finger Pretzel Rods are more than just a Halloween treat—they’re a conversation starter, a memory maker, and honestly, just really fun to make. After seven attempts and countless chocolate-covered disasters, I can confidently say this recipe is foolproof.
What I love most about them is how they bring people together. Every time I serve them, someone gasps, someone laughs, and someone asks for the recipe. They’re the kind of treat that makes Halloween feel magical, even if you’re just sitting at home in your pajamas watching scary movies.
I’d love to hear how yours turn out. Did you try a fun variation? Did your kids help with the almond placement? Did anyone actually scream when they saw them? Drop a comment below and share your witch finger adventures—I read every single one and respond to as many as I can.
Happy Halloween, my friends. May your chocolate stay smooth, your pretzels stay crunchy, and your witch fingers be gloriously, wonderfully creepy.
Frequently Asked Questions
Can I make these ahead of time for a party?
Absolutely! These can be made up to 3 days in advance. Store them in an airtight container at room temperature, and they’ll be perfect for your Halloween gathering. Just don’t refrigerate them, or the texture will suffer.
My white chocolate seized up. What did I do wrong?
White chocolate seizes when it gets too hot or comes into contact with water. Make sure your bowl and utensils are completely dry, and always melt in short intervals, stirring frequently. If it does seize, unfortunately, you’ll need to start over with fresh chocolate.
Can I use almond bark instead of white chocolate?
Yes! Almond bark is actually easier to work with because it’s already tempered for melting. It won’t have the same creamy flavor as quality white chocolate, but it sets beautifully and is more forgiving for beginners.
How do I get the green sprinkles to stick evenly?
The key is timing. Sprinkle the green sugar while the white chocolate is still tacky but not completely wet. If the chocolate is too wet, the sugar will sink in. Too dry, and it won’t stick. Wait about 2-3 minutes after dipping, then sprinkle.
My almonds keep falling off. What am I doing wrong?
This usually happens when the white chocolate has started to set before you add the almond. Work in smaller batches and add the almonds immediately after dipping. Also, make sure you’re pressing gently but firmly—the almond needs to make full contact with the chocolate.
Pin This Recipe!
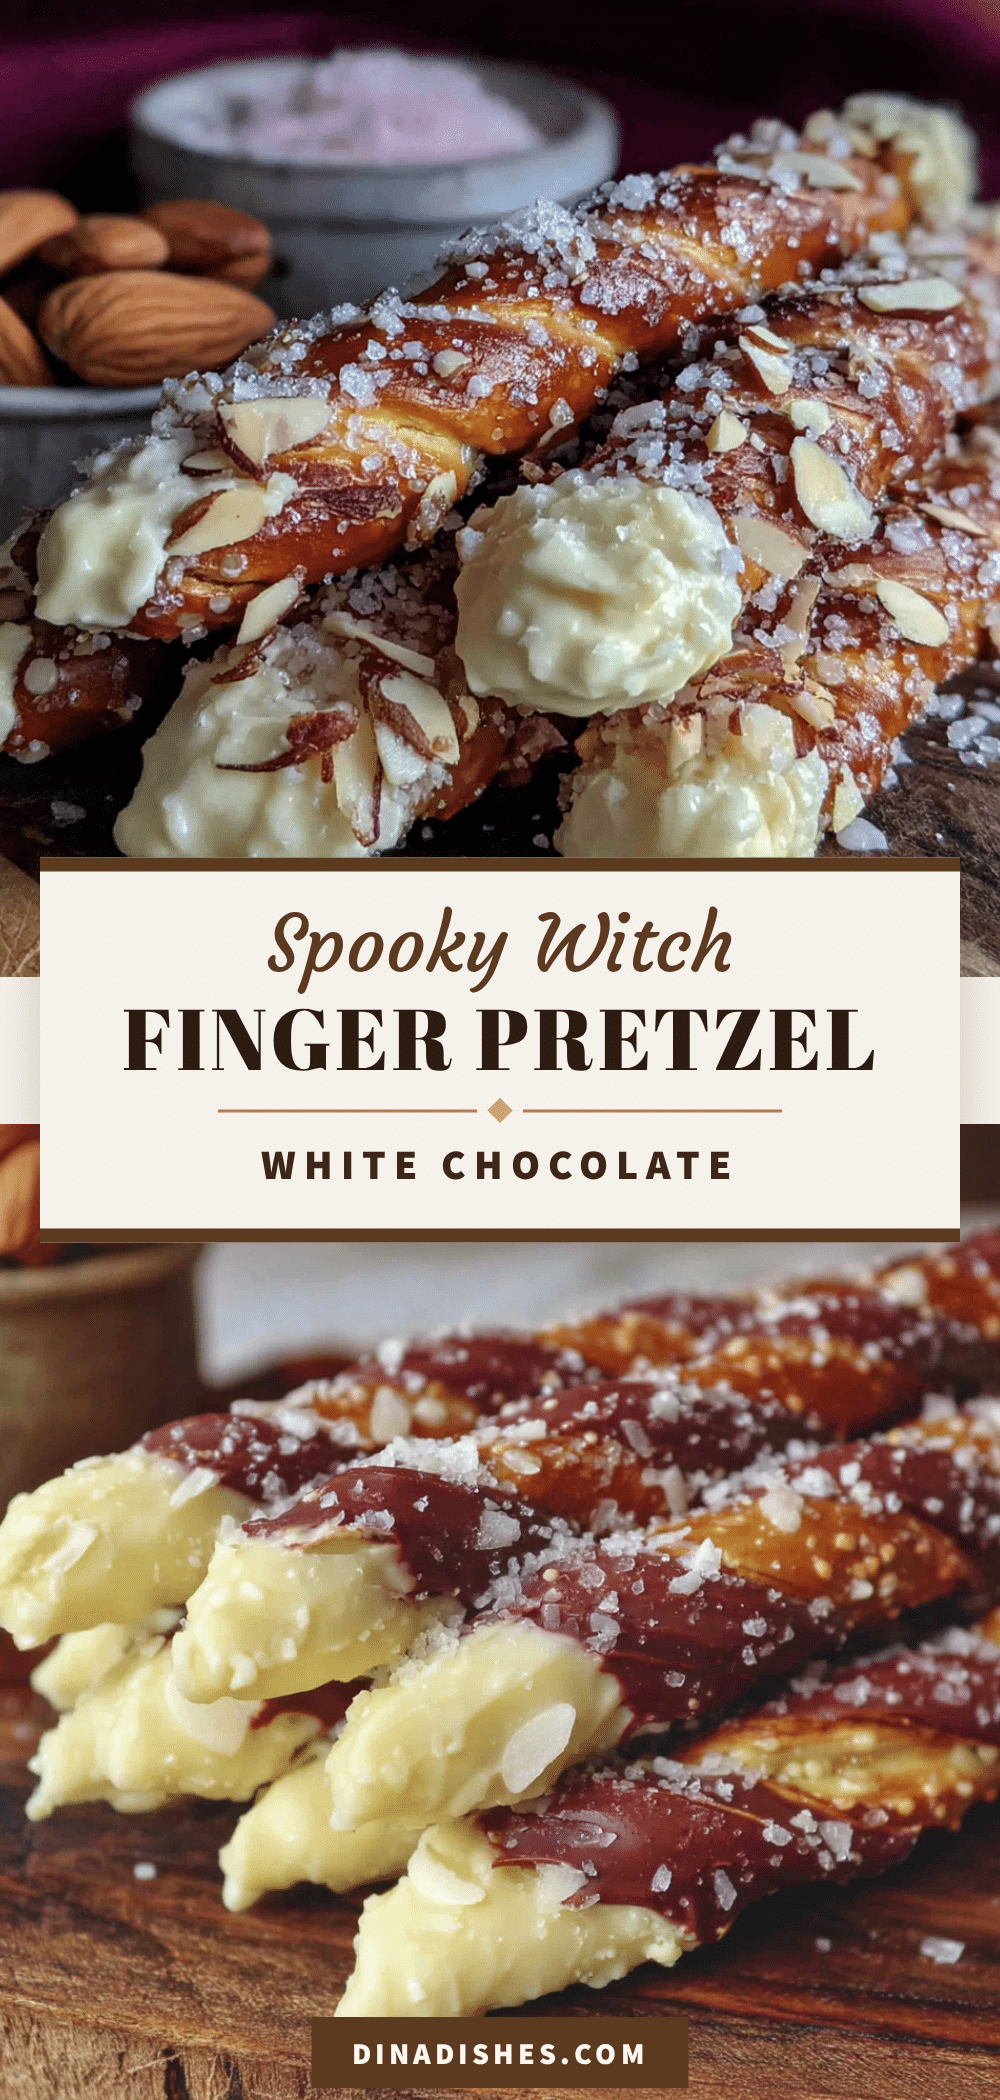
Spooky White Chocolate Witch Finger Pretzel Rods – Easy Halloween Treat

These spooky white chocolate witch finger pretzel rods are a quick and easy Halloween treat that looks impressively creepy but requires only five simple ingredients. Perfect for parties, bake sales, or a fun family activity, they combine salty pretzels, creamy white chocolate, and crunchy almond ‘nails’ for a delightfully spooky snack.
- Prep Time: 15 minutes
- Cook Time: 5 minutes
- Total Time: 30 minutes
- Yield: 24 servings 1x
- Category: Dessert
- Cuisine: American
Ingredients
- 12 ounces pretzel rods (about 24 rods)
- 16 ounces white chocolate melting wafers
- 1 tablespoon coconut oil
- 24 whole raw almonds
- 1/4 cup green sanding sugar or sprinkles
- Red gel food coloring (optional)
- Edible glitter (optional)
Instructions
- Prep your workspace: Line two baking sheets with wax paper. Count out 24 pretzel rods and 24 whole almonds. Make sure almonds are dry.
- Melt the white chocolate: Place white chocolate melting wafers in a microwave-safe bowl. Microwave in 30-second intervals, stirring thoroughly between each, until completely smooth (about 2-3 minutes total). Add coconut oil and stir until fully incorporated.
- Test the temperature: Dip one pretzel rod about two-thirds of the way into the white chocolate. If chocolate runs off too quickly, let it cool for a minute. If it clumps, add another tiny splash of coconut oil.
- Dip the pretzels: Working one at a time, dip each pretzel rod into the white chocolate, holding at an angle and rotating to coat about two-thirds of the rod. Let excess drip back into the bowl. Place on prepared baking sheet. Repeat with all 24 pretzels, spacing about an inch apart.
- Add the fingernails: While white chocolate is still wet, place one whole almond at the tip of each pretzel rod, pressing gently so it adheres. The almond should cover the very end of the pretzel, with the pointed tip extending slightly beyond. Work in batches of 4-5 pretzels.
- Create the knuckle lines: Use the tip of a toothpick or small skewer to create 2-3 horizontal lines on each finger, about halfway between the almond and the undipped portion of the pretzel.
- Add the green magic: While white chocolate is still tacky, sprinkle green sanding sugar over the dipped portions. Work in batches of 4-5 to ensure the sugar sticks.
- Optional blood effect: Dip a toothpick into red gel food coloring and gently dab a tiny dot at the base of each almond for a ‘bloody cuticle’ effect.
- Set and harden: Let the finished witch fingers sit at room temperature until white chocolate is completely set and firm (15-20 minutes). Do not refrigerate.
- Final touch: Once set, drizzle extra melted white chocolate over the fingers for a more textured look if desired.
Notes
Do not refrigerate the finished fingers as condensation will cause the chocolate to bloom and lose its shine. Work in small batches to prevent the chocolate from setting before adding almonds. If pretzel rods break during dipping, dip the broken piece and call it a ‘severed finger’—guests love it.
Nutrition
- Serving Size: 1 witch finger
- Calories: 165
- Sugar: 14
- Sodium: 210
- Fat: 9
- Saturated Fat: 5
- Carbohydrates: 20
- Fiber: 1
- Protein: 3
Keywords: Halloween treats, witch fingers, pretzel rods, white chocolate, easy Halloween recipe, spooky snacks, party food