My neighbor Mark asked why I couldn’t just skip the marinade and coat the jerky strips directly with brown sugar before smoking. I started to explain why that wouldn’t work—something about moisture content and sugar burning—then stopped. Mark’s a bow hunter who processes his own deer every season, and he’d just watched me spend twenty minutes whisking together a complicated brine. I decided to try it his way.
The kitchen smelled like burnt sugar and regret for the first fifteen minutes. I’m not going to lie, I almost scraped the whole batch into the compost bin. But I let it ride, figuring I’d learned my lesson about taking shortcuts. When I pulled those strips off the smoker, the surface had this dark, caramelized crust that I’d never gotten from my marinade method. The inside stayed tender and the smoke flavor had concentrated in a way that made my usual recipe taste like an afterthought.
That was three falls ago, and I haven’t gone back to my old method. Mark still brings his deer over for processing, and I still pretend I knew what I was doing when I took his advice. Honestly, this Smoky Sweet Brown Sugar Deer Jerky for fall is the direct result of being too stubborn to admit a beginner had a better idea than me. You know that feeling when someone suggests something that goes against everything you’ve learned, and it turns out they were right all along? That’s this recipe.
Every time I make a batch now, I think about that afternoon—the smoke curling up from the smoker, the way the brown sugar caramelized into something almost candied, and the quiet satisfaction of watching Mark grab a handful on his way out the door. This jerky has become my go-to for fall hunting trips, tailgates, and those crisp afternoons when you need something savory and sweet to keep you going. It’s the recipe that taught me to shut up and listen once in a while.
Why You’ll Love This Recipe
This isn’t your typical deer jerky that tastes like leather and regret. The sweet-smoky balance hits different, and the texture stays surprisingly tender for a dried meat snack.
- No Complicated Marinade: You’re literally coating the strips and letting the smoker do the work. The brown sugar melts into the meat as it cooks, creating a caramelized crust that locks in moisture.
- Perfect for Fall Activities: Hunting season, football games, hiking trips, or just sitting on the porch watching the leaves change—this jerky fits every autumn scenario.
- Uses Real Ingredients: No liquid smoke, no preservatives, no weird additives. Just venison, brown sugar, spices, and wood smoke.
- Crowd-Pleaser Even for Non-Hunters: The sweet profile mellows out the gamey flavor that turns some people off. I’ve watched my aunt—who swears she hates venison—polish off half a bag.
- Better Than Store-Bought: Once you make your own, you’ll never pay fifteen dollars for a tiny bag of overpriced jerky again. The cost savings alone makes this worth doing.
What sets this recipe apart is the technique—coating the meat directly instead of marinating it overnight. It sounds wrong, I know, but the result is a jerky with concentrated smoky flavor and a sweet crust that doesn’t peel off or flake away. The brown sugar doesn’t just sit on top; it integrates into the meat fibers as the moisture evaporates, creating layers of flavor that build with every chew.
This is comfort food for the fall season, reimagined as something you can pack in your pocket and take anywhere. It’s the kind of snack that makes you close your eyes after the first bite and think about crackling fires and cool mornings. Perfect for sharing with friends who think they don’t like venison, or for hoarding in your own pantry—I won’t judge either way.
What Ingredients You Will Need
This recipe uses simple, pantry-friendly ingredients that transform basic venison into something special. Most of these items you probably already have in your kitchen, which makes this a last-minute-friendly project.
- 2 pounds venison roast or hindquarter (trimmed of silver skin and visible fat—fat goes rancid in jerky and shortens shelf life)
- 1 cup dark brown sugar, packed (light brown works in a pinch, but dark has more molasses flavor that stands up to the smoke)
- 3 tablespoons Worcestershire sauce (I prefer Lea & Perrins for the depth of flavor)
- 2 tablespoons soy sauce (low-sodium works fine—you can always add more salt later)
- 1 tablespoon smoked paprika (regular paprika won’t give you that campfire taste)
- 2 teaspoons garlic powder (not garlic salt—we’re controlling the salt separately)
- 2 teaspoons onion powder (adds that savory backbone)
- 1 teaspoon black pepper (freshly ground if you have it)
- 1 teaspoon red pepper flakes (optional, but the heat plays nicely with the sweet)
- 1 teaspoon curing salt (Prague Powder #1 or pink curing salt—this is optional but recommended for food safety if you’re storing long-term)
- Hickory or applewood chips (soaked in water for at least 30 minutes before smoking)
Ingredient selection tips: Look for venison that’s been properly trimmed. Any silver skin left on will turn into chewy, unpleasant bits that nobody wants to bite into. If you’re buying from a processor, ask them to leave a roast whole instead of grinding it—you’ll get cleaner slices.
Substitution guidance: No venison? Beef flank steak or sirloin tip works beautifully with the same method. The cooking time stays roughly the same since both meats are lean. For a gluten-free version, swap the soy sauce for tamari or coconut aminos. The flavor profile shifts slightly but still tastes fantastic.
Brand preference note: I’ve tested this with generic brown sugar and name-brand, and honestly, the difference is minimal once it caramelizes on the smoker. Save your money on the sugar and spend it on good Worcestershire sauce—that’s where the flavor backbone lives.
Equipment Needed
You don’t need a dehydrator for this recipe, which is good news if you’re like me and hate storing single-use appliances. A smoker is ideal, but I’ll give you alternatives.
- Electric or charcoal smoker (I use a Masterbuilt electric, but any smoker that holds 160-180°F works)
- Sharp slicing knife (a dull knife will shred the meat instead of cutting cleanly)
- Cutting board (dedicated one for raw meat is ideal)
- Large mixing bowl (for coating the strips)
- Cooling racks (for laying strips on the smoker grates)
- Instant-read thermometer (to verify smoker temperature stays consistent)
- Paper towels (for patting meat dry before coating)
- Airtight containers or vacuum sealer (for storage)
Alternative equipment: No smoker? You can use a dehydrator set to 160°F and add a few drops of liquid smoke to the coating mixture. The texture will be slightly different—drier and more traditional jerky-like—but still delicious. An oven set to its lowest temperature with the door cracked open also works in a pinch. I’ve done it during a snowstorm when I couldn’t get to the smoker, and while it wasn’t quite the same, it scratched the itch.
Budget-friendly tip: Don’t run out and buy a fancy smoker just for jerky. Check Facebook Marketplace or Craigslist—people sell barely-used smokers for pennies on the dollar after they realize smoking meat requires patience. I found my current one for forty bucks.
Preparation Method
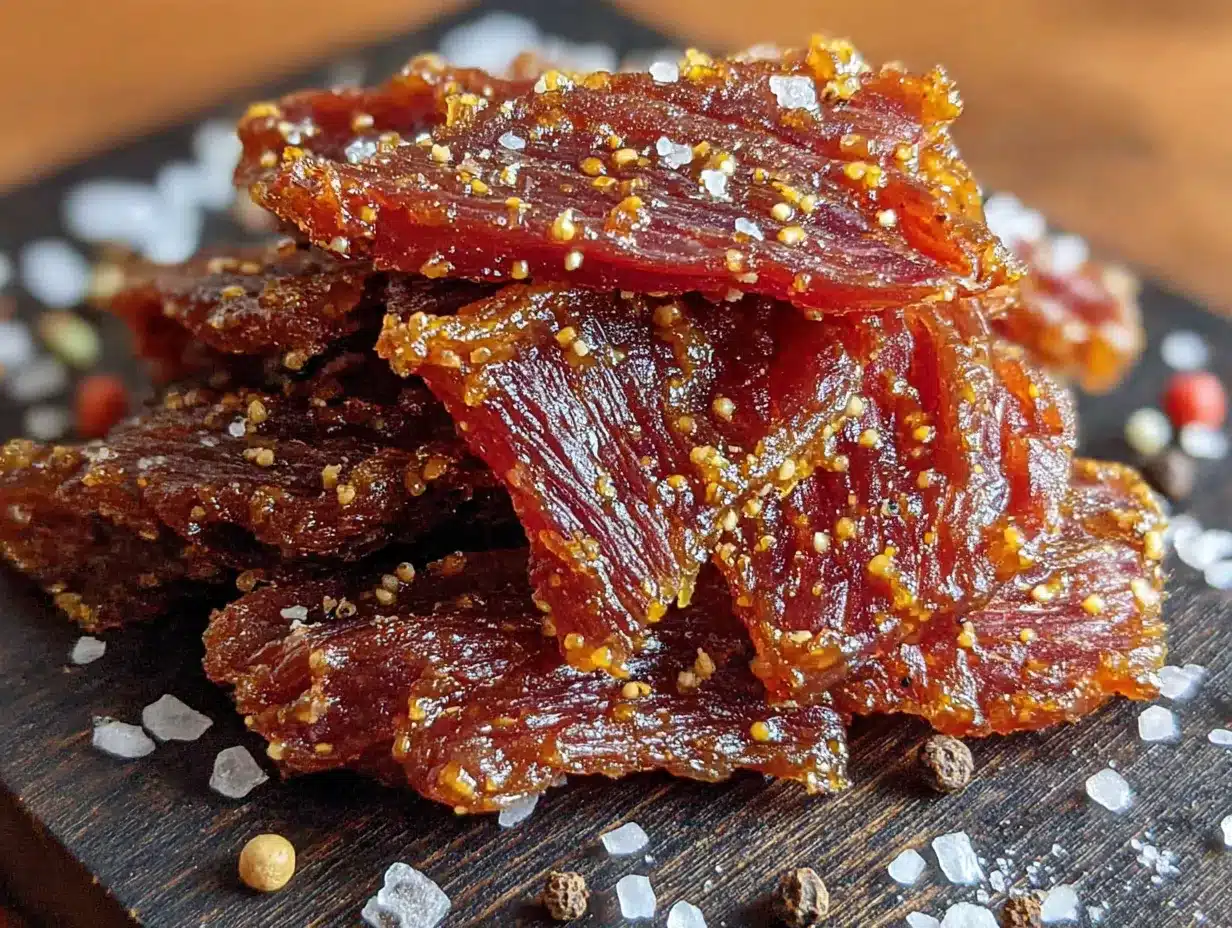
This process takes about 4-6 hours total, but most of that is hands-off smoking time. The actual prep work takes maybe 30 minutes.
- Partially freeze the venison (about 1-2 hours) until it’s firm but not rock-hard. This makes slicing thin, even strips much easier. You want slices about 1/4 inch thick—thick enough to hold together, thin enough to dry properly. Slice against the grain for tender jerky, or with the grain for chewier texture. I prefer against the grain for this recipe since the sweet coating makes it tender enough already.
- Trim any remaining fat or silver skin from the slices as you go. This is tedious, I know, but skipping this step means you’ll be picking around fatty bits later. Trust me on this one—I learned the hard way after a batch went rancid in two weeks because I got lazy.
- Pat the strips dry with paper towels. Excess moisture will steam the meat instead of smoking it, and we want that dry heat to concentrate flavors. Let them sit on paper towels for about 10 minutes while you prepare the coating mixture.
- In a large bowl, combine the brown sugar, Worcestershire sauce, soy sauce, smoked paprika, garlic powder, onion powder, black pepper, and red pepper flakes if using. Mix until the brown sugar dissolves into a thick paste. It should look like wet sand—not runny, but not dry either. If it seems too thick, add a tablespoon of water. Too thin? Add more brown sugar.
- Add the venison strips to the bowl and toss by hand until every strip is thoroughly coated. Don’t be shy—get in there with your fingers and make sure the paste gets into every crevice. The coating should cling to the meat, not pool in the bottom of the bowl. Let the coated strips rest for 15 minutes while you prepare the smoker.
- Preheat your smoker to 170°F. If your smoker runs hot, aim for 160-165°F. You want low and slow—high heat will cook the meat instead of drying it, and the sugar will burn before the jerky finishes. Add your soaked wood chips to the smoker box. Hickory gives the classic smoky flavor, but applewood adds a fruitier note that pairs beautifully with the brown sugar.
- Arrange the strips on cooling racks in a single layer, making sure they don’t touch or overlap. Air circulation is crucial for even drying. If strips are touching, they’ll steam and stay wet, which leads to spoilage later. I can usually fit about a pound per rack.
- Place the racks in the smoker and close the lid. Resist the urge to peek every 15 minutes—every time you open the door, you lose heat and smoke. Set a timer for 2 hours and walk away. Go do something else. This is the hard part.
- After 2 hours, check the jerky. It should look dry on the surface but still feel pliable when bent. If it cracks or snaps, it’s overdone. If it feels wet or sticky, give it another 30-60 minutes. The exact time depends on your smoker, humidity, and thickness of your slices. My electric smoker usually takes about 3-4 hours total at 170°F.
- Test for doneness by taking a piece out and letting it cool for 5 minutes. Bend it—if it cracks but doesn’t break completely, it’s done. If it bends without cracking, it needs more time. If it snaps clean in half, you’ve gone too far and it’ll be tough (still edible, just not ideal).
- Remove the jerky from the smoker and let it cool completely on the racks. This step is non-negotiable—warm jerky trapped in a container will create condensation that ruins the texture and invites mold. I let mine sit out for at least an hour before bagging.
Cooking Tips & Techniques
I’ve made more bad batches of jerky than I care to admit, so let me save you some heartache with what I’ve learned.
The biggest mistake people make is slicing unevenly. Thick pieces take forever to dry while thin pieces turn into crackers. Take the extra time to make uniform slices—your future self will thank you when every piece has the same texture. I use a meat slicer now, but a sharp knife and steady hand works fine.
Temperature control is everything with this recipe. The brown sugar wants to burn at higher temperatures, so keep your smoker below 180°F. I once got distracted and let my smoker creep up to 200°F, and the sugar turned bitter and acrid. The whole batch tasted like regret and charcoal. Don’t be like me.
Weather affects your results more than you’d think. Humid days mean longer drying times. Rainy weather means your smoker struggles to maintain temperature. I plan my jerky-making for clear, cool days when possible. If you’re stuck with bad weather, just add an extra hour to your drying time and check frequently.
Rotate your racks halfway through if your smoker has hot spots. My electric smoker runs hotter on the bottom rack, so I swap positions at the 2-hour mark. This ensures even drying across all your strips.
Let the jerky rest overnight in a paper bag before storing. This step sounds weird, but it allows the moisture to equalize throughout the meat. Jerky fresh from the smoker can seem perfect, then turn tough overnight. The rest period gives you a more accurate read on the final texture.
Variations & Adaptations
This recipe is forgiving enough to play around with once you’ve made it the basic way once or twice.
Spicy Maple Version: Swap the brown sugar for maple syrup (reduce the amount to 3/4 cup since it’s liquid) and add an extra tablespoon of red pepper flakes. The maple gives a different sweetness—lighter, more floral—and the heat builds as you chew. I made this for a hunting trip last November and it disappeared in two days.
Teriyaki Twist: Replace the Worcestershire with additional soy sauce and add 1/4 cup of mirin or rice vinegar. Toss in a tablespoon of grated fresh ginger and two minced garlic cloves. This version is more savory than sweet, and the ginger cuts through the gamey flavor beautifully. Great for people who think venison tastes too strong.
Pepper-Crusted Variation: After coating the strips in the brown sugar mixture, press cracked black pepper and coarse sea salt into both sides. The pepper creates a crust that cracks when you bite into it, and the salt balances the sweetness. This is my husband’s favorite version—he calls it “jerky with a suit on.”
Dehydrator Method: If you don’t have a smoker, prepare the strips exactly the same way and arrange them on dehydrator trays. Set the dehydrator to 160°F and dry for 4-6 hours, checking after hour 4. Add a teaspoon of liquid smoke to the coating mixture to approximate the smoky flavor. It won’t be identical, but it’s close enough to satisfy the craving.
Gluten-Free Adaptation: Use tamari or coconut aminos instead of soy sauce, and verify your Worcestershire sauce is gluten-free (Lea & Perrins is, but some store brands aren’t). Everything else in the recipe is naturally gluten-free, so this is an easy swap.
Serving & Storage Suggestions
This jerky is best served at room temperature, straight from the storage container. I know that’s not fancy, but jerky isn’t fancy food—it’s fuel for adventures and afternoons.
Serving ideas: Pack it for hiking trips, hunting stands, road trips, or tailgates. Crumble it over salads for a smoky protein boost. Chop it fine and mix into cheese balls or dips for unexpected flavor. I’ve even used it in chili—rehydrate the pieces in hot water for 10 minutes, then add them with the beans. The sweet-smoky flavor adds depth that ground beef can’t touch.
Storage instructions: Once completely cool, store the jerky in an airtight container or vacuum-sealed bag. Kept at room temperature, it’ll last 2-3 weeks. In the refrigerator, it keeps for 2-3 months. In the freezer? I’ve found batches from two years ago that were still perfectly good. The key is removing as much air as possible—oxygen is what degrades the flavor and texture over time.
Moisture management: If you notice condensation forming inside the storage container, the jerky wasn’t dry enough. Take it out, spread it on a baking sheet, and put it in a 150°F oven for 20-30 minutes to drive off excess moisture. Then let it cool completely before returning to the container.
Flavor development: The jerky actually tastes better after a day or two of resting. The smoky flavor mellows and the sweet notes become more pronounced. I always try to let my batches sit for at least 24 hours before diving in—but I’ll admit, I rarely succeed at waiting that long.
Nutritional Information & Benefits
Per 1-ounce serving (about 3-4 strips):
| Nutrient | Amount |
|---|---|
| Calories | 85 |
| Protein | 15g |
| Fat | 2g |
| Carbohydrates | 8g |
| Sugar | 7g |
| Sodium | 320mg |
Health benefits: Venison is one of the leanest red meats available, with significantly less fat than beef. It’s packed with B vitamins, iron, and zinc—nutrients that support energy metabolism and immune function. The protein content makes this jerky an excellent post-hike or post-workout snack that keeps you full without the sugar crash of processed snacks.
Dietary considerations: This recipe is dairy-free, egg-free, and can be made gluten-free with simple substitutions. It’s naturally low-carb compared to most commercial snacks. The curing salt is optional, so you can skip it if you’re watching sodium intake—just plan to eat the jerky within a week or freeze it for longer storage.
Personal perspective: I don’t pretend jerky is a health food—it’s a treat that happens to have some redeeming nutritional qualities. But compared to a bag of chips or a candy bar, this is a much better option for sustained energy during outdoor activities. Plus, you know exactly what went into it, which counts for something.
Conclusion
This Smoky Sweet Brown Sugar Deer Jerky for fall has become a staple in my kitchen every autumn, and I don’t see that changing anytime soon. It’s the recipe that taught me to question my assumptions and listen to the guy who’s been processing his own deer for twenty years. Sometimes the best lessons come from unexpected teachers.
I encourage you to make this recipe your own—adjust the spice level, try different wood chips, experiment with the variations. Jerky is forgiving that way. It wants you to play with it. And if you end up with a batch that’s a little too sweet or a little too smoky? You’ll still have homemade jerky that beats anything from a store.
I’d love to hear how yours turns out. Drop a comment below with your favorite variation or any questions that come up during the process. And if you end up with a story about being wrong about a cooking technique, even better—those are my favorite kind of comments to read.
Happy smoking, and here’s to fall flavors that stick with you long after the last piece is gone.
Frequently Asked Questions
Can I use beef instead of venison for this recipe?
Absolutely. Beef flank steak, sirloin tip, or top round all work beautifully. The cooking time stays roughly the same since both meats are lean. The flavor will be milder—less gamey—but the sweet-smoky profile still shines through.
How do I know when the jerky is done without over-drying it?
The bend test is your best friend. Take a piece out, let it cool for 5 minutes, then bend it. It should crack slightly on the surface but not break in half. If it bends like rubber without cracking, it needs more time. If it snaps clean, it’s overdone but still edible.
Do I really need curing salt, or can I skip it?
You can skip it if you plan to eat the jerky within a week or store it in the freezer. Curing salt (Prague Powder #1) provides protection against botulism during long-term room temperature storage. For short-term use, it’s optional. I use it when making large batches for hunting trips.
Why did my brown sugar burn on the smoker?
Your smoker was too hot. Keep the temperature at 170°F or below. Brown sugar caramelizes and burns at higher temperatures. If your smoker runs hot, try 160°F and expect a longer drying time. You can also reduce the sugar slightly to minimize burning risk.
How long does homemade deer jerky last?
Properly dried and stored jerky lasts 2-3 weeks at room temperature, 2-3 months in the refrigerator, and up to a year in the freezer. The key is removing as much air as possible from the storage container. Vacuum sealing extends the shelf life significantly.
Pin This Recipe!
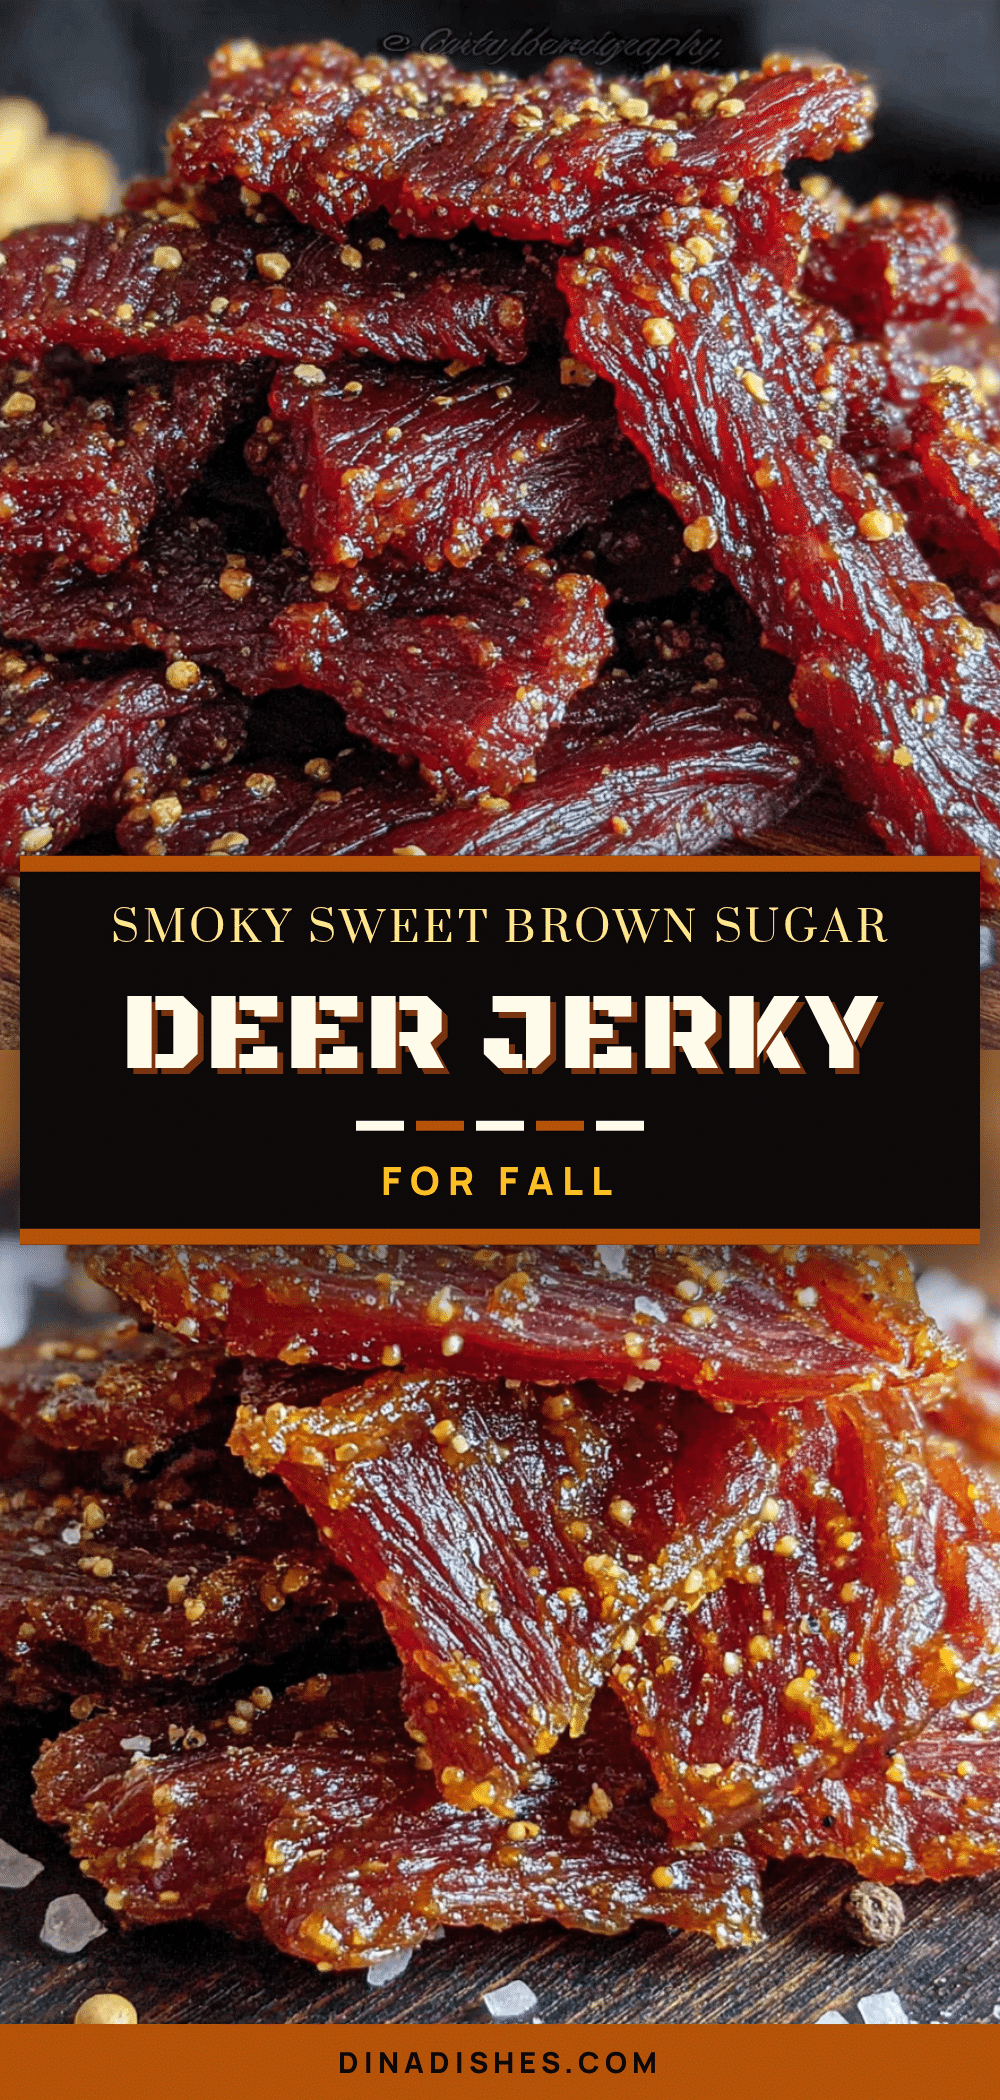
Best Smoky Sweet Brown Sugar Deer Jerky Recipe for Fall
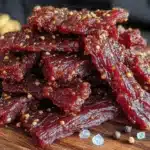
This Smoky Sweet Brown Sugar Deer Jerky for fall is a game-changer, using a direct brown sugar coating instead of a complicated marinade to create a caramelized crust and tender, smoky meat. It’s the perfect savory-sweet snack for hunting trips, tailgates, and crisp autumn afternoons.
- Prep Time: 30 minutes
- Cook Time: 3-4 hours
- Total Time: 4-6 hours
- Yield: 4 servings 1x
- Category: Snack
- Cuisine: American
Ingredients
- 2 pounds venison roast or hindquarter (trimmed of silver skin and visible fat)
- 1 cup dark brown sugar, packed
- 3 tablespoons Worcestershire sauce
- 2 tablespoons soy sauce (low-sodium works fine)
- 1 tablespoon smoked paprika
- 2 teaspoons garlic powder
- 2 teaspoons onion powder
- 1 teaspoon black pepper (freshly ground if you have it)
- 1 teaspoon red pepper flakes (optional)
- 1 teaspoon curing salt (Prague Powder #1 or pink curing salt, optional but recommended for long-term storage)
- Hickory or applewood chips (soaked in water for at least 30 minutes before smoking)
Instructions
- Partially freeze the venison (about 1-2 hours) until it’s firm but not rock-hard. Slice into 1/4 inch thick strips against the grain for tender jerky, or with the grain for chewier texture.
- Trim any remaining fat or silver skin from the slices as you go.
- Pat the strips dry with paper towels. Let them sit on paper towels for about 10 minutes while you prepare the coating mixture.
- In a large bowl, combine the brown sugar, Worcestershire sauce, soy sauce, smoked paprika, garlic powder, onion powder, black pepper, and red pepper flakes if using. Mix until the brown sugar dissolves into a thick paste. It should look like wet sand—not runny, but not dry either. If it seems too thick, add a tablespoon of water. Too thin? Add more brown sugar.
- Add the venison strips to the bowl and toss by hand until every strip is thoroughly coated. Let the coated strips rest for 15 minutes while you prepare the smoker.
- Preheat your smoker to 170°F (aim for 160-165°F if your smoker runs hot). Add your soaked wood chips to the smoker box.
- Arrange the strips on cooling racks in a single layer, making sure they don’t touch or overlap.
- Place the racks in the smoker and close the lid. Set a timer for 2 hours and walk away.
- After 2 hours, check the jerky. It should look dry on the surface but still feel pliable when bent. If it cracks or snaps, it’s overdone. If it feels wet or sticky, give it another 30-60 minutes. The exact time depends on your smoker, humidity, and thickness of your slices. My electric smoker usually takes about 3-4 hours total at 170°F.
- Test for doneness by taking a piece out and letting it cool for 5 minutes. Bend it—if it cracks but doesn’t break completely, it’s done. If it bends without cracking, it needs more time. If it snaps clean in half, you’ve gone too far and it’ll be tough (still edible, just not ideal).
- Remove the jerky from the smoker and let it cool completely on the racks. This step is non-negotiable—warm jerky trapped in a container will create condensation that ruins the texture and invites mold. I let mine sit out for at least an hour before bagging.
Notes
The biggest mistake people make is slicing unevenly. Take the extra time to make uniform slices. Temperature control is everything with this recipe. The brown sugar wants to burn at higher temperatures, so keep your smoker below 180°F. Weather affects your results more than you’d think. Humid days mean longer drying times. Rotate your racks halfway through if your smoker has hot spots. Let the jerky rest overnight in a paper bag before storing to allow the moisture to equalize throughout the meat.
Nutrition
- Serving Size: 1 ounce (about 3-4 s
- Calories: 85
- Sugar: 7
- Sodium: 320
- Fat: 2
- Carbohydrates: 8
- Protein: 15
Keywords: deer jerky, venison jerky, brown sugar jerky, smoked jerky, fall recipe, hunting snack, homemade jerky, sweet jerky, smoky jerky