I was at the library, of all places, trying to find a book on container gardening that my four-year-old had hidden somewhere in the kids’ section, when I overheard the children’s librarian talking to a mom at the checkout desk. She wasn’t talking about story time or the summer reading program. She was describing, in very specific detail, the exact texture of the chocolate chip cookies her grandmother used to make for the library staff every holiday season. “They were thick,” she said, “and chewy right to the edge, but light enough that you could eat two without feeling like you swallowed a brick.” I was supposed to be looking for a book, but I was, honestly, frozen in the “New Nonfiction” aisle, holding a book about worms, just listening. She said the secret was letting the dough rest, which I thought was just something fancy bakeries did to sound important. She was so passionate about it, this quiet woman in a cardigan, that I had to ask her for the recipe. She laughed and said it wasn’t a secret, just a few tricks her grandma picked up working in a small-town bakery. I scribbled it on the back of a due-date slip I found in my pocket. The ink smudged a little, but I’ve been making these chewy chocolate chip cookies ever since. They’re the ones my kids now beg for, the ones that disappear from the lunchbox in the first hour. Maybe you’ve been there, chasing a perfect cookie recipe, only to end up with flat, crispy discs that taste more like sugar than comfort. I know I was. But this one? This one stuck.
Why You’ll Love This Recipe
Let’s be honest, finding a cookie recipe that makes everyone happy is like finding a unicorn. You want it crispy, your partner wants it cakey, and the kids just want it to have enough chocolate chips to turn their fingers brown. This recipe hits that sweet spot. It’s the kind of cookie that makes you look like a hero for almost no effort.
- Kid-Approved & Budget-Friendly: This recipe uses simple, affordable ingredients you likely already have. No fancy flours or imported butter. It’s designed for the family kitchen, not a professional pastry lab.
- Thick, Chewy, and Bakery-Style: We get that signature bakery texture without any weird ingredients. The secret is in the technique—melting the butter and resting the dough—which anyone can do.
- Perfect for Busy Families: The dough comes together in about 15 minutes. You can bake them right away, or stash the dough in the fridge for a quick treat later in the week. It’s a lifesaver for after-school snacks or last-minute school bake sales.
- Crowd-Pleaser Guaranteed: I have yet to meet a picky eater who turns these down. They are sweet, but not overly so, with a deep buttery flavor and just the right amount of salt to balance it out.
- Unbelievably Delicious: The texture is the star here. That first bite gives you a slight crunch on the outside, then gives way to a soft, dense, chewy center that is pure comfort. It’s the kind of chewy chocolate chip cookie that makes you close your eyes after the first bite, even if you’re just standing over the kitchen counter.
What Ingredients You Will Need
This recipe is built on pantry staples. The magic isn’t in expensive ingredients, but in how we treat them. Every component plays a specific role in creating that perfect chew.
- All-Purpose Flour: The backbone of the cookie. I use standard all-purpose flour for the best structure. (Avoid bread flour here, as it can make the cookies too tough and bready, which isn’t what we want for a chewy cookie.)
- Unsalted Butter: We melt this, which is the key to chewiness. Using unsalted lets you control the salt level. I prefer Land O’Lakes for its consistent fat content, but any standard brand works perfectly.
- Light Brown Sugar: This is non-negotiable for moisture and that deep, caramel-like flavor. The molasses in brown sugar is what gives the cookies their soft, chewy center. Pack it firmly into your measuring cup.
- Granulated Sugar: It helps with spreading and gives the edges a slight crispness. The balance of brown to white sugar is what creates that “bakery style” texture.
- Large Eggs: They bind everything together and add richness. Make sure they are at room temperature for the best emulsion. (If you forget, place them in a bowl of warm water for 5 minutes.)
- Vanilla Extract: Pure vanilla is worth the splurge here. It enhances the chocolate and makes the cookie taste “complete.” I use about a tablespoon, which is more than most recipes call for, because I love the flavor.
- Baking Soda: This is our leavening agent. It helps the cookies spread just enough and gives them a nice lift. Make sure it’s fresh for the best results.
- Salt: A generous amount of flaky sea salt on top is a game-changer. It cuts the sweetness and makes the chocolate pop. Don’t skip it.
- Semi-Sweet Chocolate Chips: I use a mix of standard chips and chopped chocolate bars for the best texture. The chips hold their shape, and the chopped chocolate creates those melty puddles. For a budget-friendly option, Guittard or Ghirardelli chips are excellent. (If your family prefers milk chocolate, you can swap it out, but the cookies will be much sweeter.)
Equipment Needed
You don’t need a fancy kitchen to make these. A few basic tools will get the job done beautifully.
- Large Mixing Bowls: One for the wet ingredients, one for the dry. I prefer glass or stainless steel.
- Whisk: For combining the dry ingredients and smoothing out the wet mixture.
- Rubber Spatula or Wooden Spoon: For folding in the chocolate chips. A spatula is gentler and prevents over-mixing.
- Cookie Scoop: A 1.5-tablespoon scoop (size #40) is perfect for uniform cookies. If you don’t have one, use two spoons to drop the dough. (I dropped a scoop on my toe once, so be careful with the heavy ones!)
- Baking Sheets: Light-colored, rimmed baking sheets work best. Dark sheets can cause the bottoms to burn.
- Parchment Paper or Silicone Baking Mat: Essential for preventing sticking and ensuring even baking. I prefer parchment for easier cleanup.
- Wire Cooling Rack: For cooling the cookies properly so they don’t get soggy on the bottom.
Preparation Method
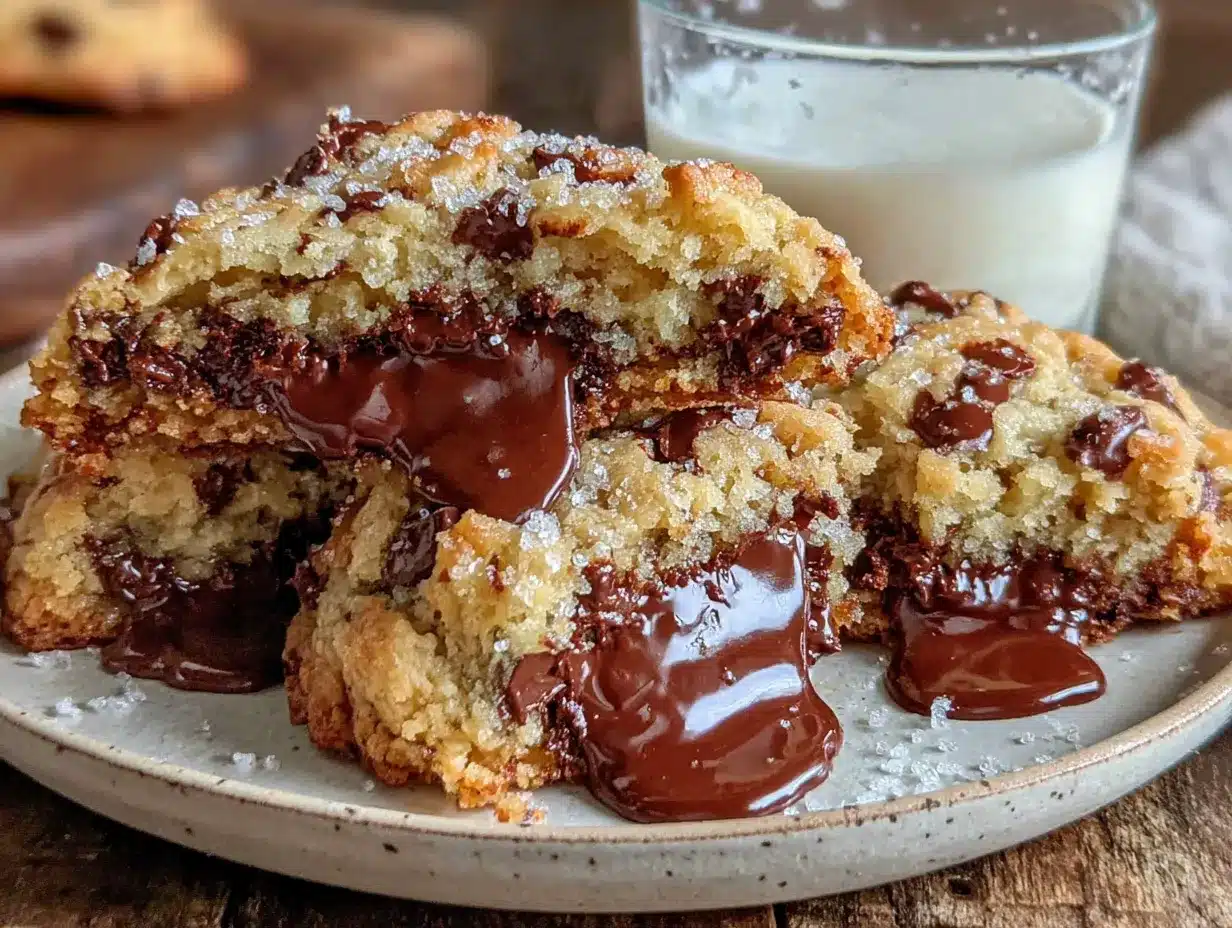
Follow these steps carefully, and you will have a batch of perfect chewy chocolate chip cookies every single time. Trust the process, especially the resting step.
- Melt the Butter (5 minutes): In a large microwave-safe bowl, melt 1 cup (2 sticks / 226g) of unsalted butter. Heat it in 30-second bursts until just melted. You don’t want it hot, just liquid. Let it cool for 2-3 minutes. This is the first secret to chewiness.
- Combine the Sugars (3 minutes): Add 1 cup (200g) of packed light brown sugar and ½ cup (100g) of granulated sugar to the melted butter. Whisk vigorously for about 2 minutes until the mixture looks like a thick, grainy paste. It should lighten in color slightly. This step dissolves the sugar and creates a shiny, smooth base.
- Add the Egg and Vanilla (2 minutes): Crack in 2 large eggs (room temperature) and add 1 tablespoon (15ml) of vanilla extract. Whisk until completely combined and the mixture is smooth and glossy. It might look a little separated at first, but keep whisking. It will come together.
- Mix the Dry Ingredients (2 minutes): In a separate bowl, whisk together 2 ½ cups (315g) of all-purpose flour, 1 teaspoon of baking soda, and ½ teaspoon of salt. Make sure there are no lumps in the baking soda.
- Combine Wet and Dry (3 minutes): Pour the dry ingredients into the wet mixture. Use your rubber spatula to fold everything together. Stir just until you see the last streak of flour disappear. Over-mixing here will make the cookies tough. The dough will be thick and slightly greasy looking. That’s perfect.
- Add the Chocolate (2 minutes): Fold in 2 cups (340g) of semi-sweet chocolate chips (or a mix of chips and chopped chocolate). Make sure they are evenly distributed. The dough will be very stiff now.
- Rest the Dough (30 minutes – 24 hours): This is the most important step. Cover the bowl with plastic wrap and let it sit at room temperature for 30 minutes. If you have time, refrigerate it for 2 hours or even overnight. This allows the flour to fully hydrate and the flavors to meld. It is the secret to that thick, bakery-style texture. I once skipped this step when I was in a rush, and the cookies spread into flat, greasy discs. Don’t be like me.
- Preheat and Prep (10 minutes): When you’re ready to bake, preheat your oven to 375°F (190°C). Line two baking sheets with parchment paper.
- Scoop the Dough (5 minutes): Use your cookie scoop to portion out the dough. Scoop it into balls and place them 2 inches apart on the prepared baking sheets. For extra tall cookies, roll the dough balls into a tall cylinder shape rather than a perfect sphere.
- Bake (10-12 minutes): Bake one sheet at a time in the center of the oven. Bake for 10 minutes for soft, chewy cookies, or 12 minutes for slightly crispier edges. The cookies will look puffy, golden around the edges, and still very soft in the center. They will look underdone. That’s exactly what you want.
- Cool on the Sheet (5 minutes): Let the cookies cool on the baking sheet for 5 minutes. They will continue to cook from the residual heat. This sets the center perfectly. Then, transfer them to a wire rack to cool completely. If you move them too soon, they will fall apart.
Cooking Tips & Techniques
I’ve made this recipe more times than I can count, and I’ve learned a few things the hard way. Here are my best tips to guarantee success.
- Don’t Skip the Rest: I know it’s tempting to bake them right away, but that 30-minute rest is the difference between a flat cookie and a thick, chewy one. The flour needs time to absorb the melted butter. If you’re in a real hurry, even 15 minutes helps.
- Chill for Best Flavor: If you can refrigerate the dough for 24 hours, the flavor deepens significantly. The brown sugar and vanilla have time to really get to know each other. It’s a game-changer.
- The “Bang” Technique: When the cookies come out of the oven, immediately bang the baking sheet on the counter or stovetop. This deflates the puffy center and creates those beautiful, crinkly tops and a denser, chewier texture. It’s a classic bakery trick.
- Room Temperature Eggs Matter: Cold eggs will seize the melted butter, making the dough lumpy. If you forget to take them out, place them in a bowl of warm water for 5 minutes. It saves the batch.
- Measure Flour Correctly: Scooping flour directly from the bag packs it down, leading to dry cookies. Instead, fluff the flour with a spoon, then spoon it into your measuring cup and level it off with a knife. This is a small step that makes a huge difference.
Variations & Adaptations
This base recipe is incredibly flexible. Once you master the basic chewy chocolate chip cookie, you can play around with it to suit your family’s mood or what you have in the pantry.
- Chocolate Lover’s Dream: Swap ½ cup of the all-purpose flour for ½ cup of unsweetened cocoa powder. Add an extra ¼ cup of chocolate chips. You get a double chocolate cookie that is still perfectly chewy.
- Nutty Crunch: Fold in 1 cup of toasted, chopped walnuts or pecans along with the chocolate chips. The crunch is a fantastic contrast to the soft dough. I do this when I want a cookie that feels a little more “grown-up.”
- M&M’s Fun: For the kids, substitute 1 cup of the chocolate chips with 1 cup of M&M’s. It makes the cookies colorful and extra special for birthday parties or holidays. The candy shells stay intact and add a nice pop of color.
- Gluten-Free Option: Use a 1:1 gluten-free baking flour blend (like King Arthur Measure for Measure). The texture will be slightly more tender, but they will still be chewy and delicious. Add an extra tablespoon of milk if the dough seems too dry.
Serving & Storage Suggestions
These cookies are best warm, but they are honestly amazing at any temperature. Here is how to serve and store them to keep them at their peak.
Serving: Serve them slightly warm with a tall glass of cold milk. For an extra treat, sandwich a scoop of vanilla ice cream between two cookies for an instant ice cream sandwich. They are also fantastic crumbled over a bowl of vanilla yogurt or used as a base for a cookie sundae.
Storage: Store the baked cookies in an airtight container at room temperature for up to 5 days. Place a slice of white bread in the container with the cookies. The bread will absorb excess moisture and keep the cookies soft and chewy. (Swap the bread out every day or two.)
Freezing: You can freeze the baked cookies for up to 3 months. Layer them between sheets of parchment paper in a freezer-safe bag. To reheat, pop one in the microwave for 10-15 seconds, or in a 300°F oven for 5 minutes. The dough itself freezes beautifully too. Scoop it into balls, freeze them on a sheet pan, then transfer to a freezer bag. You can bake them directly from frozen, just add 2-3 minutes to the baking time.
Nutritional Information & Benefits
Let’s be real, these are a treat. But knowing what’s in them helps you enjoy them even more. The nutritional values are estimates based on a standard serving size of one cookie.
Estimated Nutrition (per cookie): Calories: 180, Fat: 9g, Carbohydrates: 24g, Protein: 2g, Sugar: 15g.
Health Benefits: While they are a dessert, they aren’t empty calories. The semi-sweet chocolate contains antioxidants (flavonoids) that are good for heart health. The eggs provide a small amount of protein and choline, which is important for brain health. Using butter over margarine means you are getting natural fats, which your body processes more efficiently. Plus, the act of baking and sharing these cookies is good for the soul. I always feel better when I’ve made something for my family.
Dietary Considerations: This recipe contains gluten, dairy, and eggs. For a dairy-free version, you can use vegan butter sticks (like Miyoko’s) and dairy-free chocolate chips. For a gluten-free version, see the variations section above.
Conclusion
These chewy chocolate chip cookies have become a staple in my kitchen for a reason. They are forgiving, reliable, and they deliver on that promise of a perfect, bakery-style texture every single time. They are the kind of cookie that makes a Tuesday afternoon feel special, and they are simple enough to make with a toddler “helping” you measure the flour. I love that I can make a big batch of dough on a Sunday, bake a few for the week, and have the rest ready to go for a rainy day or an unexpected playdate. The recipe came from a librarian in a cardigan, but it feels like it came from my own grandmother. I hope you make these, and I hope they become your family’s favorite, too. Please leave a comment below and let me know how they turned out! Did you add nuts? Did the kids love them? I’d love to hear your story.
Frequently Asked Questions
Can I use margarine instead of butter?
I don’t recommend it. Butter provides the best flavor and texture. Margarine has a higher water content, which can make the cookies spread too much and turn out greasy. Stick with real butter for the best results.
Why did my cookies turn out flat?
This is usually because the butter was too warm or the dough wasn’t rested. Make sure your melted butter has cooled for a few minutes before adding the sugars. Also, don’t skip the 30-minute rest. If your baking soda is old, it won’t provide enough lift, so check the expiration date.
Can I make these cookies without a mixer?
Absolutely! This recipe is designed to be made by hand. A whisk for the wet ingredients and a sturdy spatula for the dry ingredients is all you need. It’s actually easier to avoid over-mixing when you do it by hand.
How do I make my cookies softer the next day?
Place a slice of white bread in the container with the cookies. The bread will release moisture and the cookies will absorb it, making them soft again. Change the bread slice every day or two. This trick works like magic.
Can I use dark brown sugar instead of light brown sugar?
Yes, you can. Dark brown sugar has more molasses, which will make the cookies even softer and give them a deeper, more caramel-like flavor. They will be slightly darker in color. It’s a great swap if you want a richer taste.
Pin This Recipe!
Best Chewy Chocolate Chip Cookies – Kid-Approved Easy Recipe
These thick, chewy chocolate chip cookies are a family favorite, made with simple ingredients and a secret technique for a bakery-style texture. Perfect for busy families, they come together quickly and are guaranteed to be a crowd-pleaser.
- Prep Time: 15 minutes
- Cook Time: 10-12 minutes
- Total Time: 45 minutes (plus 30 minutes resting time)
- Yield: 24 cookies 1x
- Category: Dessert
- Cuisine: American
Ingredients
- 1 cup (2 sticks / 226g) unsalted butter
- 1 cup (200g) packed light brown sugar
- ½ cup (100g) granulated sugar
- 2 large eggs, room temperature
- 1 tablespoon (15ml) vanilla extract
- 2 ½ cups (315g) all-purpose flour
- 1 teaspoon baking soda
- ½ teaspoon salt
- 2 cups (340g) semi-sweet chocolate chips (or mix of chips and chopped chocolate)
Instructions
- Melt the butter: In a large microwave-safe bowl, melt 1 cup of unsalted butter in 30-second bursts until just melted. Let it cool for 2-3 minutes.
- Combine the sugars: Add 1 cup packed light brown sugar and ½ cup granulated sugar to the melted butter. Whisk vigorously for about 2 minutes until the mixture looks like a thick, grainy paste and lightens slightly in color.
- Add the egg and vanilla: Crack in 2 large eggs (room temperature) and add 1 tablespoon of vanilla extract. Whisk until completely combined and the mixture is smooth and glossy.
- Mix the dry ingredients: In a separate bowl, whisk together 2 ½ cups all-purpose flour, 1 teaspoon baking soda, and ½ teaspoon salt until no lumps remain.
- Combine wet and dry: Pour the dry ingredients into the wet mixture. Use a rubber spatula to fold together just until the last streak of flour disappears. Do not over-mix.
- Add the chocolate: Fold in 2 cups of semi-sweet chocolate chips (or a mix of chips and chopped chocolate) until evenly distributed.
- Rest the dough: Cover the bowl with plastic wrap and let it sit at room temperature for 30 minutes, or refrigerate for 2-24 hours for best flavor.
- Preheat and prep: When ready to bake, preheat oven to 375°F (190°C). Line two baking sheets with parchment paper.
- Scoop the dough: Use a 1.5-tablespoon cookie scoop to portion out the dough. Place balls 2 inches apart on the prepared baking sheets. For extra tall cookies, roll into tall cylinder shapes.
- Bake: Bake one sheet at a time in the center of the oven for 10-12 minutes. The cookies should look puffy, golden around the edges, and still soft in the center.
- Cool on the sheet: Let the cookies cool on the baking sheet for 5 minutes, then transfer to a wire rack to cool completely.
Notes
Resting the dough for at least 30 minutes is crucial for thick, chewy cookies. For best flavor, refrigerate the dough for 24 hours. Use the ‘bang’ technique: when cookies come out of the oven, bang the baking sheet on the counter to create crinkly tops. Measure flour correctly by fluffing, spooning, and leveling. Room temperature eggs are important to prevent the melted butter from seizing.
Nutrition
- Serving Size: 1 cookie
- Calories: 180
- Sugar: 15
- Sodium: 120
- Fat: 9
- Saturated Fat: 5
- Carbohydrates: 24
- Fiber: 1
- Protein: 2
Keywords: chewy chocolate chip cookies, kid-approved cookies, easy cookie recipe, bakery-style cookies, homemade cookies