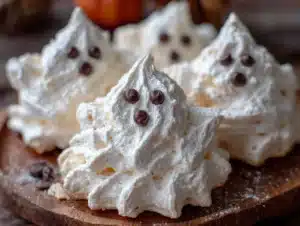
The PTA Halloween party was in twelve hours and I’d completely forgotten. I mean, completely. My daughter had reminded me that morning—”Mom, don’t forget the spooky treats!”—and I’d nodded along while packing lunches, mentally reviewing my work schedule, and completely erasing her words from my brain. Classic mom move, honestly.
So there I was at 9 PM, staring into my pantry like it held answers. Everyone else would be bringing elaborate cake pops shaped like mummies, graham cracker haunted houses with royal icing roofs, and those creepy finger cookies with almond nails. I had three egg whites. A bag of chocolate chips. And a desperate need to not show up empty-handed.
I remembered making meringue cookies once in culinary school—light as air, sweet, and surprisingly simple if you didn’t overthink them. The problem was, plain white cookies aren’t exactly spooky. But then I spotted the mini chocolate chips and it clicked. Little ghost shapes. Tiny chocolate eyes. Done in under an hour if I hustled.
The power went out halfway through whipping the meringue. I’m not kidding. The kitchen went dark, the mixer slowed to a pathetic whir, and I stood there in the glow of my phone flashlight, whisk in hand, wondering if this was a sign. But I kept going—by hand, because I’m stubborn like that—and somehow, some way, those little ghosts turned out perfect.
They disappeared first at the party. The elaborate stuff sat half-eaten while my last-minute ghosts got snatched up by kids and parents alike. Maybe you’ve been there—that moment when simple wins over complicated, and you breathe a little easier knowing you pulled it off. That’s this recipe. It’s the one you make when you have no time, no fancy ingredients, and honestly no idea if it’ll work. And it always, always does.
Why You’ll Love This Recipe
Let me tell you why these Light Ghost Meringue Cookies with Easy Chocolate Chip Eyes are about to become your go-to Halloween treat. I’ve made these for three different parties now, and every single time, someone asks for the recipe. They’re that good—and that easy.
- Quick & Easy: From start to finish, these come together in about 45 minutes. The active prep time is maybe 15 minutes—the rest is just baking low and slow while you do something else.
- Simple Ingredients: You need exactly four ingredients. Four! Egg whites, sugar, vanilla, and mini chocolate chips. Chances are you already have them in your kitchen right now.
- Perfect for Halloween: Whether it’s a classroom party, office potluck, or neighborhood gathering, these ghost cookies fit right in. They’re cute without being fussy, spooky without being scary.
- Crowd-Pleaser: Kids love the chocolate eyes. Adults love that they’re light and not too sweet. Everyone loves how adorable they look.
- Unbelievably Delicious: The texture is what gets people. Crisp on the outside, slightly chewy in the middle, and that melt-in-your-mouth meringue sweetness balanced by the dark chocolate chips. It’s next-level comfort food in cookie form.
What makes this different from other meringue recipes? It’s the technique. I whip the egg whites to stiff peaks with a pinch of salt—that extra step makes them more stable and gives the cookies that perfect pillowy shape. Plus, I pipe them into ghost shapes instead of just dropping spoonfuls, which takes maybe two extra minutes but makes them ten times cuter.
Honestly, this recipe isn’t just good—it’s the kind that makes you close your eyes after the first bite. It’s Halloween fun without the sugar crash, and it fits perfectly into eating well without feeling like you’re missing out.
What Ingredients You Will Need
This recipe uses simple, wholesome ingredients to deliver that light, airy texture and sweet chocolate pop. You probably have most of these in your pantry already, which is exactly how I like to cook.
- Egg whites: 3 large egg whites, room temperature. Room temperature egg whites whip up higher and more stable than cold ones. Separate your eggs carefully—any yolk in the whites will prevent them from whipping properly.
- Granulated sugar: ¾ cup (150 grams). Regular white sugar works best here. Don’t use powdered sugar—it changes the texture and the cookies won’t hold their shape as well.
- Vanilla extract: 1 teaspoon. Pure vanilla extract gives the best flavor, but imitation vanilla works fine too. You could also use almond extract for a different twist.
- Mini chocolate chips: ¼ cup (45 grams) for the eyes, plus extra for decorating. Mini chips are perfect because they’re small enough to look like ghost eyes without being overwhelming. I like Enjoy Life brand for allergy-friendly options or Ghirardelli for extra rich flavor.
- Cream of tartar: ¼ teaspoon (optional but recommended). This stabilizes the egg whites and helps them hold their shape. If you don’t have it, a pinch of salt works as a substitute.
- Salt: A tiny pinch. Helps balance the sweetness and stabilizes the egg whites.
Ingredient tips from my kitchen: For the best results, use fresh eggs. Older eggs actually whip up better because the whites are thinner, but fresh eggs give a cleaner flavor. If your eggs are cold, place them in a bowl of warm water for 5 minutes to bring them to room temperature quickly.
Substitution guidance: Need this to be vegan? Use aquafaba (the liquid from a can of chickpeas) instead of egg whites. Whip it the same way—it works surprisingly well. For a sugar-free version, try monk fruit sweetener or erythritol, though the texture will be slightly different.
Equipment Needed
You don’t need fancy equipment for these ghost cookies, which is part of why I love them so much. Here’s what you’ll need:
- Electric mixer: A stand mixer with a whisk attachment is ideal, but a hand mixer works perfectly too. I’ve made these with both, and honestly, the hand mixer gives me more control. You can whip by hand, but your arm will get a serious workout.
- Large mixing bowl: Glass or metal works best. Plastic bowls can retain grease, which ruins meringue.
- Piping bag with round tip: A disposable piping bag with a ½-inch round tip is easiest. No piping bag? Use a zip-top bag with the corner snipped off. I’ve done it that way more times than I can count.
- Baking sheet: Line it with parchment paper or a silicone baking mat. Do NOT use greased pans—the meringue needs something to grip onto.
- Small spatula: For scraping every last bit of meringue into the piping bag. Waste not, want not.
- Cooling rack: Optional but helpful for cooling the cookies completely.
Budget-friendly options: Skip the piping bag and use a zip-top bag. Skip the silicone mat and use parchment paper. Skip the stand mixer and use a hand mixer. Seriously, this recipe is forgiving.
Preparation Method
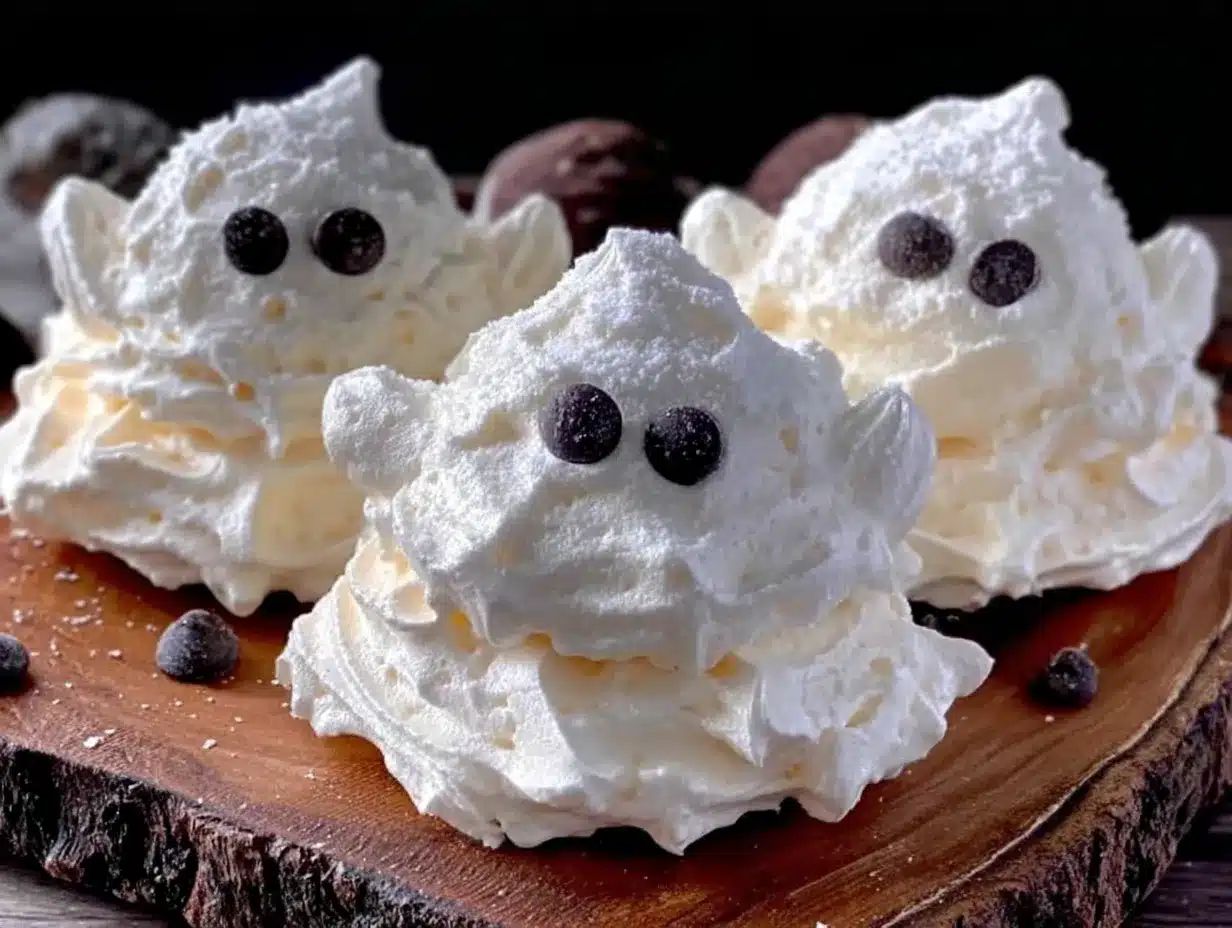
Okay, let’s make some ghosts! Here’s how I do it step by step.
- Preheat and prep: Preheat your oven to 200°F (95°C). Line a baking sheet with parchment paper or a silicone mat. Set aside.
- Separate the eggs: Crack your cold eggs and separate the whites from the yolks. Be careful—any yolk in the whites will ruin the meringue. I separate each egg into a small bowl first, then add the white to the mixing bowl. That way, if one yolk breaks, you don’t ruin the whole batch.
- Let the whites warm up: Let the egg whites sit at room temperature for about 10 minutes. This helps them whip up higher and more stable.
- Start whipping: Add the cream of tartar and salt to the egg whites. Begin whipping on medium speed until frothy and bubbly—about 1 minute.
- Add the sugar slowly: With the mixer running, add the sugar one tablespoon at a time. I know it’s tempting to dump it all in, but slow and steady gives you a better texture. Keep whipping on medium-high speed.
- Whip to stiff peaks: Continue whipping for about 5-7 minutes total. You’re looking for stiff, glossy peaks that hold their shape when you lift the whisk. The mixture should be thick and white, not runny at all. Here’s my test: turn the bowl upside down—if nothing moves, you’re good. (I’ve done this and had meringue on my face before. Learn from my mistakes.)
- Add vanilla: Beat in the vanilla extract on low speed, just until combined. Don’t overmix or you’ll deflate the meringue.
- Prepare your piping bag: Fit your piping bag with a round tip or snip the corner of a zip-top bag. Fill the bag with the meringue mixture.
- Pipe the ghosts: Pipe small ghost shapes onto the prepared baking sheet. Start with a round base, then pull upward to create a little peak for the head. Make them about 2 inches tall and 1½ inches wide. Leave about 1 inch between each ghost—they don’t spread much, but they need a little breathing room.
- Add the eyes: Gently press two mini chocolate chips into each ghost for eyes. Press them in just enough so they stick—don’t push them all the way through. I like to place them a little unevenly for a cuter, more whimsical look.
- Bake low and slow: Place the baking sheet in the preheated oven and bake for 1 hour to 1 hour 15 minutes. The cookies should be dry to the touch and easily lift off the parchment paper. They shouldn’t be brown at all—just pale and slightly glossy.
- Cool completely: Turn off the oven and leave the cookies inside with the door cracked open for about 30 minutes. This helps them dry out completely without cracking. Then transfer them to a cooling rack.
Sensory cues to watch for: The meringue should look glossy and smooth when it’s ready to pipe. When you lift the whisk, the peak should stand straight up without flopping over. During baking, your kitchen will smell sweet and faintly vanilla—but you won’t smell much because the oven is so low. The cookies should feel dry and light when done, almost like Styrofoam in texture.
My personal tip: If it’s a humid day, bake the cookies a little longer. Humidity is meringue’s worst enemy—it makes them sticky and chewy instead of crisp. I learned this the hard way during a rainy October when my ghosts came out looking sad and droopy.
Cooking Tips & Techniques
After making these ghost cookies more times than I can count, I’ve collected a few tricks that make all the difference. Let me share them so you don’t make the same mistakes I did.
The bowl must be clean. This is non-negotiable. Any grease or residue on your bowl or whisk will prevent the egg whites from whipping properly. I wipe my bowl with a little lemon juice or vinegar on a paper towel before I start, just to be safe. Trust me on this one—I ruined a batch because I used a bowl that had a tiny bit of butter residue.
Don’t rush the sugar. Adding the sugar slowly is the difference between glossy, stable meringue and grainy, weepy meringue. Each tablespoon needs to dissolve completely before you add the next. Rub a little between your fingers—if it feels gritty, keep whipping.
Watch the weather. Meringue is sensitive to humidity. On rainy or humid days, the cookies may take longer to bake and might not get as crisp. If you’re in a humid climate, try baking them a little longer at a slightly lower temperature—190°F for 1½ hours works well.
Pipe with confidence. The first time I piped ghosts, they looked more like blobs. Don’t worry about perfection—each ghost has its own personality. Uneven eyes, lopsided heads, slightly different sizes—that’s what makes them charming. Kids especially love the imperfect ones.
Storage matters. These cookies need to be stored in an airtight container at room temperature. If you put them in the fridge, they’ll absorb moisture and get sticky. I keep mine in a tin with a tight-fitting lid, layered between parchment paper.
My biggest failure: I once tried to double the batch and whipped everything in a bowl that was too small. Meringue expanded everywhere—on my counter, on my shirt, on the floor. My kitchen looked like a snow globe exploded. So use a big enough bowl, okay?
Variations & Adaptations
These ghost cookies are fun as-is, but they’re also a great base for experimenting. Here are some variations I’ve tried and loved.
Chocolate Ghosts: Swap 2 tablespoons of sugar for 2 tablespoons of unsweetened cocoa powder. Sift it in with the sugar to avoid lumps. The ghosts come out pale brown, which actually looks kind of spooky. Add white chocolate chips for eyes instead of dark chocolate for contrast.
Peppermint Ghosts: Replace the vanilla extract with ½ teaspoon peppermint extract. The minty flavor pairs beautifully with the dark chocolate eyes. I made these for a Christmas party once and they were a hit—just call them snow ghosts instead.
Vegan Ghosts: Use aquafaba from a can of chickpeas. Whip 3 tablespoons of aquafaba with the cream of tartar and salt until frothy, then add sugar the same way. They take a little longer to whip, but the result is surprisingly similar. Use dairy-free chocolate chips for the eyes.
Funfetti Ghosts: Fold in 2 tablespoons of rainbow sprinkles after whipping, just before piping. The sprinkles add color and crunch. Kids go crazy for these.
Different shapes: Pipe the meringue into other Halloween shapes—pumpkins (round with a green M&M stem), bats (wider base with pointed wings), or even spider webs (swirl the meringue in concentric circles). Just adjust the baking time slightly for larger shapes.
My personal favorite variation: I add a tiny pinch of cinnamon and nutmeg to the sugar before whipping. It gives the cookies a warm, cozy flavor that feels perfect for fall. Plus, the spices make the kitchen smell incredible while they bake.
Serving & Storage Suggestions
These ghost cookies are best served at room temperature, right after they’ve cooled completely. The texture is perfectly crisp on the outside with a slight chewiness inside, and the chocolate chips add little pockets of richness.
Presentation ideas: Arrange the ghosts on a white platter for a spooky, minimalist look. Or place them on a dark plate to make the white ghosts pop. For Halloween parties, I like to scatter them on a tray with some fake spider webs and plastic spiders—it’s cute without being over the top.
Complementary treats: Serve these alongside other light Halloween treats like pumpkin spice popcorn, caramel apples, or dark chocolate bark. They pair beautifully with hot apple cider or a warm mug of spiced tea. For adults, a glass of cold milk or a pumpkin spice latte is perfect.
Storage instructions: Store the cookies in an airtight container at room temperature for up to 5 days. Do not refrigerate—the moisture will make them sticky. If you live in a humid climate, add a food-safe silica gel packet to the container to keep them crisp.
Freezer instructions: These cookies freeze beautifully! Place them in a single layer in a freezer-safe container with parchment paper between layers. Freeze for up to 3 months. Thaw at room temperature for about 15 minutes before serving. Don’t thaw them in the fridge—again, moisture is the enemy.
How flavors develop: Honestly, these cookies taste best on the first day, when the meringue is perfectly crisp. After a day or two, they soften slightly, which some people actually prefer. If they do soften, you can re-crisp them in a 200°F oven for 10 minutes.
Nutritional Information & Benefits
These ghost cookies are surprisingly light compared to most Halloween treats. Here’s the breakdown per cookie (makes about 24 cookies):
- Calories: Approximately 35-40 calories per cookie
- Carbohydrates: 8 grams
- Sugar: 7 grams
- Protein: 1 gram
- Fat: 0.5 grams
- Sodium: 10 mg
Health benefits: These cookies are naturally fat-free (except for the chocolate chips), which makes them a lighter option for Halloween. Egg whites are a good source of protein and contain no cholesterol. Plus, because they’re so light and airy, it’s easy to stop at just one or two—unlike dense, buttery cookies.
Dietary considerations: This recipe is naturally gluten-free and nut-free, making it safe for many common allergies. For a dairy-free version, use dairy-free chocolate chips. For a vegan version, use aquafaba. For a lower-sugar version, reduce the sugar to ½ cup—the texture will be slightly different, but still delicious.
My wellness perspective: I love that these cookies let me enjoy Halloween treats without the heavy feeling that comes with most holiday baking. They satisfy that sweet craving without derailing my eating habits. It’s all about balance, right?
Conclusion
These Light Ghost Meringue Cookies with Easy Chocolate Chip Eyes are proof that simple can be spectacular. They came from a moment of panic and pantry desperation, and now they’re the Halloween treat I look forward to making every year. That’s the thing about recipes sometimes—the best ones come when you least expect them.
I hope you give these a try, whether you’re scrambling for a last-minute party contribution or just want something fun to make with your kids on a fall afternoon. Don’t stress about making them perfect—the imperfect ones have the most personality. And honestly, they taste just as good no matter what they look like.
If you make these, I’d love to hear how they turn out! Drop a comment below and tell me about your ghost cookie adventures. Did your kids help pipe them? Did you try a fun variation? Did you have a kitchen disaster that turned into a triumph? Share it all—I read every comment and I love hearing from you.
And if you’re looking for more Halloween baking ideas, check out my spiderweb brownies or these pumpkin sugar cookies for more festive fun. Happy haunting, and happy baking!
Frequently Asked Questions
Can I make these ghost cookies ahead of time?
Yes! These cookies actually keep really well. Bake them up to 5 days in advance and store them in an airtight container at room temperature. They also freeze beautifully for up to 3 months.
Why did my meringue turn out flat and runny?
This usually happens if there’s any grease or yolk in the egg whites, or if the bowl wasn’t perfectly clean. Make sure your bowl and whisk are spotless, and separate each egg carefully. Humidity can also cause issues—try baking on a dry day.
Can I use liquid egg whites from a carton?
You can, but the results won’t be as good. Carton egg whites are pasteurized, which changes their protein structure and makes them harder to whip to stiff peaks. Fresh egg whites give you a much better texture.
How do I know when the cookies are done baking?
The cookies should be dry to the touch and easily lift off the parchment paper. They shouldn’t be brown at all. If they’re still sticky after an hour, bake them for another 10-15 minutes. Every oven is different, so keep an eye on them.
Can I use regular chocolate chips instead of mini chips?
You can, but mini chips work better for the eyes because they’re smaller and more proportionate to the ghost shape. If you only have regular chips, try cutting them in half with a sharp knife. Or use them for a different look—big eyes make for funny, expressive ghosts!
Pin This Recipe!
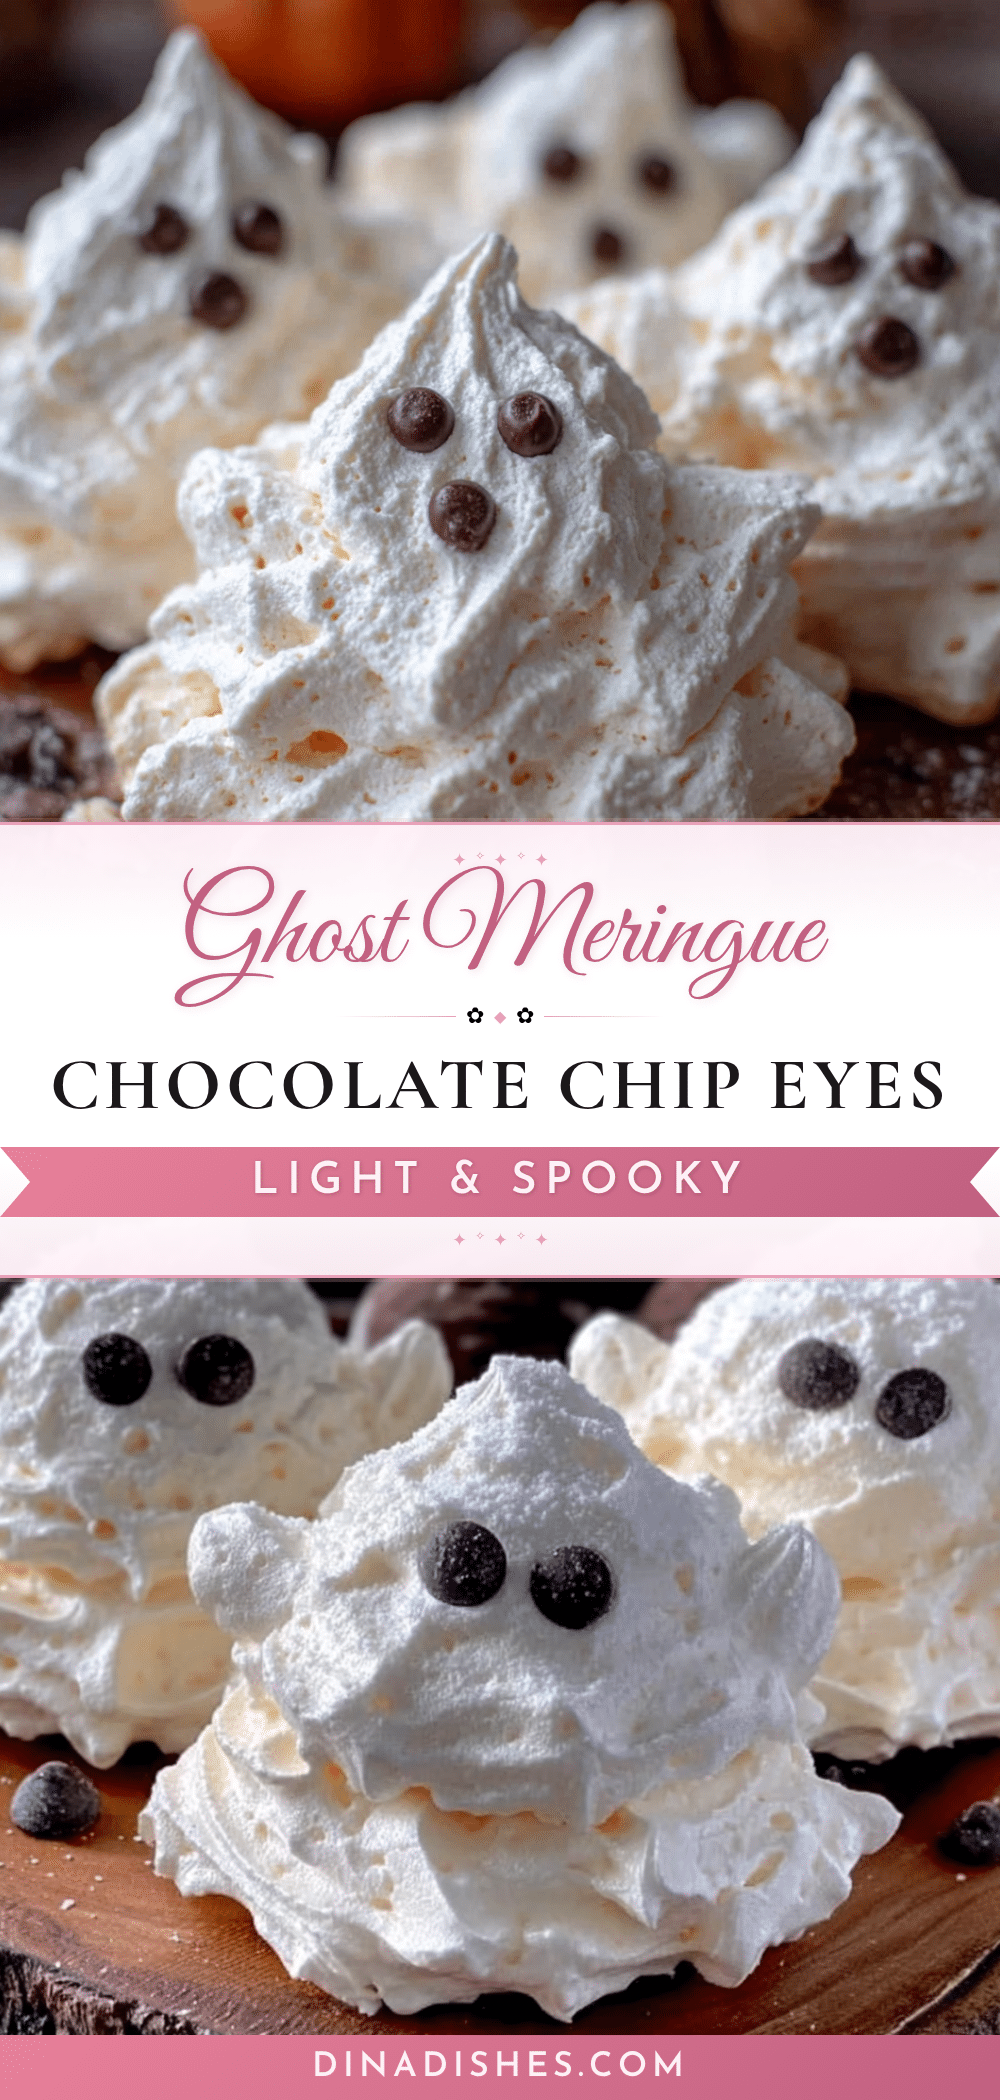
Light Ghost Meringue Cookies with Easy Chocolate Chip Eyes
Light, airy meringue cookies shaped like ghosts with mini chocolate chip eyes. A quick and easy Halloween treat made with just four simple ingredients, perfect for last-minute parties or festive baking.
- Prep Time: 15 minutes
- Cook Time: 1 hour 15 minutes
- Total Time: 1 hour 30 minutes
- Yield: 24 cookies 1x
- Category: Dessert
- Cuisine: American
Ingredients
- 3 large egg whites, room temperature
- 3/4 cup (150 grams) granulated sugar
- 1 teaspoon vanilla extract
- 1/4 cup (45 grams) mini chocolate chips, plus extra for decorating
- 1/4 teaspoon cream of tartar (optional but recommended)
- A tiny pinch of salt
Instructions
- Preheat your oven to 200°F (95°C). Line a baking sheet with parchment paper or a silicone mat.
- Separate the eggs carefully, ensuring no yolk gets into the whites. Let the egg whites sit at room temperature for about 10 minutes.
- Add the cream of tartar and salt to the egg whites. Begin whipping on medium speed until frothy and bubbly—about 1 minute.
- With the mixer running, add the sugar one tablespoon at a time. Continue whipping on medium-high speed.
- Whip for about 5-7 minutes total until stiff, glossy peaks form. The mixture should be thick and white.
- Beat in the vanilla extract on low speed, just until combined.
- Fit a piping bag with a round tip or snip the corner of a zip-top bag. Fill the bag with the meringue mixture.
- Pipe small ghost shapes onto the prepared baking sheet: start with a round base, then pull upward to create a little peak for the head. Make them about 2 inches tall and 1½ inches wide, leaving about 1 inch between each.
- Gently press two mini chocolate chips into each ghost for eyes, placing them slightly unevenly for a whimsical look.
- Bake for 1 hour to 1 hour 15 minutes, until the cookies are dry to the touch and easily lift off the parchment paper.
- Turn off the oven and leave the cookies inside with the door cracked open for about 30 minutes to dry out completely.
- Transfer to a cooling rack and cool completely before serving.
Notes
For best results, ensure the bowl and whisk are completely clean and grease-free. Humidity can affect meringue; on humid days, bake a little longer. Store in an airtight container at room temperature for up to 5 days. Do not refrigerate. Freeze for up to 3 months.
Nutrition
- Serving Size: 1 cookie
- Calories: 3540
- Sugar: 7
- Sodium: 10
- Fat: 0.5
- Carbohydrates: 8
- Protein: 1
Keywords: ghost cookies, meringue cookies, Halloween cookies, easy Halloween treats, light cookies, chocolate chip meringue, spooky cookies, last-minute Halloween