The woman at the farmers’ market booth watched me grab my third bag of shredded cheddar. She didn’t say anything at first, just smiled a little and kept arranging her bundles of fresh thyme. Then she leaned over and said, “You know, that cheese wants to be a straw, not a slab.” I laughed, thinking she was joking about some kind of cheese sculpture. But she was serious. She pulled out a small bag from under her table — twisted, golden, salty looking sticks — and handed one to me. It was a cheese straw. Crunchy, flaky, and honestly, life-changing in a way I wasn’t prepared for on a random Saturday morning. I asked her for the recipe, and she shrugged and said, “It’s just cheese and dough. But the trick is the twist.”
That conversation stuck with me, partly because of how casually she shared it. She wasn’t trying to teach me a secret family heirloom. She was just passing along something good, like you’d hand a neighbor a tomato from your garden. I made her version a few times, then started tweaking it for my own kitchen chaos. I added a pinch of cayenne, swapped in some Parmesan, and eventually realized these things were perfect for Halloween. You know that feeling when you need a party snack that looks impressive but takes almost no effort? That’s these cheese straws. They look like little witchy fingers or spooky twisted wands, but they come together in about 20 minutes flat.
I’ve probably made these for every Halloween gathering for the last five years. The first time, I burned a batch because I got distracted by a scary movie. Honestly, the slightly darker ones still got eaten — people just called them “extra crispy.” That’s the kind of forgiving recipe this is. Whether you’re throwing a last-minute costume party or just want something fun to snack on while handing out candy, these quick spooky cheese straws deliver. Maybe you’ve been there — standing in the kitchen at 5 PM on Halloween, realizing you have nothing to serve. This is your solution. Let me tell you, they disappear fast.
Why You’ll Love This Recipe
I’ve tested this recipe more times than I care to count. Some batches came out too greasy. Some were too bland. But this version? It’s the Goldilocks of cheese straws. Here’s why this one works when others don’t:
- Quick & Easy: From fridge to table in under 30 minutes. No chilling time, no complicated folds. Just mix, roll, twist, and bake. Perfect for that 5 PM Halloween panic.
- Simple Ingredients: You probably have everything already. Butter, flour, cheese, salt. That’s it. No weird specialty items that cost $12 and sit in your pantry forever.
- Perfect for Halloween Parties: They look spooky without being over-the-top. Kids love them. Adults love them. Even that one guest who “doesn’t do themed food” will grab three.
- Crowd-Pleaser: I’ve brought these to potlucks, office parties, and neighborhood gatherings. They always get the same reaction — someone takes a bite, pauses, and says, “Wait, what’s in these?” Then they go back for more.
- Unbelievably Delicious: The texture is what gets you. Crispy on the outside, slightly tender inside, with that salty, cheesy flavor that makes you close your eyes after the first bite.
What makes this recipe different from the rest is the technique. Most cheese straw recipes use puff pastry, which is fine but takes forever to thaw and can get soggy. This version uses a simple pastry dough that comes together in one bowl. The twist is what creates those flaky layers without any complicated laminating. It’s comfort food reimagined for busy weeknights — or in this case, busy Halloween evenings. Perfect for impressing guests without stress, or turning a simple snack into something memorable.
What Ingredients You Will Need
This recipe uses simple, mostly pantry-staple ingredients to deliver that bold, cheesy flavor and satisfying crunch. The magic is in how they come together, not in fancy components.
For the Dough
- 1 ½ cups all-purpose flour (spooned and leveled — don’t scoop straight from the bag or you’ll get too much)
- ½ teaspoon salt (I use fine sea salt; table salt works too, just reduce to ¼ teaspoon)
- ¼ teaspoon cayenne pepper (optional, but gives a nice little warmth without being spicy)
- ½ cup cold unsalted butter, cut into small cubes (Kerrygold is my go-to for flavor, but any good butter works)
- ¼ cup cold water (ice water is best — keep it in the fridge until ready)
For the Cheese Coating
- 1 ½ cups sharp cheddar cheese, finely shredded (buy a block and shred it yourself — pre-shredded has anti-caking agents that affect texture)
- ¼ cup grated Parmesan cheese (the kind in the green can works fine, but fresh grated is even better)
- ½ teaspoon paprika (smoked paprika adds a deeper flavor if you have it)
- ¼ teaspoon garlic powder (not garlic salt — we already have enough salt)
For the Spooky Look
- Optional: black sesame seeds or poppy seeds (for a “dirt” or “spider egg” effect on top)
- Optional: a few drops of orange food coloring (if you want a more festive color; I skip this most years)
Ingredient Selection Tips: For the best flavor, use a sharp cheddar — the sharper, the better. Mild cheddar won’t give you that punchy cheesy taste. I’ve tried this with white cheddar too, and it works beautifully. If you’re dairy-sensitive, you can swap in a good quality dairy-free cheddar shred. Just know the texture will be slightly less crisp. For a gluten-free version, use a 1:1 gluten-free flour blend — I’ve had good luck with King Arthur’s Measure for Measure.
Substitution Guidance: No cayenne? Use black pepper or a pinch of chili flakes. Out of Parmesan? Add more cheddar. Want it extra spicy? Add a few drops of hot sauce to the water before mixing. The recipe is forgiving, which is exactly what you need on a busy Halloween night.
Equipment Needed
You don’t need much for this recipe, which is part of the beauty. Here’s what you’ll want:
- Large mixing bowl (any bowl works, but a wide one makes mixing easier)
- Pastry cutter or two forks (for cutting butter into flour; your hands work too, but they’ll warm the butter)
- Rolling pin (a wine bottle works in a pinch — I’ve done it)
- Sharp knife or pizza cutter (for cutting the dough into strips)
- Baking sheet (lined with parchment paper or a silicone mat)
- Pastry brush (for the egg wash; a clean paintbrush works too)
Budget-Friendly Options: If you don’t have a pastry cutter, two knives work just as well. No rolling pin? A smooth water bottle or even a clean can of beans will do the job. I’ve made these in a friend’s kitchen with a wine bottle and a butter knife, and they turned out perfectly. The key is keeping everything cold, not having fancy tools.
Personal Note: I once made these using only a fork and my hands because I’d moved and couldn’t find my pastry cutter. It took a little longer, but the result was the same. Don’t let missing equipment stop you.
Preparation Method
Let’s get these spooky cheese straws made. This whole process takes about 25 minutes from start to finish. Set a timer if you tend to get distracted — I’ve learned that lesson the hard way.
- Preheat your oven to 400°F (200°C). Line a baking sheet with parchment paper. Do this first so the oven is hot when you’re ready.
- Mix the dry ingredients. In your large bowl, whisk together the flour, salt, cayenne (if using), and paprika. Make sure the cayenne is evenly distributed — nobody wants a bite that’s pure heat.
- Cut in the butter. Add the cold butter cubes to the flour mixture. Using your pastry cutter or forks, cut the butter into the flour until it looks like coarse meal with some pea-sized butter pieces remaining. This takes about 2 minutes. The butter pieces are what create flakiness, so don’t overdo it. You want visible butter bits.
- Add the water. Sprinkle the cold water over the flour-butter mixture. Stir with a fork until the dough just comes together. It will look shaggy and not perfectly smooth — that’s correct. If it seems too dry, add another tablespoon of cold water. If it’s too wet, add a sprinkle of flour.
- Bring it together. Turn the dough out onto a lightly floured surface. Gently knead it 3-4 times, just until it forms a cohesive disk. Do not overwork it — warm hands will melt the butter and make the straws tough. Wrap the disk in plastic wrap and refrigerate for 10 minutes. (Yes, this is the only chill time. I know, it’s a miracle.)
- Prepare the cheese coating. While the dough chills, mix the shredded cheddar, Parmesan, and garlic powder in a shallow bowl or plate. Set aside.
- Roll out the dough. On a lightly floured surface, roll the chilled dough into a rectangle about ¼-inch thick. Don’t stress about perfect edges — rustic is better for Halloween anyway. Aim for roughly 10×12 inches.
- Add the cheese. Sprinkle about half of the cheese mixture evenly over the dough. Gently press it into the dough with your rolling pin or hands. Flip the dough over and repeat with the remaining cheese on the other side. Press gently so the cheese sticks.
- Cut into strips. Using a sharp knife or pizza cutter, cut the dough into strips about ½-inch wide and 6-8 inches long. You’ll get about 20-24 strips depending on your rectangle size.
- Twist the straws. Pick up each strip by both ends and twist gently in opposite directions. Place them on the prepared baking sheet, pressing the ends down slightly so they don’t untwist. Space them about 1 inch apart — they’ll spread a little.
- Bake. Bake for 12-15 minutes, until the edges are golden brown and the cheese is bubbly. The smell in your kitchen right now is absolutely intoxicating. Halfway through, rotate the baking sheet for even browning.
- Cool. Let the cheese straws cool on the baking sheet for 5 minutes, then transfer to a wire rack. They’ll crisp up as they cool. If you eat one immediately (and you will), it’ll be softer — still delicious, but the crunch comes after cooling.
Sensory Cues: The dough should feel cool and slightly tacky but not sticky. When you twist the strips, they should hold their shape without cracking. The cheese should look melted and slightly browned around the edges when done. You’ll smell that nutty, toasty cheese aroma about 2 minutes before they’re ready.
Cooking Tips & Techniques
I’ve made this recipe probably forty times by now. Here’s what I’ve learned the hard way so you don’t have to.
Keep everything cold. This is the number one rule for flaky cheese straws. Cold butter creates steam pockets in the oven, which gives you those delicate layers. If your kitchen is warm, pop the dough back in the fridge for 5 minutes between steps. I once made these on a hot August day and the dough turned into a greasy mess — learned that lesson fast.
Don’t over-twist. One or two gentle twists is enough. Over-twisting causes the dough to crack and break apart in the oven. If a strip does break, just press it back together — it’ll still taste great, it just won’t look as pretty. I call those “spooky broken bones” and they’re always the first ones eaten.
Space them properly. These spread more than you think. I crowded a batch once and ended up with one giant cheese straw blob. Still tasted incredible, but it wasn’t exactly Instagram-worthy. Give them room to breathe.
Watch the last 2 minutes. Ovens vary wildly. Your cheese straws might be done at 12 minutes or need 15. The difference between perfect and burnt is about 30 seconds. Check at 12 minutes, then every minute after. You’re looking for golden edges, not dark brown.
Make-ahead tip: You can prepare the dough up to 2 days ahead and keep it wrapped in the fridge. Just roll, cut, and bake when you’re ready. You can also freeze unbaked twisted straws on a baking sheet, then transfer to a freezer bag. Bake from frozen, adding 2-3 minutes to the time.
My biggest failure: I once forgot the salt. The cheese straws were edible but bland — like eating cardboard with a hint of cheese. Salt is crucial for bringing out the flavor. Don’t skip it.
Variations & Adaptations
This recipe is a great base for experimentation. Here are some variations I’ve tried and loved:
Spicy Ghost Pepper Straws
Add ½ teaspoon of cayenne and ¼ teaspoon of ghost pepper powder to the flour mixture. These are not for the faint of heart. I brought these to a Halloween party and watched a friend turn bright red. He ate four anyway. Pair with a cooling dip like ranch or sour cream.
Herby Witch’s Brew Straws
Add 1 tablespoon of dried rosemary and 1 teaspoon of dried thyme to the cheese mixture. The herbs give an earthy, savory note that’s perfect for fall. I made these for a Thanksgiving-adjacent gathering and they disappeared faster than the turkey.
Everything Bagel Mummy Straws
After twisting, brush the straws with a little beaten egg and sprinkle with everything bagel seasoning. The sesame, poppy, garlic, and onion flavors pair surprisingly well with cheddar. These taste like a bagel and cheese straw had a delicious baby.
Gluten-Free Version
Use a 1:1 gluten-free flour blend. I’ve tested this with Bob’s Red Mill and King Arthur — both work well. The texture will be slightly more crumbly, so handle gently. Add an extra tablespoon of water if the dough feels dry.
Dairy-Free Version
Use vegan butter and dairy-free cheddar shreds. Miyoko’s or Violife work best for texture. The flavor won’t be as sharp, but it’s still satisfying. Add a pinch of nutritional yeast for extra cheesiness.
My personal favorite variation: I once added a teaspoon of truffle oil to the dough. It was absurdly indulgent and completely unnecessary, but wow. If you want to impress someone, truffle cheese straws are the way to go.
Serving & Storage Suggestions
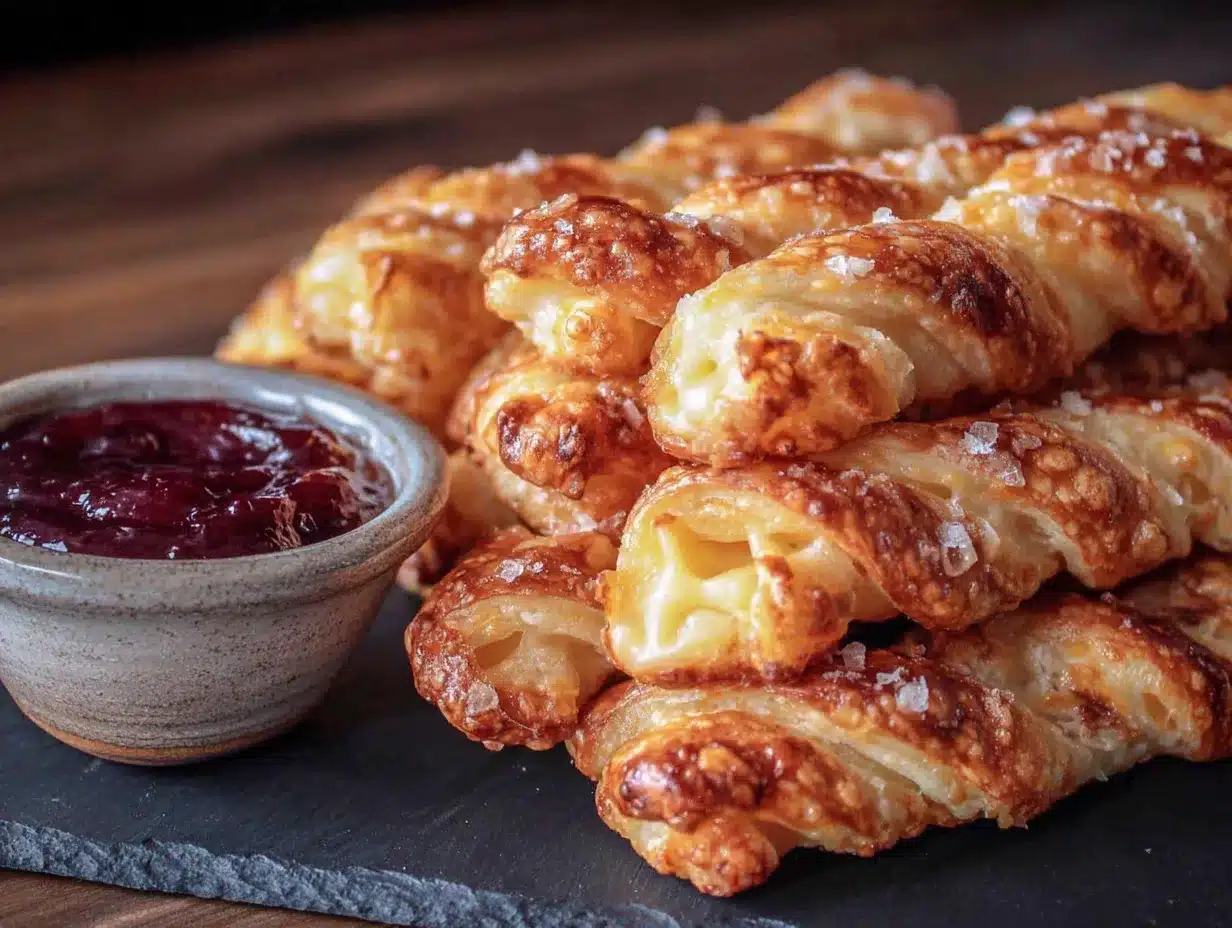
These cheese straws are best served at room temperature, which makes them perfect for parties. Arrange them on a platter standing upright in a jar or cup for a “witch’s broom” look. Or lay them out in a circle around a bowl of dip — I like a simple sriracha mayo or roasted red pepper dip.
Complementary Dishes: These pair beautifully with a bowl of tomato soup for a cozy Halloween dinner. They’re also great alongside a charcuterie board — the salty, cheesy crunch contrasts nicely with cured meats and sweet fruits. For a drink, try an amber ale or a dry cider. The bubbles cut through the richness.
Storage: Store leftover cheese straws in an airtight container at room temperature for up to 5 days. Do not refrigerate — they’ll absorb moisture and lose their crunch. If they do soften, pop them in a 300°F oven for 3-4 minutes to re-crisp.
Freezing: Baked cheese straws freeze beautifully. Place them in a single layer in a freezer bag, squeeze out the air, and freeze for up to 3 months. Thaw at room temperature for 15 minutes before serving. Or reheat directly from frozen at 350°F for 5 minutes.
Flavor Development: Honestly, these taste even better the next day. The flavors meld together overnight, and the texture stays crisp if stored properly. I often make them a day ahead for parties — one less thing to worry about on the day.
Nutritional Information & Benefits
Let’s be real — these are a treat, not a health food. But here’s what you’re getting per serving (about 2 straws):
- Calories: Approximately 180-200
- Protein: 6-7 grams (thanks to the cheese)
- Fat: 13-15 grams (mostly from butter and cheese)
- Carbohydrates: 12-14 grams
- Calcium: About 15% of your daily value
Health Benefits: Cheese provides calcium and protein, which support bone health and muscle function. Butter contains fat-soluble vitamins A, D, E, and K. The cayenne pepper (if you use it) contains capsaicin, which may boost metabolism slightly. But honestly, the biggest benefit here is the joy of eating something delicious with people you like.
Dietary Considerations: This recipe contains gluten and dairy. For gluten-free and dairy-free adaptations, see the variations section above. It is nut-free, egg-free (unless you use an egg wash), and can be made vegetarian.
Personal Wellness Perspective: I believe in balance. These cheese straws aren’t everyday food. They’re for Halloween parties, cozy gatherings, and moments when you want something special. Enjoy them without guilt, and maybe have a salad for lunch the next day. That’s my approach anyway.
Conclusion
These quick spooky cheese straws have become a Halloween tradition in my house, and I think they deserve a spot in yours too. They’re fast, forgiving, and genuinely impressive — the kind of recipe that makes people think you spent hours when you really spent 25 minutes. The woman at the farmers’ market would probably approve of how I’ve adapted her casual recipe into something that brings so much joy every October.
I encourage you to make these your own. Add extra spice, swap the cheese, shape them into little pretzel knots instead of straws. The recipe is a starting point, not a rulebook. And if you burn a batch? Call them “charred witch fingers” and watch them disappear anyway. That’s the Halloween spirit.
I’d love to hear how yours turn out. Drop a comment below with your favorite variation or tag me in your spooky cheese straw photos. Did you make them extra spicy? Did your kids help twist them? Did you eat the whole batch before the party started? (No judgment here — I’ve done it too.) Happy Halloween, and happy snacking!
Frequently Asked Questions
Can I make these cheese straws ahead of time?
Absolutely. You can prepare the dough up to 2 days ahead and keep it refrigerated. Or bake them fully and store in an airtight container at room temperature for up to 5 days. They actually taste better the next day.
Why did my cheese straws turn out greasy?
This usually happens when the butter is too warm when mixing, or if the oven temperature is too low. Make sure your butter is cold straight from the fridge, and bake at 400°F. Also, using pre-shredded cheese can contribute to greasiness because of the anti-caking agents.
Can I use puff pastry instead of making dough from scratch?
Yes, you can. Thaw a sheet of puff pastry, sprinkle with cheese, cut into strips, and twist. Bake at 400°F for 12-15 minutes. The texture will be lighter and flakier, but the flavor won’t be as rich. Both versions are delicious in different ways.
How do I get the perfect twist without breaking the dough?
If your dough is cracking when you twist, it’s either too dry or too warm. Add a tiny bit more water next time, or chill the dough for an extra 5 minutes. Also, twist gently — one full rotation is usually enough. Think of it like wringing out a dish towel, but very softly.
Can I freeze unbaked cheese straws?
Yes! Place the twisted, unbaked straws on a baking sheet and freeze until solid (about 1 hour). Transfer to a freezer bag. When ready to bake, place them frozen on a lined baking sheet and add 2-3 minutes to the baking time. No need to thaw first.
Pin This Recipe!
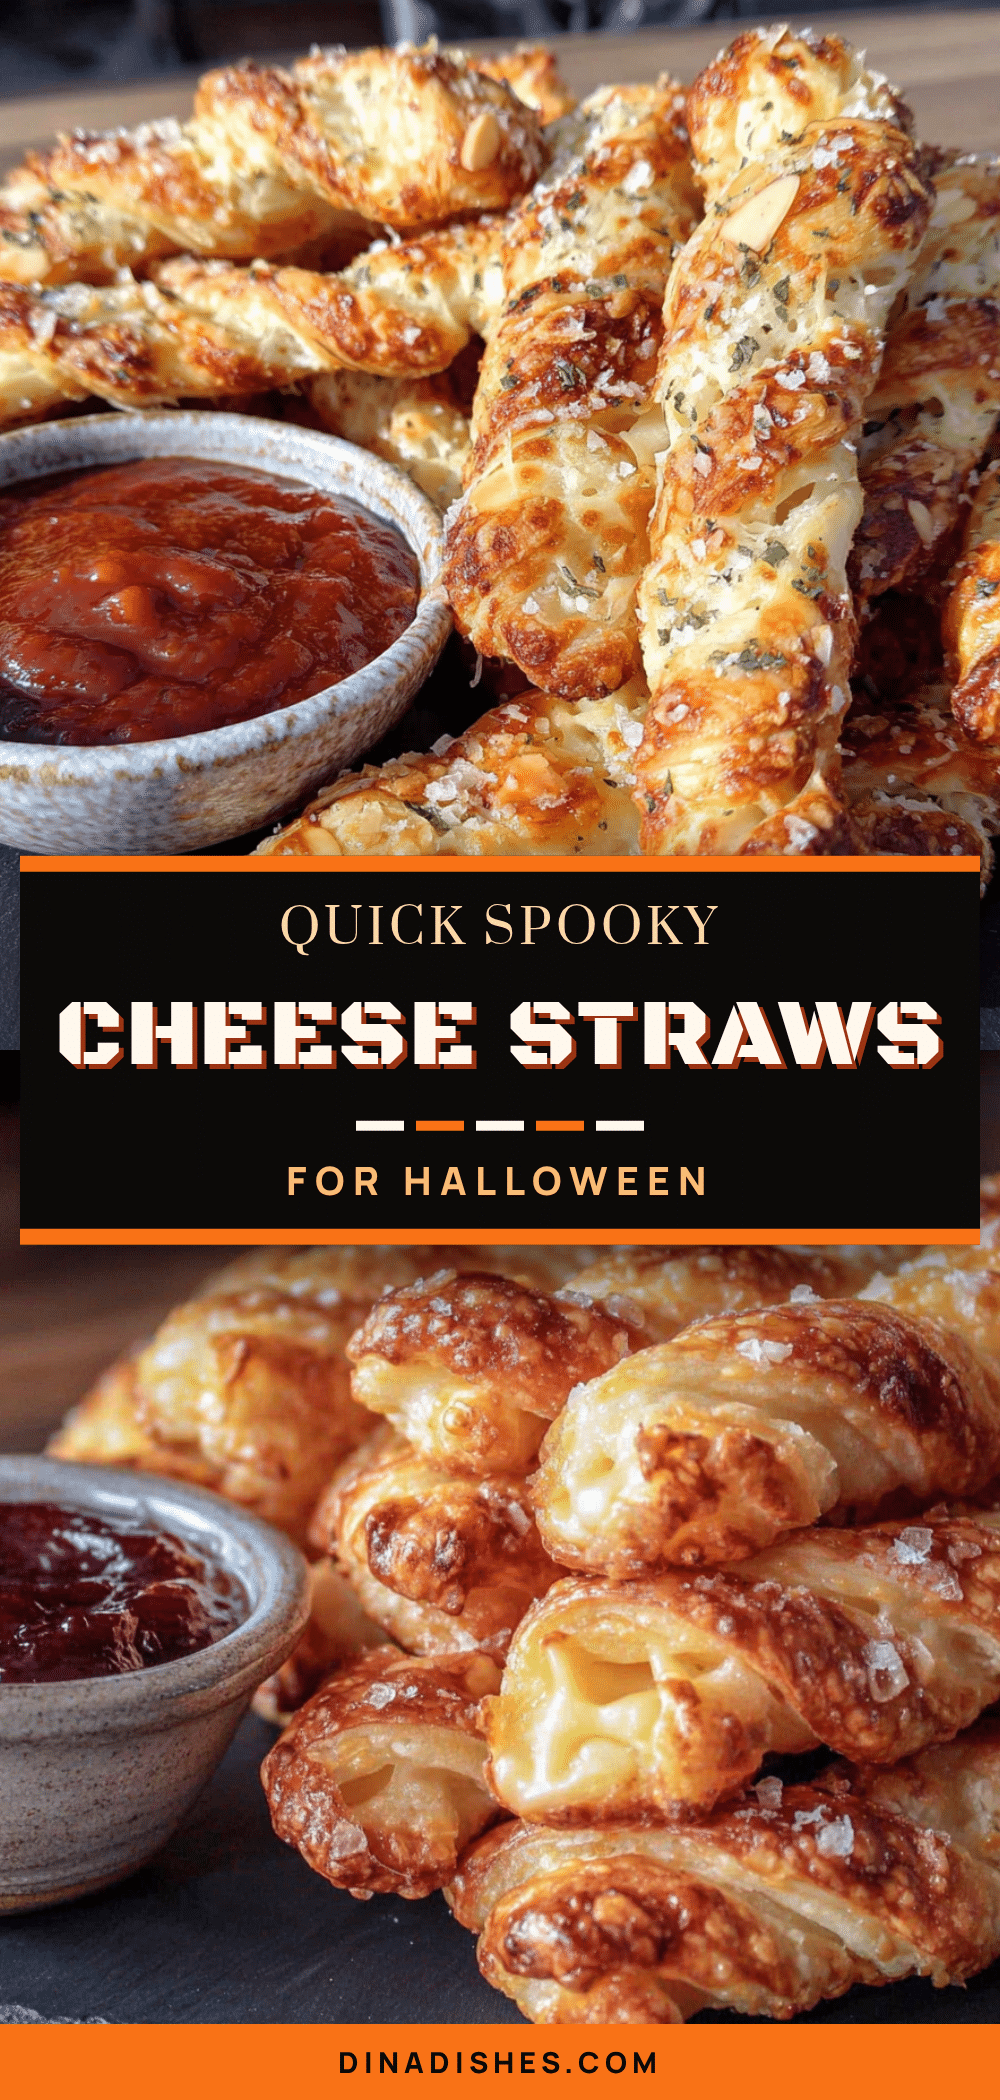
Quick Spooky Cheese Straws: Easy Halloween Appetizer
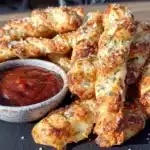
These quick spooky cheese straws are a perfect Halloween appetizer that comes together in about 25 minutes. With a simple pastry dough and a cheesy coating, they look like witchy fingers or spooky twisted wands and are always a crowd-pleaser.
- Prep Time: 15 minutes
- Cook Time: 12-15 minutes
- Total Time: 25-30 minutes
- Yield: 10-12 servings (about 2 straws per serving) 1x
- Category: Appetizer
- Cuisine: American
Ingredients
- 1 ½ cups all-purpose flour (spooned and leveled)
- ½ teaspoon fine sea salt (or ¼ teaspoon table salt)
- ¼ teaspoon cayenne pepper (optional)
- ½ cup cold unsalted butter, cut into small cubes
- ¼ cup cold water (ice water preferred)
- 1 ½ cups sharp cheddar cheese, finely shredded
- ¼ cup grated Parmesan cheese
- ½ teaspoon paprika (smoked paprika preferred)
- ¼ teaspoon garlic powder
- Optional: black sesame seeds or poppy seeds for topping
- Optional: a few drops of orange food coloring
Instructions
- Preheat your oven to 400°F (200°C). Line a baking sheet with parchment paper.
- In a large bowl, whisk together the flour, salt, cayenne (if using), and paprika.
- Add the cold butter cubes to the flour mixture. Using a pastry cutter or forks, cut the butter into the flour until it looks like coarse meal with some pea-sized butter pieces remaining (about 2 minutes).
- Sprinkle the cold water over the flour-butter mixture. Stir with a fork until the dough just comes together. It will look shaggy. If too dry, add another tablespoon of cold water; if too wet, add a sprinkle of flour.
- Turn the dough out onto a lightly floured surface. Gently knead 3-4 times until it forms a cohesive disk. Do not overwork. Wrap in plastic wrap and refrigerate for 10 minutes.
- While the dough chills, mix the shredded cheddar, Parmesan, and garlic powder in a shallow bowl or plate. Set aside.
- On a lightly floured surface, roll the chilled dough into a rectangle about ¼-inch thick (roughly 10×12 inches).
- Sprinkle about half of the cheese mixture evenly over the dough. Gently press it into the dough with a rolling pin or hands. Flip the dough over and repeat with the remaining cheese on the other side. Press gently.
- Using a sharp knife or pizza cutter, cut the dough into strips about ½-inch wide and 6-8 inches long. You’ll get about 20-24 strips.
- Pick up each strip by both ends and twist gently in opposite directions. Place on the prepared baking sheet, pressing the ends down slightly. Space them about 1 inch apart.
- Bake for 12-15 minutes, until the edges are golden brown and the cheese is bubbly. Halfway through, rotate the baking sheet for even browning.
- Let the cheese straws cool on the baking sheet for 5 minutes, then transfer to a wire rack. They will crisp up as they cool.
Notes
Keep everything cold for flaky layers. Do not over-twist the strips. Watch the last 2 minutes of baking to avoid burning. The dough can be made up to 2 days ahead and refrigerated. Unbaked twisted straws can be frozen and baked directly from frozen, adding 2-3 minutes to the baking time.
Nutrition
- Serving Size: 2 straws
- Calories: 180200
- Sugar: 0.5
- Sodium: 250300
- Fat: 1315
- Saturated Fat: 810
- Carbohydrates: 1214
- Fiber: 0.5
- Protein: 67
Keywords: cheese straws, Halloween appetizer, quick snack, party food, cheddar cheese straws, spooky snacks