I was standing in the baking aisle last Tuesday, staring at a bag of pecans that cost more than my lunch for the whole week, when a specific memory hit me — and suddenly I was seven years old at my Aunt Ruth’s tiny kitchen table, the one with the wobbly leg she always fixed with a folded napkin. She had just pulled a pan of pecan pie bars out of the oven, and the whole room smelled like brown sugar and butter and something I couldn’t name but desperately wanted to taste. I remember watching her pour the filling, thinking it looked like liquid gold, and she caught me staring and laughed — that wheezy laugh she had — and said, “Don’t you worry, honey, there’s plenty for everyone.” Except there never really was plenty, was there? She made one pie for eight people, and we all got slivers so thin you could almost see through them.
That’s the thing about pecan pie — it’s a holiday dessert, a special occasion thing, and it makes way too much for two people. You either eat it for a week straight or you throw half of it away, and honestly, neither option feels great. I mean, I love pecan pie as much as the next person, but day four of leftover pie is a sad place to be. So I started playing around in my kitchen last fall, trying to figure out how to get that same sticky-sweet-nutty satisfaction without committing to a full pie pan. These budget-friendly pecan pie bars for two were born from that experiment, and let me tell you — they hit every single note the original does, but they don’t leave you with a fridge full of leftovers or a dent in your grocery budget. Maybe you’ve been there too, standing in the store wondering if you should just skip dessert because the ingredients cost too much for just one pie.
These bars use a fraction of the ingredients, come together in under an hour, and taste like you spent way more time and money than you actually did. That’s my kind of dessert.
Why You’ll Love This Recipe
I’ve tested this recipe about six times now, tweaking the crust thickness and the filling ratio until it felt exactly right. Here’s what makes these pecan pie bars worth every single minute in the kitchen:
- Quick & Easy : From start to finish, you’re looking at about 45 minutes. No complicated pastry techniques, no chilling dough for hours — just mix, press, pour, and bake.
- Simple Ingredients : You probably have most of these things already. Butter, flour, sugar, eggs — the usual suspects. The only special purchase is pecans, and you only need a cup of them.
- Perfect for Weeknights : These aren’t just for holidays. They’re small enough to make on a random Tuesday when you just want something sweet after dinner.
- No Waste : This is the whole point. You get exactly four bars — two for tonight, two for tomorrow — and then you’re done. No sad leftover pie sitting in your fridge for a week.
- Budget-Friendly : By scaling down the recipe, you save money on ingredients. A full pecan pie can easily cost $15 to make. These bars cost about $4 to $5, depending on where you buy your pecans.
- Unbelievably Delicious : The crust is buttery and crisp, the filling is rich and gooey, and the pecans toast up perfectly on top. It’s comfort food in bar form.
What makes this recipe different from the usual pecan pie bars is the crust-to-filling ratio. Most bar recipes give you a thick, bready base that overpowers the filling. I wanted something that felt more like actual pecan pie — a thin, crisp crust that supports the filling without stealing the show. After a few failed attempts (one crust was so hard I could have used it as a frisbee), I landed on this version, and it’s the one I keep coming back to.
These bars are the kind of dessert that makes you close your eyes after the first bite. They’re rich enough to feel indulgent but light enough that you don’t regret eating two. Perfect for date night, a quiet evening at home, or honestly, just because you deserve a little something sweet.
What Ingredients You Will Need
This recipe uses simple, everyday ingredients to deliver that classic pecan pie flavor without any fuss. Most of these are pantry staples, so you might not even need a grocery run.
For the Crust
- All-purpose flour, 1/2 cup (60g) — regular white flour works perfectly here. No need for anything fancy.
- Unsalted butter, 3 tablespoons (42g), cold and cut into small cubes — cold butter is key for a flaky, tender crust. I use Kerrygold when I can find it on sale, but any good butter works.
- Powdered sugar, 1 tablespoon (8g) — this gives the crust a slightly sweeter, more tender texture than granulated sugar would.
- Salt, a pinch — just enough to balance the sweetness.
- Ice water, 1 to 2 tablespoons (15-30ml) — add slowly, just until the dough comes together. You might not need all of it.
For the Filling
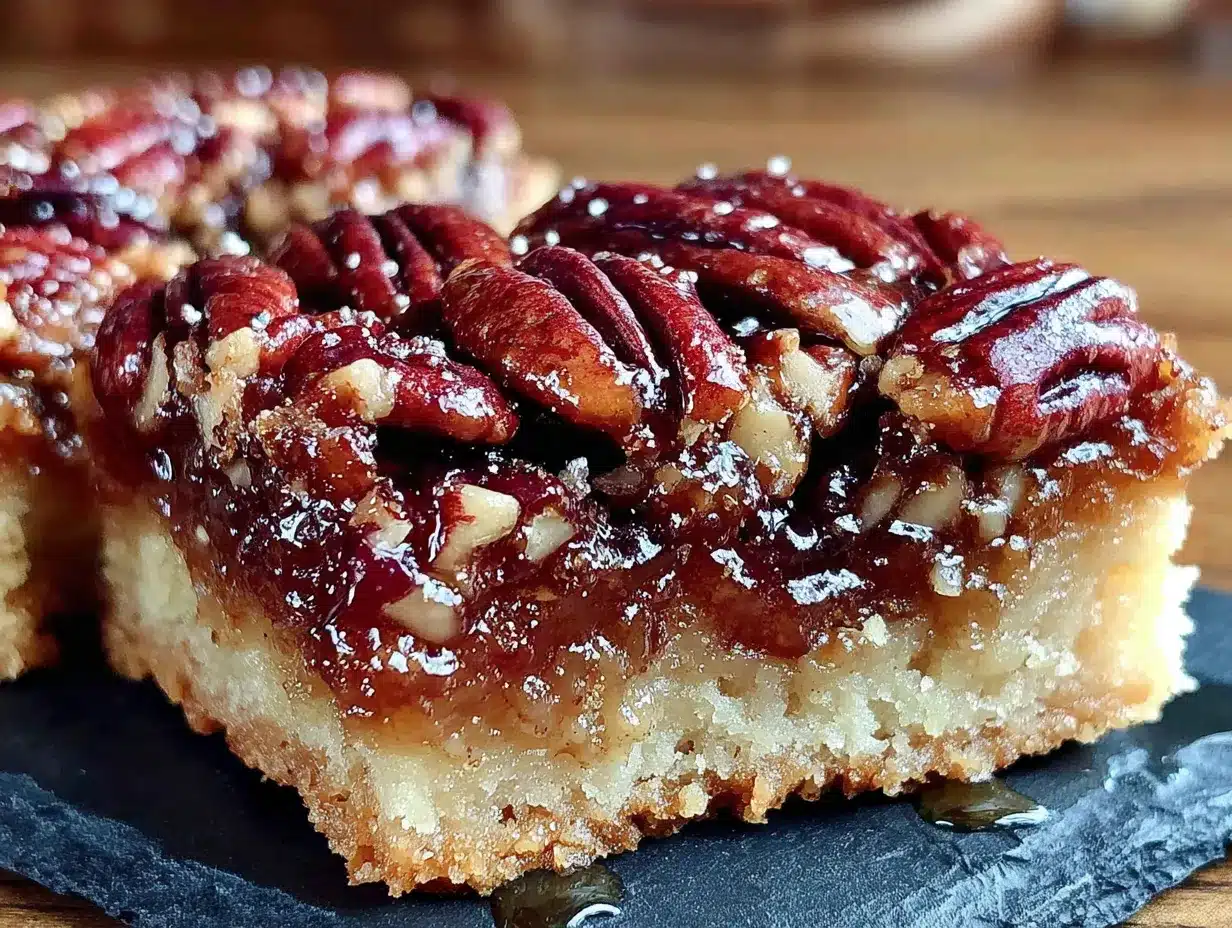
- Pecans, 1 cup (100g), roughly chopped — buy pecan halves and chop them yourself for the best texture and flavor. Pre-chopped pecans are often stale and uneven. If you’re on a tight budget, check the bulk bins — they’re usually cheaper than the bagged ones.
- Light corn syrup, 1/4 cup (60ml) — this is what gives pecan pie its signature gooey texture. I’ve tried substituting honey and maple syrup, but honestly, corn syrup works best here for texture. (Use dark corn syrup if you want a deeper, richer flavor.)
- Brown sugar, 1/4 cup (50g), packed — light or dark brown sugar both work. Dark brown sugar gives a more molasses-y flavor that I personally love.
- Unsalted butter, 2 tablespoons (28g), melted — adds richness to the filling.
- Large egg, 1 — this binds the filling and gives it that custard-like texture. Make sure your egg is at room temperature for easier mixing.
- Vanilla extract, 1/2 teaspoon — pure vanilla extract is worth the splurge here. Imitation vanilla works in a pinch, but the flavor won’t be as warm and complex.
- Salt, a pinch — salt is crucial in pecan pie. It cuts the sweetness and makes the flavors pop.
Ingredient Substitutions
- No corn syrup? You can use a combination of 2 tablespoons honey and 2 tablespoons maple syrup, but the texture will be slightly less gooey and more liquid. Let the bars cool completely before cutting — they’ll be softer.
- Need it gluten-free? Swap the all-purpose flour for a 1-to-1 gluten-free baking flour blend. I’ve tested this with Bob’s Red Mill, and it works well.
- Out of brown sugar? Mix 1/4 cup white sugar with 1 teaspoon molasses. It’s not exactly the same, but it gets you close.
One thing I learned the hard way — don’t skip the salt. I made a batch without it once, and the bars tasted flat and one-dimensional. That little pinch makes everything taste more like itself.
Equipment Needed
You don’t need a lot of fancy equipment for these bars, which is another reason I love this recipe.
- Small baking dish (6-inch square or similar) — I use a 6-inch ceramic baking dish I found at a thrift store for two dollars. A small loaf pan also works, but the bars will be thicker and可能需要 a few extra minutes of baking time. If you don’t have a small dish, you can use a standard 8×8 pan and just double the recipe — but then you’re back to having leftovers, which kind of defeats the purpose.
- Mixing bowls (one small, one medium) — nothing special. I use the same bowls I use for everything else.
- Pastry cutter or fork — for cutting the butter into the flour. If you have cold hands, you can also just use your fingertips. The goal is to get pea-sized crumbs of butter coated in flour.
- Measuring cups and spoons — accurate measurements matter more in small-batch baking. A little too much flour and the crust gets tough.
- Parchment paper — line your dish with parchment, leaving some overhang for easy removal. Trust me on this. The first time I made these, I didn’t use parchment, and I spent twenty minutes chiseling bars out of the dish.
- Rolling pin (optional) — you can press the crust into the dish with your fingers, so you don’t strictly need a rolling pin. But if you want an even crust, a small rolling pin helps.
If you bake often, you probably already have everything on this list. If you’re new to baking, don’t go out and buy a bunch of specialized tools. A fork, a bowl, and your hands are really all you need.
Preparation Method
Let’s get to the good part. Here’s how to make these budget-friendly pecan pie bars for two, step by step.
Step 1: Preheat and Prep
Preheat your oven to 350°F (175°C). Line your small baking dish with parchment paper, leaving about an inch of overhang on two opposite sides. This will make it much easier to lift the bars out later. Lightly grease the parchment with a tiny bit of butter or non-stick spray.
Step 2: Make the Crust
In a small mixing bowl, whisk together 1/2 cup (60g) all-purpose flour, 1 tablespoon (8g) powdered sugar, and a pinch of salt. Add 3 tablespoons (42g) of cold, cubed butter. Use a pastry cutter or a fork to cut the butter into the flour mixture until it looks like coarse crumbs with some pea-sized butter pieces remaining. Drizzle in 1 tablespoon (15ml) of ice water and stir with a fork. The dough should start to clump together. If it seems dry, add another tablespoon of water, one teaspoon at a time. Don’t overwork it — you want it just barely holding together.
Step 3: Press the Crust
Transfer the dough to your prepared dish. Press it evenly into the bottom and about 1/4 inch up the sides. I use my fingers for this, but the bottom of a flat measuring cup works too if you want a super even surface. Prick the crust a few times with a fork to prevent it from puffing up while baking. Pop it in the preheated oven and bake for 12 to 14 minutes, until it’s lightly golden around the edges. Set it aside to cool slightly while you make the filling.
Step 4: Prepare the Pecans
While the crust bakes, roughly chop 1 cup (100g) of pecans. I like to leave some pieces a little bigger for texture. Spread the chopped pecans on a small baking sheet and toast them in the oven for 3 to 4 minutes, just until they smell fragrant. Watch them carefully — pecans burn fast. I may or may not have learned this the hard way. (Spoiler: I did.)
Step 5: Make the Filling
In a medium bowl, whisk together 1/4 cup (60ml) light corn syrup, 1/4 cup (50g) packed brown sugar, 2 tablespoons (28g) melted butter, 1 large egg, 1/2 teaspoon vanilla extract, and a pinch of salt. Whisk until everything is smooth and well combined. The mixture should be thick and glossy. Don’t over-whisk — you don’t want to incorporate too much air.
Step 6: Assemble
Sprinkle the toasted pecans evenly over the pre-baked crust. Pour the filling over the pecans, making sure it spreads out evenly. The pecans might float a little — that’s fine. Gently nudge them around with a spatula if you want them more evenly distributed.
Step 7: Bake
Bake the bars at 350°F (175°C) for 18 to 22 minutes. The filling should be set around the edges but still slightly jiggly in the center. It will continue to set as it cools. If the top starts browning too quickly, loosely tent the dish with foil for the last 5 minutes.
Step 8: Cool and Cut
Let the bars cool in the dish for at least 20 minutes. Then, using the parchment overhang, lift them out and transfer to a wire rack to cool completely. This is the hardest part — waiting. But if you cut them while they’re still warm, the filling will ooze everywhere, and you’ll end up with a delicious but messy situation. I speak from experience.
Once completely cool, cut into four equal bars. Or two big bars if you’re feeling generous with yourself. No judgment here.
Cooking Tips & Techniques
After making these bars more times than I care to count, here are the things I wish someone had told me from the start.
Don’t skip toasting the pecans. This is non-negotiable. Toasting brings out the natural oils in the nuts and gives them a deeper, almost buttery flavor. Raw pecans in the filling taste flat and a little bitter. Three minutes in the oven makes a world of difference.
Watch your crust. The first time I made these, I over-baked the crust because I got distracted by a phone call. It came out hard and crumbly, and the filling leaked through the cracks. Set a timer. Actually set two timers. Your future self will thank you.
Room temperature egg matters. Cold egg will seize up the butter in the filling and make it lumpy. Leave your egg on the counter for 15 minutes before you start, or place it in a bowl of warm water for 5 minutes. It’s a small step that makes a big difference in the texture.
Line your dish properly. I cannot stress this enough. Parchment paper with overhang is your best friend. The first batch I made without it ended up as pecan pie crumble because I couldn’t get the bars out in one piece. Delicious crumble, sure, but not what I was going for.
Let them cool completely. I know it’s tempting to dig in while they’re still warm, but the filling needs time to set. Warm pecan pie bars are runny and messy. Cool pecan pie bars are perfect little squares of joy. Patience pays off.
Use a sharp knife. When cutting the cooled bars, use a sharp, straight-edged knife and wipe it clean between cuts. This gives you clean edges instead of ragged, sticky ones. If your knife is dull, the filling will drag and smear.
Variations & Adaptations
One of the best things about this recipe is how easy it is to adapt. Here are some variations I’ve tried and loved.
Chocolate Pecan Bars: Sprinkle 2 tablespoons of mini chocolate chips over the crust before adding the pecans and filling. The chocolate melts into the filling and creates a fudgy layer. I made this version for a friend who claimed she didn’t like pecan pie, and she ate three bars.
Bourbon Maple Pecan Bars: Replace the corn syrup with 2 tablespoons maple syrup and add 1 tablespoon bourbon. Reduce the brown sugar to 3 tablespoons. The bourbon adds warmth and complexity, and the maple syrup gives it a fall-inspired twist. This is my go-to version for the holidays.
Gluten-Free Version: Use a 1-to-1 gluten-free flour blend in the crust. I’ve tested this with Cup4Cup and King Arthur’s gluten-free blend, and both worked well. The crust will be slightly more delicate, so handle it gently when pressing into the dish.
Less Sweet Version: If you prefer desserts that aren’t overly sweet, reduce the brown sugar to 3 tablespoons and add an extra pinch of salt. You can also swap the corn syrup for a combination of 2 tablespoons honey and 2 tablespoons water, though the texture will be slightly different.
Nut-Free Option: Replace the pecans with roasted sunflower seeds or pumpkin seeds. It won’t taste exactly like pecan pie, but it’s a great alternative if you have nut allergies. Toast the seeds lightly before using them.
Spiced Version: Add 1/4 teaspoon cinnamon and a pinch of nutmeg to the filling. This gives the bars a cozy, almost pumpkin-pie-like warmth. I love this version in the fall with a cup of hot apple cider.
My personal favorite variation is the bourbon maple version. I made it last Thanksgiving for a small gathering, and everyone asked for the recipe. It felt fancy without being fussy, which is exactly my style.
Serving & Storage Suggestions
These pecan pie bars are versatile enough to serve in a few different ways, depending on the occasion.
Serving Temperature: They’re delicious at room temperature, but I actually prefer them slightly warm. Pop a bar in the microwave for about 10 seconds — just enough to soften the filling without melting it. Serve with a small scoop of vanilla ice cream or a dollop of lightly sweetened whipped cream. The cold creaminess against the warm, gooey bar is pure magic.
Pairing Suggestions: These bars pair beautifully with coffee or black tea. The bitterness of the coffee cuts through the sweetness of the filling. For a special treat, serve them with a small glass of bourbon or dark rum. I once served these with a salted caramel latte, and it was a revelation.
Storage: Store leftover bars in an airtight container at room temperature for up to 3 days. If your kitchen is warm, you can refrigerate them, but let them come to room temperature before serving — the filling gets firm when cold. To freeze, wrap each bar individually in plastic wrap, then place them in a freezer-safe bag. They’ll keep for up to 2 months. Thaw at room temperature for about 30 minutes before serving.
Reheating: The best way to reheat a frozen or refrigerated bar is in a 300°F (150°C) oven for 5 to 7 minutes. The microwave works in a pinch, but it can make the crust soggy. If you’re using the microwave, do 10-second intervals and stop as soon as the filling feels warm.
One thing I love about these bars is that the flavors actually get better after a day. The filling settles and becomes more cohesive, and the crust absorbs just a little bit of the moisture from the filling, making everything taste more integrated. So if you can wait a day, do it.
Nutritional Information & Benefits
Let’s be real — these are not health food. They’re a treat, and they should be enjoyed as such. But here’s the breakdown if you’re curious.
Per bar (based on 4 bars per recipe):
- Calories: approximately 310
- Total Fat: 20g
- Saturated Fat: 7g
- Cholesterol: 65mg
- Sodium: 85mg
- Total Carbohydrates: 32g
- Dietary Fiber: 2g
- Sugars: 22g
- Protein: 4g
Pecans are actually a decent source of healthy fats, fiber, and antioxidants. They contain magnesium, which is good for muscle function and sleep, and thiamine, which supports energy metabolism. So while these bars are definitely a dessert, they’re not completely empty calories. The butter and egg also provide some fat-soluble vitamins and protein.
Dietary Considerations: This recipe contains gluten, dairy, eggs, and tree nuts. For a gluten-free version, see the variations section above. For a dairy-free version, use a plant-based butter substitute — I’ve had good results with Miyoko’s European Style Cultured Vegan Butter. For an egg-free version, this recipe is trickier because the egg provides structure, but you can try a flax egg (1 tablespoon ground flaxseed mixed with 3 tablespoons water, let sit for 5 minutes). The texture won’t be exactly the same, but it works in a pinch.
I personally believe that dessert should be enjoyed without guilt. These bars are a small indulgence — just four servings — so you can have your treat and move on. No waste, no regrets.
Conclusion
These budget-friendly pecan pie bars for two are everything I love about cooking — they solve a real problem (too much dessert, too much money) without sacrificing flavor or satisfaction. They’re quick enough for a weeknight, special enough for a date night, and small enough that you don’t end up eating pecan pie for breakfast three days in a row. (Not that I’m judging if that’s your thing.)
What I love most about this recipe is how it captures the essence of pecan pie — that sticky, nutty, buttery goodness — in a fraction of the time and cost. It’s the kind of recipe that makes you feel clever, like you’ve figured out a little secret. And honestly, you have.
I’d love to hear how these turn out for you. Did you try one of the variations? Did you come up with your own twist? Drop a comment below and let me know. And if you’re looking for another small-batch dessert to try, check out my small batch chocolate chip cookies — they’re just as easy and just as satisfying. Happy baking, friends!
Frequently Asked Questions
Can I use a different nut instead of pecans?
Absolutely. Walnuts work well, though they have a slightly more bitter flavor. You can also use a mix of pecans and walnuts. If you’re avoiding nuts entirely, roasted pumpkin seeds or sunflower seeds are good alternatives, but the taste will be different.
Why did my filling turn out runny?
This usually happens for one of two reasons: the bars weren’t baked long enough, or they were cut while still warm. The filling needs to set as it cools, so be patient. If you baked them for the full time and they’re still runny after cooling, your oven might run cool. Next time, try baking for an extra 2 to 3 minutes.
Can I double this recipe for a crowd?
Yes! Double all the ingredients and use an 8×8-inch baking dish. Bake the crust for 15 to 17 minutes and the assembled bars for 25 to 30 minutes. You’ll get about 9 to 12 bars, depending on how you cut them.
How do I know when the bars are done baking?
The edges should be set and slightly puffed, while the center should still have a slight jiggle when you gently shake the dish. It’s better to under-bake slightly than over-bake — the filling will continue to set as it cools. Over-baked pecan pie bars can become hard and candy-like.
Can I make these bars ahead of time?
Definitely. These bars actually taste better the next day. Make them a day ahead, let them cool completely, and store them in an airtight container at room temperature. They’ll stay fresh for up to 3 days. You can also freeze them for up to 2 months — just wrap each bar individually before freezing.
Pin This Recipe!
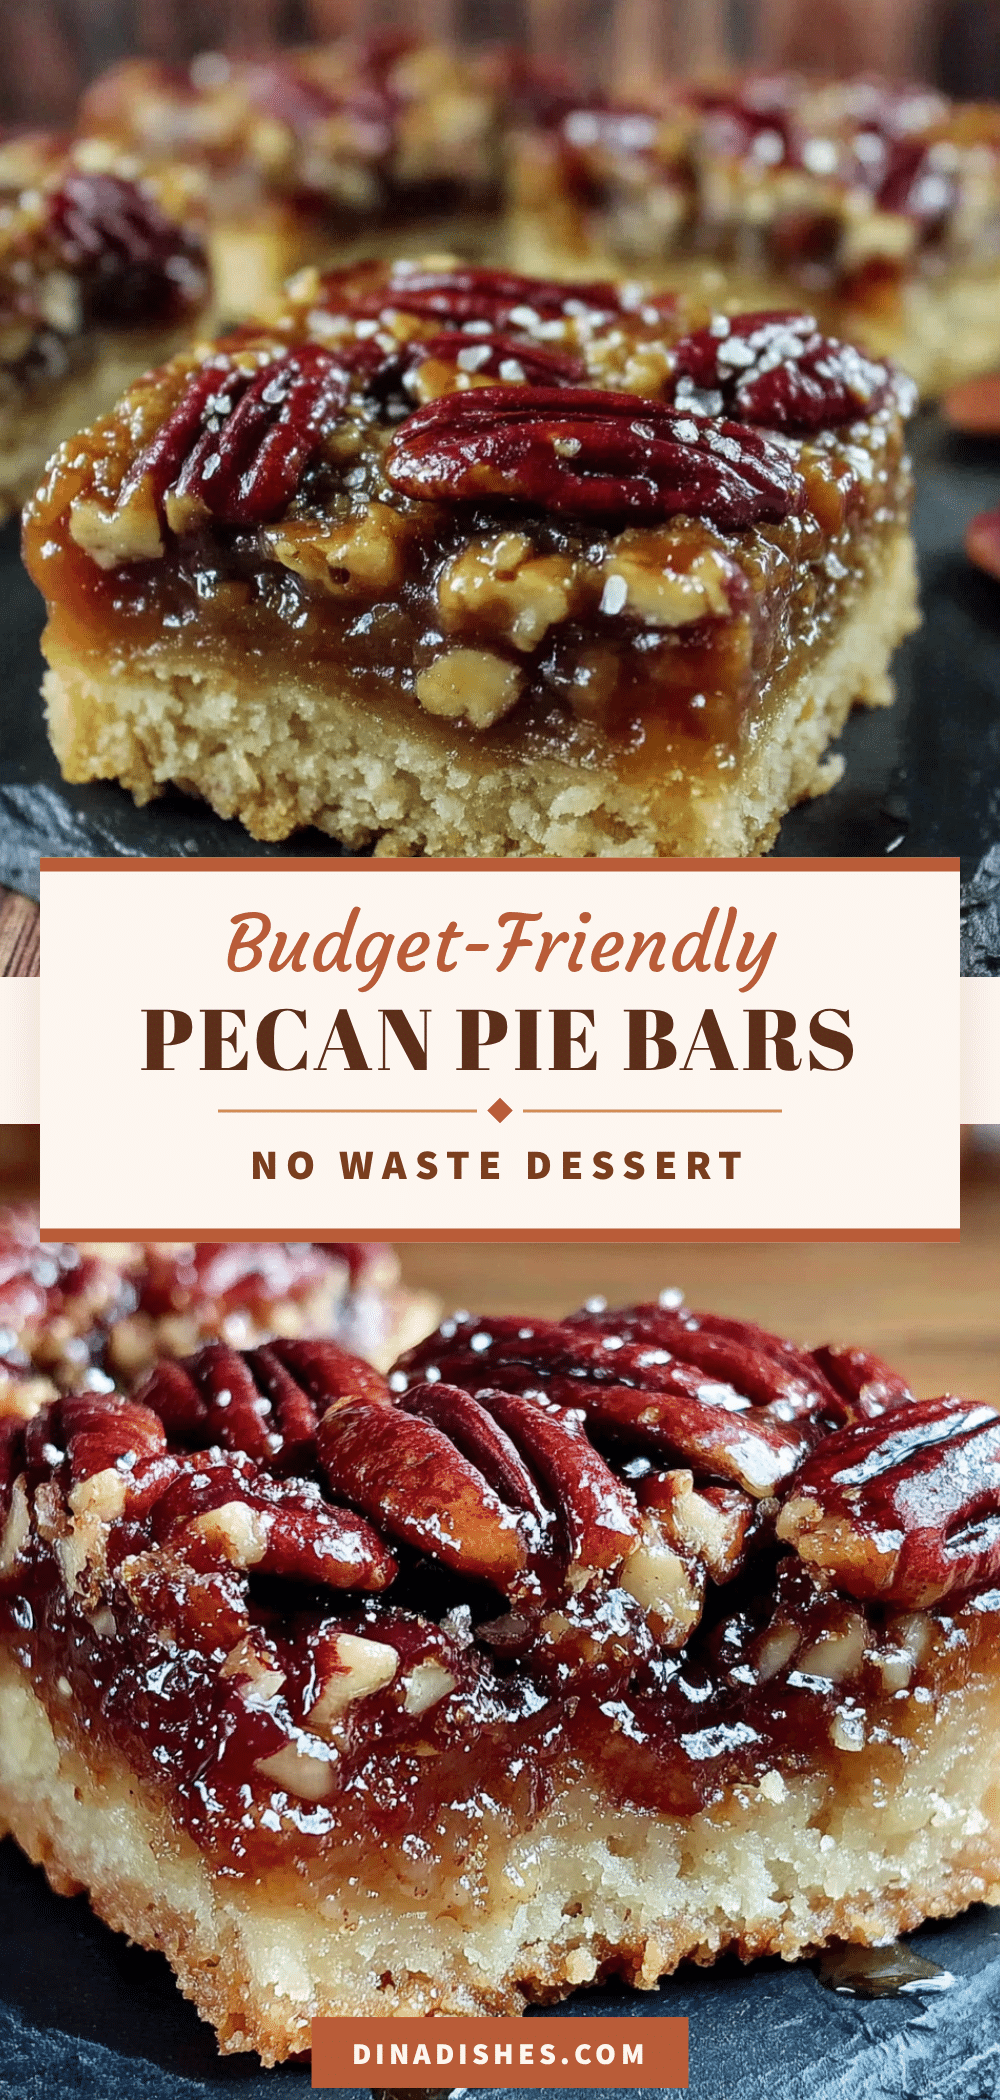
Budget-Friendly Pecan Pie Bars for Two – No Waste Dessert
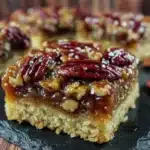
These pecan pie bars for two deliver all the sticky-sweet-nutty goodness of classic pecan pie without the waste or high cost. Made with simple ingredients and ready in under an hour, they’re perfect for a weeknight treat or a small gathering.
- Prep Time: 15 minutes
- Cook Time: 30 minutes
- Total Time: 45 minutes
- Yield: 4 bars 1x
- Category: Dessert
- Cuisine: American
Ingredients
- 1/2 cup (60g) all-purpose flour
- 3 tablespoons (42g) unsalted butter, cold and cut into small cubes
- 1 tablespoon (8g) powdered sugar
- 1 pinch salt
- 1 to 2 tablespoons (15-30ml) ice water
- 1 cup (100g) pecans, roughly chopped
- 1/4 cup (60ml) light corn syrup
- 1/4 cup (50g) packed brown sugar
- 2 tablespoons (28g) unsalted butter, melted
- 1 large egg, at room temperature
- 1/2 teaspoon vanilla extract
- 1 pinch salt
Instructions
- Preheat oven to 350°F (175°C). Line a small baking dish (6-inch square or similar) with parchment paper, leaving overhang on two sides. Lightly grease the parchment.
- In a small bowl, whisk together flour, powdered sugar, and a pinch of salt. Cut in cold butter using a pastry cutter or fork until mixture resembles coarse crumbs with some pea-sized butter pieces. Drizzle in 1 tablespoon ice water and stir with a fork until dough clumps together. Add more water if needed, one teaspoon at a time.
- Press dough evenly into the bottom and about 1/4 inch up the sides of the prepared dish. Prick crust with a fork. Bake for 12-14 minutes until lightly golden around edges. Set aside to cool slightly.
- While crust bakes, roughly chop pecans. Spread on a small baking sheet and toast for 3-4 minutes until fragrant. Watch carefully to prevent burning.
- In a medium bowl, whisk together corn syrup, brown sugar, melted butter, egg, vanilla extract, and a pinch of salt until smooth and glossy.
- Sprinkle toasted pecans evenly over pre-baked crust. Pour filling over pecans, spreading evenly. Gently nudge pecans if needed.
- Bake at 350°F (175°C) for 18-22 minutes until edges are set and center is slightly jiggly. If top browns too quickly, tent with foil for last 5 minutes.
- Cool in dish for at least 20 minutes. Use parchment overhang to lift bars out and transfer to a wire rack to cool completely. Cut into 4 equal bars once completely cool.
Notes
Don’t skip toasting the pecans for best flavor. Let bars cool completely before cutting to avoid runny filling. For best results, use room temperature egg. Bars taste even better the next day.
Nutrition
- Serving Size: 1 bar
- Calories: 310
- Sugar: 22
- Sodium: 85
- Fat: 20
- Saturated Fat: 7
- Carbohydrates: 32
- Fiber: 2
- Protein: 4
Keywords: pecan pie bars, small batch dessert, budget-friendly dessert, pecan bars for two, no waste dessert