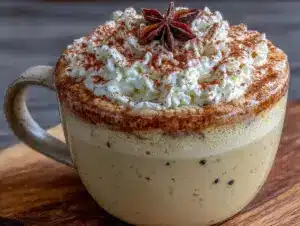
I had the whole thing planned out. A rich, decadent, traditional eggnog that would make my grandmother proud. I’d spent a week sourcing the best farm-fresh eggs and a real vanilla bean that cost more than my lunch. I was going to whisk and temper and create this magical holiday elixir. Then, at the very last second, I grabbed the wrong carton from the fridge. Instead of the whole milk, I accidentally dumped in a quart of low-fat milk. I stood there, staring at the thin, watery liquid swirling in my pot, and honestly, I almost poured the whole thing down the drain. It was a Tuesday night, I was already tired from work, and my kitchen counter was covered in a fine dusting of nutmeg. I thought I had ruined everything.
But you know, I’m stubborn. And the idea of wasting that beautiful vanilla bean felt like a crime. So I just went with it. I figured, worst case scenario, I’d have a slightly less creamy, very sad cup of warm milk. I cracked the eggs, separated the yolks (a messy, frustrating process when you’re already annoyed), and started to temper them. The whole time, I was muttering to myself about how this was going to be a bland, watery disaster. Maybe you’ve been there—that moment when you’re convinced you’ve just wasted a bunch of good ingredients on a whim.
Then, I scraped the seeds from that gorgeous vanilla bean into the pot. The smell alone started to change my mood. It was rich and floral and promising. I whisked the mixture over a low flame, watching it thicken—not into a heavy custard, but into something silky and light. When I finally poured it into a mug, took a sip, and felt that warm, spiced hug spread through my chest, I knew I had stumbled onto something. It wasn’t a failure at all. It was a happy accident that gave me a version of eggnog I actually prefer: a lighter cooked vanilla bean eggnog that doesn’t weigh you down but still delivers all the cozy, festive flavor. This is the recipe that stuck, and I keep making it because it feels good, not just indulgent.
Why You’ll Love This Recipe
Let’s be real for a second. Traditional eggnog is delicious, but it’s also a glass of liquid dessert that can leave you feeling like you need a nap. This version changes the game. It’s a lighter cooked vanilla bean eggnog that gives you all the satisfaction without the heavy, sluggish feeling.
- No Raw Eggs, No Worries: We cook the base, so you get all the creamy, rich texture without any of the safety concerns. It’s perfect for pregnant friends, the elderly, or anyone who’s just a little skittish about raw eggs.
- Surprisingly Simple Ingredients: You don’t need a specialty grocery store. You probably have milk, eggs, and sugar in your kitchen right now. The vanilla bean is the star, but even a good extract works in a pinch.
- Perfect for Holiday Gatherings: This is the drink that pleases everyone. It’s festive enough for a Christmas Eve party but light enough to enjoy after a big holiday dinner without feeling stuffed.
- Unbelievably Delicious: The texture is the real win here. It’s silky and smooth, not gloopy. The vanilla bean adds these tiny, aromatic specks that burst with flavor in every sip. It’s comfort food, but reimagined to be a little kinder to your body.
- Crowd-Pleaser: I’ve served this to my family, who are die-hard traditional eggnog fans, and they couldn’t tell the difference. They just asked for seconds. It’s that good.
What makes this different from every other eggnog recipe out there? It’s the balance. Most light versions taste thin or watery. By using a precise ratio of milk to egg yolks and a slow, gentle cooking method, you get that signature luxurious mouthfeel without the heavy cream. It’s a technique I’ve tested and tweaked over a dozen times to get just right. This isn’t just another version; it’s the best version for anyone who wants to feel good about what they’re drinking.
What Ingredients You Will Need
This recipe uses simple, wholesome ingredients to deliver that classic eggnog flavor and a beautifully smooth texture. The magic really happens when you let the vanilla bean infuse the milk—it creates a depth that extract just can’t match. Here’s everything you’ll need:
For the Eggnog Base
- Whole milk, 4 cups (960 ml): This is the backbone of our lighter version. It provides enough fat to feel rich and satisfying, but keeps the final drink from being too heavy. I don’t recommend going lower than 2% milk, or the texture will be too thin.
- Large egg yolks, 6: These are what give the eggnog its velvety, smooth texture. The yolks are rich in lecithin, which acts as a natural emulsifier to keep everything creamy. Save the whites for an omelet or meringue!
- Granulated sugar, 1/2 cup (100 grams): Just enough to sweeten the drink without overpowering the delicate vanilla. You can adjust this slightly to your taste, but I find this is the sweet spot.
- 1 vanilla bean: This is non-negotiable for the best flavor. Look for beans that are plump, moist, and flexible. I prefer beans from Madagascar or Tahiti for their rich, floral aroma. You’ll split it lengthwise and scrape out the tiny seeds.
- Vanilla extract, 1 teaspoon (5 ml): A little extra vanilla boost. I use pure vanilla extract, not imitation, for a cleaner taste. (Adds depth to the flavor profile)
- Ground nutmeg, 1/2 teaspoon: Freshly grated is always best, but pre-ground works fine in a pinch. It adds that warm, classic holiday spice.
- Ground cinnamon, 1/4 teaspoon: A subtle warmth that complements the nutmeg and vanilla without taking over.
- Pinch of salt: Don’t skip this! A tiny pinch of salt brightens all the other flavors and balances the sweetness.
For Serving (Optional but Recommended)
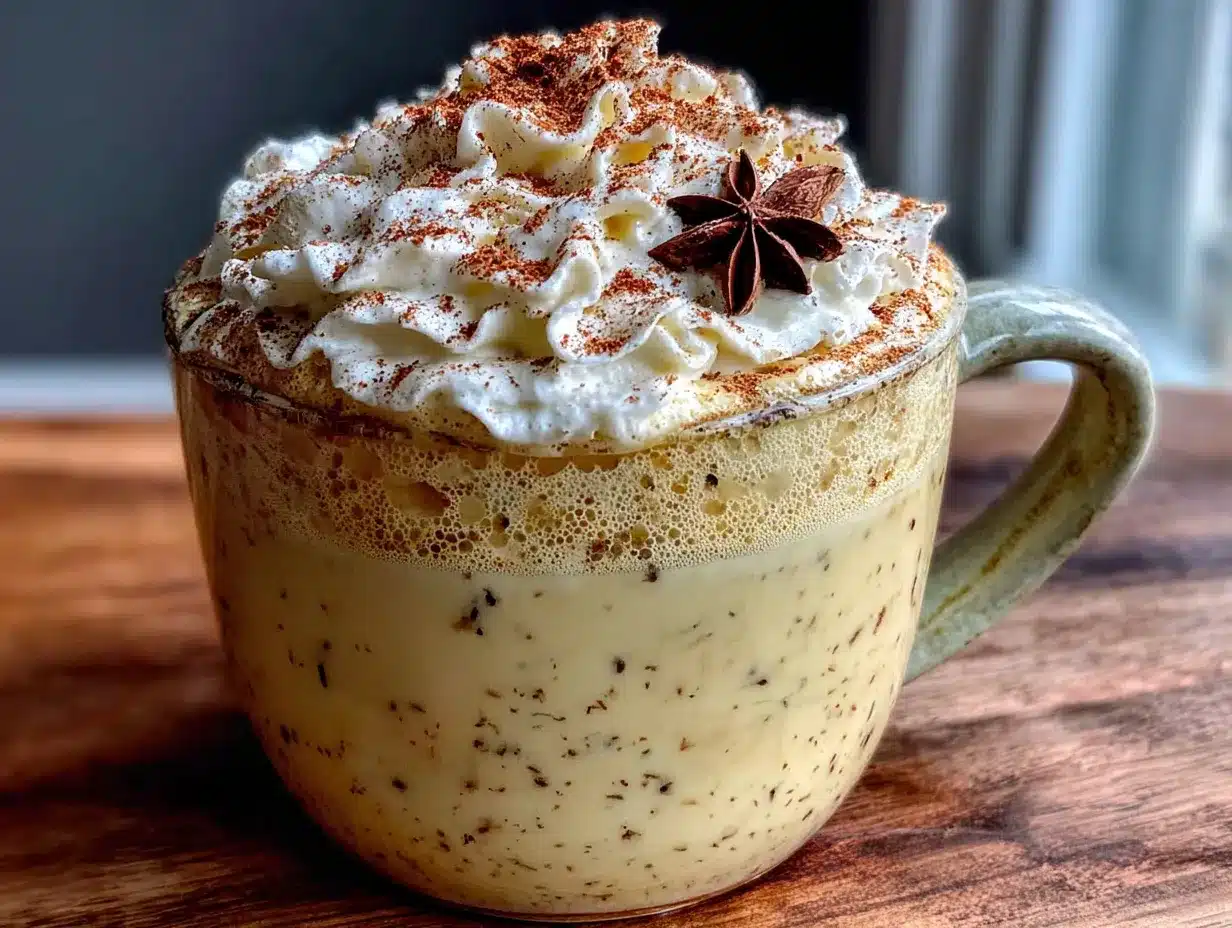
- Whipped cream: A dollop on top is a classic move. You can use regular or a light version.
- Extra ground nutmeg or cinnamon: For a final festive garnish.
- Rum, bourbon, or brandy (optional): If you want to spike it, this base is a perfect canvas. Add it to individual glasses so everyone can customize.
Ingredient Selection Tip: For the best texture, use fresh, high-quality egg yolks from pasture-raised eggs if you can. They have a richer color and flavor that makes the final drink look beautifully golden. If you can’t find a fresh vanilla bean, you can substitute with 2 tablespoons of high-quality vanilla bean paste or 2 teaspoons of pure vanilla extract. The flavor won’t be quite as complex, but it will still be delicious.
Equipment Needed
You don’t need any fancy gadgets for this recipe, which is part of its charm. Here’s what you’ll need to get the job done:
- A medium, heavy-bottomed saucepan: This is crucial. A heavy bottom distributes heat evenly and prevents the milk from scorching. A cheap, thin pot can lead to burnt spots. I use my trusty stainless steel All-Clad, but a good non-stick pot works too.
- A whisk: A balloon whisk is best for getting into the corners of the pot and ensuring a smooth mixture. A silicone whisk is great for non-stick pans.
- A fine-mesh strainer: This is your secret weapon for a perfectly smooth eggnog. It will catch any tiny bits of cooked egg or vanilla bean pod that might sneak in. Don’t skip this step!
- A sharp knife and cutting board: For splitting the vanilla bean.
- A large mixing bowl: For whisking the egg yolks and sugar.
- A ladle or heat-proof measuring cup: For tempering the eggs. You need something to slowly add the hot milk to the yolks.
- Storage container or pitcher: For chilling the eggnog. A glass pitcher or a large mason jar works perfectly.
- Candy thermometer (optional but helpful): If you’re nervous about cooking the eggs, a thermometer takes the guesswork out. You want the mixture to reach 160°F (71°C) for safety. I’ve done it without one for years, but it’s a nice tool for beginners.
Budget-Friendly Tip: Don’t have a fine-mesh strainer? You can use a clean, thin kitchen towel or several layers of cheesecloth placed over a bowl. It works just as well for catching those little bits.
Preparation Method
Okay, let’s make this happen. This process is more forgiving than you think, but we’ll take it step by step to build your confidence. The key is patience—don’t rush the heating process.
- Infuse the Milk (5 minutes): Pour the 4 cups of whole milk into your medium saucepan. Use the tip of your sharp knife to split the vanilla bean lengthwise down the middle. Don’t cut all the way through—just open it like a book. Then, use the back of the knife to scrape out the tiny black seeds. Add both the seeds and the empty pod to the milk. Place the saucepan over medium heat. You want to warm the milk until it’s steaming and tiny bubbles form around the edges—do not let it boil! This should take about 4-5 minutes. Once it’s hot, remove the pan from the heat, cover it, and let the vanilla bean steep for 15 minutes. This step is where the magic happens, infusing the milk with that deep, aromatic vanilla flavor.
- Whisk the Egg Yolks (3 minutes): While the milk is steeping, grab your large mixing bowl. Add the 6 egg yolks and 1/2 cup of granulated sugar. Whisk them together vigorously until the mixture is pale, thick, and falls from the whisk in a smooth ribbon. This is called “ribbon stage.” It usually takes about 2-3 minutes of solid whisking. It should look like a thick, pale yellow paste. If you’re using a hand mixer, you can do this faster on medium speed.
- Temper the Eggs (5 minutes): This is the step that scares people, but I promise it’s simple. You need to slowly raise the temperature of the egg yolks so they don’t scramble when they hit the hot milk. Remove the vanilla bean pod from the milk (rinse it off and save it to make vanilla sugar!). Slowly pour about 1 cup of the hot milk into the egg yolk mixture, whisking constantly. This warms up the yolks. Then, pour the entire egg-milk mixture back into the saucepan with the rest of the hot milk, whisking continuously.
- Cook the Eggnog (8-10 minutes): Place the saucepan back over medium-low heat. This is where you need to be patient. Stir the mixture constantly with your whisk, making sure to scrape the bottom and corners of the pan. You’re looking for the mixture to thicken enough to coat the back of a spoon. If you have a thermometer, you want it to reach 160°F (71°C). Do not let it boil! Boiling will curdle the eggs. The process should take about 8-10 minutes. You’ll see the mixture go from foamy to smooth and silky. It will visibly thicken.
- Strain and Cool (2 minutes): Once the mixture has thickened, immediately remove it from the heat. Place your fine-mesh strainer over a clean bowl or your storage pitcher. Pour the eggnog through the strainer to catch any potential bits of cooked egg or vanilla bean pod. This guarantees a perfectly smooth texture.
- Add Final Flavors and Chill (2 hours minimum): Stir in the 1 teaspoon of vanilla extract, 1/2 teaspoon of ground nutmeg, 1/4 teaspoon of ground cinnamon, and a pinch of salt. Whisk until everything is combined. Let the eggnog cool on the counter for about 20 minutes, then cover it and place it in the refrigerator to chill. It needs at least 2 hours to get nice and cold, but overnight is even better. The flavors will meld and deepen as it sits.
Pro-Tip: If you see any small lumps forming while you’re cooking, don’t panic! Just whisk vigorously—they will often disappear. If they don’t, the strainer will catch them. You’ve got this.
Cooking Tips & Techniques
I’ve made this recipe more times than I can count, and I’ve definitely had my share of mishaps. Here are the lessons I learned the hard way so you don’t have to.
- The Low and Slow Rule: The biggest mistake I made was getting impatient and turning up the heat. The first time I tried this, I thought, “How bad could it be?” I cranked the heat to medium-high, and within two minutes, I had sweet, scrambled eggs floating in my milk. It was a disaster. Always use medium-low heat and constant stirring. It’s not a race.
- Don’t Skip the Steeping: I once tried to save time by skipping the 15-minute vanilla bean steep. I just added the seeds and started cooking. The flavor was noticeably weaker. That steep time is what pulls all those gorgeous, complex vanilla notes out of the pod. It’s a short wait for a huge payoff.
- Use a Heavy-Bottomed Pan: I learned this one the expensive way. I used a thin, cheap saucepan, and the milk scorched on the bottom before the rest of it was even hot. The burnt flavor ruined the whole batch. A heavy-bottomed pan distributes the heat evenly, preventing hot spots and scorching.
- Multitasking Strategy: While the milk is steeping, I get all my other ingredients measured and ready. I whisk the eggs and sugar, measure the spices, and get my strainer set up. This way, when it’s time to cook, I can focus entirely on the whisking without having to scramble for anything.
- Consistency Check: The “coat the back of a spoon” test is your best friend. Dip a clean spoon into the mixture, pull it out, and run your finger across the back. If the line holds and doesn’t get flooded with liquid, it’s thick enough. If it’s still runny, give it another minute or two.
Variations & Adaptations
One of the best things about this base recipe is how easily it adapts to different tastes and dietary needs. Here are some of my favorite spins.
- Dairy-Free Version: This works surprisingly well! Substitute the whole milk with a full-fat oat milk or canned coconut milk (the full-fat kind, not the light version). Oat milk gives the most neutral, creamy texture. Coconut milk will add a slight coconut flavor, which pairs beautifully with the vanilla and nutmeg. The process is exactly the same.
- Spiced Chai Eggnog: For a cozy autumn twist, add 2 cinnamon sticks, 4 whole cloves, and a 1-inch piece of fresh ginger (sliced) to the milk while it steeps with the vanilla bean. Strain them out when you remove the vanilla pod. It’s like a chai latte and eggnog had a delicious baby.
- Mocha Eggnog: This is my personal favorite for a special treat. After you strain the eggnog, whisk in 2 tablespoons of high-quality unsweetened cocoa powder until it’s completely dissolved. The chocolate and vanilla are a match made in heaven, and it feels incredibly indulgent.
- Low-Sugar Option: You can easily reduce the sugar to 1/3 cup (66 grams) or substitute it with a monk fruit sweetener or allulose. The texture might be slightly less thick, but the flavor will still be fantastic. I’ve done this for friends who are watching their sugar intake, and they loved it.
- Spiked Eggnog: As I mentioned, this base is a perfect canvas for spirits. My favorite combination is 1 ounce of dark rum and 1/2 ounce of bourbon per serving. Add the alcohol directly to the glass before pouring the eggnog over it. This way, everyone can choose their own adventure.
Serving & Storage Suggestions
This eggnog is best served ice cold, straight from the fridge. The flavors are more vibrant and the texture is perfectly silky when it’s well-chilled.
- Serving Temperature: Pour the chilled eggnog into your favorite festive glasses or mugs. Top with a generous dollop of whipped cream and a light dusting of freshly grated nutmeg or cinnamon. For a visual treat, you can rim the glass with a mixture of sugar and cinnamon.
- Complementary Dishes: This lighter eggnog pairs beautifully with soft and chewy gingerbread cookies or a slice of cranberry orange pound cake. It’s also a lovely companion to a simple plate of classic sugar cookies for a holiday cookie swap.
- Storage: Store any leftover eggnog in a tightly sealed container or pitcher in the refrigerator for up to 4 days. The flavor actually gets better after a day or two as the spices continue to meld.
- Reheating (Not Recommended): I don’t recommend reheating this eggnog, as the texture can become slightly grainy. It’s designed to be a cold drink. If you absolutely must have a warm version, you can gently reheat it over very low heat, stirring constantly, but never let it boil.
- Freezing: You can freeze this eggnog! Pour it into an airtight container, leaving about an inch of headroom for expansion. It will keep for up to 3 months. Thaw it overnight in the refrigerator and give it a good shake or whisk before serving to re-emulsify it. The texture might be slightly less smooth, but the flavor will be perfect.
Nutritional Information & Benefits
While eggnog is still a treat, this lighter version is a much smarter choice than the traditional heavy cream-laden stuff. Here’s a general estimate per 8-ounce serving (without alcohol or whipped cream):
| Nutrient | Amount |
|---|---|
| Calories | ~180 |
| Total Fat | 8g |
| Saturated Fat | 4g |
| Cholesterol | 195mg |
| Sodium | 95mg |
| Total Carbohydrates | 18g |
| Sugars | 17g |
| Protein | 9g |
Health Highlights: This recipe is a good source of high-quality protein from the milk and egg yolks. The egg yolks also provide choline, a nutrient important for brain health. Using whole milk instead of heavy cream significantly reduces the saturated fat content, making it a more heart-friendly option. Plus, you get a tiny dose of antioxidants from the nutmeg and cinnamon. It’s a festive indulgence you can feel good about.
Dietary Considerations: This recipe is naturally gluten-free and can be made dairy-free and low-sugar using the substitutions mentioned above. It does contain eggs and dairy in its standard form.
Conclusion
So there you have it. My happy little accident that turned into a holiday staple. This lighter cooked vanilla bean eggnog is proof that you don’t need a gallon of heavy cream to get that rich, soul-soothing flavor. It’s creamy, it’s festive, and it won’t leave you feeling like you need to undo your top button after one glass.
I really hope you give this one a try. Don’t be afraid to make it your own—play with the spices, try the mocha version, or spike it however you like. That’s the beauty of a simple, solid base recipe. It’s a canvas for your own holiday creativity.
If you make this, I’d love to hear about it! Leave a comment below and let me know how it turned out, or share your own twist on it. And if you’re looking for another lightened-up holiday favorite, you might enjoy my lighter cranberry sauce—it’s another one of those recipes that proves healthy and delicious can absolutely go hand in hand. Happy sipping!
Frequently Asked Questions
Can I use vanilla extract instead of a vanilla bean?
Absolutely! While the vanilla bean gives a more complex, floral flavor, you can substitute it with 2 teaspoons of high-quality pure vanilla extract. Add it after you’ve removed the pot from the heat, just before straining.
Why did my eggnog curdle?
Curdling usually happens when the heat is too high or you stopped stirring. The eggs cook too quickly and form little lumps. If this happens, don’t panic! Immediately remove the pot from the heat and whisk vigorously. If it’s not too far gone, you can save it. If not, just strain it through a fine-mesh strainer—the texture will still be smooth, even if it’s not perfect.
Can I make this eggnog ahead of time for a party?
Yes, and I actually recommend it! This eggnog tastes even better after it’s had a day or two to chill in the fridge. The flavors meld and deepen beautifully. You can make it up to 3 days in advance.
Is this eggnog safe for pregnant women?
Yes! Because the eggs are cooked to a safe temperature (160°F / 71°C), there is no risk of salmonella. This makes it a much safer choice for pregnant women, the elderly, and anyone with a compromised immune system who still wants to enjoy a festive treat.
Can I double this recipe?
Definitely. This recipe doubles or even triples very well. Just make sure you use a large enough pot—you need room to whisk without splashing. The cooking time will be slightly longer, so keep an eye on the temperature and use the spoon test to check for doneness.
Pin This Recipe!
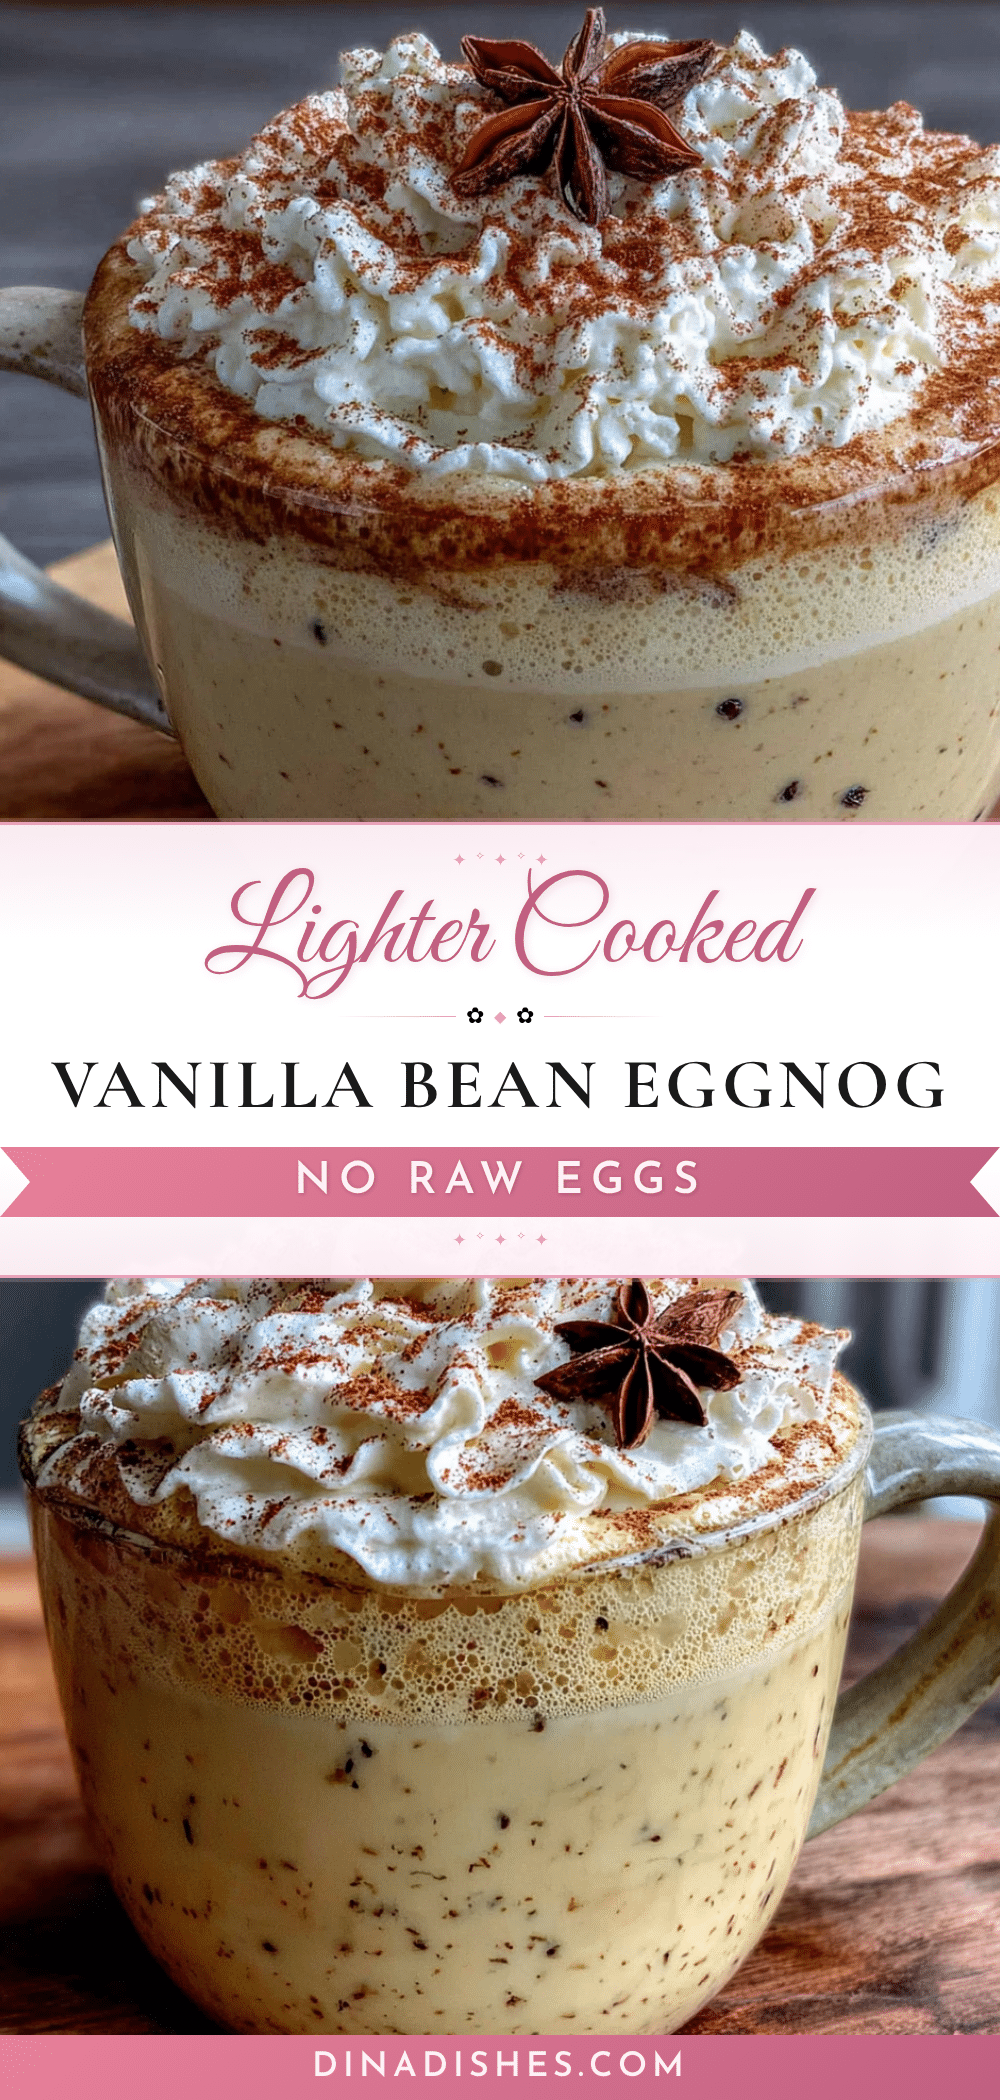
Lighter Cooked Vanilla Bean Eggnog Recipe (No Raw Eggs)
A lighter, cooked vanilla bean eggnog that delivers all the cozy, festive flavor without the heavy cream. This version uses whole milk and a gentle cooking method for a silky, smooth texture that’s safe to enjoy.
- Prep Time: 15 minutes
- Cook Time: 15 minutes
- Total Time: 2 hours 30 minutes (includes chilling)
- Yield: 4 servings 1x
- Category: Beverage
- Cuisine: American
Ingredients
- 4 cups (960 ml) whole milk
- 6 large egg yolks
- 1/2 cup (100 grams) granulated sugar
- 1 vanilla bean
- 1 teaspoon (5 ml) vanilla extract
- 1/2 teaspoon ground nutmeg
- 1/4 teaspoon ground cinnamon
- Pinch of salt
- Whipped cream (for serving, optional)
- Extra ground nutmeg or cinnamon (for garnish, optional)
- Rum, bourbon, or brandy (optional, for spiking)
Instructions
- Infuse the Milk: Pour 4 cups of whole milk into a medium saucepan. Split the vanilla bean lengthwise, scrape out the seeds, and add both seeds and pod to the milk. Heat over medium heat until steaming and tiny bubbles form around the edges (do not boil). Remove from heat, cover, and let steep for 15 minutes.
- Whisk the Egg Yolks: In a large mixing bowl, whisk together 6 egg yolks and 1/2 cup granulated sugar until pale, thick, and ribbon-like (about 2-3 minutes).
- Temper the Eggs: Remove the vanilla bean pod from the milk. Slowly pour about 1 cup of hot milk into the egg yolk mixture, whisking constantly. Then pour the egg-milk mixture back into the saucepan with the remaining milk, whisking continuously.
- Cook the Eggnog: Place the saucepan over medium-low heat. Stir constantly with a whisk, scraping the bottom and corners, until the mixture thickens enough to coat the back of a spoon (about 8-10 minutes). Do not let it boil. If using a thermometer, heat to 160°F (71°C).
- Strain and Cool: Immediately remove from heat. Pour the eggnog through a fine-mesh strainer into a clean bowl or pitcher to catch any cooked egg bits or vanilla pod pieces.
- Add Final Flavors and Chill: Stir in 1 teaspoon vanilla extract, 1/2 teaspoon ground nutmeg, 1/4 teaspoon ground cinnamon, and a pinch of salt. Let cool on the counter for 20 minutes, then cover and refrigerate for at least 2 hours (overnight is best). Serve cold with optional whipped cream and a dusting of nutmeg or cinnamon.
Notes
For best flavor, use a plump, moist vanilla bean from Madagascar or Tahiti. If you don’t have a vanilla bean, substitute with 2 tablespoons vanilla bean paste or 2 teaspoons pure vanilla extract. To avoid curdling, keep heat low and stir constantly. The eggnog can be stored in the refrigerator for up to 4 days and freezes well for up to 3 months.
Nutrition
- Serving Size: 8 ounces
- Calories: 180
- Sugar: 17
- Sodium: 95
- Fat: 8
- Saturated Fat: 4
- Carbohydrates: 18
- Protein: 9
Keywords: eggnog, vanilla bean, lighter eggnog, cooked eggnog, no raw eggs, holiday drink, Christmas, festive