Tuesday night was two hours away and I’d completely forgotten I was supposed to bring dinner to our neighborhood book club. Not just any dinner, mind you—this group takes food seriously. Last month, Sarah brought homemade ravioli from scratch. The month before, Marco did a slow-braised lamb shank that I still dream about. And here I was, staring into my fridge at 4:47 PM with nothing but a pack of chicken thighs, a sad wedge of Parmesan, and some garlic that was starting to sprout.
Panic doesn’t even begin to cover it. I actually considered calling in sick—to my own book club. But then I remembered I’d just gotten that air fryer my sister swore by, still sitting in its box on the counter. I’d been too intimidated to use it, honestly. But desperate times, you know? I figured I’d throw something together, apologize for the lackluster offering, and hope everyone was too polite to mention it.
I tossed the chicken in some oil, grated what felt like half my arm’s worth of Parmesan, minced that sad garlic, and just… hoped. Twenty minutes later, I pulled out these golden, crispy, impossibly flavorful thighs that smelled like a restaurant kitchen. I brought them over still warm, still half-embarrassed, and watched in disbelief as they disappeared before the actual discussion even started. Three people asked for the recipe. Two texted me the next day. One said, and I quote, “I don’t even care what book we read next, just bring those chicken thighs again.”
So yeah, this recipe became my accidental signature dish. And the best part? It takes almost no effort. Maybe you’ve been there—staring down a hungry family or an unexpected dinner obligation with nothing but a few basic ingredients and a prayer. This one’s for those nights.
Why You’ll Love This Recipe
Let me tell you why this air fryer garlic Parmesan chicken thighs recipe has earned a permanent spot in my weekly rotation. It solves problems you didn’t even know you had.
- Ready in Under 30 Minutes: From fridge to table in about 25 minutes flat. That’s faster than takeout delivery, and way more satisfying.
- Simple Pantry Ingredients: You probably have everything already. Chicken thighs, garlic, Parmesan, oil, salt, pepper. That’s it. No fancy grocery runs.
- Perfect for Busy Weeknights: This is the definition of weeknight dinner. Minimal prep, hands-off cooking, and zero fuss.
- Crowd-Pleaser Guaranteed: I’ve served these to picky kids, foodie friends, and my dad who “doesn’t trust air fryers.” Everyone loves them.
- Actually Crispy Without Deep Frying: The air fryer works magic here. You get that shatteringly crisp skin without standing over a pot of hot oil.
What makes this version different from every other garlic chicken recipe out there? It’s the technique. Most recipes tell you to just toss everything together and hope for the best. I figured out through trial and error—and a few sad, soggy batches—that the secret is building the flavor in layers. The garlic gets bloomed in hot oil first, the Parmesan creates this incredible crust, and the air fryer’s circulating heat does the rest. It’s not just another recipe; it’s my best version after dozens of attempts.
This is the kind of meal that makes you close your eyes after the first bite. It’s comfort food reimagined—healthier, faster, but with the same soul-soothing satisfaction. Perfect for impressing unexpected guests or turning a chaotic Tuesday into something memorable.
What Ingredients You Will Need
This recipe uses simple, honest ingredients to deliver big flavor without the fuss. Most of these are pantry staples you probably already have on hand.
- Chicken Thighs: 4-6 bone-in, skin-on chicken thighs (about 1.5-2 pounds total). The skin gets incredibly crispy in the air fryer, and the bone keeps the meat juicy. Boneless works too, but reduce cooking time by about 5 minutes.
- Garlic: 4-5 cloves, minced fresh. Please don’t use the jarred stuff here—fresh garlic makes a huge difference. I’ve tried both, and fresh garlic gives that aromatic punch that makes this dish sing.
- Parmesan Cheese: 1/2 cup freshly grated Parmesan (about 2 ounces). Skip the green can stuff. Pre-grated Parmesan doesn’t melt the same way and won’t create that golden crust. Grate it yourself from a block—it takes two minutes and changes everything.
- Olive Oil: 2 tablespoons extra virgin olive oil. You need enough to help the seasoning stick and encourage browning. Avocado oil works great too if that’s what you have.
- Salt: 1 teaspoon kosher salt. If using table salt, reduce to 3/4 teaspoon. Salt is crucial for drawing out moisture and helping the skin crisp up.
- Black Pepper: 1/2 teaspoon freshly ground black pepper. Adds warmth and depth without overpowering the garlic and Parmesan.
- Paprika: 1 teaspoon (optional but recommended). I use sweet paprika for color and mild smokiness. Smoked paprika works beautifully too if you want a deeper flavor.
- Dried Italian Seasoning: 1 teaspoon (optional). Adds herbal notes that complement the garlic. Oregano, thyme, or rosemary work individually if that’s what you have.
- Fresh Parsley: For garnish (optional). Adds a pop of color and freshness at the end. Totally skippable if you’re in a rush.
I personally prefer using chicken thighs from Bell & Evans or Mary’s Free Range Chicken—they consistently have good skin-to-meat ratio and cook evenly. For the Parmesan, BelGioioso is my go-to brand for reliable quality at the grocery store. Look for a block that feels firm and smells nutty, not sour.
If you’re watching sodium, you can reduce the salt slightly, but don’t skip it entirely—it’s essential for the crispy skin. For a dairy-free version, try using nutritional yeast instead of Parmesan. It won’t be exactly the same, but it adds a similar umami kick.
Equipment Needed
You don’t need a professional kitchen for this one. Here’s what you’ll actually use:
- Air Fryer: Any brand works—I use a Cosori 5.8-quart and it fits 4-6 thighs comfortably. If yours is smaller, cook in batches. Don’t overcrowd or you’ll end up with steamed chicken instead of crispy.
- Mixing Bowl: Medium-sized, for tossing the chicken with oil and seasonings. Glass or stainless steel works best.
- Microplane or Box Grater: For grating that Parmesan fresh. A microplane gives you that fluffy, meltable texture. A box grater’s fine side works too.
- Garlic Press or Knife: I use a knife because I like controlling the size of the mince. A garlic press is faster if you’re in a hurry.
- Tongs: For flipping the chicken halfway through. Silicone-tipped ones won’t scratch your air fryer basket.
- Meat Thermometer: Optional but highly recommended. Takes the guesswork out of doneness. I use a ThermoPro TP-16—under $15 and worth every penny.
- Cutting Board: For resting the chicken after cooking. Let it sit for a few minutes before serving.
No air fryer? You can bake these in a 425°F oven on a wire rack set over a baking sheet. Add 5-10 minutes to the cooking time and flip halfway. It won’t be quite as crispy, but it’s still delicious.
Preparation Method
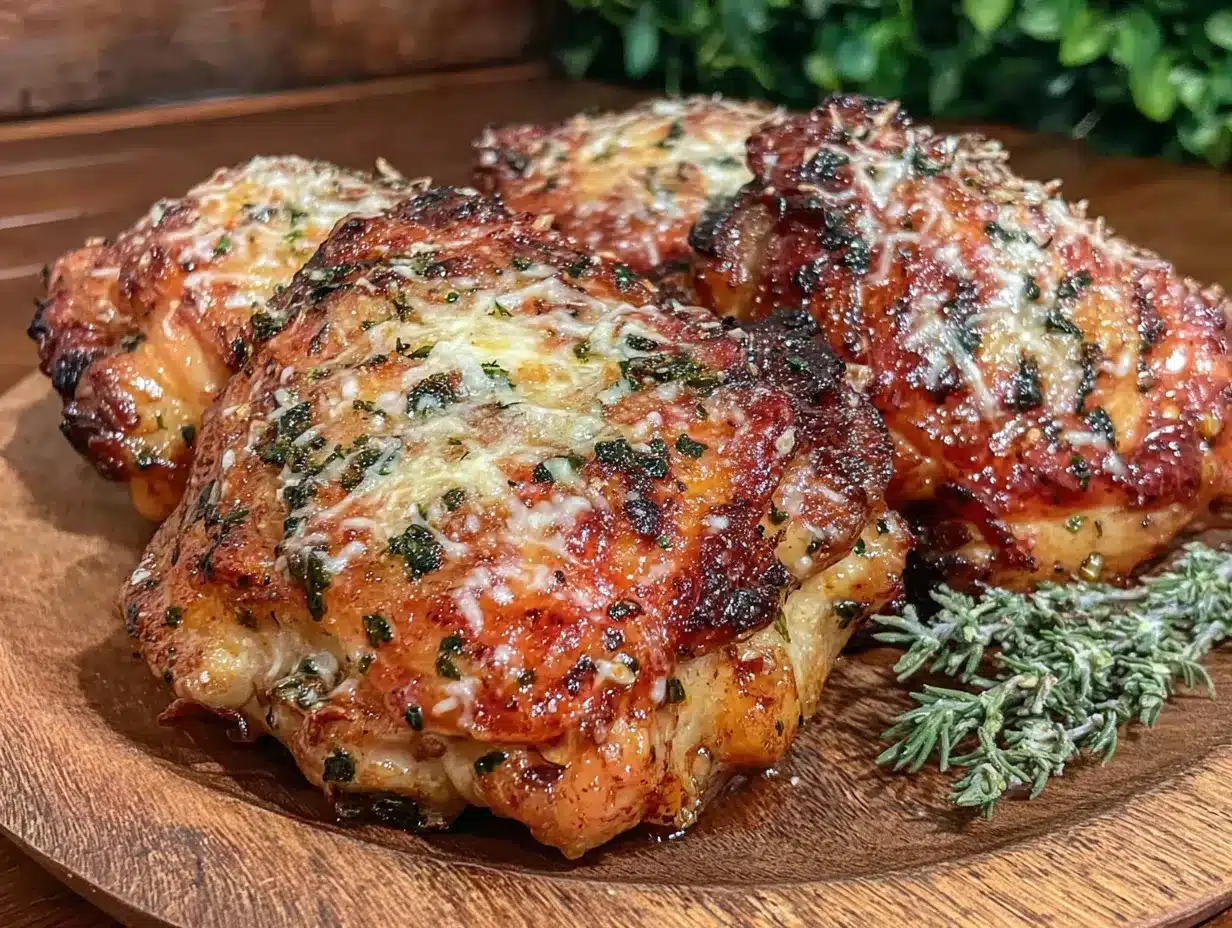
Alright, let’s get cooking. This is straightforward, but follow these steps closely for the best results.
- Pat the chicken dry. This is the most important step. Use paper towels and really press into the skin to absorb as much moisture as possible. Wet skin won’t crisp up—it’ll steam. I learned this the hard way after several sad, rubbery attempts. Take your time here.
- Season the chicken. Place the chicken thighs in a medium mixing bowl. Drizzle with 2 tablespoons olive oil. Add 1 teaspoon kosher salt, 1/2 teaspoon black pepper, 1 teaspoon paprika, and 1 teaspoon dried Italian seasoning (if using). Toss everything together with your hands until each thigh is evenly coated. Don’t be shy—get in there.
- Prepare the garlic mixture. In a small bowl, combine the minced garlic (4-5 cloves) with 1 tablespoon of the olive oil. Let it sit for a minute. This blooms the garlic and mellows its raw edge. Set aside for now—we’ll add it later.
- Preheat the air fryer. Set your air fryer to 400°F and let it preheat for 3-5 minutes. A hot start helps the skin begin crisping immediately. If your model doesn’t have a preheat setting, just run it empty for 3 minutes.
- Arrange the chicken. Place the seasoned chicken thighs skin-side down in the air fryer basket. Make sure they’re in a single layer with space between each piece. Air needs to circulate for that crispy magic to happen. If they’re touching, they’ll steam each other.
- Cook the first side. Cook at 400°F for 10 minutes. Don’t open the basket to check—let it do its thing. You’ll start smelling that garlic and Parmesan goodness around minute 7.
- Flip and add garlic. Using tongs, carefully flip each thigh over. Now spoon the garlic-oil mixture over the skin side. Sprinkle the freshly grated Parmesan evenly over the top. Don’t skip this step—the garlic needs to be on top so it doesn’t burn, and the Parmesan creates that gorgeous crust.
- Cook the second side. Return the basket to the air fryer and cook for another 8-12 minutes at 400°F. The exact time depends on your air fryer and the size of your thighs. You’re looking for an internal temperature of 175-185°F for thighs (they’re dark meat and benefit from cooking a bit higher than breasts). The skin should be deep golden brown and crispy to the touch.
- Rest the chicken. Remove the chicken from the air fryer and transfer to a cutting board. Let it rest for 5 minutes. I know it’s tempting to dig in immediately, but resting lets the juices redistribute. Cut into one too soon and all that goodness runs out onto the board instead of staying in the meat.
- Garnish and serve. Sprinkle with fresh chopped parsley if you’re using it. The color contrast against the golden, Parmesan-crusted skin is gorgeous.
A quick note on timing: if you’re cooking more than 4 thighs, work in batches. Don’t try to cram everything in at once. The extra 10 minutes is worth it for properly crispy chicken.
Cooking Tips & Techniques
I’ve made this recipe probably thirty times now, and I’ve messed it up in every possible way. Here’s what I’ve learned so you don’t have to repeat my mistakes.
Don’t skip drying the chicken. This is the number one mistake people make. Moisture is the enemy of crispiness. I once rushed through this step and ended up with chicken that looked pale and sad. Pat it dry like you mean it.
Fresh garlic really matters. I tried the jarred minced garlic once because I was out of fresh. The result was… fine, I guess? But it lacked that sweet, nutty quality that fresh garlic develops when it cooks. The pre-minced stuff has a sharper, more one-dimensional flavor. Take the extra 30 seconds to peel and mince fresh cloves.
Watch your cook times. Air fryers vary wildly. My friend’s Ninja runs hot and finishes everything 3 minutes early. My Cosori is more moderate. The first time you make this, check the temperature at the 8-minute mark on the second side. You can always cook longer, but you can’t un-cook dried-out chicken.
Let the air fryer recover between batches. If you’re cooking multiple batches, give the air fryer 2-3 minutes to come back up to temperature before adding the next batch. Dropping cold chicken into a cooler basket means longer cook times and less crispy results.
Multitask wisely. While the chicken is cooking its first side, prep your side dish. I usually throw some broccoli or asparagus in the oven or microwave. Or make a quick salad. By the time the chicken is resting, everything else is ready to go.
One more thing—don’t crowd the basket. I know it’s tempting to fit as many thighs as possible to save time. But overcrowding drops the temperature and traps steam. You’ll end up with soggy-skinned chicken that’s cooked through but not crispy. Space is your friend here.
Variations & Adaptations
This recipe is flexible, and I’ve tried quite a few variations over the months. Here are some favorites:
Spicy Garlic Parmesan: Add 1/2 teaspoon red pepper flakes to the garlic-oil mixture. The heat cuts through the richness beautifully. I do this when I’m cooking for myself and want a little kick.
Lemon Herb Version: Add the zest of one lemon to the seasoning mix and squeeze fresh lemon juice over the finished chicken. The acidity brightens everything up. This is my go-to summer variation.
Dairy-Free Adaptation: Skip the Parmesan and add an extra tablespoon of nutritional yeast to the seasoning mix. It won’t be exactly the same, but it gives that cheesy, umami flavor without the dairy. My lactose-intolerant friend swears by this version.
Boneless, Skinless Option: If that’s all you have, reduce cooking time to 8 minutes per side. The chicken will cook faster without bone and skin. It won’t be as crispy, but it’s still flavorful and tender.
Oven Method: Preheat oven to 425°F. Place chicken on a wire rack over a baking sheet. Bake for 25-30 minutes, flipping halfway through and adding the garlic-Parmesan topping at the flip. The wire rack is key—it lets air circulate underneath.
Different Herbs: Swap the Italian seasoning for rosemary or thyme. Both pair beautifully with garlic and Parmesan. I’ve even used a pinch of dried sage in the fall—it gives the chicken a cozy, almost Thanksgiving-like vibe.
I’ve tried a version with a tablespoon of Dijon mustard mixed into the oil, and honestly, it was fantastic. The mustard adds tanginess and helps the seasoning stick even better. Give it a shot if you’re feeling adventurous.
Serving & Storage Suggestions
These thighs are best served hot and crispy, right out of the air fryer. But they’re still good at room temperature, which makes them perfect for meal prep or picnics.
Serving: Serve the chicken on a warm platter with a sprinkle of fresh parsley and maybe a few lemon wedges on the side. The brightness of lemon is a perfect counterpoint to the rich, garlicky chicken. I love pairing these with a simple arugula salad dressed with lemon vinaigrette, or roasted vegetables like broccoli, asparagus, or green beans. Mashed potatoes or a crusty baguette are also fantastic for soaking up any juices.
Beverage Pairings: A crisp white wine like Sauvignon Blanc or Pinot Grigio cuts through the richness. For beer drinkers, a light lager or pilsner works well. If you’re going non-alcoholic, sparkling water with lemon is refreshing.
Storage: Leftover chicken keeps in an airtight container in the refrigerator for up to 4 days. The skin will lose its crispiness, but the flavor remains excellent. I actually love chopping up leftovers for salads or sandwiches the next day.
Reheating: The air fryer is your best friend here. Reheat at 350°F for 3-4 minutes until warmed through. The skin crisps back up beautifully. Avoid the microwave—it’ll turn the skin rubbery and sad. If you don’t have an air fryer, reheat in a 350°F oven for about 10 minutes.
Freezing: These freeze well for up to 3 months. Let the cooked chicken cool completely, then wrap individually in plastic wrap and place in a freezer bag. Thaw overnight in the fridge before reheating in the air fryer or oven.
Honestly, the flavors actually deepen overnight. The garlic and Parmesan meld together even more. Cold, straight from the fridge, these make an incredible chicken salad. Just shred the meat and mix with a little mayo, celery, and maybe some grapes. Trust me on this one.
Nutritional Information & Benefits
Here’s the approximate nutritional breakdown for one serving (one thigh, using bone-in, skin-on chicken with the Parmesan topping):
| Nutrient | Amount per Serving |
|---|---|
| Calories | 320-380 |
| Protein | 28-32g |
| Fat | 22-26g |
| Saturated Fat | 7-9g |
| Carbohydrates | 2-3g |
| Fiber | 0g |
| Sugar | 0g |
| Sodium | 650-750mg |
Chicken thighs are a fantastic source of high-quality protein, which supports muscle health and keeps you feeling full. They’re also rich in B vitamins, particularly niacin and B6, which help convert food into energy. The skin provides some healthy fats, and the garlic adds allicin, a compound known for its immune-supporting properties.
Parmesan cheese adds calcium and protein, plus that incredible umami flavor. If you’re watching your sodium, you can reduce the added salt—the Parmesan already brings some saltiness to the dish.
This recipe is naturally gluten-free and low-carb, making it suitable for keto, paleo, and whole30 diets (just skip the Parmesan for whole30 or use a compliant version). It’s also nut-free and egg-free. If you have dairy concerns, use the nutritional yeast variation mentioned above.
Frequently Asked Questions
Can I make this with chicken breasts instead of thighs?
Absolutely. Boneless, skinless chicken breasts will work, but the cook time will be shorter—about 8 minutes per side at 400°F. Check for an internal temperature of 165°F. The result will be leaner and less crispy, so consider adding a light coating of oil and seasoning to help with browning.
Why is my chicken not crispy in the air fryer?
Usually it’s one of three things: the chicken wasn’t dried properly before seasoning, the basket was overcrowded, or the air fryer wasn’t hot enough when the chicken went in. Make sure to pat the skin very dry, leave space between pieces, and preheat the air fryer for at least 3 minutes.
Can I use pre-grated Parmesan cheese?
You can, but I wouldn’t recommend it. Pre-grated Parmesan contains anti-caking agents that prevent it from melting smoothly. It tends to burn rather than form that beautiful golden crust. Freshly grated from a block is absolutely worth the extra minute of effort.
How do I prevent the garlic from burning?
This is why we add the garlic halfway through cooking, not at the beginning. Garlic burns easily at high temperatures. By adding it when you flip the chicken, it has just enough time to cook through and mellow without turning bitter. Also, mixing it with oil first helps protect it.
Can I double this recipe?
Yes, but you’ll need to cook in batches. Don’t try to cram 8 thighs into the basket at once. Cook them in batches of 4-6, letting the air fryer recover for 2-3 minutes between batches. The total time is still under an hour for a double batch, and the results are consistently excellent.
Conclusion
This air fryer garlic Parmesan chicken thighs recipe is proof that you don’t need hours in the kitchen or a dozen specialty ingredients to make something genuinely memorable. It came together in a panic, on a Tuesday night, with nothing but basic ingredients and a willingness to try something new. And honestly? That’s the kind of cooking that sticks with you.
I hope you give this recipe a shot, whether you’re staring down a hungry family on a weeknight, need something impressive for a last-minute gathering, or just want a reliable, delicious dinner that doesn’t demand much from you. Feel free to tweak the seasonings, swap in different herbs, or make it your own. That’s the beauty of a simple recipe—it’s a starting point, not a rulebook.
I’d love to hear how it turns out for you. Drop a comment below and let me know if you tried any variations, or share your own air fryer tips. And if you’re looking for more quick weeknight dinners, check out my crispy garlic chicken or these air fryer chicken drumsticks—they follow the same no-fuss philosophy. Happy cooking, friend. You’ve got this.
Pin This Recipe!
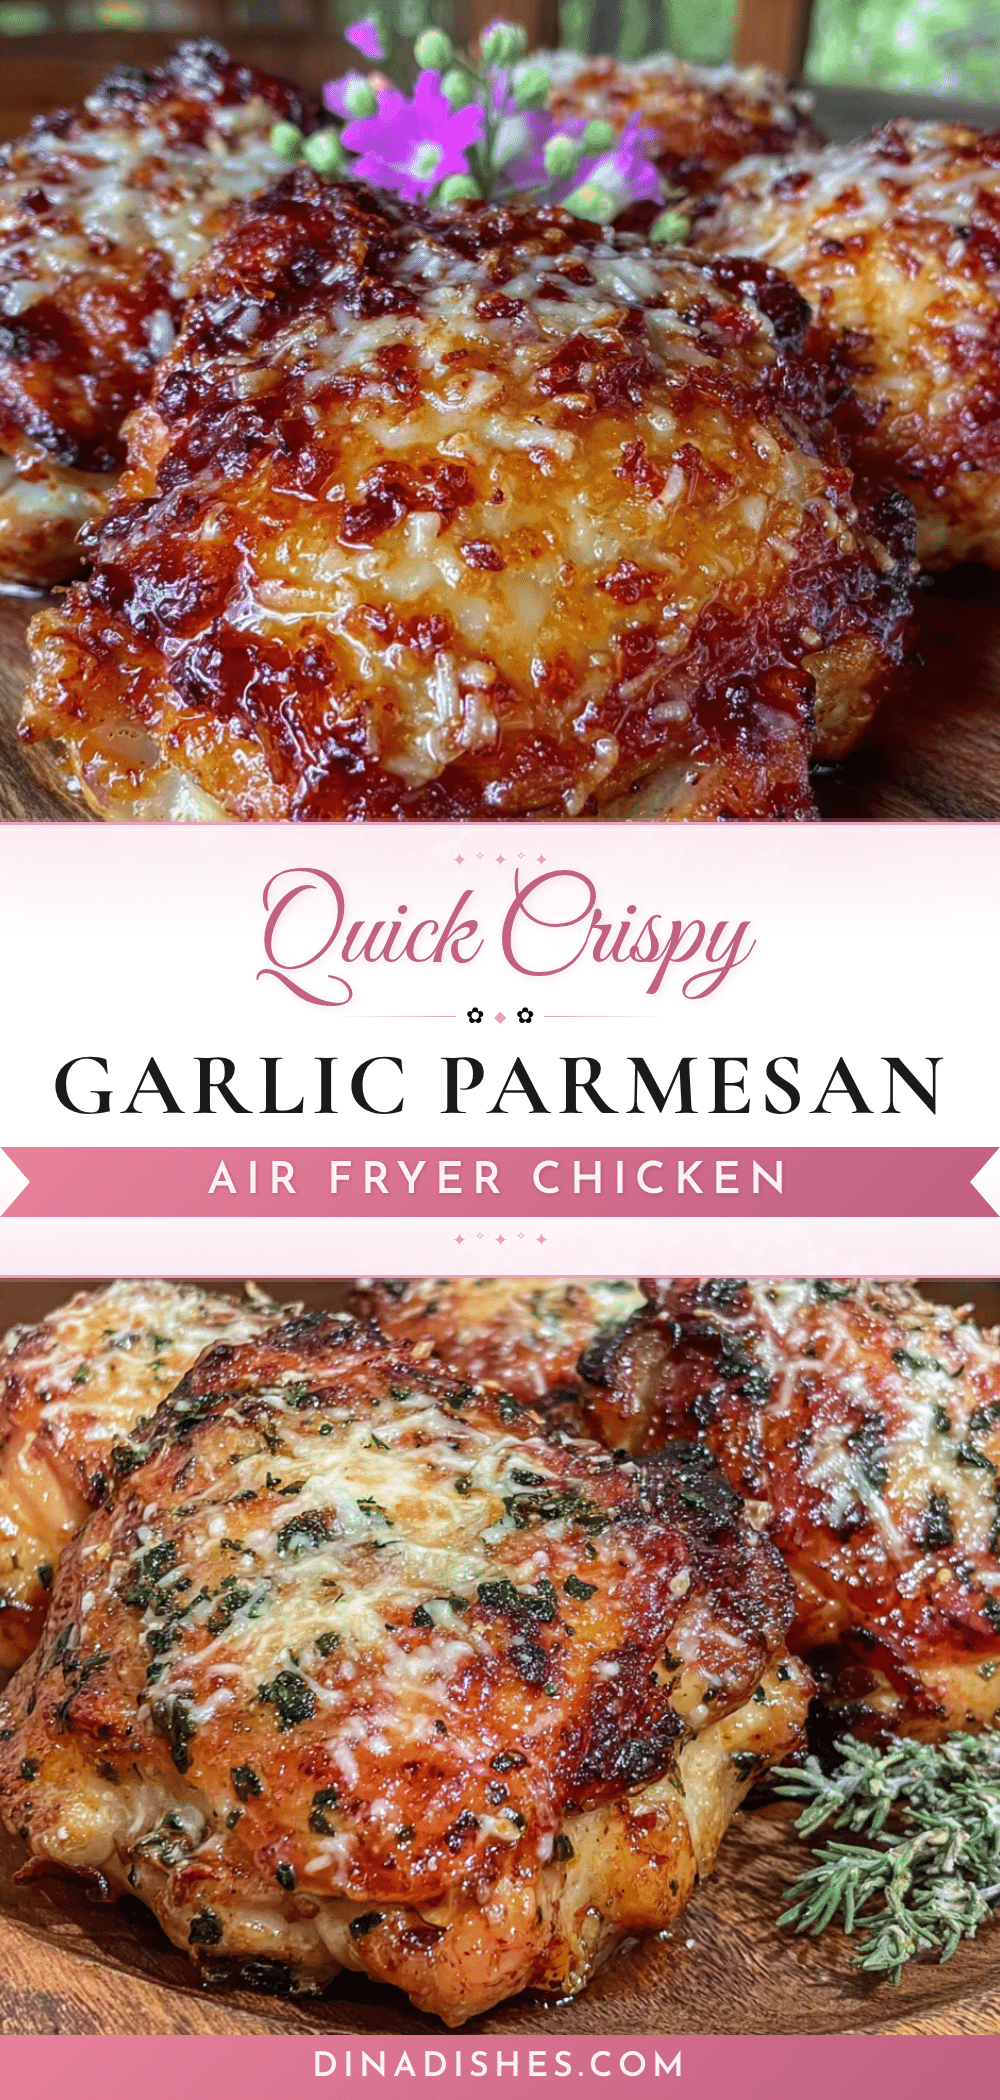
Best Easy Air Fryer Garlic Parmesan Chicken Thighs Recipe

Crispy, golden air fryer chicken thighs with a garlic Parmesan crust, ready in under 30 minutes. Perfect for busy weeknights or last-minute dinner obligations.
- Prep Time: 10 minutes
- Cook Time: 18-22 minutes
- Total Time: 28-32 minutes
- Yield: 4 servings 1x
- Category: Main Course
- Cuisine: American
Ingredients
- 4–6 bone-in, skin-on chicken thighs (about 1.5–2 pounds total)
- 4–5 cloves garlic, minced fresh
- 1/2 cup freshly grated Parmesan cheese (about 2 ounces)
- 2 tablespoons extra virgin olive oil
- 1 teaspoon kosher salt
- 1/2 teaspoon freshly ground black pepper
- 1 teaspoon paprika (optional but recommended)
- 1 teaspoon dried Italian seasoning (optional)
- Fresh parsley for garnish (optional)
Instructions
- Pat the chicken dry with paper towels, pressing into the skin to absorb as much moisture as possible.
- Place chicken thighs in a medium mixing bowl. Drizzle with 2 tablespoons olive oil. Add 1 teaspoon kosher salt, 1/2 teaspoon black pepper, 1 teaspoon paprika, and 1 teaspoon dried Italian seasoning (if using). Toss with hands until evenly coated.
- In a small bowl, combine minced garlic with 1 tablespoon olive oil. Let sit for a minute to bloom the garlic.
- Preheat air fryer to 400°F for 3-5 minutes.
- Arrange seasoned chicken thighs skin-side down in the air fryer basket in a single layer with space between each piece.
- Cook at 400°F for 10 minutes without opening the basket.
- Using tongs, carefully flip each thigh. Spoon garlic-oil mixture over the skin side. Sprinkle freshly grated Parmesan evenly over the top.
- Return basket to air fryer and cook for another 8-12 minutes at 400°F, until internal temperature reaches 175-185°F and skin is deep golden brown and crispy.
- Remove chicken from air fryer and transfer to a cutting board. Let rest for 5 minutes.
- Sprinkle with fresh chopped parsley if desired and serve.
Notes
Don’t skip drying the chicken—moisture is the enemy of crispiness. Fresh garlic matters; jarred minced garlic lacks the sweet, nutty quality. Air fryers vary, so check temperature at the 8-minute mark on the second side. Let air fryer recover between batches. Don’t overcrowd the basket. For dairy-free, use nutritional yeast instead of Parmesan. For boneless skinless thighs, reduce cooking time to 8 minutes per side.
Nutrition
- Serving Size: 1 chicken thigh
- Calories: 320380
- Sodium: 650750
- Fat: 2226
- Saturated Fat: 79
- Carbohydrates: 23
- Protein: 2832
Keywords: air fryer chicken thighs, garlic parmesan chicken, crispy chicken thighs, easy weeknight dinner, air fryer recipe


