My sister-in-law, Jen, had sworn she hated iced sugar cookies for over a decade. “Too sweet,” she’d say, waving a hand at the platter at every family gathering. “And the frosting is always that weird, waxy stuff that sticks to the roof of your mouth.” Honestly, I couldn’t argue with her on the waxy frosting part. I’d choked down my fair share of those grocery store platters, too. But I also knew that a properly made, iced cookie was a thing of beauty. So, last November, I found myself in my flour-dusted kitchen, a stubborn part of me wanting to crack her anti-cookie armor. I wasn’t trying to convert her, you know. I just wanted to see if I could make a version that didn’t rely on a stick of butter and a pound of powdered sugar to taste good.
The challenge was real. I wanted something that felt festive and special for Thanksgiving, but didn’t leave you in a sugar coma before the turkey even hit the table. I started messing around with a lighter dough, swapping in some whole wheat pastry flour and cutting back on the sugar. The first batch was… okay. Edible, but a little too “healthy” tasting. It lacked that satisfying, buttery crumb. Then, on a Tuesday afternoon, I had a little breakthrough. I was making a batch just for myself, a quiet experiment, when I heard the front door open. Jen had stopped by to borrow a pie plate. She walked into the kitchen, saw the cooling turkeys and pumpkins on the wire rack, and her face did this funny thing. She was trying to be skeptical, but her eyes kept darting back to the cookies.
“Those look… different,” she said, picking up a little iced turkey. She took a bite. And then another. She didn’t say anything for a full minute, just chewed thoughtfully. “Okay,” she finally admitted, a little begrudgingly. “This is actually good. The frosting isn’t gross.” That was it. That was my win. These aren’t just “healthy” cookies; they’re the good kind that makes you close your eyes after the first bite. They have that perfect soft-baked center, a slight crisp edge, and a creamy icing that’s sweet but not cloying. It’s the recipe that changed my sister-in-law’s mind about an entire category of dessert, and I think it might change yours, too. Maybe you’ve had the same experience with a sad, dry cookie that promised more than it delivered. Let me tell you, this one is different.
Why You’ll Love This Recipe
These aren’t your grandmother’s cutout cookies—well, they have the same nostalgic charm, but they’re a whole lot friendlier to your waistline and your afternoon energy levels. I’ve tested this recipe about five times now (someone had to eat the evidence), and it’s become my go-to for the Thanksgiving table. Here’s why I think you’ll feel the same way:
- Quick & Easy: From mixing to the first bite, you can have a batch done in under an hour. The dough comes together in one bowl, and there’s no chilling required. Perfect for when you realize you need a dessert for the potluck *tonight*.
- Simple Ingredients: No weird, hard-to-find stuff. You probably have everything in your pantry right now. We’re using a mix of all-purpose and whole wheat pastry flour for a lighter crumb, and Greek yogurt to keep the dough tender without all the butter.
- Perfect for Thanksgiving: These little turkeys and pumpkins are the star of the dessert table. They’re festive, fun to decorate with the kids, and they don’t compete with the pumpkin pie. They’re the perfect pre-pie snack.
- Crowd-Pleaser: I brought these to a Friendsgiving, and they were gone in ten minutes. The best part? Nobody guessed they were “lightened-up.” They just thought they were really good cookies. It’s the kind of recipe that makes you look like a hero without all the effort.
- Unbelievably Delicious: The texture is the real win here. The Greek yogurt and a touch of coconut oil give the dough a soft, pliable feel that bakes up into a cookie that’s crisp on the outside and tender on the inside. It’s next-level comfort food, honestly.
What makes this different from the other “healthy” cookie recipes out there? It’s the technique of using a simple, two-ingredient glaze instead of a heavy buttercream. This glaze sets up with a beautiful shine and a clean, sweet finish that lets the subtle vanilla and nutmeg flavors of the cookie shine through. It’s comfort food reimagined—healthier, faster, but with the same soul-soothing satisfaction. Perfect for impressing guests without stress, or turning a simple Tuesday into something a little more special.
What Ingredients You Will Need
This recipe uses simple, wholesome ingredients to deliver bold flavor and satisfying texture without the fuss. Most of these are pantry staples, which is my favorite kind of recipe. Here’s what you’ll need to grab:
For the Cookie Dough
- 1 cup all-purpose flour (125g) – This gives the cookies structure. I’ve tested this with a 1:1 gluten-free blend, and it works great, too.
- 1 cup whole wheat pastry flour (120g) – This is the secret to a lighter texture. It adds a tiny bit of nutty flavor and fiber without making the cookies dense. (Don’t use regular whole wheat flour; it’s too heavy.)
- 1/2 teaspoon baking powder – For a little lift.
- 1/4 teaspoon baking soda – Helps them spread just a bit.
- 1/2 teaspoon salt – Balances the sweetness.
- 1/2 teaspoon ground nutmeg – This is my little nod to Thanksgiving. It adds a warm, cozy flavor that pairs perfectly with the glaze.
- 1/4 cup coconut oil (60ml), melted and cooled – I like using unrefined coconut oil for a subtle flavor, but refined works if you want a neutral taste. (You can also use softened butter, but the coconut oil keeps them lighter.)
- 1/2 cup packed light brown sugar (100g) – Adds moisture and a deeper flavor than white sugar.
- 1 large egg – Room temperature is best for even mixing.
- 1/4 cup plain Greek yogurt (60g) – This is the magic ingredient. It replaces half the butter and keeps the dough incredibly tender. I recommend Fage or Chobani for thickness.
- 1 teaspoon vanilla extract – Pure, if you have it.
For the Glaze & Decorations

- 1 cup powdered sugar (120g) – Sifted to avoid lumps.
- 2-3 tablespoons milk (any kind works) – This is the liquid base. Start with 2 tablespoons and add more for a thinner glaze.
- 1/2 teaspoon vanilla extract – For flavor.
- Food coloring gels (orange, yellow, red) – I like the gel colors from Wilton; they give vibrant colors without thinning the glaze.
- Sprinkles or jimmies – For decorating the turkeys and pumpkins. (Optional, but highly recommended for the fun factor.)
Equipment Needed
You don’t need a fancy bakery setup for these. Here’s what I used in my own tiny kitchen:
- Large mixing bowl – Any bowl will do, but a wide one makes mixing easier.
- Whisk – For combining the dry ingredients.
- Rubber spatula – For folding the dough together.
- Rolling pin – I have a wooden one, but a wine bottle works in a pinch. (I’ve done it.)
- Turkey and pumpkin cookie cutters – The star of the show! You can find these at any craft store or online. If you don’t have them, any 2-3 inch shape will work.
- Baking sheets – I line mine with parchment paper for easy cleanup.
- Wire cooling rack – Essential for letting the glaze set properly.
- Small piping bags or zip-top bags – For the colored glaze. A squeeze bottle works great, too.
Preparation Method
Alright, let’s get to the fun part. I’ll walk you through it step-by-step, just like I’m standing next to you in the kitchen.
- Preheat and Prep: First, preheat your oven to 350°F (175°C). Line two baking sheets with parchment paper. This is a small step, but it makes a huge difference for even baking and easy cleanup.
- Mix the Dry Ingredients: In your large bowl, whisk together the all-purpose flour, whole wheat pastry flour, baking powder, baking soda, salt, and nutmeg. Give it a good 15 seconds of whisking to make sure everything is evenly distributed. (I once forgot the baking powder, and the cookies came out like little hockey pucks. Don’t be like me.)
- Mix the Wet Ingredients: In a separate smaller bowl (or the same one if you’re a one-bowl rebel like me), whisk together the melted and cooled coconut oil, brown sugar, egg, Greek yogurt, and vanilla extract. Whisk until it’s smooth and well combined. It should look a little like caramel.
- Combine Wet and Dry: Pour the wet ingredients into the dry ingredients. Use your rubber spatula to fold everything together. Mix just until you no longer see streaks of flour. Overmixing will make the cookies tough. The dough will be soft and a little sticky—that’s perfect. (If it feels too sticky to handle, add one extra tablespoon of all-purpose flour.)
- Roll and Cut: Lightly dust your work surface and rolling pin with a little flour. Turn the dough out and pat it into a disc. Roll it out to about 1/4-inch (6mm) thickness. I like it a little thicker for a softer cookie. Now, dip your cookie cutters in flour (this prevents sticking) and cut out your turkeys and pumpkins. Place them about 1 inch apart on your prepared baking sheets. Gather the scraps, re-roll, and cut again. I usually get about 24-30 cookies, depending on the size of my cutters.
- Bake: Bake for 8-10 minutes, or until the edges are just barely golden brown. The centers will still look a little soft and puffy. Don’t overbake! They will continue to set on the pan. Let them cool on the baking sheet for 5 minutes, then transfer to a wire rack to cool completely. This is crucial—if you glaze them while they’re warm, the icing will melt into a puddle.
- Make the Glaze: While the cookies are cooling, make the glaze. In a small bowl, whisk together the sifted powdered sugar, 2 tablespoons of milk, and the vanilla extract. You’re looking for a consistency that’s thick but still drips off the whisk in a smooth ribbon. If it’s too thick, add the last tablespoon of milk, one drop at a time. If it’s too thin, add a little more powdered sugar.
- Color and Decorate: Divide the glaze into small bowls. Add your food coloring gels to make orange for the pumpkins and a few fall colors for the turkeys. I like to make a little brown for the turkey bodies and orange for the beaks. Transfer each color to a small piping bag or a zip-top bag with a tiny corner snipped off. (I’ve used a toothpick to draw on details before, and it works in a pinch.)
- Ice the Cookies: Once the cookies are completely cool, it’s time to decorate. For the pumpkins, outline the shape with orange glaze, then fill it in. For the turkeys, outline the body with brown, fill it in, and then add little orange beaks and red waddles. Tap the cookie gently on the counter to help the glaze settle into a smooth layer. Add your sprinkles while the glaze is still wet. Let them set for about 30 minutes to 1 hour. The glaze will harden to a beautiful, shiny finish.
Cooking Tips & Techniques
I’ve made a lot of mistakes so you don’t have to. Here are the things I wish I’d known from the start:
- Don’t Overwork the Dough: This is the number one rule for tender cookies. Mix until just combined. If you see a little flour pocket, just fold it in gently. The more you mess with it, the more gluten develops, and the tougher your cookies will be.
- Chill if You Have Time: While I said no chilling is required, if you have 30 minutes, pop the rolled-out dough in the fridge. It makes the cutouts even cleaner and prevents the cookies from spreading too much. I do this when I’m not in a rush.
- Use a Light Hand with Flour: When rolling out the dough, use just enough flour to prevent sticking. Too much extra flour on the surface will dry out the cookies. I keep a small bowl of flour nearby and just dust my rolling pin lightly.
- The Perfect Glaze Consistency: This is the trickiest part. If your glaze is too thick, it won’t spread and will look lumpy. If it’s too thin, it will run right off the cookie. The perfect test? Dip a spoon in. The glaze should coat the back of the spoon and then slowly fall off in a smooth ribbon. If it falls off in a clump, add a drop of milk. If it runs off like water, add a little more powdered sugar.
- Timing is Everything: Bake one sheet at a time on the middle rack. If you put two sheets in at once, the heat circulates unevenly, and you’ll end up with some overdone and some underdone cookies. It’s worth the extra few minutes.
Variations & Adaptations
One of the best things about this recipe is how flexible it is. Here are a few ways to make it your own:
- Gluten-Free Version: Swap the all-purpose flour for a good 1:1 gluten-free baking blend (I like Bob’s Red Mill). The whole wheat pastry flour can be replaced with an additional cup of the gluten-free blend. The texture will be slightly more delicate, but still delicious.
- Vegan Adaptation: Use a flax egg (1 tablespoon ground flaxseed mixed with 3 tablespoons water) and a dairy-free Greek yogurt (like Kite Hill). The coconut oil is already vegan. The cookies will be a little less tender, but the flavor is spot on.
- Spice It Up: For a more intense fall flavor, add 1/2 teaspoon of cinnamon and 1/4 teaspoon of ground ginger to the dry ingredients. It gives the cookies a chai-like warmth that’s incredible with the vanilla glaze.
- No Cookie Cutters? No problem! Roll the dough into a log, chill it for an hour, and slice it into rounds. You can even press a few sprinkles into the top before baking for a simpler, no-fuss cookie.
- Different Glaze Flavors: Instead of vanilla, try adding a teaspoon of lemon or orange zest to the glaze. It adds a bright, citrusy note that cuts through the sweetness beautifully. I did this for a batch last week, and it was a game-changer.
Serving & Storage Suggestions
These cookies are best served at room temperature, after the glaze has fully set. They make a beautiful addition to a Thanksgiving dessert table, nestled next to the pumpkin pie and pecan tarts. I like to arrange them on a large wooden platter with a few sprigs of rosemary and some mini pumpkins for a rustic look.
For storage, place the fully decorated cookies in an airtight container, layering them between sheets of parchment paper. They will keep at room temperature for up to 5 days. The glaze will stay shiny and the cookies will remain soft. Honestly, they taste even better on day two, once the flavors have had a chance to meld together.
You can also freeze the un-iced cookies for up to 3 months. Just bake and cool them completely, then place them in a freezer-safe bag. When you’re ready to decorate, thaw them at room temperature, then make the glaze fresh. This is my secret for holiday prep—I bake the cookies weeks in advance and just do the decorating the day before the party. To re-crisp them after freezing, pop them in a 300°F (150°C) oven for 3-4 minutes.
Nutritional Information & Benefits
I don’t like to get too bogged down in numbers, but I know it helps to have an idea. Per cookie (based on 24 cookies), here’s the estimated breakdown:
- Calories: ~95 kcal
- Fat: 3g
- Carbohydrates: 16g
- Sugar: 9g
- Protein: 2g
- Fiber: 1g
The use of whole wheat pastry flour adds a bit of fiber, which helps slow down the sugar absorption, keeping your energy levels more stable. The Greek yogurt contributes a small amount of protein and calcium, making these a slightly more balanced treat than your standard sugar cookie. For me, the real benefit is knowing exactly what’s in my food. No weird preservatives, no high-fructose corn syrup—just real ingredients that make you feel good about what you’re eating. They fit perfectly into a balanced lifestyle, even during the indulgent holiday season.
Conclusion
So, there you have it. These Lightened-Up Iced Thanksgiving Cookie Cutouts are more than just a dessert; they’re a little story of changing minds and finding joy in the process. They’re proof that you don’t have to sacrifice flavor for a healthier treat, and that a simple, well-made cookie can win over even the most stubborn skeptic. I love this recipe because it’s forgiving, fun to decorate, and it always brings a smile to people’s faces when they see those little turkeys and pumpkins. I hope you give them a try and make them your own. Maybe you’ll add a little extra cinnamon, or use a different shape, or get the kids involved in the decorating mess. Whatever you do, I’d love to hear about it. Leave a comment below and tell me how your batch turned out, or share a photo on Pinterest. Let’s make this Thanksgiving a little lighter, and a whole lot sweeter. Happy baking, friend!
Frequently Asked Questions
Can I use all-purpose flour instead of whole wheat pastry flour?
Yes, you absolutely can! Just use 2 cups (250g) of all-purpose flour in total. The cookies will be a little less tender and have a slightly different texture, but they will still be delicious. I’ve done it when I was out of whole wheat pastry flour, and nobody complained.
Why did my cookies spread too much?
This usually happens if the dough was too warm or if you used too much coconut oil. Make sure your coconut oil is melted and *cooled* before adding it. If the dough feels very soft or greasy, pop it in the fridge for 20 minutes before rolling it out. Also, double-check your measurements—a little extra oil can cause a lot of spread.
Can I freeze the decorated cookies?
I don’t recommend freezing them after they are iced. The glaze can get sticky and lose its shine. It’s much better to freeze the un-iced cookies and decorate them fresh. If you absolutely must freeze them, place them in a single layer in a freezer-safe container with parchment paper between each layer, and thaw them in the fridge overnight.
How do I get the glaze to be perfectly smooth?
The key is sifting your powdered sugar and using a whisk. Lumps in the sugar will create bumps in the glaze. Also, add the milk slowly. You can always add more, but you can’t take it out. If you get air bubbles in the glaze, let it sit for 5 minutes before using, or gently tap the bowl on the counter to release them.
Can I make these cookies dairy-free?
Yes! This recipe is very adaptable. Use a dairy-free Greek yogurt (like a coconut or soy-based one) and a plant-based milk (like almond or oat milk) for the glaze. The coconut oil is already dairy-free. Just make sure your yogurt is thick, not watery, to maintain the right dough consistency.
Pin This Recipe!
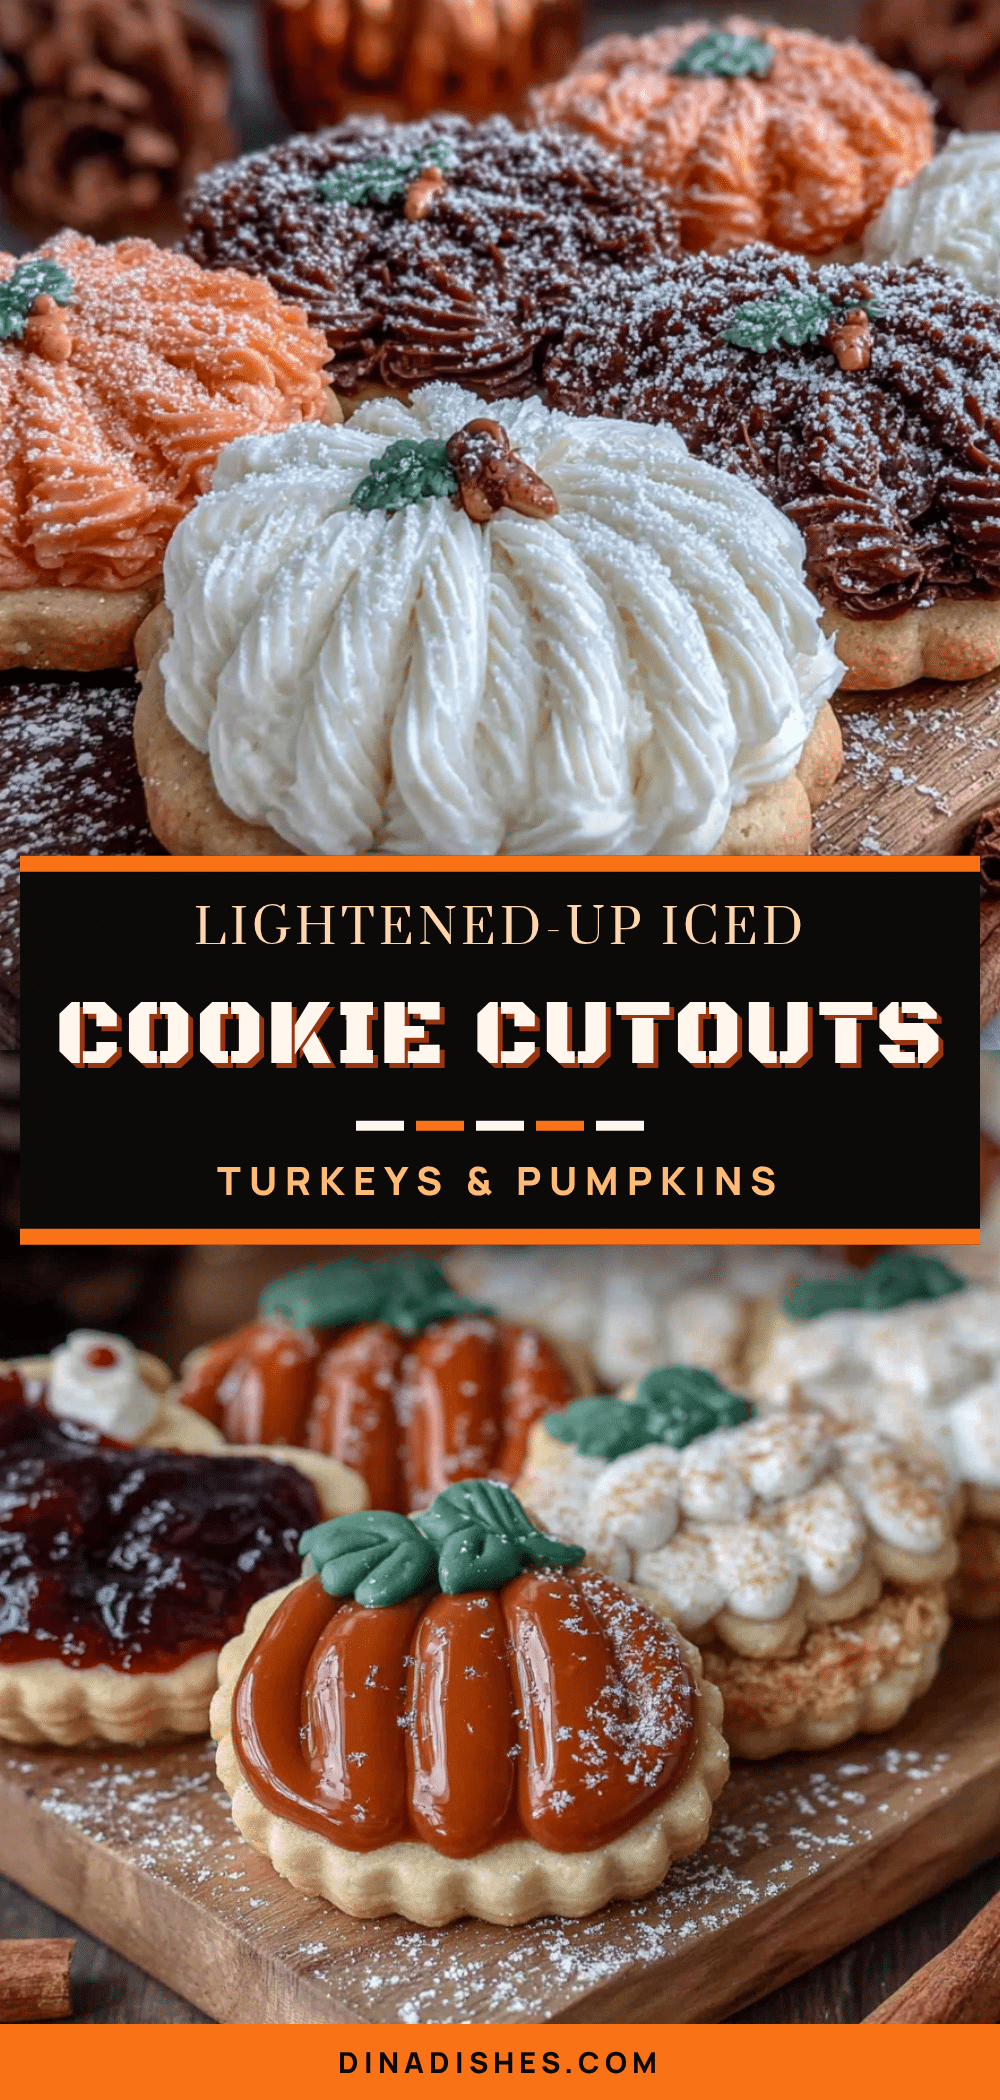
Lightened-Up Iced Thanksgiving Cookie Cutouts
These soft-baked, iced sugar cookies are a healthier twist on a classic holiday treat. Made with whole wheat pastry flour and Greek yogurt, they have a perfect texture and a creamy, not-too-sweet glaze that will win over even the biggest skeptics.
- Prep Time: 20 minutes
- Cook Time: 10 minutes
- Total Time: 1 hour (including cooling and setting)
- Yield: 24-30 cookies 1x
- Category: Dessert
- Cuisine: American
Ingredients
- 1 cup all-purpose flour (125g)
- 1 cup whole wheat pastry flour (120g)
- 1/2 teaspoon baking powder
- 1/4 teaspoon baking soda
- 1/2 teaspoon salt
- 1/2 teaspoon ground nutmeg
- 1/4 cup coconut oil (60ml), melted and cooled
- 1/2 cup packed light brown sugar (100g)
- 1 large egg, room temperature
- 1/4 cup plain Greek yogurt (60g)
- 1 teaspoon vanilla extract
- 1 cup powdered sugar (120g), sifted
- 2–3 tablespoons milk (any kind)
- 1/2 teaspoon vanilla extract (for glaze)
- Food coloring gels (orange, yellow, red)
- Sprinkles or jimmies (optional)
Instructions
- Preheat oven to 350°F (175°C). Line two baking sheets with parchment paper.
- In a large bowl, whisk together all-purpose flour, whole wheat pastry flour, baking powder, baking soda, salt, and nutmeg.
- In a separate bowl, whisk together melted and cooled coconut oil, brown sugar, egg, Greek yogurt, and vanilla extract until smooth.
- Pour wet ingredients into dry ingredients. Fold with a rubber spatula until just combined. Dough will be soft and slightly sticky.
- Lightly dust a work surface and rolling pin with flour. Roll dough to 1/4-inch (6mm) thickness. Cut out shapes with cookie cutters dipped in flour. Place 1 inch apart on prepared baking sheets.
- Bake for 8-10 minutes, until edges are just barely golden. Centers will look soft. Cool on baking sheet for 5 minutes, then transfer to a wire rack to cool completely.
- For the glaze: Whisk together sifted powdered sugar, 2 tablespoons milk, and 1/2 teaspoon vanilla extract. Add more milk if needed for a thick but drippy consistency.
- Divide glaze into small bowls and tint with food coloring gels. Transfer to piping bags or zip-top bags with a tiny corner snipped off.
- Once cookies are completely cool, decorate: outline shapes with glaze, fill in, and tap gently to smooth. Add sprinkles while glaze is wet. Let set for 30 minutes to 1 hour until hardened and shiny.
Notes
Don’t overwork the dough to keep cookies tender. For cleaner cutouts, chill rolled dough for 30 minutes. Glaze should coat the back of a spoon and fall off in a smooth ribbon. Bake one sheet at a time on the middle rack for even results. Cookies keep in an airtight container at room temperature for up to 5 days. Un-iced cookies can be frozen for up to 3 months.
Nutrition
- Serving Size: 1 cookie
- Calories: 95
- Sugar: 9
- Sodium: 65
- Fat: 3
- Saturated Fat: 2
- Carbohydrates: 16
- Fiber: 1
- Protein: 2
Keywords: Thanksgiving cookies, iced sugar cookies, healthy cookies, lightened-up cookies, cutout cookies, fall cookies, turkey cookies, pumpkin cookies


