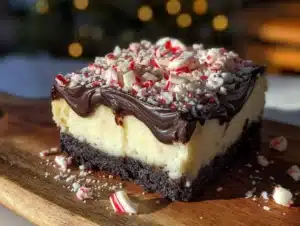
I was at the hardware store last December—honestly, just trying to find a new Christmas tree stand because ours had finally given up after fifteen years—when the cashier, a guy named Frank who looked like he’d rather be anywhere else, started telling me about these cheesecake bars. Frank, the man who sold me caulk and lightbulbs, was describing a dessert with such specific passion that I actually put down my wallet to listen. “My wife makes them every year,” he said, not quite looking at me, “but she lightened them up so we don’t feel terrible after. You gotta try the peppermint ones.” I wasn’t expecting cooking advice from a hardware store cashier, but there I was, standing by the snow shovels, listening to Frank explain exactly how to make lighter peppermint bark cheesecake bars.
The funny thing is, I almost forgot about it. I got home, wrestled the new tree stand into place, and didn’t think about Frank’s dessert until three days later when I was staring at a block of cream cheese in my fridge, wondering what to do with it. Maybe you’ve been there—stuck in that holiday dessert rut where everything feels too heavy, too sweet, or too complicated. That’s when I remembered Frank. I texted my friend who knows everyone in town, got his wife’s recipe, and made a batch that same afternoon. Let me tell you, the first bite was a genuine surprise. It had that creamy, rich cheesecake texture you crave, but without that brick-in-your-stomach feeling afterward.
The secret, I learned, is a few smart swaps that don’t sacrifice the indulgence. The peppermint is bright and festive, the chocolate layer gives you that bark experience, and the whole thing comes together in a way that feels special without requiring a culinary degree. I’ve made these lighter peppermint bark cheesecake bars for three holiday parties since, and every time, someone asks for the recipe. Frank probably has no idea he’s become my unlikely holiday hero, but honestly, I think about him every December when I pull these out of the oven. This recipe stayed with me because it proves you can have your cheesecake and eat it too—without the guilt.
Why You’ll Love This Recipe
Let’s be real for a second—holiday desserts are usually a nutritional free-for-all. These lighter peppermint bark cheesecake bars are different. They give you all the festive flavor and creamy satisfaction without the sugar crash or the post-dessert regret. I’ve tested this recipe at least six times now, tweaking the ratios until it hit that sweet spot between decadent and sensible.
- Quick & Easy: You can have these in the fridge chilling in about 30 minutes of hands-on time. Perfect for those last-minute holiday gatherings or when you need a dessert that doesn’t stress you out.
- Simple Ingredients: No weird health-food store finds here. Everything is available at a regular grocery store, and you probably have most of it already.
- Perfect for Holiday Parties: These bars travel well, slice cleanly, and look gorgeous on a platter. They’re the kind of dessert that disappears before the cookies do.
- Crowd-Pleaser: I’ve served these to kids, grandparents, and that one friend who claims they don’t like “healthy desserts.” Everyone goes back for seconds.
- Unbelievably Delicious: The texture is where this recipe shines. The crust is crisp, the cheesecake layer is silky, and the peppermint crunch on top gives you that satisfying snap.
What makes this different from other lightened cheesecake recipes? It’s the combination of reduced-fat cream cheese with a touch of Greek yogurt that keeps the texture luxuriously creamy without being dense. Plus, the peppermint bark topping uses dark chocolate, which adds antioxidants and a deeper flavor that complements the mint beautifully. This isn’t just another version—it’s the version that makes you close your eyes after the first bite and actually mean it when you say, “Wow.”
What Ingredients You Will Need
This recipe uses simple, wholesome ingredients to deliver that indulgent cheesecake experience without the heavy calories. Most of these are pantry staples or easy holiday finds.
For the Crust
- 1 ½ cups chocolate wafer crumbs (about 24 wafers, or use reduced-fat graham crackers for a milder flavor)
- 3 tablespoons unsalted butter, melted (I use salted in a pinch and just skip the added salt)
- 1 tablespoon granulated sugar (optional, if your wafers aren’t sweet enough)
- Pinch of salt (balances the sweetness)
For the Cheesecake Filling
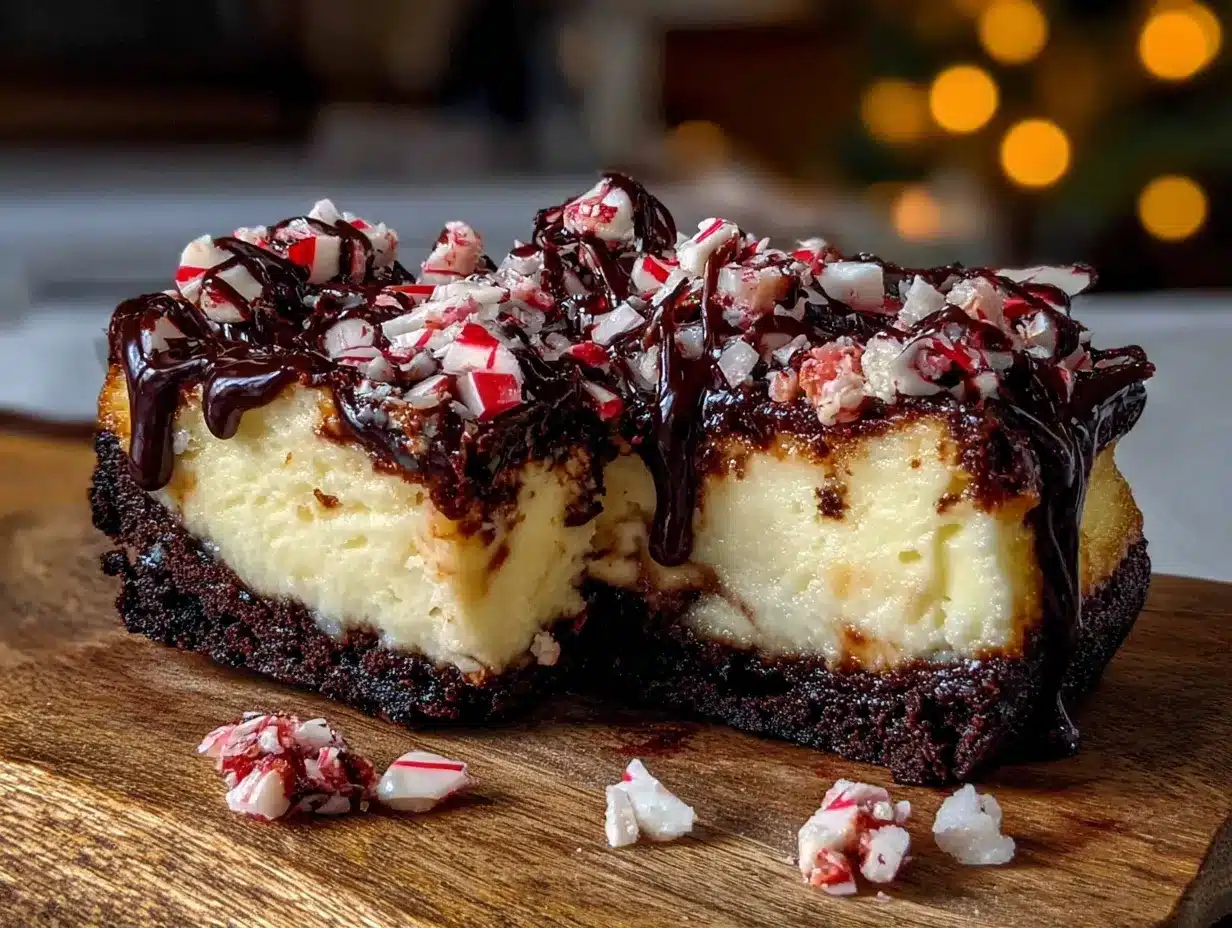
- 16 ounces reduced-fat cream cheese, softened (Neufchâtel works perfectly—don’t use fat-free, the texture gets weird)
- ½ cup plain Greek yogurt (I prefer 2% for creaminess, but non-fat works too)
- ¾ cup powdered sugar (dissolves easier than granulated for a smooth filling)
- 2 large eggs, room temperature (cold eggs can make the filling lumpy)
- 1 teaspoon vanilla extract (pure, not imitation, if you have it)
- ½ teaspoon peppermint extract (start with less—you can always add more, but you can’t take it out)
- 2-3 drops red food coloring (optional, for that pretty pink swirl effect)
For the Topping
- ½ cup dark chocolate chips (I like Ghirardelli 60% cacao for the best balance of sweetness and richness)
- 1 teaspoon coconut oil or vegetable oil (helps the chocolate melt smoothly)
- ¼ cup crushed peppermint candies (about 8-10 hard candies, crushed in a bag with a rolling pin—therapeutic, honestly)
- Optional: 2 tablespoons white chocolate chips (for that classic bark look)
For the peppermint extract, look for pure peppermint oil or extract—not mint, not spearmint. They’re different, and peppermint gives you that authentic candy cane flavor. If you’re dairy-free, you can use a plant-based cream cheese alternative, though the texture will be slightly less firm. I’ve tried it with Kite Hill brand and it worked well, just chill it an extra hour.
Equipment Needed
- 9×9-inch baking pan (an 8×8 works too, your bars will just be slightly thicker)
- Parchment paper (for easy lifting—don’t skip this, trust me on the cleanup)
- Electric hand mixer or stand mixer (you can whisk by hand, but your arm will hate you)
- Medium mixing bowls (at least two)
- Rubber spatula (for scraping every last bit of cheesecake goodness)
- Rolling pin or meat tenderizer (for crushing candies—a ziplock bag works great)
- Small microwave-safe bowl (for melting chocolate)
- Measuring cups and spoons
If you don’t have a 9×9 pan, you can use a standard 8×8 or even a small loaf pan for a deeper bar—just adjust the baking time by about 5-10 minutes. I’ve also made these in a mini cheesecake pan for individual servings, which is adorable for holiday parties. The parchment paper trick is non-negotiable, though. I learned that the hard way after spending 20 minutes scrubbing a pan.
Preparation Method
- Preheat your oven to 325°F (163°C). Line your 9×9-inch pan with parchment paper, leaving some overhang on two opposite sides. This creates little handles for lifting the bars out later. Lightly spray the parchment with non-stick spray, just in case.
- Make the crust. In a medium bowl, combine the chocolate wafer crumbs, melted butter, sugar (if using), and salt. Stir with a fork until the mixture looks like wet sand and holds together when pressed. Pour it into your prepared pan and press it down firmly and evenly. I use the bottom of a measuring cup for this—it gives you a nice, flat surface. Bake for 10 minutes, then set aside to cool slightly while you make the filling. Your kitchen will smell like chocolate and butter, which is never a bad thing.
- Start the cheesecake filling. In a large mixing bowl, beat the softened cream cheese with an electric mixer on medium speed until smooth and creamy—about 2 minutes. Scrape down the sides of the bowl with your spatula. Add the Greek yogurt and beat for another minute until combined. The mixture should be silky with no lumps. If you see lumps, keep beating—they’ll eventually smooth out.
- Add the sweeteners and flavorings. Add the powdered sugar, vanilla extract, and peppermint extract. Beat on low speed until combined, then increase to medium for about 30 seconds. Taste the filling—it should have a gentle peppermint kick without being overpowering. If you want more, add another ¼ teaspoon, but go slowly. Peppermint is bossy.
- Add the eggs. Crack your eggs into a small bowl first (this prevents shell pieces from ending up in your filling). With the mixer on low, add the eggs one at a time, mixing just until incorporated after each addition. Overmixing at this stage can incorporate too much air, which leads to cracks on top. If you want the pink swirl effect, remove about ¼ cup of the filling to a small bowl, add 2-3 drops of red food coloring, and stir gently. Set aside.
- Assemble the bars. Pour the plain cheesecake filling over the pre-baked crust and spread it evenly with your spatula. If you made the colored filling, drop small spoonfuls of it on top of the plain filling, then use a knife or toothpick to swirl it gently. Don’t over-swirl or you’ll lose the pattern. Tap the pan gently on the counter a few times to release any air bubbles.
- Bake the cheesecake. Place the pan in the preheated oven and bake for 28-32 minutes, or until the edges are set and the center jiggles slightly when you gently shake the pan. It will look a bit underdone in the middle—that’s exactly what you want. Overbaking leads to dry, cracked cheesecake. Turn off the oven, crack the door open, and let the cheesecake cool in the oven for 15 minutes. This gentle cooling helps prevent cracking.
- Cool completely. Remove the pan from the oven and place it on a wire rack to cool to room temperature—about 1 hour. Then cover the pan with plastic wrap and refrigerate for at least 4 hours, but overnight is better. Patience is hard, I know, but this is where the magic happens. The bars need time to set properly.
- Make the topping. Once the bars are fully chilled, make the chocolate layer. Place the dark chocolate chips and coconut oil in a small microwave-safe bowl. Microwave in 20-second intervals, stirring between each, until the chocolate is smooth and glossy. Let it cool for 2-3 minutes—if it’s too hot, it will melt the cheesecake surface.
- Finish the bars. Pour the melted chocolate over the chilled cheesecake and spread it into an even layer. Immediately sprinkle the crushed peppermint candies over the chocolate before it sets. If you’re using white chocolate for extra bark effect, melt it separately and drizzle it over the top, then swirl with a toothpick. Return the pan to the refrigerator for at least 30 minutes to set the chocolate.
- Slice and serve. Use the parchment handles to lift the entire block of cheesecake out of the pan. Place it on a cutting board and use a sharp knife to slice into 16 squares. For clean cuts, wipe the knife with a damp paper towel between slices. Trust me, your bars will look bakery-level.
Cooking Tips & Techniques
I’ve made this recipe at least a dozen times, and I’ve made every mistake in the book so you don’t have to. Here’s what I’ve learned.
Room temperature ingredients matter. I know, everyone says this, but it’s actually true for cheesecake. Cold cream cheese creates lumps that no amount of beating will fully smooth out. Leave your cream cheese and eggs on the counter for about 30 minutes before starting. If you forget (which I do constantly), you can microwave the cream cheese in 10-second bursts until it’s soft but not warm.
Don’t overmix the filling. This was my biggest failure early on. I’d get distracted and let the mixer run while I answered a text, and then my cheesecake would puff up in the oven and collapse into a cracked mess. Mix just until each ingredient is incorporated, then stop. Air bubbles are the enemy of a smooth top.
The jiggle test is your friend. When you take the cheesecake out of the oven, the center should wobble like Jell-O when you gently shake the pan. If it’s completely firm, it’s overbaked. If it’s liquidy, it needs more time. That gentle jiggle means it will set perfectly in the fridge.
Crush candies strategically. Put your peppermint candies in a ziplock bag, wrap it in a kitchen towel, and go to town with a rolling pin. The towel prevents the bag from breaking (learned that after a candy explosion on my kitchen floor). Leave some pieces a bit larger for texture—you don’t want dust, you want little crunchy bits.
Timing is everything. I like to make these the day before a party. The cheesecake sets overnight, the chocolate firms up perfectly, and all I have to do the next day is slice and arrange on a platter. It’s the most low-stress holiday dessert I know.
Variations & Adaptations
One of the best things about this recipe is how easily it adapts to different tastes and dietary needs. Here are some variations I’ve tried and loved.
Gluten-Free Version: Use gluten-free chocolate wafer cookies or gluten-free graham crackers for the crust. I’ve used the Schar brand chocolate cookies and they work beautifully—just crush them a bit finer since they’re more delicate.
Dairy-Free Version: Swap the cream cheese for a dairy-free alternative like Kite Hill or Tofutti, use coconut yogurt instead of Greek yogurt, and use a vegan butter substitute. The texture will be slightly softer, so chill for an extra hour before slicing. The dark chocolate topping is naturally dairy-free if you check the label.
White Chocolate Peppermint: For a completely different look, use white chocolate for the topping instead of dark. Add a few drops of peppermint extract to the white chocolate for extra flavor. The bars will be sweeter and have that classic candy cane aesthetic.
Mocha Twist: Add 1 tablespoon of instant espresso powder dissolved in 1 teaspoon of water to the cheesecake filling. The coffee flavor pairs amazingly with chocolate and peppermint—it’s like a peppermint mocha in bar form.
No-Bake Version: If you’re short on oven space during the holidays, you can make this a no-bake cheesecake. Use a pre-made graham cracker crust, and for the filling, fold in 1 cup of whipped heavy cream or whipped topping after mixing the cream cheese mixture. Chill for at least 6 hours before adding the topping. The texture is lighter and mousse-like.
Individual Mini Bars: Press the crust mixture into a 12-cup muffin tin lined with paper liners. Divide the filling among the cups and bake for about 15-18 minutes. Top with chocolate and crushed candies as directed. These are perfect for parties where people want to grab and go.
Serving & Storage Suggestions
These lighter peppermint bark cheesecake bars are best served cold, straight from the refrigerator. The texture is firm but creamy, and the chocolate topping has that satisfying snap. I like to let them sit at room temperature for about 5 minutes before serving—just enough to take the chill off without losing the structure.
For presentation, arrange the bars on a white platter or a festive holiday plate. A dusting of powdered sugar over the top adds a snowy effect, and a few extra crushed peppermint candies scattered around the plate looks gorgeous. If you’re feeling fancy, add a tiny sprig of fresh mint on each bar.
These pair beautifully with a cup of hot coffee, a mug of peppermint tea, or even a glass of cold milk. For an adult gathering, they’re fantastic alongside a peppermint martini or a dark stout beer—the bitterness of the beer balances the sweetness of the bars.
Storage Instructions: Keep the bars in an airtight container in the refrigerator for up to 5 days. Layer them with parchment paper between each layer to prevent sticking. The flavors actually deepen after a day or two, so don’t worry if you make them ahead.
Freezer Instructions: These freeze beautifully. Wrap individual bars tightly in plastic wrap, then place them in a freezer-safe bag or container. They’ll keep for up to 3 months. To thaw, transfer to the refrigerator overnight or let sit at room temperature for about 20 minutes. The chocolate might get a bit of condensation, but the flavor stays perfect.
I’ve noticed that the peppermint flavor mellows slightly after a day in the fridge, so if you’re making these ahead, consider adding just a touch more peppermint extract to the filling. The crushed candies on top stay crunchy for about 2 days, then start to soften slightly—which some people actually prefer.
Nutritional Information & Benefits
Here’s the honest breakdown for one bar (based on 16 servings):
- Calories: Approximately 185
- Protein: 6g
- Carbohydrates: 20g
- Fat: 10g
- Saturated Fat: 5g
- Fiber: 1g
- Sugar: 14g
- Sodium: 160mg
Compared to a traditional cheesecake bar, you’re saving about 80-100 calories and 8g of fat per serving. The Greek yogurt adds protein and probiotics, while the dark chocolate provides antioxidants and a lower sugar content than milk chocolate. The reduced-fat cream cheese cuts the saturated fat without sacrificing that creamy texture we all love.
These bars are vegetarian and can easily be made gluten-free or dairy-free with the substitutions mentioned above. They contain dairy, eggs, and gluten (unless modified), so keep that in mind for guests with allergies. The peppermint can also be a trigger for some people with acid reflux, so offer a plain version if needed.
I love that this dessert lets me enjoy a holiday treat without derailing my healthy eating habits. It’s about balance, not deprivation—and honestly, that’s a much better approach to holiday eating than swearing off dessert entirely.
Conclusion
These lighter peppermint bark cheesecake bars have become my signature holiday dessert, and I honestly can’t imagine a December without them. They’re the perfect combination of festive flavor, creamy texture, and guilt-free indulgence that makes everyone happy. Frank the hardware store cashier probably has no idea how much joy he’s brought into my kitchen, but I think about him every time I pull these out of the fridge.
I hope you’ll give these a try and make them your own. Maybe you’ll add extra chocolate, or skip the swirl, or double the peppermint—that’s the beauty of a good recipe. It’s a starting point, not a rulebook.
If you make these lighter peppermint bark cheesecake bars, I’d love to hear about it! Drop a comment below and tell me how they turned out, or share a photo on social media and tag me. Did you try a variation? Did your family love them as much as mine does? Let’s keep the conversation going—because great recipes are meant to be shared.
Happy holidays, and happy baking! You’ve got this.
Frequently Asked Questions
Can I use full-fat cream cheese instead of reduced-fat?
Absolutely. The bars will be richer and slightly denser, but they’ll still be delicious. Just note that the calorie and fat content will increase. If you’re using full-fat, you might want to reduce the butter in the crust slightly to balance the richness.
Why did my cheesecake crack on top?
Cracks usually happen from overbaking or sudden temperature changes. Make sure you’re not overmixing the filling (which incorporates too much air), and always let the cheesecake cool gradually in the oven with the door cracked open. If you still get cracks, don’t worry—the chocolate topping covers them beautifully.
Can I use store-bought crust instead of making my own?
Yes, a pre-made graham cracker crust will work in a pinch. You’ll need two 9-inch crusts, or you can use a 9×13 pan with a store-bought crust. Just adjust the baking time slightly since the crust is already baked.
How do I crush peppermint candies without making a mess?
Put the candies in a sturdy ziplock bag, wrap it in a clean kitchen towel, and use a rolling pin or meat tenderizer to crush them. The towel prevents the bag from breaking. You can also use a food processor, but pulse carefully—you want chunks, not powder.
Can I make these bars vegan?
Yes, with a few swaps. Use vegan cream cheese, coconut yogurt, flax eggs (1 tablespoon ground flaxseed mixed with 3 tablespoons water per egg), and a vegan butter substitute. The texture will be slightly softer, so chill for an extra hour. Use dairy-free dark chocolate for the topping.
Pin This Recipe!
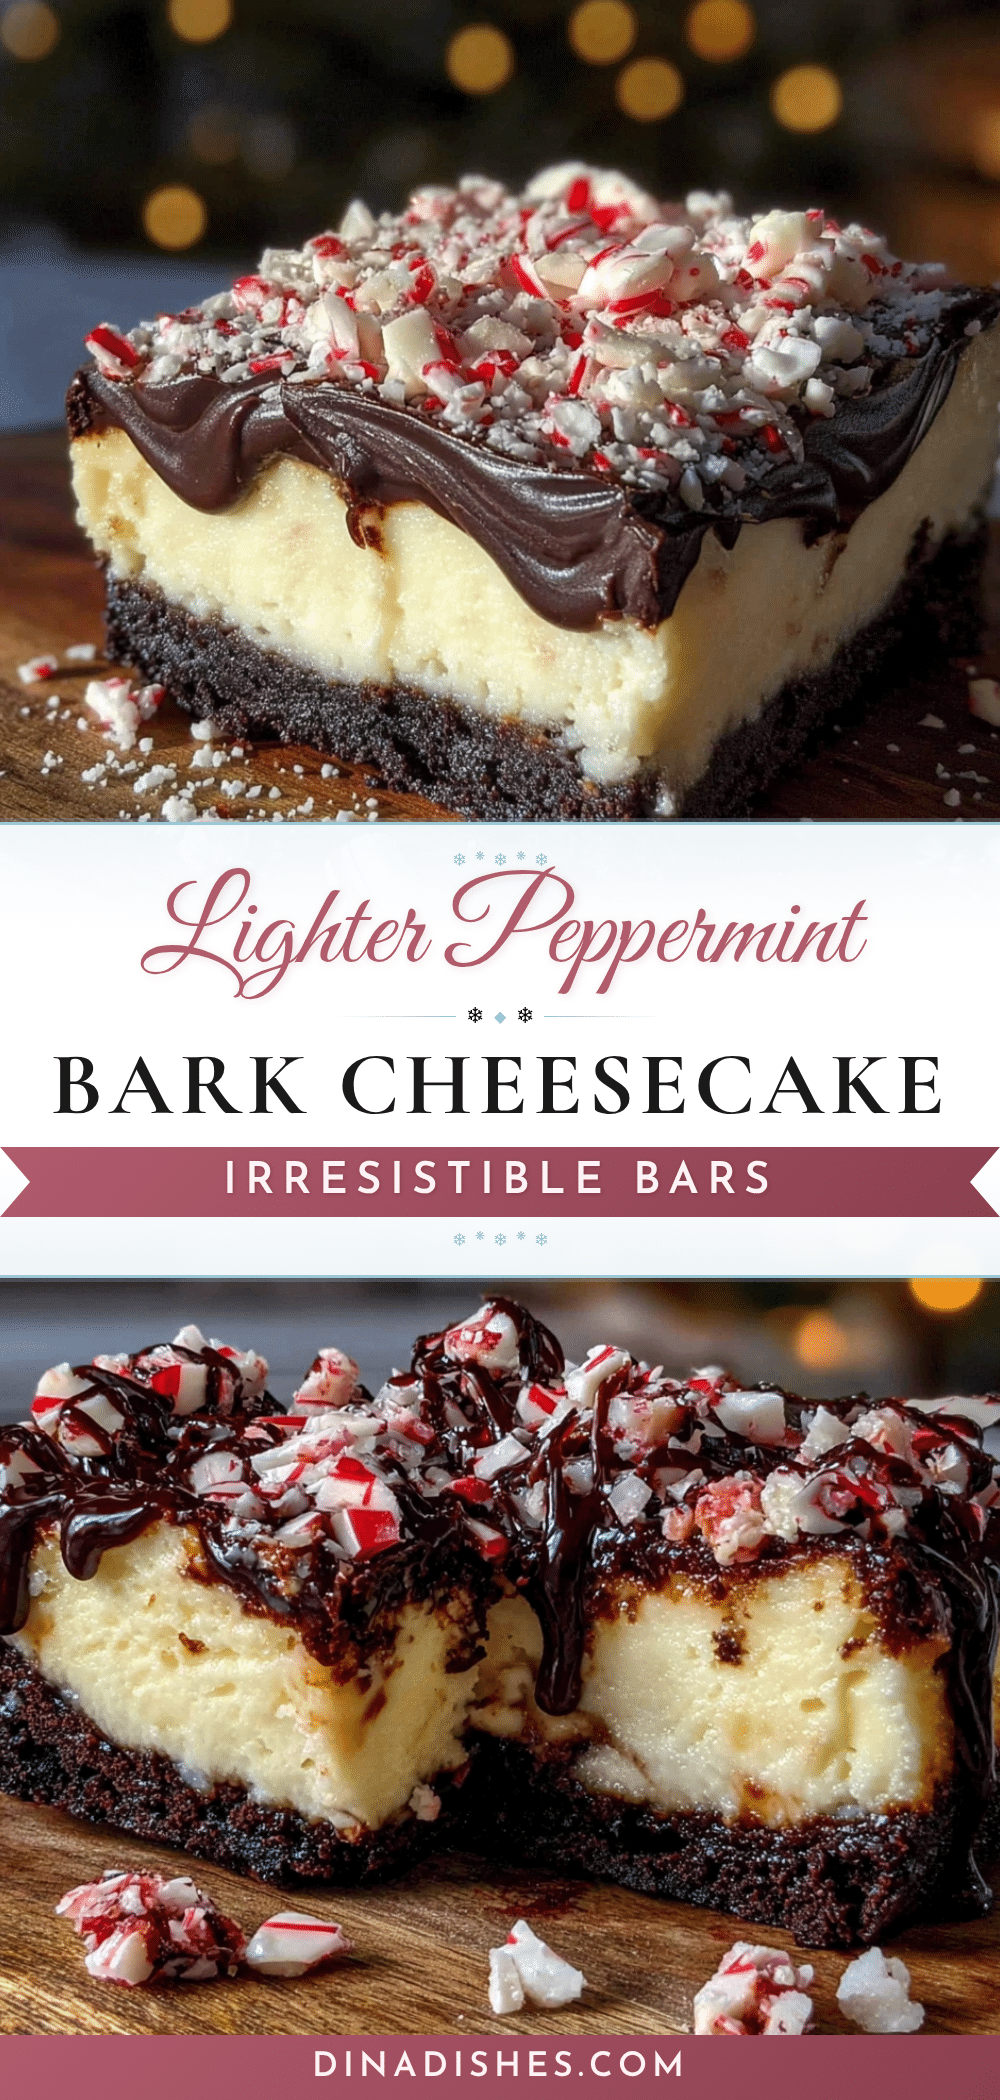
Lighter Peppermint Bark Cheesecake Bars
These lighter peppermint bark cheesecake bars offer all the festive flavor and creamy satisfaction of traditional cheesecake without the guilt. Made with reduced-fat cream cheese and Greek yogurt, they’re a quick and easy holiday dessert that’s perfect for parties.
- Prep Time: 30 minutes
- Cook Time: 30 minutes
- Total Time: 5 hours (includes chilling)
- Yield: 16 servings 1x
- Category: Dessert
- Cuisine: American
Ingredients
- 1 ½ cups chocolate wafer crumbs (about 24 wafers, or use reduced-fat graham crackers)
- 3 tablespoons unsalted butter, melted
- 1 tablespoon granulated sugar (optional)
- Pinch of salt
- 16 ounces reduced-fat cream cheese, softened (Neufchâtel works perfectly)
- ½ cup plain Greek yogurt (2% preferred)
- ¾ cup powdered sugar
- 2 large eggs, room temperature
- 1 teaspoon vanilla extract (pure preferred)
- ½ teaspoon peppermint extract
- 2–3 drops red food coloring (optional)
- ½ cup dark chocolate chips (60% cacao recommended)
- 1 teaspoon coconut oil or vegetable oil
- ¼ cup crushed peppermint candies (about 8–10 hard candies)
- Optional: 2 tablespoons white chocolate chips
Instructions
- Preheat your oven to 325°F (163°C). Line a 9×9-inch baking pan with parchment paper, leaving overhang on two opposite sides. Lightly spray with non-stick spray.
- Make the crust: In a medium bowl, combine chocolate wafer crumbs, melted butter, sugar (if using), and salt. Stir until mixture resembles wet sand. Press firmly into the prepared pan using the bottom of a measuring cup. Bake for 10 minutes, then set aside to cool slightly.
- Start the cheesecake filling: In a large mixing bowl, beat softened cream cheese with an electric mixer on medium speed until smooth and creamy, about 2 minutes. Scrape down sides. Add Greek yogurt and beat for another minute until combined.
- Add sweeteners and flavorings: Add powdered sugar, vanilla extract, and peppermint extract. Beat on low until combined, then increase to medium for 30 seconds. Taste and adjust peppermint if desired.
- Add eggs: Crack eggs into a small bowl first. With mixer on low, add eggs one at a time, mixing just until incorporated after each addition. If using red food coloring, remove about ¼ cup of filling, add 2-3 drops, and stir gently.
- Assemble the bars: Pour plain cheesecake filling over pre-baked crust and spread evenly. If using colored filling, drop small spoonfuls on top and swirl gently with a knife or toothpick. Tap pan on counter to release air bubbles.
- Bake the cheesecake: Bake for 28-32 minutes, until edges are set and center jiggles slightly. Turn off oven, crack door open, and let cheesecake cool in oven for 15 minutes.
- Cool completely: Remove pan from oven and place on a wire rack to cool to room temperature, about 1 hour. Cover with plastic wrap and refrigerate for at least 4 hours, preferably overnight.
- Make the topping: Once bars are fully chilled, place dark chocolate chips and coconut oil in a small microwave-safe bowl. Microwave in 20-second intervals, stirring between each, until smooth. Let cool for 2-3 minutes.
- Finish the bars: Pour melted chocolate over chilled cheesecake and spread into an even layer. Immediately sprinkle crushed peppermint candies over chocolate. If using white chocolate, melt separately and drizzle over top, then swirl with a toothpick. Return to refrigerator for at least 30 minutes to set chocolate.
- Slice and serve: Use parchment handles to lift cheesecake out of pan. Place on cutting board and slice into 16 squares using a sharp knife, wiping knife with a damp paper towel between slices.
Notes
Room temperature ingredients are crucial for a smooth filling. Don’t overmix the filling to avoid cracks. The jiggle test is key: center should wobble like Jell-O when done. Crush candies in a ziplock bag wrapped in a towel to avoid mess. Make ahead the day before for best results.
Nutrition
- Serving Size: 1 bar
- Calories: 185
- Sugar: 14
- Sodium: 160
- Fat: 10
- Saturated Fat: 5
- Carbohydrates: 20
- Fiber: 1
- Protein: 6
Keywords: peppermint bark, cheesecake bars, lighter cheesecake, holiday dessert, easy dessert, peppermint cheesecake, reduced-fat cheesecake