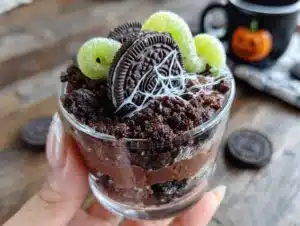
I had refused to make Halloween-themed desserts for years. Something about the whole concept felt gimmicky to me—food should be beautiful, not a prop, right? I’d roll my eyes at the neon-colored frosting and those plastic spider rings perched on cupcakes. Then last October, I walked into my neighbor’s kitchen unannounced to borrow an egg, and there she was—my very serious, very practical neighbor who gardens in sensible shoes—sitting at her kitchen table, eating what looked like a tiny pot of actual dirt with a demitasse spoon. She looked caught. “It’s not what you think,” she said, with chocolate on her lip. She handed me a spoon. I sat down. And honestly? I’ve been making these cozy Halloween dirt cups every October since. That’s the thing about recipes you don’t respect—sometimes they just know better than you do.
I mean, let me tell you—I was skeptical right up until that first bite. The way the crushed Oreo crust gives way to that silky, rich pudding underneath, and then you hit a gummy worm, all sweet and chewy in the middle of all that creaminess? It’s got no business being this good. It’s the kind of dessert that doesn’t try to impress you. It just sits there, looking like mud, waiting for you to stop being a snob and take a bite. Maybe you’ve been there—judging a recipe by its cover, only to realize you were the problem all along.
What got me is how simple it is. No complicated techniques, no fancy ingredients. Just chocolate pudding, crushed cookies, a handful of gummy worms, and a little pot to put it in. But something about eating it out of a little flower pot with a tiny shovel spoon makes the whole thing feel special. It’s cozy in a way that’s hard to explain—like being a kid again, but with better taste. I keep making these because they remind me that not everything has to be serious. Some of the best recipes are the ones you’re too proud to try.
Why You’ll Love This Recipe
Let’s be real for a second—there are about a million dirt cup recipes out there. But this one? This one is different. I’ve tested this version at three different Halloween parties, two family gatherings, and one very rainy Tuesday when I just needed something silly to cheer myself up. Each time, I tweaked something small—the pudding ratio, the chilling time, the way the Oreos are crushed—until it felt just right. Here’s why this particular recipe wins every time:
- Quick & Easy: Comes together in about 20 minutes of active work. The hardest part is waiting for the pudding to set in the fridge.
- Simple Ingredients: You probably already have most of this in your kitchen. No weird specialty items, no hunting down obscure baking supplies.
- Perfect for Halloween: Whether it’s a classroom party, a cozy night in, or a spooky movie marathon, these dirt cups fit right in without being over-the-top.
- Crowd-Pleaser: I’ve watched adults sneak these out of the fridge when they thought no one was looking. Kids obviously love them, but grown-ups can’t resist either.
- Unbelievably Delicious: The texture is what gets you—crunchy Oreo crumbs, silky pudding, and those chewy gummy worms hiding inside. It’s a party in a little cup.
What makes this version different from the rest? It’s all in the pudding. I use a homemade chocolate pudding base instead of the instant box mix most recipes call for. It takes an extra ten minutes, but the difference is night and day—richer, creamier, and way more satisfying. Plus, I’ve figured out the perfect Oreo-to-pudding ratio so you get that satisfying crunch in every single bite, not just at the top. This isn’t just another dirt cup recipe—it’s the one that turned me into a believer.
What Ingredients You Will Need
This recipe uses simple, honest ingredients to create something that feels a little bit magical. Most of these are pantry staples, which makes it perfect for last-minute Halloween plans or when you just want to make something fun without a grocery store run.
For the Chocolate Pudding
- 2 cups whole milk (adds richness; 2% works too, but don’t go lower than that)
- 1/2 cup granulated sugar
- 1/4 cup unsweetened cocoa powder (I prefer Ghirardelli for its deep chocolate flavor)
- 3 tablespoons cornstarch
- 1/4 teaspoon salt
- 2 large egg yolks (room temperature, so they blend smoothly)
- 2 tablespoons unsalted butter (cut into small pieces, for that glossy finish)
- 1 teaspoon vanilla extract
For the Dirt Cups
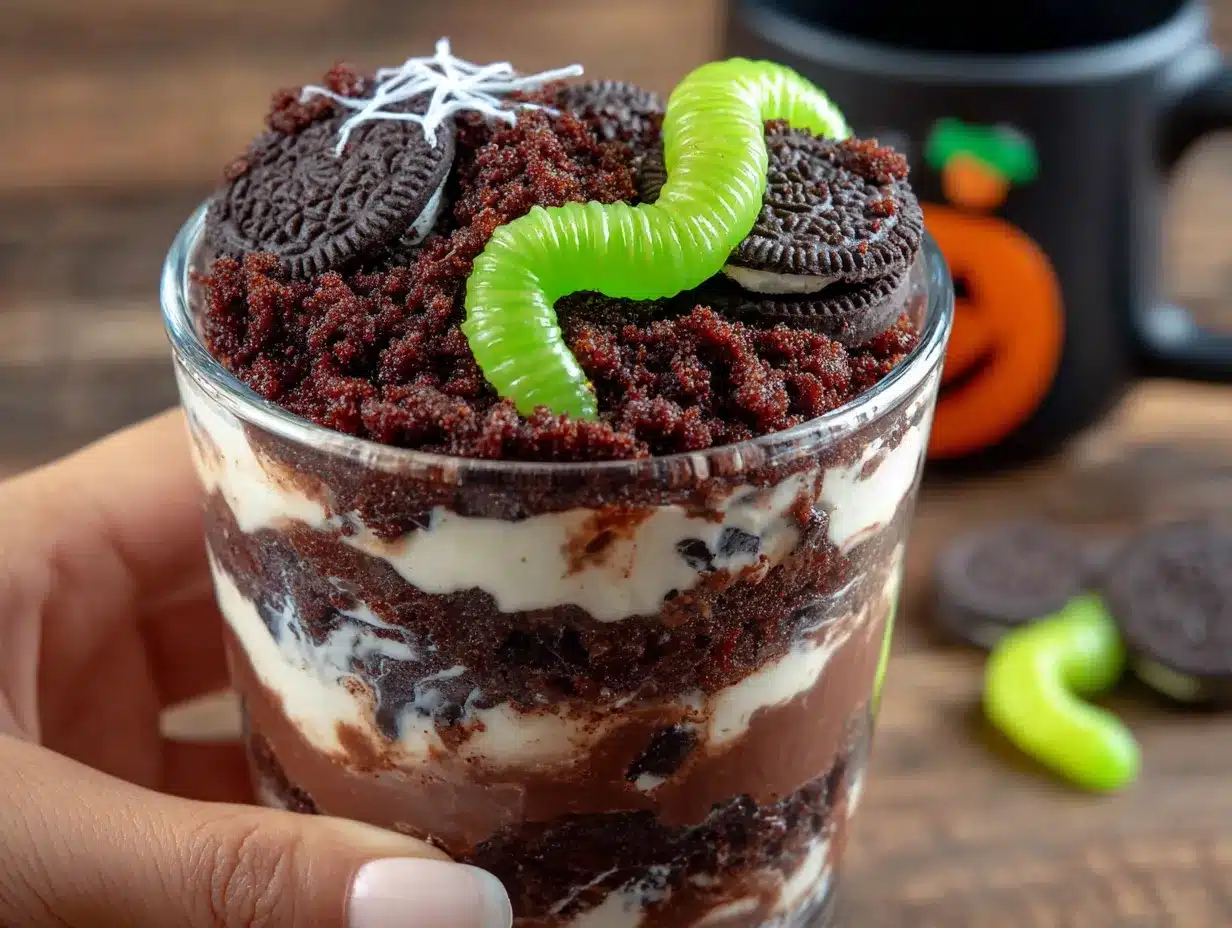
- 24 Oreo cookies (about 2 cups crushed; regular, not double-stuf)
- 12-16 gummy worms (the sour kind add a nice tang, but classic works too)
- 4 small flower pots or clear cups (I use 8-ounce plastic cups for parties, but tiny terra cotta pots are adorable)
- Optional: fresh mint leaves or small fake flowers for decoration on top
A note on the Oreos—I’ve tried this with the double-stuf version and it throws off the texture. The extra filling makes the “dirt” clump together instead of staying crumbly. Stick with regular Oreos for the best results. And for the gummy worms, look for the thicker, chewier ones rather than the thin, stringy kind. They hold up better when you push them into the pudding and they don’t get lost in the texture.
If you’re dairy-free, you can substitute the whole milk with oat milk or full-fat coconut milk. The pudding won’t be quite as thick, but it still works. For the butter, use a good vegan butter stick—not the spreadable kind in a tub. And if you want to go gluten-free, there are decent gluten-free chocolate sandwich cookies available now. I’ve tested with the Glutino brand and it worked fine, though the crumbs are a little finer.
Equipment Needed
You don’t need much for this recipe, which is part of its charm. Here’s what you’ll want to have on hand:
- A medium saucepan for the pudding. Nothing fancy—just something with a heavy bottom so the milk doesn’t scorch.
- A whisk for smoothing out the cocoa and cornstarch. A balloon whisk works best.
- A food processor or a sturdy zip-top bag and rolling pin for crushing the Oreos. I’ve done both methods—the food processor is faster and gives you more control over the texture, but the bag-and-rolling-pin method is oddly satisfying and requires less cleanup.
- 4 small cups or pots for serving. Clear plastic cups let you see the layers, which is part of the fun. Terra cotta pots are adorable but make sure they’re food-safe or lined with a plastic cup.
- A small spatula for scraping every last bit of pudding out of the saucepan (because wasting chocolate is a crime).
- Measuring cups and spoons—the usual suspects.
If you don’t have a food processor, don’t sweat it. I’ve crushed Oreos with a wine bottle before and it worked just fine. The texture is actually a little more rustic that way, with some bigger chunks mixed in, which I kind of prefer. Just make sure you’re not pulverizing them into dust—you want some texture in that “dirt.”
Preparation Method
Alright, let’s make some dirt. I mean that in the best possible way.
- Make the chocolate pudding (15 minutes). In a medium saucepan, whisk together the sugar, cocoa powder, cornstarch, and salt. Make sure there are no lumps—this is important because once you add the liquid, it’s harder to break them up. In a separate bowl, whisk the egg yolks with about 1/4 cup of the milk until smooth. Set that aside.
- Heat the milk. Pour the remaining milk into the saucepan with the dry ingredients and whisk until everything is combined. Place the saucepan over medium heat and cook, whisking constantly, until the mixture starts to thicken and bubble. This takes about 5-7 minutes. Don’t walk away—pudding can scorch in seconds if you’re not paying attention. I learned this the hard way on my third test batch. The smell of burnt chocolate pudding is not a cozy Halloween vibe.
- Temper the eggs. Once the pudding is bubbling and thick, slowly pour about 1/2 cup of the hot mixture into the bowl with the egg yolks, whisking constantly. This warms the eggs up gradually so they don’t scramble when you add them to the pot. Pour the egg mixture back into the saucepan and whisk like your life depends on it for another 2 minutes, until the pudding is thick and smooth.
- Finish the pudding. Remove the saucepan from the heat and stir in the butter and vanilla extract. The butter gives the pudding that gorgeous glossy finish and makes it taste extra luxurious. Keep stirring until the butter is completely melted and incorporated. Pour the pudding through a fine-mesh strainer into a bowl if you want it extra smooth—I usually skip this step because I like a little texture, but it’s up to you.
- Chill the pudding (at least 2 hours). Cover the pudding with plastic wrap, pressing it directly onto the surface to prevent a skin from forming. Pop it in the fridge and let it set until it’s completely cold and firm. I usually make the pudding the night before and assemble the cups the next day—it makes the whole process feel effortless.
- Crush the Oreos (5 minutes). While the pudding chills, crush your Oreos. If using a food processor, pulse them until they resemble coarse sand—you want some small chunks, not powder. If using the bag method, put the cookies in a zip-top bag and go to town with a rolling pin. It’s a great stress reliever, honestly. Set the crumbs aside.
- Assemble the dirt cups (10 minutes). When the pudding is set, give it a good stir to loosen it up. Spoon or pipe about 1/4 cup of pudding into the bottom of each cup. Add a layer of crushed Oreos—about 2 tablespoons—then press a couple of gummy worms into the pudding so they’re peeking out. Add another layer of pudding, then top with more Oreo crumbs. I like to leave a little mound of “dirt” on top for that authentic look.
- Add the finishing touches. Poke a couple more gummy worms into the top layer so they look like they’re crawling out of the dirt. If you’re using flower pots, stick a mint leaf or a small fake flower in the top for that “something’s growing in here” effect. Refrigerate for at least 30 minutes before serving so everything sets together.
A few things I’ve learned the hard way: Don’t overfill the cups. Leave about 1/2 inch of space at the top so the Oreo crumbs don’t spill everywhere when you’re moving them. And if you’re making these for a party, assemble them no more than 4-6 hours ahead. The Oreo crumbs will start to soften and get mushy if they sit too long, and you lose that satisfying crunch.
Cooking Tips & Techniques
I’ve made a lot of mistakes with this recipe so you don’t have to. Here’s what I’ve learned:
Don’t rush the pudding. I know it’s tempting to crank up the heat to make it thicken faster, but medium heat is your friend. High heat will give you lumpy pudding or, worse, burnt milk. The first time I made this, I got impatient and ended up with a grainy, scorched mess that tasted like regret. Low and slow, my friend.
The cornstarch slurry trick. If your pudding isn’t thickening after 10 minutes, don’t panic. Mix 1 tablespoon of cornstarch with 2 tablespoons of cold milk in a small bowl, then whisk it into the pudding. It’ll thicken up almost immediately. This is my emergency backup plan and it’s never failed me.
Crush Oreos in batches. If you’re making a big batch for a party, crush the Oreos in small batches rather than dumping them all in the food processor at once. They crush more evenly and you get a better mix of fine crumbs and small chunks. I usually do 6-8 cookies at a time.
Pipe the pudding for cleaner layers. If you want those Instagram-worthy layers, put the pudding in a piping bag (or a zip-top bag with the corner snipped off) and pipe it into the cups. It gives you more control and keeps the sides of the cup clean so you can see the beautiful layers. I’m usually too lazy for this, but when I’m feeling fancy, it makes a big difference.
Let the gummy worms come to room temperature. Cold gummy worms are hard and less flexible, which makes them harder to position in the pudding. Let them sit out for 10-15 minutes before you start assembling. They’ll bend more easily and look more natural crawling out of the dirt.
Variations & Adaptations
This recipe is endlessly adaptable. Here are some of my favorite variations:
Peanut Butter Dirt Cups: Swirl 1/4 cup of creamy peanut butter into the pudding before layering. The chocolate-peanut butter combo is absolutely killer. I made these for a friend’s Halloween party and they disappeared in about 10 minutes.
Vegan Dirt Cups: Use full-fat coconut milk instead of whole milk, vegan butter, and a flax egg (1 tablespoon ground flaxseed mixed with 3 tablespoons water) instead of the egg yolks. The pudding will be slightly less thick, but still delicious. I’ve tested this version and it holds up surprisingly well.
Pumpkin Spice Dirt Cups: Add 1/2 cup of pumpkin puree and 1 teaspoon of pumpkin pie spice to the pudding along with the butter and vanilla. It gives the dirt cups a fall twist that’s perfect for Thanksgiving or a cozy autumn night. Top with crushed graham crackers instead of Oreos for extra seasonal vibes.
Gluten-Free Version: Use gluten-free chocolate sandwich cookies and make sure your cornstarch is certified gluten-free. The rest of the ingredients are naturally gluten-free, so this is an easy swap.
Extra Spooky Version: Add a few drops of orange or green food coloring to the pudding for a more Halloween-y look. I’ve also added edible glitter to the Oreo crumbs for a “magical dirt” effect that kids absolutely lose their minds over.
My personal favorite variation? The peanut butter one. There’s something about the salty-sweet combo that makes these dirt cups feel even more indulgent. I made them for a cozy movie night once and my husband ate three before I could stop him.
Serving & Storage Suggestions
These dirt cups are best served cold, straight from the fridge. The contrast between the cold, creamy pudding and the crunchy Oreo crumbs is what makes them so satisfying. If you’re serving them at a party, I recommend pulling them out of the fridge about 10 minutes before serving—just enough time to take the chill off without losing the texture.
Presentation ideas:
- Serve in clear plastic cups so everyone can see the layers. It’s part of the fun.
- Use small terra cotta pots for that authentic “dirt” look. Just make sure they’re clean and food-safe, or line them with a plastic cup.
- Garnish with a fresh mint leaf or a small fake flower stuck in the top.
- Add a little plastic shovel or spoon for that gardening vibe. I found a pack of mini plastic shovels at a party store and they’re always a hit.
Storage: These dirt cups will keep in the fridge for up to 3 days, but the Oreo crumbs will start to soften after about 24 hours. If you want to make them ahead, I recommend preparing the pudding and crushing the Oreos separately, then assembling them no more than 6 hours before serving. The gummy worms will stay chewy and the crumbs will stay crunchy.
Freezing: I don’t recommend freezing these. The pudding gets icy and the texture falls apart when thawed. If you have leftovers, just keep them in the fridge and enjoy them within a couple of days.
One thing I love about these dirt cups is that the flavors actually get better after a few hours in the fridge. The Oreo crumbs absorb a little moisture from the pudding and soften slightly, which creates a texture that’s almost like a cookie crust. It’s different from the fresh version, but equally delicious in its own way.
Nutritional Information & Benefits
Let’s be honest—these are a treat, not a health food. But here’s the approximate nutritional breakdown per serving (based on 4 servings):
| Nutrient | Amount per Serving |
|---|---|
| Calories | 485 |
| Total Fat | 22g |
| Saturated Fat | 11g |
| Cholesterol | 115mg |
| Sodium | 420mg |
| Total Carbohydrates | 68g |
| Dietary Fiber | 3g |
| Sugars | 48g |
| Protein | 8g |
That said, there are some redeeming qualities here. The milk provides calcium and vitamin D, and the cocoa powder is rich in antioxidants. The eggs add a little protein. And honestly? Sometimes the mental health benefits of eating something fun and nostalgic are worth more than any nutritional calculation. I’m a big believer in balance—eat your vegetables, but also eat your dirt cups.
If you’re looking to lighten things up, you can use low-fat milk and reduce the sugar to 1/3 cup. The pudding won’t be as rich, but it’ll still be good. And if you’re watching your sugar intake, sugar-free chocolate pudding mix is an option, though I haven’t tested it with this recipe.
Conclusion
Look, I get it. Dirt cups sound silly. They look silly. But sometimes the best recipes are the ones that don’t take themselves too seriously. These cozy Halloween dirt cups have become a tradition in my house, and I think they deserve a spot in yours too. They’re easy enough to make on a weeknight, fun enough to serve at a party, and comforting enough to eat alone on a rainy October evening when you just need something sweet.
I’d love to hear how yours turn out. Did you try the peanut butter variation? Did your kids go crazy for the gummy worms? Did you find yourself eating one straight from the fridge at midnight like I definitely don’t do? Drop a comment below and let me know. And if you have a variation I haven’t tried, please share it—I’m always looking for new ways to play with this recipe. Happy Halloween, friends. Go make some dirt.
Frequently Asked Questions
Can I use instant pudding mix instead of homemade?
You absolutely can, and I won’t judge you. Just follow the instructions on the box for the pudding, then proceed with the rest of the recipe. The texture will be a little lighter and less rich, but it’s still delicious. I’ve done it when I’m short on time and it works fine.
How far ahead can I make these?
You can make the pudding up to 3 days in advance and keep it in the fridge. But for the assembled cups, I recommend no more than 6 hours before serving. The Oreo crumbs start to soften after that, and the gummy worms can get a little weird if they sit in the pudding too long.
Can I use different cookies instead of Oreos?
Sure! Chocolate wafer cookies, gluten-free sandwich cookies, or even crushed graham crackers work well. Just keep in mind that different cookies will give you different textures and sweetness levels. I’ve also used crushed chocolate chip cookies in a pinch and it was surprisingly good.
My pudding turned out lumpy. What went wrong?
Lumpy pudding usually means the cornstarch wasn’t fully dissolved before cooking, or the heat was too high. Next time, make sure you whisk the dry ingredients together really well before adding the milk, and keep the heat at medium. If your pudding is already lumpy, you can try whisking it vigorously or straining it through a fine-mesh sieve.
Can I make these in a large dish instead of individual cups?
Absolutely! Just layer everything in a 9×9 dish or a trifle bowl. You’ll want to double the recipe for a larger dish. It’s great for parties because people can scoop out as much as they want. Just keep in mind that the layers won’t be as neat when you serve it.
Pin This Recipe!

Cozy Halloween Dirt Cups: Best Oreo Gummy Worm Treats
Rich homemade chocolate pudding layered with crushed Oreo cookies and gummy worms, served in individual cups for a fun and spooky Halloween treat. This easy no-bake dessert is a crowd-pleaser that adults and kids alike will love.
- Prep Time: 20 minutes
- Cook Time: 15 minutes
- Total Time: 2 hours 35 minutes (includes chilling time)
- Yield: 4 servings 1x
- Category: Dessert
- Cuisine: American
Ingredients
- 2 cups whole milk
- 1/2 cup granulated sugar
- 1/4 cup unsweetened cocoa powder
- 3 tablespoons cornstarch
- 1/4 teaspoon salt
- 2 large egg yolks, room temperature
- 2 tablespoons unsalted butter, cut into small pieces
- 1 teaspoon vanilla extract
- 24 Oreo cookies (regular, not double-stuf)
- 12–16 gummy worms (sour or classic)
- 4 small flower pots or clear cups (8-ounce)
- Optional: fresh mint leaves or small fake flowers for decoration
Instructions
- Make the chocolate pudding: In a medium saucepan, whisk together sugar, cocoa powder, cornstarch, and salt until no lumps remain. In a separate bowl, whisk egg yolks with 1/4 cup of the milk until smooth. Set aside.
- Heat the milk: Pour remaining milk into the saucepan with dry ingredients and whisk to combine. Place over medium heat and cook, whisking constantly, until mixture thickens and bubbles, about 5-7 minutes.
- Temper the eggs: Slowly pour about 1/2 cup of the hot pudding mixture into the bowl with egg yolks, whisking constantly. Pour the egg mixture back into the saucepan and whisk for another 2 minutes until thick and smooth.
- Finish the pudding: Remove from heat and stir in butter and vanilla extract until butter is melted and incorporated. For extra smooth pudding, strain through a fine-mesh sieve (optional).
- Chill the pudding: Cover with plastic wrap pressed directly onto the surface to prevent skin from forming. Refrigerate for at least 2 hours or until completely cold and firm. Can be made up to 3 days ahead.
- Crush the Oreos: In a food processor, pulse Oreos until they resemble coarse sand with some small chunks. Alternatively, place in a zip-top bag and crush with a rolling pin.
- Assemble the dirt cups: Give chilled pudding a stir. Spoon or pipe about 1/4 cup pudding into each cup. Add a layer of crushed Oreos (about 2 tablespoons), then press a couple of gummy worms into the pudding so they peek out. Add another layer of pudding, then top with more Oreo crumbs.
- Add finishing touches: Poke a few more gummy worms into the top layer to look like they’re crawling out. If desired, garnish with a mint leaf or small fake flower. Refrigerate for at least 30 minutes before serving.
Notes
Don’t overfill cups—leave about 1/2 inch of space at the top. Assemble no more than 4-6 hours ahead to keep Oreo crumbs crunchy. For dairy-free, use oat milk or full-fat coconut milk and vegan butter. For gluten-free, use gluten-free chocolate sandwich cookies. Let gummy worms come to room temperature for easier positioning.
Nutrition
- Serving Size: 1 dirt cup
- Calories: 485
- Sugar: 48
- Sodium: 420
- Fat: 22
- Saturated Fat: 11
- Carbohydrates: 68
- Fiber: 3
- Protein: 8
Keywords: Halloween dirt cups, Oreo gummy worm treats, chocolate pudding cups, no-bake Halloween dessert, easy Halloween treats