The woman at the farmers market booth watched me staring at her cookie display for a good two minutes before she said anything. I was trying to figure out how she got the royal icing so perfectly smooth—like a little porcelain pond on top of each sugar cookie. She finally laughed and said, “You keep squinting like that, you’re gonna give yourself a headache.” I apologized, embarrassed, but she just waved me off and handed me a broken cookie from the back. “The trick is the consistency,” she said. “Thin enough to settle, thick enough to stay put.”
That was three Octobers ago, and I’ve thought about her advice every single time I’ve made royal icing since. Honestly, I didn’t even plan on making black cat spider cookies that year. I was supposed to be making pumpkin-shaped cutouts for my niece’s Halloween party, but I dropped the entire container of orange sprinkles on the floor. My dog thought it was the greatest moment of her life, and I was left staring at a batch of plain sugar cookies with zero plan. That’s when I remembered the farmer’s market lady and her perfectly iced cookies. I grabbed some black gel food coloring, a piping bag, and decided to make the cutest—and slightly spooky—black cat spider cookies I could manage.
The first few looked more like confused blobs than cats, let me tell you. But somewhere around cookie number seven, something clicked. The icing started behaving, the little spider legs looked intentional, and I actually laughed out loud in my kitchen. Maybe you’ve been there—where a baking mishap turns into something unexpectedly fun. These adorable black cat spider sugar cookies with royal icing are exactly that kind of happy accident. They’re the reason I keep a backup plan in my pantry and why I’ll never underestimate a good royal icing recipe again.
Why You’ll Love This Recipe
These aren’t just cute cookies—they’re the kind that make people stop and smile before they even take a bite. I’ve tested this recipe through three Halloweens, two different ovens, and one very humid kitchen that tried to ruin my royal icing. It survived all of it, and so will you.
- Kid-Friendly & Fun to Decorate: The black cat spider design is simple enough for little hands but cute enough to impress adults. My niece made a batch that looked like happy little monsters, and everyone loved them.
- Perfect Royal Icing Every Time: No more guessing games with your icing consistency. I’ll walk you through exactly how thick or thin it needs to be—no farmers market mentor required.
- Make-Ahead Friendly: Bake the cookies up to a week ahead and decorate when you’re ready. The royal icing stores beautifully too.
- Simple Pantry Ingredients: Butter, sugar, flour, eggs, and vanilla—that’s it for the cookies. No weird extracts or hard-to-find specialty items.
- Crowd-Pleasing Flavor: Soft, buttery sugar cookies with a crisp royal icing shell. The texture combo is honestly addictive.
- Halloween Magic Without the Stress: These look like you spent hours on them, but the decorating goes fast once you get the hang of it.
What makes this recipe different from the dozens of others out there? It’s the royal icing that actually works. I’ve tweaked the ratios so it spreads smoothly without running off the edges, and it dries with that beautiful matte finish that makes cookies look professional. Plus, the black cat spider design is genuinely forgiving—if your cat looks a little squished, just add more spider legs and call it a feature.
This is the recipe that turned me into “the Halloween cookie person” in my neighborhood. It’s comforting, creative, and just spooky enough to be fun without scaring the kids. Close your eyes after that first bite—the soft cookie, the sweet icing, the little crunch of sprinkles—it’s everything a Halloween treat should be.
What Ingredients You Will Need
This recipe keeps things simple with basic baking staples. The magic happens in how you put them together and, of course, in the royal icing. Here’s what you’ll need for both the cookies and the decorating.
For the Sugar Cookies
- Unsalted butter, softened (1 cup / 226g) — I prefer Kerrygold for the rich flavor, but any good-quality butter works. Let it sit out for at least 30 minutes before starting.
- Granulated sugar (1 cup / 200g) — Regular white sugar, nothing fancy here.
- Large egg (1, room temperature) — Cold eggs can make the dough seize up. Leave it on the counter with your butter.
- Vanilla extract (2 teaspoons) — Pure vanilla makes a difference. I use Nielsen-Massey, but store brand is fine in a pinch.
- All-purpose flour (2 ½ cups / 312g) — Spoon and level your flour; don’t scoop straight from the bag or you’ll get dense cookies.
- Baking powder (½ teaspoon) — Helps the cookies puff just slightly without losing their shape.
- Salt (¼ teaspoon) — Balances the sweetness. I use fine sea salt.
For the Royal Icing
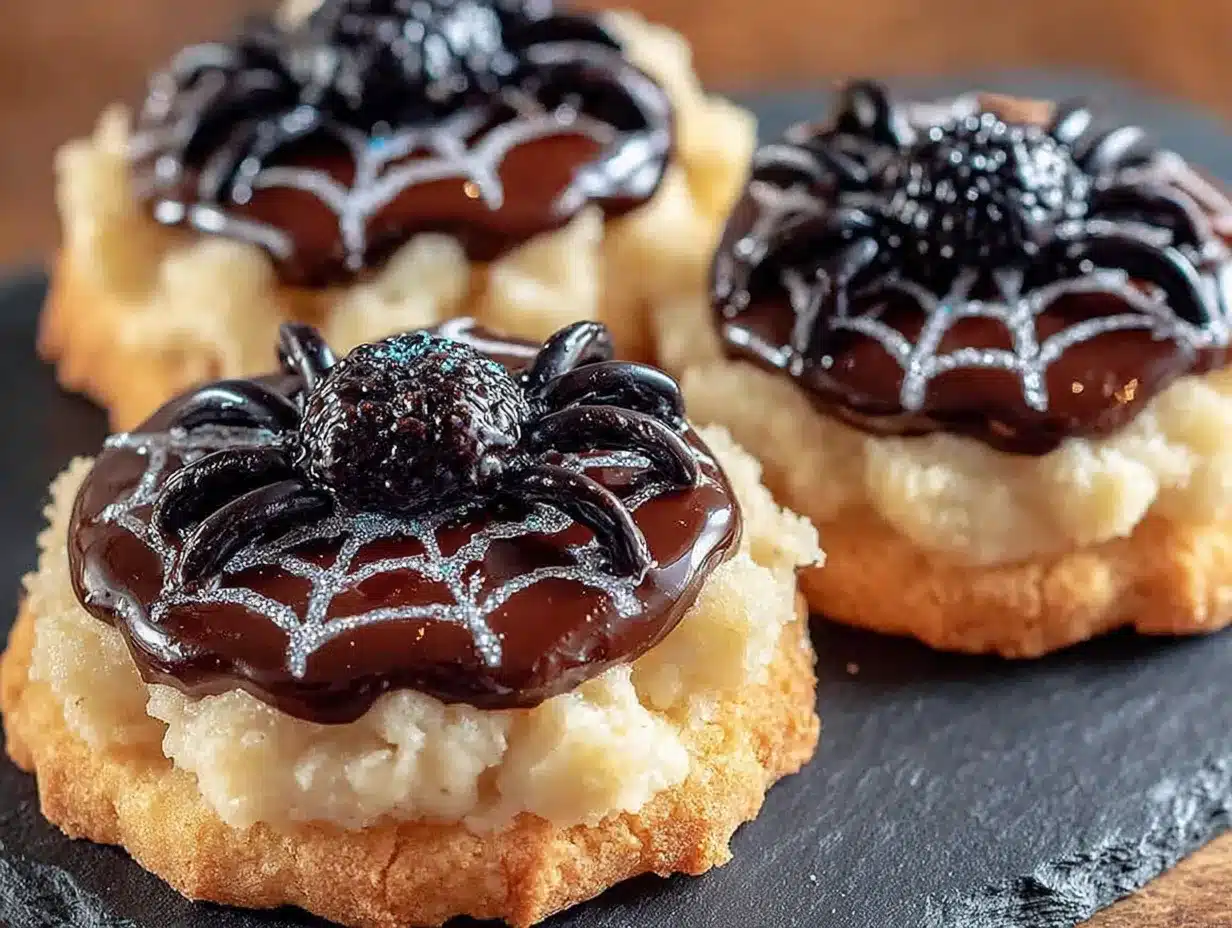
- Powdered sugar (3 cups / 360g, sifted) — Sifting is non-negotiable here. Lumps will ruin your smooth finish.
- Meringue powder (3 tablespoons) — This stabilizes the icing and gives it that professional texture. Wilton brand is my go-to.
- Water (4-5 tablespoons, room temperature) — Start with 4 and add more drop by drop until you reach the right consistency.
- Black gel food coloring (1-2 teaspoons) — Liquid coloring will mess up your icing consistency. Gel is the only way to go. I use Americolor Super Black.
- White sanding sugar or white sprinkles (for spider eyes) — Optional but adorable.
Ingredient Tips & Substitutions
If you don’t have meringue powder, you can substitute 2 large egg whites (pasteurized) plus 1 teaspoon of lemon juice. The texture will be slightly different, but it works. For a dairy-free version, use vegan butter—just make sure it’s the stick kind, not the spreadable tub. The royal icing is naturally dairy-free.
I always recommend sifting your powdered sugar even if the bag says “pre-sifted.” Trust me on this one. I skipped it once and ended up with little white lumps in my black icing that looked like dandruff on my cute black cats. Not a good look.
Equipment Needed
You don’t need a professional bakery setup for these cookies, but a few specific tools will make your life much easier.
- Stand mixer or hand mixer — Either works for the cookie dough. I use my KitchenAid for the royal icing because it needs a solid 5-7 minutes of beating.
- Rolling pin with thickness rings — These are game-changers for even cookies. If you don’t have them, use two wooden spoons or chopsticks as guides.
- Cat-shaped cookie cutter — Any size works, but medium (about 3 inches) is easiest to decorate. I found mine at a craft store for $4.
- Parchment paper or silicone baking mats — Silpat mats give the most even baking, but parchment is fine.
- Piping bags or squeeze bottles — I prefer disposable piping bags with a #2 or #3 round tip for detail work. Squeeze bottles work great for flooding larger areas.
- Small offset spatula — Helpful for spreading icing if you’re nervous about piping.
- Cooling rack — Essential for letting royal icing dry completely without spots.
- Toothpicks or scribe tool — For popping air bubbles and guiding icing into corners.
Budget-friendly tip: You can make piping bags from zip-top sandwich bags. Just snip a tiny corner off and you’re in business. I’ve done this more times than I care to admit, and it works perfectly.
Preparation Method
Step 1: Make the Sugar Cookie Dough
In your stand mixer bowl, beat the softened butter and granulated sugar together on medium speed until light and fluffy—about 3 minutes. You want it to look pale and almost creamy. Scrape down the sides of the bowl halfway through. Add the egg and vanilla extract, then beat until fully combined. The mixture might look a little curdled at this point; that’s normal.
In a separate bowl, whisk together the flour, baking powder, and salt. With the mixer on low, gradually add the dry ingredients to the wet mixture. Mix just until the dough comes together. Stop as soon as you don’t see any more flour streaks—overmixing will make your cookies tough.
Step 2: Chill the Dough
Divide the dough in half and flatten each piece into a disk about 1 inch thick. Wrap tightly in plastic wrap and refrigerate for at least 1 hour. I usually chill mine for 2 hours because I’m always doing ten things at once. The dough needs to be firm enough to roll without sticking. If you skip this step, your cookies will spread and lose their shape.
Step 3: Roll and Cut
Preheat your oven to 350°F (175°C). Line two baking sheets with parchment paper or silicone mats. Lightly flour your work surface and rolling pin. Roll one disk of dough to about ¼ inch thickness. Use your cat-shaped cutter to cut out cookies, re-rolling the scraps once. Place cookies about 2 inches apart on the prepared baking sheets.
Pro tip: If the dough starts sticking to your cutter, dip the cutter in flour between cuts. I keep a small bowl of flour next to my work station just for this.
Step 4: Bake
Bake for 8-10 minutes, or until the edges are just barely golden. The centers should look set but not brown. Rotate the baking sheet halfway through for even baking. Let the cookies cool on the baking sheet for 5 minutes, then transfer to a wire rack to cool completely. And I mean completely—warm cookies will melt your royal icing into a sad puddle.
Step 5: Make the Royal Icing
In your stand mixer bowl, combine the sifted powdered sugar and meringue powder. Add 4 tablespoons of water and beat on low until combined. Increase speed to medium-high and beat for 5-7 minutes. The icing should be thick and glossy, with stiff peaks that hold their shape when you lift the beater.
To thin the icing for flooding (the smooth base layer), add water one drop at a time while stirring gently. You’re aiming for the “10-second consistency”—when you lift a spoon and drizzle icing back into the bowl, the surface should smooth out in about 10 seconds. If it disappears faster, it’s too thin. If it takes longer, add more water.
Step 6: Color and Decorate
Divide your royal icing into two portions. Color the larger portion black using gel food coloring—it’ll look gray at first, but keep adding until it’s deep black. Leave the smaller portion white for the spider eyes and any details.
Fill your piping bags with the black icing. Pipe an outline around each cookie, then flood the inside with a slightly thinner consistency. Use a toothpick to guide the icing into corners and pop any air bubbles. Let the flooded cookies dry for at least 2 hours before adding spider legs and eyes.
Step 7: Add Spider Details
Once the base layer is completely dry, pipe eight tiny spider legs coming off each cat cookie—four on each side. Make them slightly curved for a more realistic spider look. Use the white icing to pipe two tiny dots for eyes. If you want extra sparkle, sprinkle white sanding sugar on the eyes before the icing dries.
Let the decorated cookies dry overnight for the best results. The icing needs a full 8-12 hours to harden completely, especially if you live in a humid climate.
Cooking Tips & Techniques
I’ve made these cookies enough times to have a pretty good mental list of what can go wrong—and how to fix it. Here are the things I wish someone had told me before my first attempt.
Royal icing consistency is everything. Too thick and it won’t spread; too thin and it’ll run off the cookie and pool on your counter. The 10-second test is your best friend. I keep a small bowl of water nearby and add it literally drop by drop with a teaspoon. You can always add more, but you can’t take it out.
Humidity is the enemy. If you’re decorating on a rainy day, your icing will take forever to dry. I learned this the hard way when my cookies looked perfect at bedtime but were still tacky the next morning. Run a dehumidifier in the room if you have one, or just plan to decorate on a dry day.
Don’t rush the drying time. I know you want to eat them immediately, but stacking or storing cookies before the icing is fully set will ruin all your hard work. The spider legs are especially fragile. Give them the full overnight dry time, and you’ll have cookies that stack beautifully in a container.
Practice your spider legs on parchment paper first. Do a few test runs before you pipe onto the actual cookies. You want the legs to look intentional—not like a toddler drew on your cookies with a black marker. I speak from experience here.
Keep your cookies covered while decorating. If you’re working slowly, cover the undecorated cookies with a clean kitchen towel so they don’t dry out and crack. The royal icing won’t stick well to cracked cookies.
Variations & Adaptations
One of the best things about this recipe is how easy it is to customize. Here are some ways I’ve changed it up over the years.
Gluten-Free Version: Swap the all-purpose flour for a 1:1 gluten-free baking flour blend. I’ve used Bob’s Red Mill with great results. Add an extra tablespoon of butter because gluten-free dough tends to be drier. The cookies will be slightly more delicate, so handle them gently.
Different Shapes: Don’t have a cat cookie cutter? Use a round cutter and turn the cookies into spider bodies. Pipe eight legs coming off the circle and add two white eyes. They’re even easier to make and just as cute.
Color Variations: Make orange cats for a less spooky Halloween vibe, or purple spiders for a witchy theme. The royal icing recipe works with any gel color. I once made a batch of green monsters with pink spots for a non-Halloween party, and they were a huge hit.
Flavor Twist: Add ½ teaspoon of almond extract to the cookie dough along with the vanilla. It gives the cookies a subtle marzipan flavor that pairs beautifully with the sweet royal icing. Just don’t overdo it—almond extract is strong.
Chocolate Version: Replace ¼ cup of the flour with unsweetened cocoa powder for chocolate black cats. The cookies will be darker, which means you can use white royal icing for the base and black for the details. It’s a fun reverse-color look.
Serving & Storage Suggestions
These cookies are best served at room temperature. The contrast between the soft cookie and the firm icing is perfect when they’re not straight from the fridge. Arrange them on a platter with some orange and purple sprinkles scattered around for a festive look.
They’re perfect for Halloween parties, classroom treats, or just a fun weekend baking project. I like to package them in clear cellophane bags tied with orange ribbon for neighbor gifts. They always get compliments.
Storage: Keep the decorated cookies in an airtight container at room temperature for up to 2 weeks. Layer them between sheets of parchment paper to protect the icing. Don’t refrigerate them—the humidity in the fridge can make the royal icing sticky and soft.
Freezer Instructions: You can freeze the undecorated baked cookies for up to 3 months. Just wrap them tightly in plastic wrap and then foil. Thaw at room temperature before decorating. I do this all the time when I want to spread the work over a few days.
Make-Ahead Tip: The royal icing can be made up to 3 days in advance. Store it in an airtight container in the fridge with plastic wrap pressed directly onto the surface. Let it come to room temperature and re-whip before using.
Nutritional Information & Benefits
Let’s be real—these are sugar cookies with royal icing. They’re a treat, not a health food. But here’s the nutritional breakdown if you’re curious.
Per cookie (based on 24 cookies): approximately 180 calories, 7g fat, 28g carbohydrates, 2g protein, 15g sugar. These numbers will vary based on your exact ingredients and how much icing you use.
The good news is that sugar cookies have been bringing people joy for generations. There’s something to be said for that. Plus, the royal icing contains egg whites, which provide a small amount of protein. And hey—you’re using real butter and vanilla, not artificial flavors. That counts for something in my book.
If you’re watching your sugar intake, you can reduce the icing amount or skip the spider legs. But honestly? Halloween comes once a year. I say enjoy the cookies, share them with people you love, and don’t stress about the numbers.
Conclusion
These adorable black cat spider sugar cookies with royal icing have become my signature Halloween treat, and I think they’re about to become yours too. They’re fun to make, gorgeous to look at, and absolutely delicious to eat. Every time I pull out my cat cookie cutter, I think about that farmers market lady and her perfectly smooth icing. I hope she’d be proud of how far I’ve come.
The best part about this recipe is that it leaves room for your own creativity. Maybe your cats look a little goofy or your spider legs are uneven—that’s part of the charm. Homemade cookies are supposed to look handmade. Embrace the imperfections and have fun with it.
I’d love to see your versions! Tag me when you make these, and let me know if you came up with any fun variations. Did you add extra sprinkles? Make them into ghosts instead? Share your cookie adventures in the comments below. Happy Halloween baking, friend!
Frequently Asked Questions
Can I use store-bought royal icing instead of making my own?
You can, but I don’t recommend it. Store-bought royal icing often has a weird artificial taste and doesn’t dry as hard. Homemade is way better and honestly takes just a few extra minutes.
Why did my royal icing crack after drying?
This usually happens when the icing is too thick or dries too quickly. Make sure your icing is at the proper 10-second consistency, and don’t place cookies near a heater or in direct sunlight while drying.
Can I freeze the decorated cookies?
It’s not ideal. The royal icing can absorb moisture and become sticky when thawed. I recommend freezing undecorated cookies and decorating them fresh when you’re ready to serve.
How do I get the black icing really black without using tons of food coloring?
Start with a chocolate base. Add a tablespoon of unsweetened cocoa powder to your royal icing before adding the black gel color. The cocoa base means you need way less black coloring to achieve a deep, dark shade.
My cookies spread in the oven and lost their shape. What went wrong?
Your dough wasn’t chilled enough. The butter needs to be cold when it hits the oven so the cookies hold their shape. Pop the cut cookies in the fridge for 15 minutes before baking if you’re unsure.
Pin This Recipe!
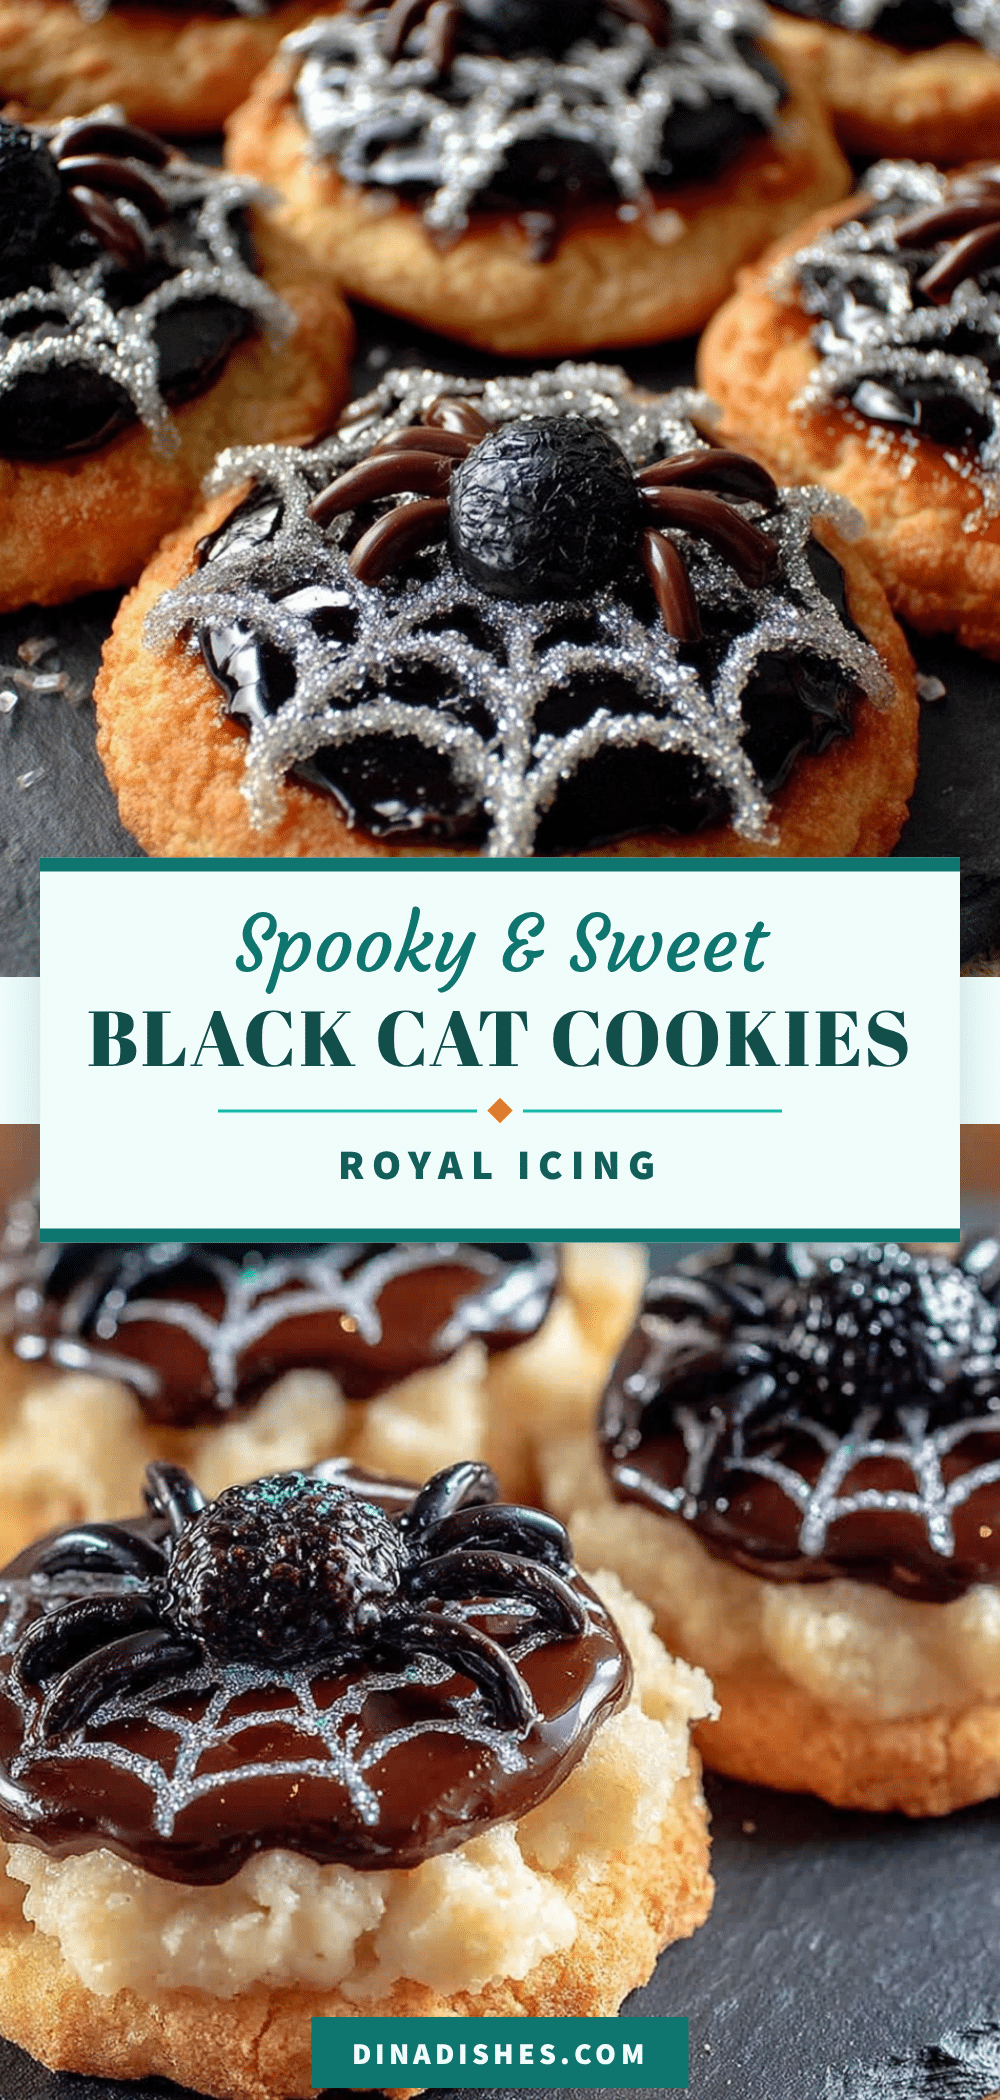
Easy Black Cat Spider Sugar Cookies – Homemade Royal Icing Best

These adorable black cat spider sugar cookies with royal icing are a fun and forgiving Halloween treat. Soft, buttery sugar cookies topped with smooth black royal icing and cute spider details are perfect for parties and gift-giving.
- Prep Time: 30 minutes
- Cook Time: 10 minutes
- Total Time: 1 hour 40 minutes (plus chilling and drying time)
- Yield: 24 servings 1x
- Category: Dessert
- Cuisine: American
Ingredients
- 1 cup (226g) unsalted butter, softened
- 1 cup (200g) granulated sugar
- 1 large egg, room temperature
- 2 teaspoons vanilla extract
- 2 ½ cups (312g) all-purpose flour
- ½ teaspoon baking powder
- ¼ teaspoon fine sea salt
- 3 cups (360g) powdered sugar, sifted
- 3 tablespoons meringue powder
- 4–5 tablespoons water, room temperature
- 1–2 teaspoons black gel food coloring
- White sanding sugar or white sprinkles (for spider eyes, optional)
Instructions
- Make the sugar cookie dough: In a stand mixer, beat softened butter and granulated sugar on medium speed until light and fluffy, about 3 minutes. Add egg and vanilla extract; beat until combined.
- In a separate bowl, whisk together flour, baking powder, and salt. Gradually add dry ingredients to wet mixture on low speed, mixing just until dough comes together.
- Divide dough in half, flatten into 1-inch thick disks, wrap in plastic wrap, and refrigerate for at least 1 hour (2 hours preferred).
- Preheat oven to 350°F (175°C). Line baking sheets with parchment paper or silicone mats.
- On a lightly floured surface, roll one disk of dough to ¼-inch thickness. Cut with a cat-shaped cookie cutter. Place cookies 2 inches apart on prepared sheets.
- Bake for 8-10 minutes, until edges are just barely golden. Rotate sheet halfway through. Cool on baking sheet for 5 minutes, then transfer to a wire rack to cool completely.
- Make the royal icing: In a stand mixer, combine sifted powdered sugar and meringue powder. Add 4 tablespoons water and beat on low until combined. Increase speed to medium-high and beat for 5-7 minutes until thick and glossy with stiff peaks.
- Thin icing for flooding: Add water drop by drop until icing reaches ’10-second consistency’ (surface smooths out in about 10 seconds when drizzled).
- Divide icing: Color larger portion black with gel food coloring; leave smaller portion white.
- Pipe black outline around each cookie, then flood inside with thinner icing. Use a toothpick to guide icing into corners and pop air bubbles. Let dry at least 2 hours.
- Add spider details: Pipe eight curved spider legs (four per side) on each cookie. Pipe two white dots for eyes. Optionally sprinkle white sanding sugar on eyes before icing dries.
- Let decorated cookies dry overnight (8-12 hours) for best results.
Notes
For best results, chill dough thoroughly to prevent spreading. Royal icing consistency is key—use the 10-second test. Avoid decorating on humid days. Store decorated cookies in an airtight container at room temperature for up to 2 weeks. Freeze undecorated cookies for up to 3 months.
Nutrition
- Serving Size: 1 cookie
- Calories: 180
- Sugar: 15
- Sodium: 60
- Fat: 7
- Saturated Fat: 4
- Carbohydrates: 28
- Protein: 2
Keywords: Halloween cookies, sugar cookies, royal icing, black cat cookies, spider cookies, easy Halloween treats