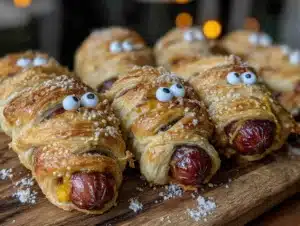
I was at the hardware store, of all places, last October. Not my usual spot for culinary inspiration, honestly. I was hunting for a specific kind of weatherstripping, and the guy at the counter—let’s call him Larry, he looked like he’d been fixing things since before I was born—started chatting while he rang me up. He asked what I was doing for Halloween, and I mumbled something about store-bought candy and hoping the kids wouldn’t egg my house. He laughed, a low rumble, and said, “You gotta make the mummy dogs. My grandkids won’t eat anything else.”
I stood there, holding my receipt, as Larry described wrapping hot dogs in strips of crescent roll dough. He wasn’t a food blogger or a chef; he was a guy who fixed leaky faucets. But the way he talked about those little mummy hot dogs—the crispy, golden wrappers, the little mustard eyes—I could picture the whole scene. It was the last place I expected to find a Halloween recipe, but there I was, in the lighting aisle, getting a masterclass in spooky snacks. I mean, you know that feeling when something so simple sounds so perfect you can’t believe you didn’t think of it yourself?
I scribbled his directions on the back of the receipt, right next to a note about silicone caulk. I made them that weekend, and let me tell you, my kitchen looked like a tiny pastry-wrapped crime scene. I forgot to leave enough space for the “eyes,” and the first batch looked more like sad, blind mummies. But the kids? They devoured them. That’s why this recipe stuck with me. It’s not fancy, it’s not complicated, but it’s the kind of fun, hands-on food that makes a holiday feel special. And it all started with a guy named Larry.
Why You’ll Love This Recipe
Let’s be real—Halloween can be a lot. Between the costumes, the decorations, and trying to keep the sugar rush at bay, the last thing you need is a complicated recipe. These spooky easy mummy hot dogs are my go-to because they solve basically every party problem at once. They’re the snack you didn’t know you needed until you see a plate of them disappear in five minutes.
- Quick & Easy: You can have these in the oven in under 10 minutes. Seriously. If you can open a can of crescent rolls and wrap a hot dog, you’ve got this handled. Perfect for that pre-trick-or-treating frenzy.
- Simple Ingredients: Hot dogs and crescent roll dough. That’s it. Maybe some mustard or ketchup for the eyes. No fancy grocery trips, no hunting for obscure spices. You probably have everything already.
- Perfect for Halloween Parties: Whether it’s a school party, a family gathering, or just a spooky movie night, these fit right in. They look the part without requiring any artistic talent.
- Crowd-Pleaser: I’ve yet to meet a kid (or adult, honestly) who doesn’t think these are fun. They’re familiar food with a silly, spooky twist. Plus, they’re easy for little hands to grab.
- Unbelievably Delicious: The combination of salty, savory hot dog wrapped in flaky, buttery crescent roll dough is just plain good. It’s comfort food in a fun package.
What makes this version different from the rest? It’s the little details. I’ve tested these more times than I care to admit to get the wrapping just right—not too tight, not too loose. The goal is a mummy that looks wrapped up but still has a bit of golden dough peeking through. It’s not just another appetizer; it’s a tiny, edible craft project that tastes amazing.
This recipe is the kind that makes you feel like a Halloween hero without any of the stress. It’s the snack that gets people talking, the one that makes your party feel a little more special. And honestly, watching a kid pick up a mummy hot dog and giggle before taking a bite? That’s the good stuff.
What Ingredients You Will Need
This recipe is beautifully simple. It uses just a handful of ingredients to create something that looks much more complicated than it is. The key is in the quality of those few items and how you handle them.
- Hot Dogs (1 package, 8-count): This is the star of the show. I recommend using standard-sized hot dogs, not the jumbo ones, as they cook more evenly and are easier to wrap. I personally prefer all-beef hot dogs for better flavor, but any kind works. You can even use turkey or chicken hot dogs for a lighter option. Look for hot dogs that are plump and juicy.
- Refrigerated Crescent Roll Dough (1 can, 8-count): This is your mummy wrapping. I’ve tried making my own dough, and while it’s possible, the canned stuff is just perfect here. It’s flaky, buttery, and so easy to work with. I recommend the Pillsbury brand for consistent results—it rolls out evenly and bakes up golden brown every time. Don’t get the “big” or “grand” size; the regular 8-count can is what you need.
- Mustard or Ketchup (for the eyes): This is where you get to decide the “face” of your mummy. I use yellow mustard because it gives a nice, bright “oooh, scary!” look. Ketchup works too, or even small dots of sriracha for a spicy mummy. You just need a tiny bit for each hot dog.
- Cooking Spray or Parchment Paper: To prevent sticking. I’ve had mummies stick to the baking sheet, and it’s heartbreaking. A light spray of non-stick cooking spray or a sheet of parchment paper is a lifesaver.
- Optional: Everything Bagel Seasoning or Sesame Seeds: For a little extra flair. I sometimes sprinkle a tiny bit of everything bagel seasoning on the dough before baking. It adds a nice savory crunch that complements the hot dog.
Substitution Guidance: If you’re looking for a gluten-free option, you can find gluten-free crescent roll dough at most major grocery stores. It works exactly the same way. For a lower-carb version, you can try wrapping the hot dogs in thin slices of cheese or even deli meat, though the texture will be different. And if you don’t have crescent rolls, you can use refrigerated pizza dough cut into thin strips—it’s a bit chewier, but still delicious.
Equipment Needed
You don’t need a fancy kitchen to pull these off. Here’s what you’ll need:
- Baking Sheet: A standard half-sheet pan works perfectly. I’ve used a cookie sheet in a pinch, and it worked fine.
- Parchment Paper or Silicone Baking Mat: This is non-negotiable for me. It prevents the mummies from sticking and makes cleanup a breeze. I’ve had mummies rip apart when trying to peel them off a bare pan—learn from my mistakes.
- Sharp Knife or Pizza Cutter: You need something to cut the crescent roll dough into strips. A pizza cutter is my favorite because it makes clean, straight lines. A sharp knife works too, just be careful not to tear the dough.
- Small Bowl or Plate: For the mustard or ketchup dots. You’ll be dipping a toothpick or the end of a chopstick to apply the eyes.
- Toothpick or Small Brush: For applying the “eyes.” A toothpick is perfect for making small dots. A small pastry brush can be used to apply an egg wash if you want a shinier finish, though it’s not necessary.
- Cooling Rack (Optional): If you want the bottoms to stay crispy, transfer the mummies to a cooling rack for a minute after baking. It lets the steam escape.
Budget-Friendly Tip: If you don’t have a pizza cutter, a clean pair of kitchen scissors works surprisingly well for cutting the dough. Just make sure they’re sharp and dry.
Preparation Method
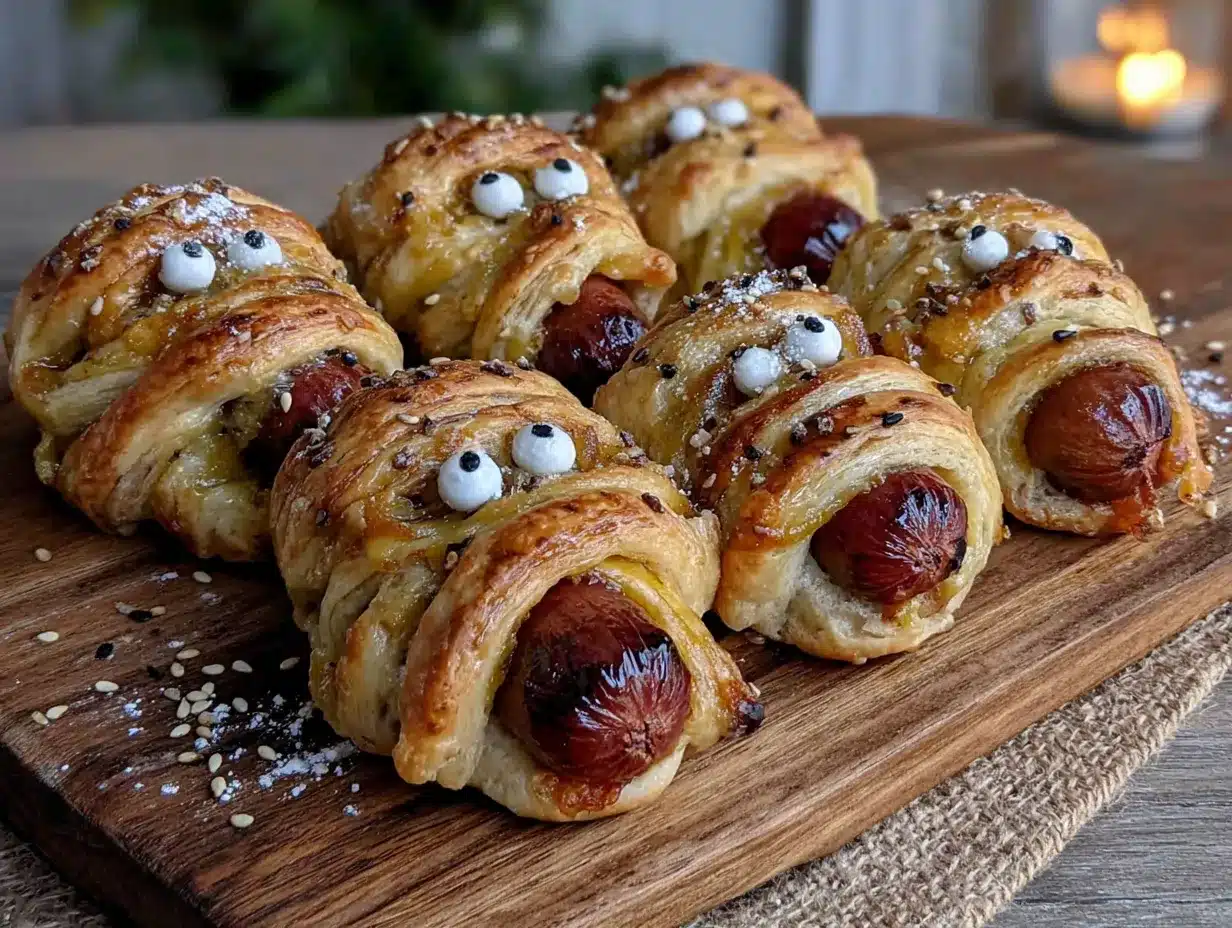
Alright, let’s get to the fun part. Here’s how to make these spooky little guys. The whole process takes about 20 minutes, and most of that is baking time.
- Preheat Your Oven: Set your oven to 375°F (190°C). While it’s heating up, line your baking sheet with parchment paper or a silicone mat. This step is crucial—don’t skip it.
- Prepare the Dough: Open the can of crescent roll dough. Don’t unroll the triangles yet. Instead, gently separate the dough along the perforated lines into 8 triangles. You’ll have 8 triangles of dough.
- Cut the Strips: Take one triangle of dough. Using a sharp knife or pizza cutter, cut it lengthwise into 3-4 long, thin strips. The strips should be about 1/2 inch wide. Don’t worry if they’re not perfectly even—mummies are supposed to look a little ragged. Repeat with all 8 triangles. You should have a pile of thin dough strips.
- Wrap the Mummies: Take one hot dog. Starting at one end, wrap a strip of dough around the hot dog at a slight angle, like you’re bandaging a tiny arm. Leave a small gap at the top for the “face” (about 1 inch). Continue wrapping, slightly overlapping the dough strips, until the hot dog is mostly covered. You don’t need to cover it completely—gaps are fine. It adds to the mummy look. The ends of the dough should stick to the hot dog.
- Place on Baking Sheet: Put the wrapped mummy hot dog on your prepared baking sheet. Make sure the loose end of the dough is tucked underneath so it doesn’t unroll while baking. Repeat with the remaining hot dogs and dough strips.
- Bake: Place the baking sheet in the preheated oven. Bake for 12-15 minutes, or until the dough is golden brown and puffed. The hot dogs will be hot and juicy. I usually check at the 12-minute mark. You’re looking for a nice, deep golden color—not pale.
- Add the Eyes: This is the moment of truth. Remove the baking sheet from the oven. Let the mummies cool for 2-3 minutes on the pan. While they’re still warm, use a toothpick to dip into mustard or ketchup and dot two small eyes onto the exposed part of the hot dog. Don’t press too hard, or you’ll poke through the hot dog. Just a light dot.
- Serve Immediately: These are best eaten warm, right after the eyes go on. The dough is flaky, the hot dog is hot, and the mustard adds a little tangy kick.
Troubleshooting Tip: If your dough strips are too long and are hanging off the ends, just trim them with your knife. And if the dough starts to feel sticky or too soft, pop it in the fridge for 5 minutes. Cold dough is much easier to handle.
Cooking Tips & Techniques
I’ve made these mummy hot dogs more times than I can count, and I’ve learned a few things the hard way. Here are my best tips to get perfect results every time.
Don’t Overwrap: The biggest mistake I made my first time was wrapping the hot dogs too tightly with the dough. When the dough bakes, it expands. If it’s wrapped too tight, it can tear or just look like a lumpy mess. Leave a little breathing room between the strips. You want the mummy to look wrapped, not constricted.
Cold Dough is Your Friend: Crescent roll dough gets soft and sticky very quickly, especially if your kitchen is warm. If the strips start feeling like they’re melting in your hands, put the whole pile of cut strips on a plate and pop them in the fridge for 10 minutes. Cold dough holds its shape better and is much easier to wrap around the hot dogs.
Space Them Out: Don’t crowd the baking sheet. These mummies need a little room to puff up and get golden on all sides. If they’re touching, they’ll steam instead of bake, and you’ll end up with pale, soggy spots. Give them at least an inch of space between each one.
The Eye Application Trick: I used to try to squeeze mustard directly from the bottle onto the hot dog. It never worked—it would blob out or make a mess. The toothpick method is the way to go. Dip the tip of a toothpick into a small puddle of mustard, then dot it onto the hot dog. You can control the size of the dot perfectly.
Make Ahead Tip: You can assemble these mummies a few hours ahead of time. Just wrap the hot dogs, place them on the baking sheet, and cover with plastic wrap. Keep them in the fridge until you’re ready to bake. Don’t add the eyes until after they come out of the oven, or the mustard will bake into a weird crust.
My Biggest Failure: The first time I made these for a party, I forgot to check the oven halfway through. I was busy decorating and lost track of time. The bottoms of the mummies were burnt black. Now I always set a timer for 10 minutes, then check every minute after that. It’s a simple thing, but it saves the batch.
Variations & Adaptations
Once you’ve mastered the basic mummy hot dog, the possibilities are endless. Here are a few ways I’ve adapted this recipe over the years to keep it fresh and fun.
Spider Dogs: Instead of wrapping the whole hot dog, cut the hot dog in half crosswise. Wrap the dough around one half, leaving the cut end exposed. Bake as directed. For the “legs,” cut thin strips of dough and attach them to the sides before baking. Add mustard eyes to the exposed end. You’ve got a spider!
Cheesy Mummies: Before wrapping the hot dog, cut a slit lengthwise down the center (don’t cut all the way through). Stuff a thin strip of cheddar cheese or a mozzarella stick into the slit. Then wrap with dough as directed. The cheese melts inside and makes them extra gooey. My kids go crazy for these.
Veggie Mummies: For a vegetarian option, swap the hot dog for a veggie dog or a pre-cooked sausage made from plant-based protein. I’ve also used thick carrot sticks that have been parboiled until just tender. They don’t have the same snap, but they’re a fun, healthier twist.
Spicy Mummies: Brush the hot dogs with a little sriracha or hot sauce before wrapping. You can also add a tiny slice of jalapeño under the dough for a surprise kick. For the eyes, use a dab of spicy brown mustard or sriracha mayo.
Sweet Mummies: This is a weird one, but trust me. Instead of hot dogs, use pre-cooked breakfast sausages or even cocktail sausages. Wrap them in the crescent dough, bake, and then dust with a little powdered sugar. The sweet and salty combo is surprisingly good.
Serving & Storage Suggestions
These mummy hot dogs are best served warm, right out of the oven. The contrast between the hot, juicy hot dog and the flaky, buttery dough is at its peak when they’re fresh. I usually serve them on a large platter, arranged in a spooky pile. A little bowl of extra mustard or ketchup for dipping is always a good idea.
Presentation Ideas: For a Halloween party, I like to serve them on a black platter or a wooden cutting board. You can scatter some pretzel sticks around them to look like “bones” or add a few plastic spiders for a fun touch. A small sign that says “Mummy Snacks” is a cute detail.
What to Serve With Them: These are a great appetizer, but they can also be part of a full Halloween meal. I pair them with a simple side of carrot sticks and celery (to balance out the indulgence) and a bowl of warm tomato soup. For a party, serve them alongside other finger foods like popcorn, chips, and dip.
Storage: If you have leftovers (which is rare in my house), let them cool completely. Store them in an airtight container in the refrigerator for up to 2 days. The dough will soften a bit, but they’re still tasty.
Reheating: The best way to reheat these is in the oven or an air fryer. Pop them on a baking sheet at 350°F (175°C) for 5-7 minutes, or until the dough crisps up again. The microwave works in a pinch, but the dough will be soggy. I don’t recommend it unless you’re desperate.
Flavor Development: Honestly, these don’t get better with age. The magic is in the fresh, hot crunch. That’s why I always make them right before serving. The flavor is at its peak when the dough is still warm and the hot dog is piping hot.
Nutritional Information & Benefits
Let’s be honest—these mummy hot dogs are a treat, not a health food. But knowing what’s in them helps you plan your meal. Here’s a rough estimate per mummy hot dog (based on standard ingredients):
- Calories: Approximately 180-220 calories
- Fat: 12-15g (mostly from the hot dog and dough)
- Carbohydrates: 12-15g (from the crescent roll dough)
- Protein: 6-8g (from the hot dog)
- Sodium: 500-700mg (hot dogs are notoriously salty)
Health Benefits: While not a superfood, hot dogs do provide a decent amount of protein, which is good for satiety. Choosing an all-beef or turkey hot dog can reduce the fat content slightly. The crescent roll dough offers some carbohydrates for quick energy, which is helpful if you’re running around with kids on Halloween night.
Dietary Considerations: This recipe is not gluten-free unless you use gluten-free dough. It contains dairy (from the butter in the crescent rolls) and soy (often in the hot dogs). If you’re watching your sodium, look for low-sodium hot dogs. For a lower-calorie option, use turkey hot dogs and trim any excess dough before baking.
My Perspective: I don’t make these every week. They’re a holiday treat, a special occasion snack. And that’s okay. Food is about joy and connection, and sometimes that comes in the form of a hot dog wrapped in dough. Balance is key—enjoy the mummy dogs, and maybe have a salad for lunch the next day.
Conclusion
So there you have it—the story of how a hardware store guy named Larry changed my Halloween game forever. These spooky easy mummy hot dogs are proof that the best recipes often come from the most unexpected places. They’re simple, they’re fun, and they taste exactly like a happy childhood memory should.
I really hope you give these a try for your next Halloween party or spooky movie night. Don’t be afraid to make them your own—add different eyes, try the cheesy version, or just go classic. The beauty of this recipe is that it’s almost impossible to mess up. And if you do? Well, they’ll still taste good.
I’d love to hear how yours turn out! Drop a comment below and tell me if your mummies had a personality. Did you use mustard or ketchup for the eyes? Did the kids help wrap them? Share your photos on Pinterest and tag me—I can’t wait to see your spooky creations.
Happy Halloween, and happy snacking! Remember, it’s not about being perfect. It’s about having fun in the kitchen and making something that makes people smile. And maybe, just maybe, you’ll find your own Larry moment someday.
Frequently Asked Questions
Can I use puff pastry instead of crescent roll dough?
Yes, you can! Puff pastry will give you a flakier, more buttery result. Just thaw it according to the package directions, cut it into thin strips, and wrap as directed. The baking time may be slightly longer—check at the 15-minute mark.
How do I keep the dough from unrolling while baking?
Make sure the loose end of the dough strip is tucked securely underneath the hot dog. The weight of the hot dog will help hold it in place. You can also press the end gently to seal it. If you’re really worried, a tiny dab of water on the end of the dough helps it stick.
Can I make these in an air fryer?
Absolutely! Preheat your air fryer to 350°F (175°C). Place the wrapped mummy hot dogs in the basket in a single layer (you may need to work in batches). Cook for 6-8 minutes, or until the dough is golden and crispy. Add the eyes after they come out.
What can I use instead of hot dogs?
You can use any pre-cooked sausage, like kielbasa, bratwurst, or even cocktail sausages. For a vegetarian option, use veggie dogs or pre-cooked plant-based sausages. Just make sure they’re fully cooked before wrapping, as the baking time is mainly for the dough.
How far in advance can I assemble these?
You can assemble the mummy hot dogs up to 4 hours ahead of time. Place them on the baking sheet, cover with plastic wrap, and keep them in the refrigerator. Bake them right before serving. Do not add the eyes until after baking, or the mustard will dry out and look weird.
Pin This Recipe!
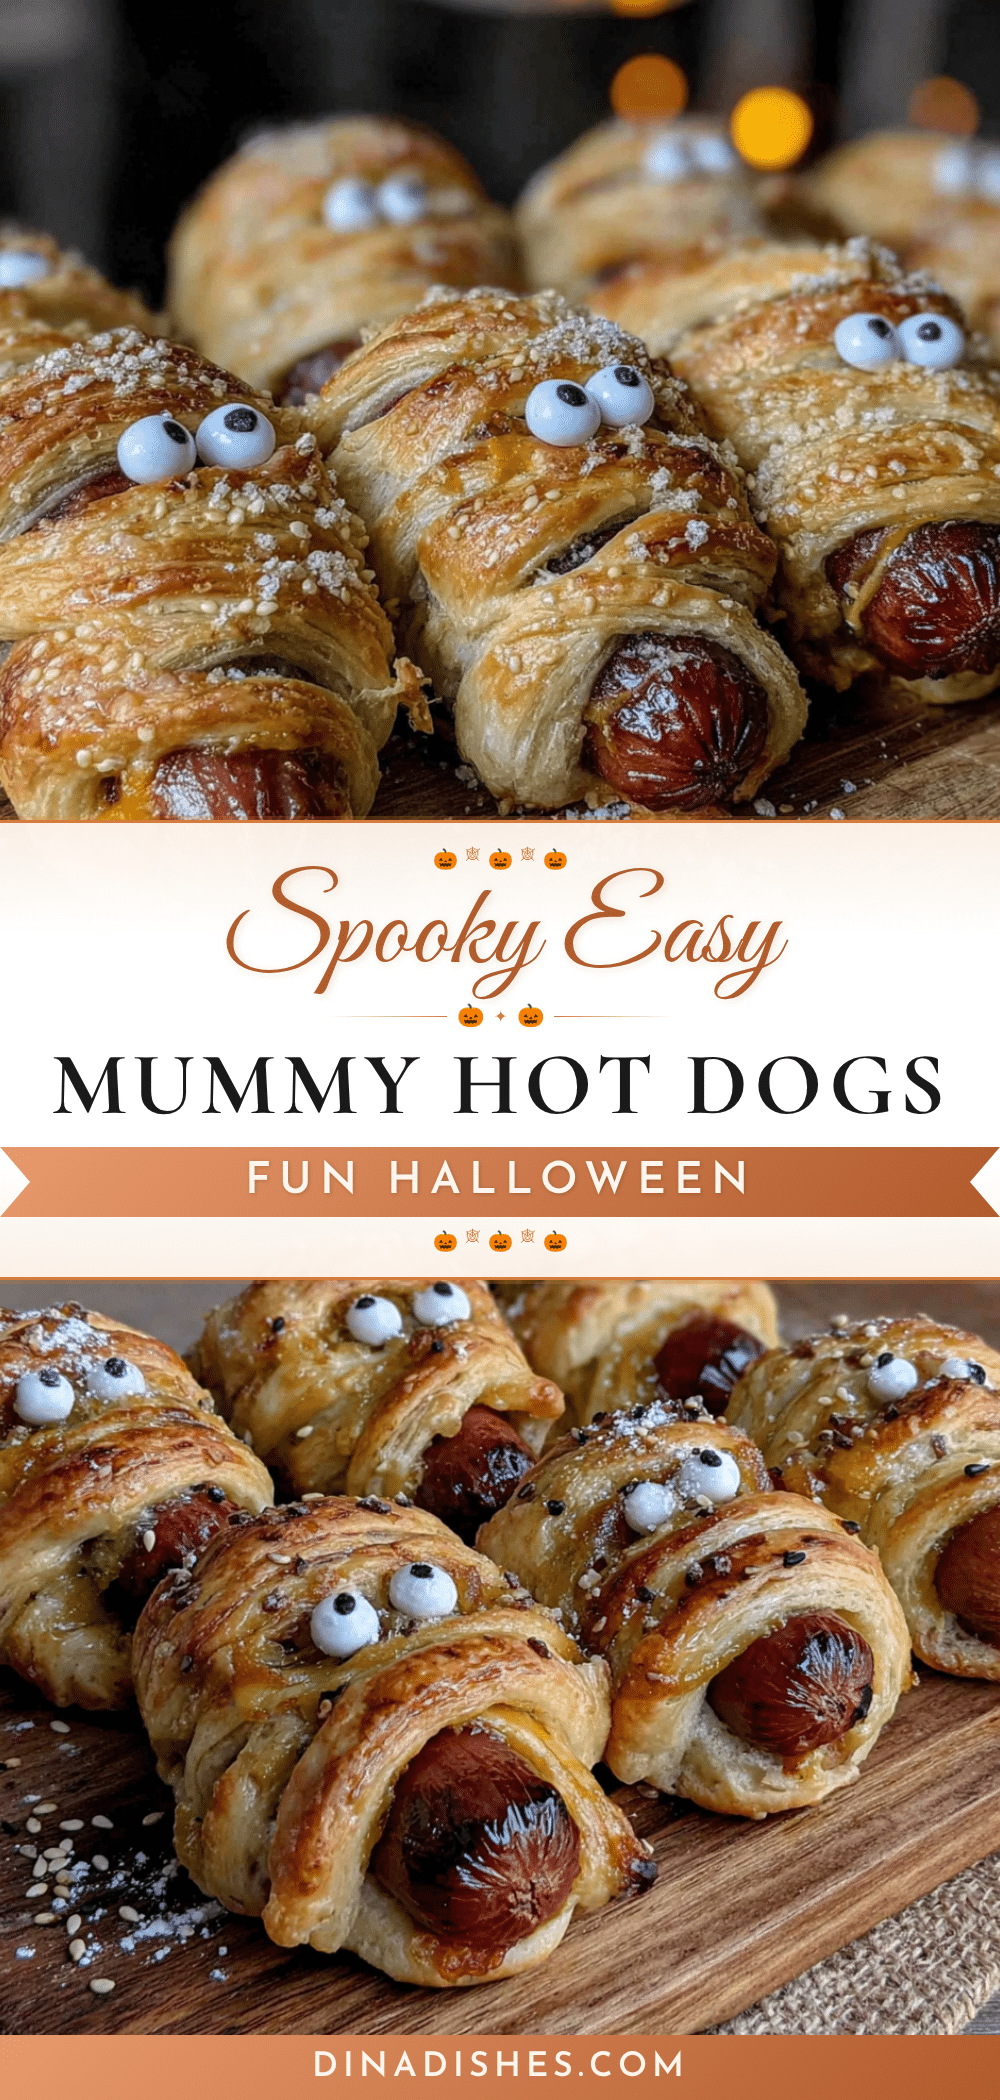
Spooky Easy Mummy Hot Dogs: The Best Fun Halloween Snack

These spooky easy mummy hot dogs are the perfect Halloween snack—quick to make with just hot dogs and crescent roll dough, they’re a crowd-pleasing treat that’s fun to prepare and delicious to eat.
- Prep Time: 10 minutes
- Cook Time: 15 minutes
- Total Time: 25 minutes
- Yield: 8 servings 1x
- Category: Appetizer
- Cuisine: American
Ingredients
- 1 package (8-count) hot dogs (standard size, preferably all-beef)
- 1 can (8-count) refrigerated crescent roll dough (regular size, not grand)
- Mustard or ketchup (for the eyes)
- Cooking spray or parchment paper
- Optional: Everything bagel seasoning or sesame seeds
Instructions
- Preheat your oven to 375°F (190°C). Line a baking sheet with parchment paper or a silicone mat.
- Open the can of crescent roll dough and separate along the perforated lines into 8 triangles.
- Using a sharp knife or pizza cutter, cut each triangle lengthwise into 3-4 thin strips, about 1/2 inch wide.
- Take one hot dog and, starting at one end, wrap a strip of dough around it at a slight angle, leaving about 1 inch exposed at the top for the face. Continue wrapping, slightly overlapping the strips, until the hot dog is mostly covered. Gaps are fine for a mummy look.
- Place the wrapped mummy hot dog on the prepared baking sheet, tucking the loose end of the dough underneath. Repeat with remaining hot dogs and dough strips.
- Bake for 12-15 minutes, or until the dough is golden brown and puffed.
- Remove from the oven and let cool for 2-3 minutes. While still warm, use a toothpick to dip into mustard or ketchup and dot two small eyes onto the exposed part of the hot dog.
- Serve immediately warm.
Notes
Don’t overwrap the hot dogs—leave some breathing room for the dough to expand. If the dough gets sticky, refrigerate it for 5-10 minutes. For make-ahead, assemble up to 4 hours in advance and refrigerate; add eyes after baking. Reheat in oven or air fryer at 350°F for 5-7 minutes.
Nutrition
- Serving Size: 1 mummy hot dog
- Calories: 200
- Sugar: 3
- Sodium: 600
- Fat: 14
- Saturated Fat: 5
- Carbohydrates: 14
- Protein: 7
Keywords: Halloween, mummy hot dogs, crescent roll, hot dog appetizer, spooky snack, easy Halloween recipe, kid-friendly