It was 10:47 PM on a particularly rainy Thursday, and I had a very specific craving for something warm, soft, and just a little bit sweet. The kind of craving that doesn’t let up. I didn’t have the energy for a full-blown baking project, and honestly, I didn’t have half the ingredients a fancy pumpkin cookie recipe would need. But I had a can of pumpkin puree that was staring at me from the pantry, a half-bag of chocolate chips from the last batch of muffins, and a wild idea that maybe, just maybe, I could make something my kids would actually eat without a fuss. So I started pulling things out of the cupboard, not really measuring at first, just going with that late-night gut feeling. The kitchen was quiet, just the hum of the fridge and the rain against the window. I forgot to set out the butter to soften—typical—so I had to get creative with the mixing method. It felt a little messy, a little reckless, but that’s how the best kitchen experiments happen, right?
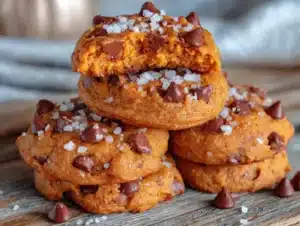
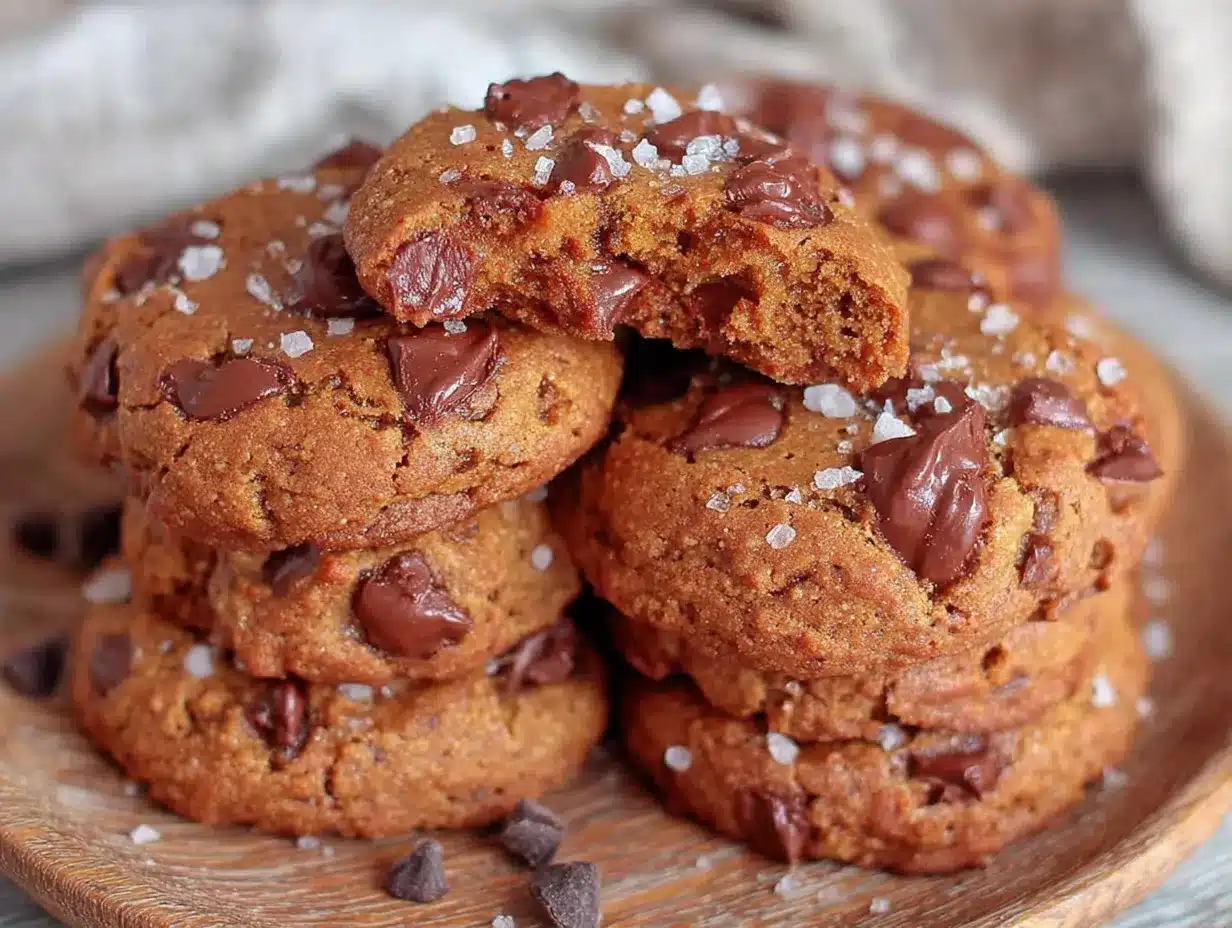
I remember thinking, “If this flops, it’s just me and the dog who will know.” But then the smell started to fill the house. Warm pumpkin, a hint of cinnamon, and that promise of melted chocolate. It was the kind of smell that makes you close your eyes for a second. I pulled them out of the oven, a little lopsided, not perfectly round, but they were golden and soft. I let one cool just enough to not burn my tongue, and that first bite? Honestly, it was a total surprise. They were perfect. Not too cakey, not too dense, with just the right amount of chocolate in every bite. Maybe you’ve been there—that moment when a kitchen gamble pays off in the best way possible. This recipe stayed with me because it proved you don’t need a fancy pantry or a perfectly planned afternoon to make something truly delicious. You just need a craving and a little bit of nerve.
Why You’ll Love This Recipe
These aren’t just another pumpkin cookie. They are the cookie that disappears from the cooling rack before you can even get them in the cookie jar. I’ve tested this recipe more times than I can count, tweaking the flour ratio and the spice blend until it was just right. It’s family-approved through and through.
- Budget-Friendly & Simple: You likely have most of these ingredients in your kitchen right now. No expensive extracts or hard-to-find spices. Just real, affordable staples that work together beautifully.
- Kid-Approved (Even Picky Eaters): The pumpkin flavor is subtle, blending perfectly with the warm spices and chocolate. My kids don’t even realize they’re eating something with a vegetable in it. They just know it’s their favorite after-school treat.
- Quick & Easy: From start to finish, these cookies come together in about 25 minutes. No chilling the dough, no complicated steps. Perfect for a last-minute bake sale or a rainy afternoon project with little helpers.
- Perfect for Fall (and All Year): While they scream autumn, I make these year-round. They’re great for Halloween parties, Thanksgiving dessert tables, or just a cozy Sunday treat.
- Unbelievably Soft & Chewy: The secret is in the pumpkin and a little trick with the butter. They stay soft for days, which is a rare thing for a cookie.
What makes this recipe different from the rest is the texture. I’ve had so many pumpkin cookies that were either dry and crumbly or too much like a muffin top. This one hits that sweet spot—soft, slightly chewy, and perfectly moist. It’s comfort food reimagined as a simple, affordable cookie that makes everyone happy. It’s the kind of recipe you’ll come back to week after week, and honestly, that’s the highest compliment I can give it.
What Ingredients You Will Need
This recipe uses simple, wholesome ingredients to deliver that soft, spiced cookie with pockets of melted chocolate. Most of these are pantry staples, making this a truly accessible treat. Let’s break down what you need and why each ingredient matters.
Dry Ingredients
- All-Purpose Flour (1 ¾ cups / 220g): This gives the cookies structure. I’ve tested this with a 1:1 gluten-free baking blend, and it works, but the texture is slightly more tender with all-purpose. Spoon and level your flour for the best results—scooping directly can pack it down and make your cookies dry.
- Baking Soda (1 teaspoon): This helps the cookies spread just a little and gives them a soft, tender crumb. Make sure it’s fresh for the best rise.
- Ground Cinnamon (1 ½ teaspoons): The backbone of the warm spice flavor. I prefer a good quality cinnamon like Saigon cinnamon for a bolder taste.
- Pumpkin Pie Spice (1 teaspoon): This is your shortcut to that classic fall flavor. If you don’t have it, you can mix your own with a pinch of nutmeg, ginger, and cloves.
- Salt (½ teaspoon): Don’t skip this! It balances the sweetness and enhances all the other flavors, especially the chocolate.
Wet Ingredients
- Unsalted Butter (½ cup / 113g, melted): This is my secret for a quick and easy cookie. Using melted butter means no waiting for it to soften, and it creates a chewier texture. If you only have salted butter, just reduce the added salt to ¼ teaspoon.
- Granulated Sugar (½ cup / 100g): Provides sweetness and helps with spreading and browning.
- Light Brown Sugar (½ cup / 100g, packed): This adds moisture and a deeper, almost caramel-like flavor. Pack it firmly into your measuring cup for the right amount.
- Pumpkin Puree (¾ cup / 170g): Not pumpkin pie filling! Make sure you’re using 100% pure pumpkin puree. It adds moisture, a subtle earthy sweetness, and that beautiful orange color. I usually use Libby’s, but any store brand works fine.
- Large Egg (1): Binds everything together and adds richness. Let it come to room temperature quickly by placing it in a bowl of warm water for 5 minutes if you forgot to take it out.
- Vanilla Extract (1 teaspoon): Enhances the sweetness and rounds out the flavors. A good pure vanilla extract makes a difference, but imitation vanilla is fine too.
Mix-Ins
- Semi-Sweet Chocolate Chips (1 cup / 175g): The star of the show! I find semi-sweet is the perfect balance—not too sweet, not too bitter. You can use milk chocolate if you want a sweeter cookie, or dark chocolate for a more grown-up flavor. I personally love Ghirardelli or Guittard chips for their consistent melting.
Equipment Needed
You don’t need a fancy bakery setup for these cookies. I’ve made them in my tiny apartment kitchen and in a friend’s country cabin with basic tools. Here’s what you’ll need:
- Large Mixing Bowls (2): One for dry ingredients, one for wet. I use a classic Pyrex glass set, and they work perfectly.
- Whisk: For combining the dry ingredients and smoothing out the wet mixture.
- Rubber Spatula or Wooden Spoon: For folding the dough together. I prefer a sturdy silicone spatula because it scrapes the bowl clean.
- Baking Sheets (2): A light-colored, rimmed baking sheet is best for even browning. Dark sheets can cause the bottoms to burn before the centers are done.
- Parchment Paper or Silicone Baking Mat: This is non-negotiable for me. It prevents sticking and makes cleanup a breeze. Plus, it helps the cookies bake evenly.
- Cookie Scoop (1.5 tablespoon size): This is a game-changer for getting uniform cookies. It’s not essential, but it makes the process faster and your cookies will bake more evenly. A regular spoon works just fine, though.
- Cooling Rack: Allows air to circulate around the cookies so they cool without getting soggy on the bottom.
Preparation Method
Alright, let’s get baking. This is a straightforward dough, so don’t overthink it. The key is to not overmix once you add the flour. Here is the step-by-step method that has never let me down.
- Preheat and Prep (5 minutes): Preheat your oven to 350°F (175°C). Line two baking sheets with parchment paper or silicone baking mats. This is your first step to success—don’t skip the lining!
- Mix the Dry Ingredients (2 minutes): In a medium bowl, whisk together the all-purpose flour, baking soda, cinnamon, pumpkin pie spice, and salt. Whisking aerates the flour and ensures the spices are evenly distributed. Set this bowl aside.
- Combine the Wet Ingredients (3 minutes): In a large bowl, whisk together the melted butter, granulated sugar, and brown sugar until well combined. It should look like a thick, grainy paste. Add the pumpkin puree, egg, and vanilla extract. Whisk vigorously until the mixture is smooth and glossy. It will be a beautiful, pale orange color. Make sure there are no streaks of egg white.
- Combine Wet and Dry (2 minutes): Pour the dry ingredients into the bowl with the wet ingredients. Using your rubber spatula, fold everything together gently. Stir just until you no longer see streaks of flour. A few small lumps are perfectly fine. Overmixing at this stage will develop the gluten and make your cookies tough.
- Add the Chocolate Chips (1 minute): Pour in the chocolate chips and fold them into the dough with a few swift strokes. Make sure they are evenly distributed throughout the dough.
- Scoop the Dough (5 minutes): Using your cookie scoop or a tablespoon, drop rounded tablespoons of dough onto the prepared baking sheets. Leave about 2 inches of space between each cookie—they will spread a little. I usually get about 12 cookies per sheet. The dough will be a bit soft and sticky, which is normal.
- Bake (10-12 minutes): Place one sheet on the middle rack of your preheated oven. Bake for 10 to 12 minutes. The edges should look set and lightly golden, while the centers will still look a little soft and puffy. A toothpick inserted into the center should come out clean or with a few moist crumbs. My personal trick is to pull them out at the 11-minute mark for the softest cookies.
- Cool on the Sheet (5 minutes): This is a crucial step! Let the cookies cool on the baking sheet for 5 minutes. They will continue to set up as they cool. If you try to move them right away, they will fall apart.
- Transfer to Rack (2 minutes): After 5 minutes, use a thin spatula to transfer the cookies to a wire cooling rack to cool completely. If you can resist, let them cool for at least 10 more minutes before serving. The chocolate needs that time to firm up just a little.
Cooking Tips & Techniques
I’ve made a lot of mistakes in the kitchen, and I’m happy to share them so you don’t have to. Here are the things I’ve learned the hard way about these pumpkin cookies.
- The Dough is Sticky – Don’t Panic: Pumpkin adds a lot of moisture, which makes the dough stickier than a standard chocolate chip cookie dough. This is normal. Don’t be tempted to add more flour, or your cookies will be dry and cakey. Just use a cookie scoop or lightly dampen your hands if you need to shape them.
- Don’t Overbake for Soft Cookies: The biggest mistake I made the first time was baking them until they looked fully golden all over. They came out dry. The trick is to pull them out when the edges are set but the centers are still slightly soft and puffed. They will continue to bake on the hot sheet as they cool. Trust the process.
- Use Room Temperature Ingredients: I know, I know, I forgot the butter in my story. But for the best texture, try to have your egg at room temperature. A cold egg can seize the melted butter and make the dough lumpy. A quick float in warm water fixes this in minutes.
- Chill the Dough for Thicker Cookies: If you want a thicker, puffier cookie, you can chill the scooped dough for 30 minutes before baking. This firms up the butter and reduces spreading. It’s not necessary for this recipe, but it’s a good trick to know.
- Rotate Your Pan Halfway: Every oven has hot spots. Halfway through the baking time, rotate your baking sheet 180 degrees. This ensures all the cookies brown evenly.
Variations & Adaptations
This recipe is a wonderful base for getting creative. Here are some of my favorite ways to switch it up, depending on what I have in the pantry or who I’m feeding.
- Spice It Up (or Down): For a more intense pumpkin flavor, add an extra ¼ teaspoon of pumpkin pie spice. If you’re making these for very young kids, you can reduce the cinnamon to 1 teaspoon for a milder taste.
- Chocolate Swap: Not a fan of semi-sweet? Use milk chocolate chips for a sweeter, kid-friendlier cookie. White chocolate chips and a handful of dried cranberries make a fantastic holiday version. I once made a batch with dark chocolate chunks and a sprinkle of flaky sea salt on top—absolutely divine for the adults.
- Add Some Crunch: Fold in ½ cup of chopped pecans or walnuts along with the chocolate chips. Toast them in a dry pan for 3-4 minutes first to bring out their nutty flavor. This is my husband’s favorite variation.
- Vegan Adaptation: To make these vegan, replace the butter with a vegan butter stick (like Earth Balance), use a flax egg (1 tablespoon ground flaxseed mixed with 3 tablespoons water, let sit for 5 minutes), and use dairy-free chocolate chips. They turn out just as soft and delicious.
- Gluten-Free Option: Use a good quality 1:1 gluten-free baking flour blend that contains xanthan gum. I’ve had great success with Bob’s Red Mill 1-to-1 Baking Flour. The cookies will be slightly more tender, but the flavor is spot on.
Serving & Storage Suggestions
These cookies are wonderful at room temperature, but they are absolutely dreamy when they are still a little warm from the oven. The chocolate is melted and gooey, and the cookie itself is pillowy soft.
For serving, I love to pile them high on a pretty plate for a bake sale or a family gathering. They also make fantastic lunchbox treats—just let them cool completely before packing them away. A cold glass of milk is the classic pairing, but they are also lovely with a warm cup of tea or apple cider for a cozy fall afternoon.
Storage: Store the completely cooled cookies in an airtight container at room temperature. They will stay soft and fresh for up to 5 days. I honestly think they taste even better on the second day, as the flavors have a chance to meld together.
Freezing: These cookies freeze beautifully. You can freeze the baked cookies in a single layer on a baking sheet, then transfer them to a freezer-safe bag for up to 3 months. Thaw them at room temperature or pop them in the microwave for 15 seconds for a quick treat. You can also freeze the unbaked dough. Scoop the dough balls onto a parchment-lined baking sheet and freeze until solid, then transfer them to a freezer bag. Bake from frozen, adding 2-3 minutes to the baking time. It’s a lifesaver for last-minute cookie emergencies.
Nutritional Information & Benefits
Let’s be honest—these are a treat, and they are meant to be enjoyed. But there are a few little perks hidden in that sweet, chocolatey bite. The pumpkin puree is a great source of Vitamin A and fiber, which is always a nice bonus when you’re feeding kids. The butter and eggs provide some protein and healthy fats, and the chocolate… well, it makes everything better.
Here are the estimated nutritional values per cookie (based on 24 cookies):
- Calories: ~155
- Fat: 8g
- Carbohydrates: 21g
- Fiber: 1g
- Sugar: 13g
- Protein: 2g
Dietary Considerations: This recipe can be easily adapted for vegan and gluten-free diets (see variations above). It contains dairy (butter) and gluten (all-purpose flour) in its standard form. If you have a nut allergy, simply skip any nut-based add-ins.
My personal perspective? I feel good about serving these to my family because I know exactly what’s in them. They are a healthier alternative to many store-bought cookies, and they bring so much joy for such a small effort. That’s a win in my book.
Conclusion
These Kid-Approved Pumpkin Chocolate Chip Cookies are more than just a recipe—they are a little piece of comfort that you can make any day of the week. They are proof that you don’t need a complicated list of ingredients or hours of free time to create something that makes everyone smile. The soft, spiced cookie paired with the melted chocolate is a combination that never gets old, and the fact that they are so easy to make is just the icing on the cake.
I truly hope you give these a try. Don’t be afraid to make them your own—add more chocolate, swap the spices, or get the kids involved in scooping the dough. That’s the beauty of a simple, forgiving recipe like this one. It’s meant to be shared and adapted.
I would absolutely love to hear how they turn out for you. Did you make any fun substitutions? Did your kids gobble them up? Please leave a comment below and let me know! And if you share a photo on Pinterest, be sure to tag me—I love seeing your baking adventures. Happy baking, friend!
Frequently Asked Questions
Can I use pumpkin pie filling instead of pumpkin puree?
No, please do not substitute pumpkin pie filling. It is pre-sweetened and spiced, which will throw off the sugar and spice balance in the recipe. Always use 100% pure pumpkin puree for the best results.
My cookies turned out flat. What went wrong?
Flat cookies are usually a result of butter that was too warm or the dough being too warm. If your kitchen is hot, try chilling the scooped dough for 20 minutes before baking. Also, make sure your baking soda is fresh—old baking soda loses its leavening power.
Can I make this recipe without an electric mixer?
Absolutely! This recipe is designed to be mixed by hand with a whisk and a spatula. No electric mixer is needed, which makes it perfect for baking with kids or in a small kitchen.
How do I know when the cookies are done baking?
Look for the edges to be set and lightly golden, while the centers will still look a little soft and puffy. A toothpick inserted into the center should come out clean or with a few moist crumbs. They will continue to set up on the hot baking sheet as they cool.
Can I double this recipe?
Yes! This recipe doubles beautifully. Just make sure you have enough space in your oven to bake the cookies in batches. You can also freeze the extra dough or baked cookies for later.
Pin This Recipe!

Best Easy Pumpkin Chocolate Chip Cookies for Kids
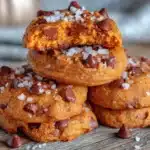
These soft and chewy pumpkin chocolate chip cookies are a quick and easy treat that kids love. Made with simple pantry ingredients, they come together in about 25 minutes and are perfect for fall baking or any time of year.
- Prep Time: 10 minutes
- Cook Time: 11 minutes
- Total Time: 25 minutes
- Yield: 24 cookies 1x
- Category: Dessert
- Cuisine: American
Ingredients
- 1 ¾ cups (220g) all-purpose flour
- 1 teaspoon baking soda
- 1 ½ teaspoons ground cinnamon
- 1 teaspoon pumpkin pie spice
- ½ teaspoon salt
- ½ cup (113g) unsalted butter, melted
- ½ cup (100g) granulated sugar
- ½ cup (100g) light brown sugar, packed
- ¾ cup (170g) pumpkin puree (not pumpkin pie filling)
- 1 large egg
- 1 teaspoon vanilla extract
- 1 cup (175g) semi-sweet chocolate chips
Instructions
- Preheat your oven to 350°F (175°C). Line two baking sheets with parchment paper or silicone baking mats.
- In a medium bowl, whisk together the all-purpose flour, baking soda, cinnamon, pumpkin pie spice, and salt. Set aside.
- In a large bowl, whisk together the melted butter, granulated sugar, and brown sugar until well combined. Add the pumpkin puree, egg, and vanilla extract. Whisk until smooth and glossy.
- Pour the dry ingredients into the wet ingredients. Fold together gently with a rubber spatula until just combined. Do not overmix.
- Fold in the chocolate chips until evenly distributed.
- Using a cookie scoop or tablespoon, drop rounded tablespoons of dough onto the prepared baking sheets, leaving about 2 inches of space between each cookie.
- Bake for 10 to 12 minutes, until the edges are set and lightly golden but the centers are still soft. Rotate the pan halfway through baking.
- Let the cookies cool on the baking sheet for 5 minutes, then transfer to a wire rack to cool completely.
Notes
The dough will be sticky—do not add extra flour. For thicker cookies, chill the scooped dough for 30 minutes before baking. Store in an airtight container at room temperature for up to 5 days. Freeze baked cookies for up to 3 months or unbaked dough for up to 3 months.
Nutrition
- Serving Size: 1 cookie
- Calories: 155
- Sugar: 13
- Sodium: 120
- Fat: 8
- Saturated Fat: 4
- Carbohydrates: 21
- Fiber: 1
- Protein: 2
Keywords: pumpkin chocolate chip cookies, easy pumpkin cookies, kid-friendly cookies, fall baking, soft pumpkin cookies