I was at the hardware store last November, of all places, trying to decide between two types of paintbrushes, when the woman behind me in line—a retired schoolteacher named Carol with flour dusted on her sweater—started explaining how she makes her honey garlic chicken. I hadn’t asked. She just saw me holding a bag of onions and said, “You know what goes perfect with those?” And honestly, I almost walked away. I was in a hurry, my cart was awkwardly balanced, and I really just wanted to pay for my brushes. But Carol kept talking, and something about the way she described the sizzle of the chicken skin hitting a cold pan stopped me cold.
She told me she’d learned it from her neighbor who ran a tiny diner in Ohio, and the secret wasn’t fancy ingredients—it was patience. “Let the garlic get sticky,” she said, tapping my cart. “That’s where the magic lives.” I scribbled her instructions on a crumpled receipt, thanked her, and honestly forgot about it for two weeks. Then came a Tuesday night in December. The kind of cold that seeps through windows. I was tired, the kind of tired where even takeout feels like too much effort. And I remembered Carol. I remembered the flour on her sweater and the way she said “sticky.”
So I grabbed some chicken thighs from the freezer, a head of garlic, and that sad bottle of honey hiding in the back of the cabinet. Let me tell you—thirty minutes later, I was standing over the stove eating straight from the pan. No plate. No shame. This cozy honey garlic chicken thighs recipe isn’t just dinner. It’s the kind of meal that makes you forget why you were tired in the first place. Maybe you’ve been there—a rough day, a cold kitchen, and the overwhelming need for something warm that doesn’t ask much of you. This is that dish.
Why You’ll Love This Recipe
Look, I’ve tested a lot of one-pan chicken recipes over the years. Some are too dry. Some are too sweet. Some require a dozen ingredients you’ll never use again. This one? It’s different. I’ve made it for my family at least a dozen times now, and every single time, someone asks for the recipe. Here’s why it works:
- Quick & Easy: From start to finish, this comes together in about 35 minutes. No marinating overnight, no complicated steps. Just sear, simmer, and eat.
- Simple Ingredients: You probably have everything in your kitchen right now. Honey, soy sauce, garlic, chicken thighs. That’s it. No grocery store scavenger hunt required.
- Perfect for Cozy Nights: This is the definition of comfort food. It’s warm, sticky-sweet, savory, and deeply satisfying. Perfect for cold weather, rainy evenings, or any day that needs a little fixing.
- Crowd-Pleaser: I’ve served this to picky kids, skeptical in-laws, and friends who “don’t really like chicken.” Every single plate came back clean. It’s that good.
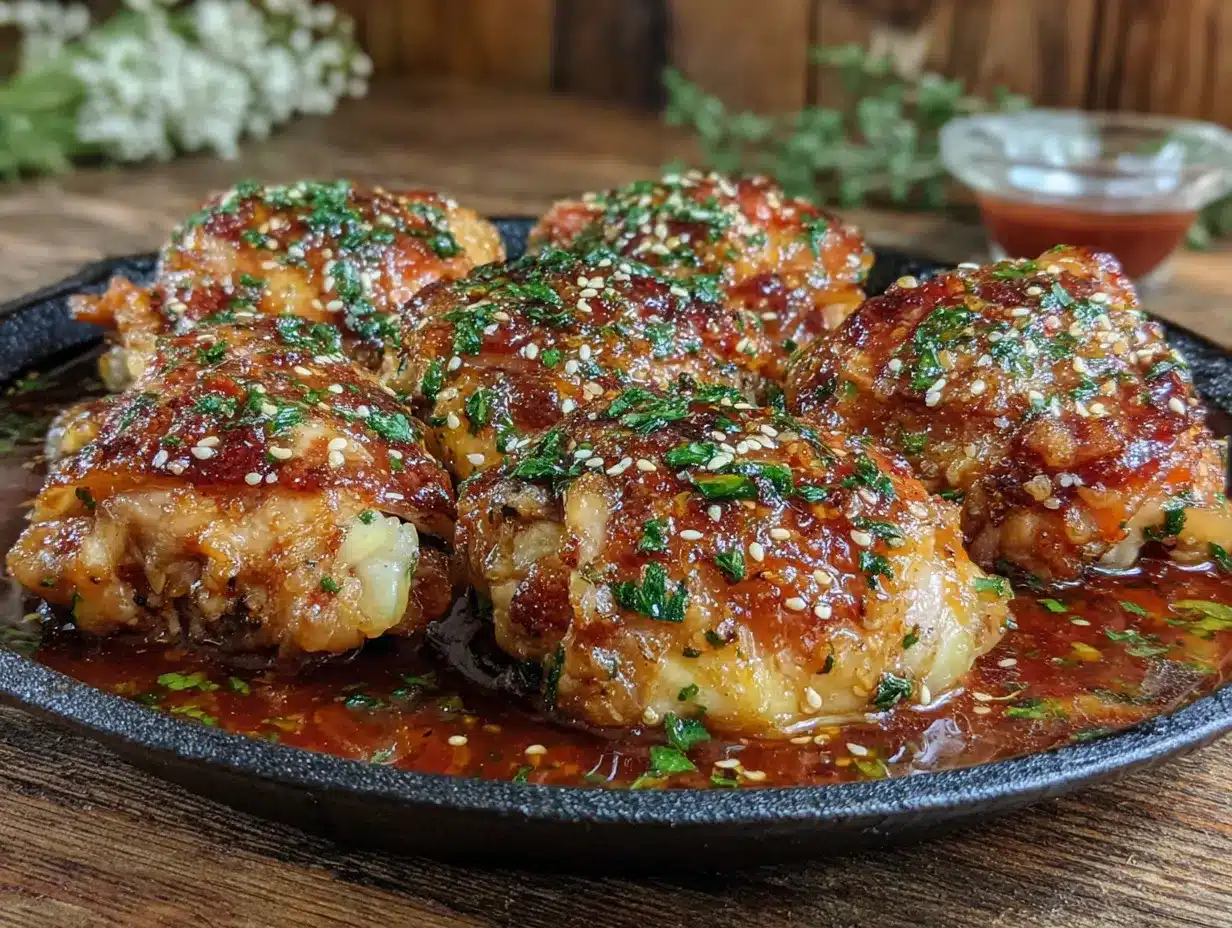
- Unbelievably Delicious: The sauce caramelizes into this glossy, sticky coating that clings to every bite of tender chicken. It’s the kind of flavor that makes you close your eyes after the first bite.
What makes this recipe different from all the other honey garlic chicken recipes out there? It’s the technique. Most recipes tell you to dump everything in a pan and bake it. That gives you watery sauce and sad skin. This method starts with a proper sear—getting that skin golden and crispy—then lets the sauce reduce and thicken right in the same pan. The result is a restaurant-quality glaze that tastes like you spent an hour, not thirty minutes. Plus, it’s all done in one pan. Less cleanup, more cozy.
This isn’t just good chicken. It’s the kind of meal that makes you want to light a candle, pour a glass of something warm, and actually sit down to enjoy it. It’s comfort food reimagined—faster, simpler, but with the same soul-soothing satisfaction. Perfect for impressing guests without stress, or turning a simple Tuesday into something memorable.
What Ingredients You Will Need
This recipe uses simple, wholesome ingredients to deliver bold flavor and satisfying texture without the fuss. Most of these are pantry staples, which means you can make this on a whim without a special trip to the store.
For the Chicken
- 6 bone-in, skin-on chicken thighs (about 2 lbs or 900g) — The skin gets crispy and renders fat for flavor. Boneless works too, but you’ll lose some richness. I prefer thighs from a local farm when I can find them—they’re juicier.
- 1 teaspoon salt — Kosher salt preferred. Don’t skip this—it seasons the meat all the way through.
- ½ teaspoon black pepper — Freshly ground adds more punch than pre-ground.
- 1 tablespoon olive oil — For searing. Avocado oil works too if you prefer a higher smoke point.
For the Honey Garlic Sauce
- 6 cloves garlic, minced — Fresh is non-negotiable here. The pre-minced stuff in a jar will burn and taste bitter. I promise, taking two minutes to mince fresh garlic is worth it.
- ⅓ cup honey (about 110g) — Local honey adds a lovely floral note, but any pure honey works. Avoid honey blends with corn syrup—they don’t caramelize the same way.
- ¼ cup low-sodium soy sauce (60ml) — Regular soy sauce works, but it’ll be saltier. Tamari or coconut aminos are great gluten-free swaps.
- 2 tablespoons rice vinegar (30ml) — Adds brightness to balance the sweetness. Apple cider vinegar works in a pinch, but use a little less—it’s stronger.
- 1 tablespoon brown sugar (12g) — Light or dark both work. This helps the sauce get that sticky, glossy texture. You can skip it if you’re watching sugar, but the glaze won’t be as thick.
- 1 teaspoon sesame oil (optional, but recommended) — Adds a nutty depth that makes the sauce taste more complex. Toasted sesame oil is best.
- ½ teaspoon red pepper flakes (optional) — For a tiny kick of heat. I add this about half the time, depending on my mood.
- ¼ cup chicken broth (60ml) — Helps deglaze the pan and keeps the sauce from getting too thick too fast. Water works if you’re out of broth.
For Garnish
- 2 green onions, sliced — Adds freshness and color.
- 1 tablespoon sesame seeds — Toasted sesame seeds add a nice crunch. I recommend McCormick or Simply Organic brands for consistent quality.
Substitution Guidance: If you’re avoiding honey, try maple syrup—it’ll be slightly less sticky but still delicious. For a gluten-free version, swap soy sauce for tamari or coconut aminos. And if you don’t have rice vinegar, a squeeze of fresh lemon juice works beautifully. Just add it at the end so the brightness doesn’t cook off.
Equipment Needed
You don’t need a fancy kitchen for this one. Here’s what you’ll need:
- Large skillet or cast iron pan (10-12 inches) — A heavy-bottomed pan is key for even searing. I use my trusty Lodge cast iron skillet for this—it holds heat beautifully and gives the chicken that perfect golden crust. If you don’t have cast iron, a stainless steel skillet works great. Avoid non-stick for the searing step—you won’t get that deep browning.
- Tongs — For flipping the chicken without piercing the skin. I’ve used cheap metal tongs for years, and they work fine.
- Cutting board and knife — For mincing garlic and slicing green onions. A sharp knife makes this step feel effortless.
- Measuring spoons and cups — For accurate sauce measurements. Eyeballing honey can lead to a too-sweet sauce.
- Small bowl — For whisking the sauce ingredients together before adding to the pan.
- Wooden spoon or spatula — For stirring the sauce and scraping up any browned bits from the pan.
If you don’t have a cast iron skillet, don’t worry. A regular heavy-bottomed pan will work—just make sure it’s oven-safe if you plan to finish the chicken in the oven (though this recipe is entirely stovetop). Budget-friendly options from Tramontina or Calphalon are excellent choices. Just avoid thin pans that heat unevenly—they’ll burn the garlic before the chicken is cooked through.
Preparation Method
Let’s get cooking. This recipe moves fast once you start, so I recommend prepping everything before you turn on the heat. Trust me—I learned the hard way that mincing garlic while the pan is smoking is not a good time.
- Pat the chicken thighs dry — Use paper towels to remove as much moisture as possible. This is the single most important step for crispy skin. Wet skin steams instead of sears, and you’ll end up with pale, rubbery chicken. Season both sides generously with salt and pepper. Let them sit at room temperature for 10 minutes while you prep the sauce.
- Make the sauce — In a small bowl, whisk together the honey, soy sauce, rice vinegar, brown sugar, sesame oil (if using), and red pepper flakes (if using). Set aside. Don’t add the garlic yet—it’ll go into the pan separately to avoid burning.
- Heat the pan — Place your skillet over medium-high heat and add the olive oil. Wait until the oil shimmers and a drop of water sizzles when flicked into the pan. This usually takes about 2 minutes. If you’re using cast iron, give it a little longer to heat evenly.
- Sear the chicken — Place the chicken thighs skin-side down in the hot pan. Don’t crowd them—work in batches if needed. Let them cook undisturbed for 5-6 minutes. I know it’s tempting to peek, but leave them alone. The skin will release naturally when it’s golden and crispy. If you try to flip too early, it’ll stick and tear. After 6 minutes, use tongs to flip each piece. The skin should be deep golden brown and crispy. Cook the other side for 4 minutes.
- Remove the chicken — Transfer the seared thighs to a plate. Don’t worry if they’re not fully cooked yet—they’ll finish in the sauce. Leave the rendered fat in the pan (about 1-2 tablespoons). This fat is liquid gold for flavor.
- Sauté the garlic — Reduce the heat to medium-low. Add the minced garlic to the pan and stir constantly for 30 seconds. It should become fragrant and just barely golden. If it starts browning too fast, remove the pan from the heat temporarily. Burnt garlic tastes bitter and will ruin the sauce.
- Deglaze the pan — Pour in the chicken broth and scrape up all the browned bits from the bottom of the pan with your wooden spoon. This is where all the flavor lives—don’t skip it. Let the broth simmer for 1 minute, scraping continuously.
- Add the sauce — Pour the honey-soy mixture into the pan. Stir to combine with the garlic and broth. Let it come to a gentle simmer—you should see small bubbles around the edges, not a violent boil.
- Return the chicken — Place the chicken thighs back in the pan, skin-side up. Spoon some of the sauce over the tops. The sauce should come about halfway up the sides of the chicken. If it looks too thin, don’t worry—it’ll reduce and thicken as it cooks.
- Simmer and baste — Reduce the heat to low, cover the pan with a lid, and let it cook for 10 minutes. After 10 minutes, remove the lid and spoon the sauce over the chicken again. The sauce should be thickening and turning glossy. Let it simmer uncovered for another 5-7 minutes, basting occasionally, until the sauce is thick enough to coat the back of a spoon and the chicken is cooked through (internal temperature of 165°F / 74°C at the thickest part).
- Rest and garnish — Remove the pan from heat. Let the chicken rest in the sauce for 5 minutes—this lets the glaze set and the juices redistribute. Sprinkle with sliced green onions and sesame seeds just before serving.
Sensory cues to watch for: When the sauce is ready, it should look like warm honey—thick, glossy, and clinging to the chicken. If you tilt the pan, the sauce should move slowly, not run like water. The garlic should be soft and fragrant, not sharp or burnt. And the chicken skin? It should be crackling-crisp on top, with sticky glaze pooling around the edges.
Cooking Tips & Techniques
I’ve made this recipe more times than I can count, and I’ve definitely made my share of mistakes along the way. Here’s what I’ve learned so you don’t have to learn the hard way:
Don’t skip the drying step. I know it feels fussy, but patting the chicken dry is the difference between crispy skin and sad, soggy skin. One time I was in a rush and skipped it. The skin steamed instead of seared, and the whole dish felt heavy and greasy. Never again.
Watch the garlic like a hawk. Garlic burns in seconds. I learned this the hard way when I walked away to answer my phone and came back to blackened garlic bits floating in my sauce. The whole batch tasted bitter and I had to start over. Keep your eyes on the pan, and if the garlic starts browning too fast, pull the pan off the heat immediately.
Let the sauce reduce properly. I know you’re hungry. I get it. But pulling the chicken out too early means watery sauce that slides right off. Let it simmer uncovered until it’s thick and sticky. You want it to cling to the chicken like a warm hug, not run off like a bad date.
Use a meat thermometer if you have one. Chicken thighs are forgiving—they stay juicy even if you go a few degrees over—but for perfect results, pull them at 165°F (74°C). If you don’t have a thermometer, cut into the thickest thigh and check that the juices run clear with no pink.
Multitasking tip: While the chicken simmers, use that time to wash your cutting board and knife, or set the table. The sauce needs occasional basting, but it doesn’t need constant attention. I usually steam some broccoli or rice during those last 10 minutes, and everything finishes at the same time.
For consistent results every time: Use the same pan size. If your pan is too big, the sauce will spread thin and reduce too fast, potentially burning before the chicken is done. If it’s too small, the chicken will be crowded and won’t brown properly. A 10-12 inch skillet is the sweet spot.
Variations & Adaptations
This recipe is wonderfully flexible. Here are some ways I’ve adapted it over the years:
Spicy Honey Garlic Chicken: Add 1-2 teaspoons of sriracha or gochujang to the sauce along with the honey. The heat balances the sweetness beautifully. I made this version for a game night and it disappeared in minutes.
Lemon Herb Version: Swap the rice vinegar for fresh lemon juice and add 1 teaspoon of dried thyme or rosemary to the sauce. The citrus cuts through the richness and makes it feel brighter. Perfect for spring evenings when you want comfort without heaviness.
Slow Cooker Adaptation: Sear the chicken as directed, then transfer everything (including the sauce) to a slow cooker. Cook on low for 4-5 hours or high for 2-3 hours. The sauce won’t reduce as much, so I recommend removing the chicken at the end and simmering the sauce on the stovetop for 10 minutes to thicken it. This version is perfect for busy days when you want dinner waiting for you.
Gluten-Free: Simply swap the soy sauce for tamari or coconut aminos. Everything else is naturally gluten-free. I’ve made this for friends with celiac disease and they couldn’t tell the difference.
Dairy-Free: This recipe is already dairy-free! No modifications needed. Just double-check your chicken broth if you’re buying store-bought—some brands add dairy.
Vegetable Add-Ins: I sometimes add broccoli florets or snap peas during the last 5 minutes of simmering. They steam in the sauce and pick up all that honey garlic flavor. It turns the dish into a complete one-pan meal with minimal extra effort.
Serving & Storage Suggestions
This cozy honey garlic chicken thighs recipe is best served hot, straight from the pan. The sauce is at its glossiest and most flavorful right after it’s finished simmering. Here’s how I like to serve it:
Serving Temperature: Serve immediately while the chicken is hot and the sauce is sticky. If it sits too long, the sauce will continue to thicken and may become too gluey. If that happens, just add a splash of warm water and stir to loosen it.
What to Serve With It: Steamed jasmine rice is my go-to—it soaks up all that extra sauce beautifully. For a lower-carb option, try cauliflower rice or serve it over a bed of sautéed greens like spinach or kale. A simple cucumber salad with rice vinegar and sesame seeds makes a refreshing side that cuts through the richness. And honestly, a crusty piece of bread for sopping up the sauce is never a bad idea.
Storage: Leftovers keep well in an airtight container in the refrigerator for up to 4 days. The flavors actually meld and deepen overnight, so it’s even better the next day. When reheating, I recommend using a skillet over medium-low heat with a splash of water or chicken broth to loosen the sauce. Microwave works too, but the skin won’t be crispy—it’ll be soft and saucy, which is still delicious in its own way.
Freezing: This dish freezes beautifully. Let it cool completely, then transfer to a freezer-safe container. It’ll keep for up to 3 months. Thaw overnight in the refrigerator and reheat as directed above. I often make a double batch and freeze half for busy weeks—it’s a lifesaver on those days when cooking feels impossible.
Flavor Development: If you’re planning ahead, the sauce can be made up to 2 days in advance and stored in the refrigerator. Just reheat it gently before adding the seared chicken. The flavors will be even more complex and well-rounded.
Nutritional Information & Benefits
Here’s the approximate nutritional breakdown for one serving (one chicken thigh with sauce, without sides):
| Nutrient | Amount per Serving |
|---|---|
| Calories | 380 kcal |
| Protein | 28g |
| Fat | 18g |
| Saturated Fat | 5g |
| Carbohydrates | 22g |
| Fiber | 0g |
| Sugar | 20g |
| Sodium | 720mg |
Health Benefits: Chicken thighs are a great source of high-quality protein, which supports muscle health and keeps you feeling full longer. They also contain iron and zinc, which are important for immune function. Garlic is known for its anti-inflammatory and immune-boosting properties—perfect for cold and flu season. Honey provides natural antioxidants and can help soothe a sore throat. While this dish is higher in sugar than some recipes, it’s still a balanced meal when paired with vegetables and whole grains.
Dietary Considerations: This recipe is naturally dairy-free and can be made gluten-free with a simple soy sauce swap. It’s not low-carb due to the honey and brown sugar, but you can reduce the sugar by half if you’re watching your intake—the sauce will be less sticky but still flavorful. For a lower-sodium version, use low-sodium soy sauce and skip the added salt during searing.
Potential Allergens: Soy (from soy sauce). If you have a soy allergy, use coconut aminos instead. Always check your chicken broth for hidden soy or gluten if you’re sensitive.
Conclusion
This cozy honey garlic chicken thighs recipe has become a staple in my kitchen for good reason. It’s the kind of meal that asks very little of you but gives so much in return—crispy skin, tender meat, and a glossy, sticky-sweet sauce that makes everything feel right with the world. Whether you’re cooking for a crowd or just for yourself on a quiet Tuesday, this one-pan wonder delivers every single time.
I love that this recipe is forgiving. You can tweak the sweetness, adjust the heat, add vegetables, or swap the protein entirely. It’s a blueprint for comfort, not a rigid rulebook. And honestly, that’s what cooking should feel like—warm, flexible, and full of possibility.
So go ahead, give it a try. Maybe you’ll discover your own little twist—a splash of lime, a sprinkle of chili flakes, or a handful of fresh herbs. And when you do, I’d love to hear about it. Drop a comment below, share your version on Pinterest, or tag me in your photos. Let’s keep this cozy recipe spreading, one sticky chicken thigh at a time.
Happy cooking, friend. You’ve got this.
Frequently Asked Questions
Can I use chicken breasts instead of thighs?
Yes, but with adjustments. Chicken breasts cook faster and are leaner, so they can dry out. Use boneless, skinless breasts and reduce the simmering time to about 10-12 minutes total. Check for doneness at 165°F (74°C). The sauce won’t be as rich without the rendered fat from the thighs, so consider adding an extra tablespoon of butter or oil to compensate.
Can I make this recipe in the oven instead of on the stovetop?
Absolutely. Sear the chicken on the stovetop as directed, then transfer the pan to a preheated 375°F (190°C) oven for 20-25 minutes. The oven heat will finish cooking the chicken and caramelize the sauce beautifully. This method is great if you’re making a larger batch or want to free up stovetop space for sides.
Why is my sauce too thin?
This usually happens when the sauce hasn’t reduced enough. Make sure to simmer it uncovered for the full 5-7 minutes after removing the lid. If it’s still thin, remove the chicken and let the sauce bubble on its own for another 3-5 minutes. It should thicken as the water evaporates. Also, check that you’re using the right pan size—a pan that’s too wide will cause the sauce to spread thin and reduce unevenly.
Can I prep this dish ahead of time for a dinner party?
Yes! You can sear the chicken and make the sauce up to 2 days in advance. Store them separately in the refrigerator. When you’re ready to serve, reheat the sauce in the skillet, add the chicken, and simmer as directed. This makes entertaining stress-free—you’ll have more time to enjoy your guests.
What can I use instead of honey for a vegan version?
Maple syrup or agave nectar are the best substitutes. Use the same amount (⅓ cup / 110g). Maple syrup will give a slightly different flavor—more woodsy and complex—but it’s still delicious. Agave is milder and closer to honey in sweetness. Keep in mind that neither will caramelize exactly like honey, so the sauce may be a touch thinner. Simmer it a few minutes longer to compensate.
Pin This Recipe!
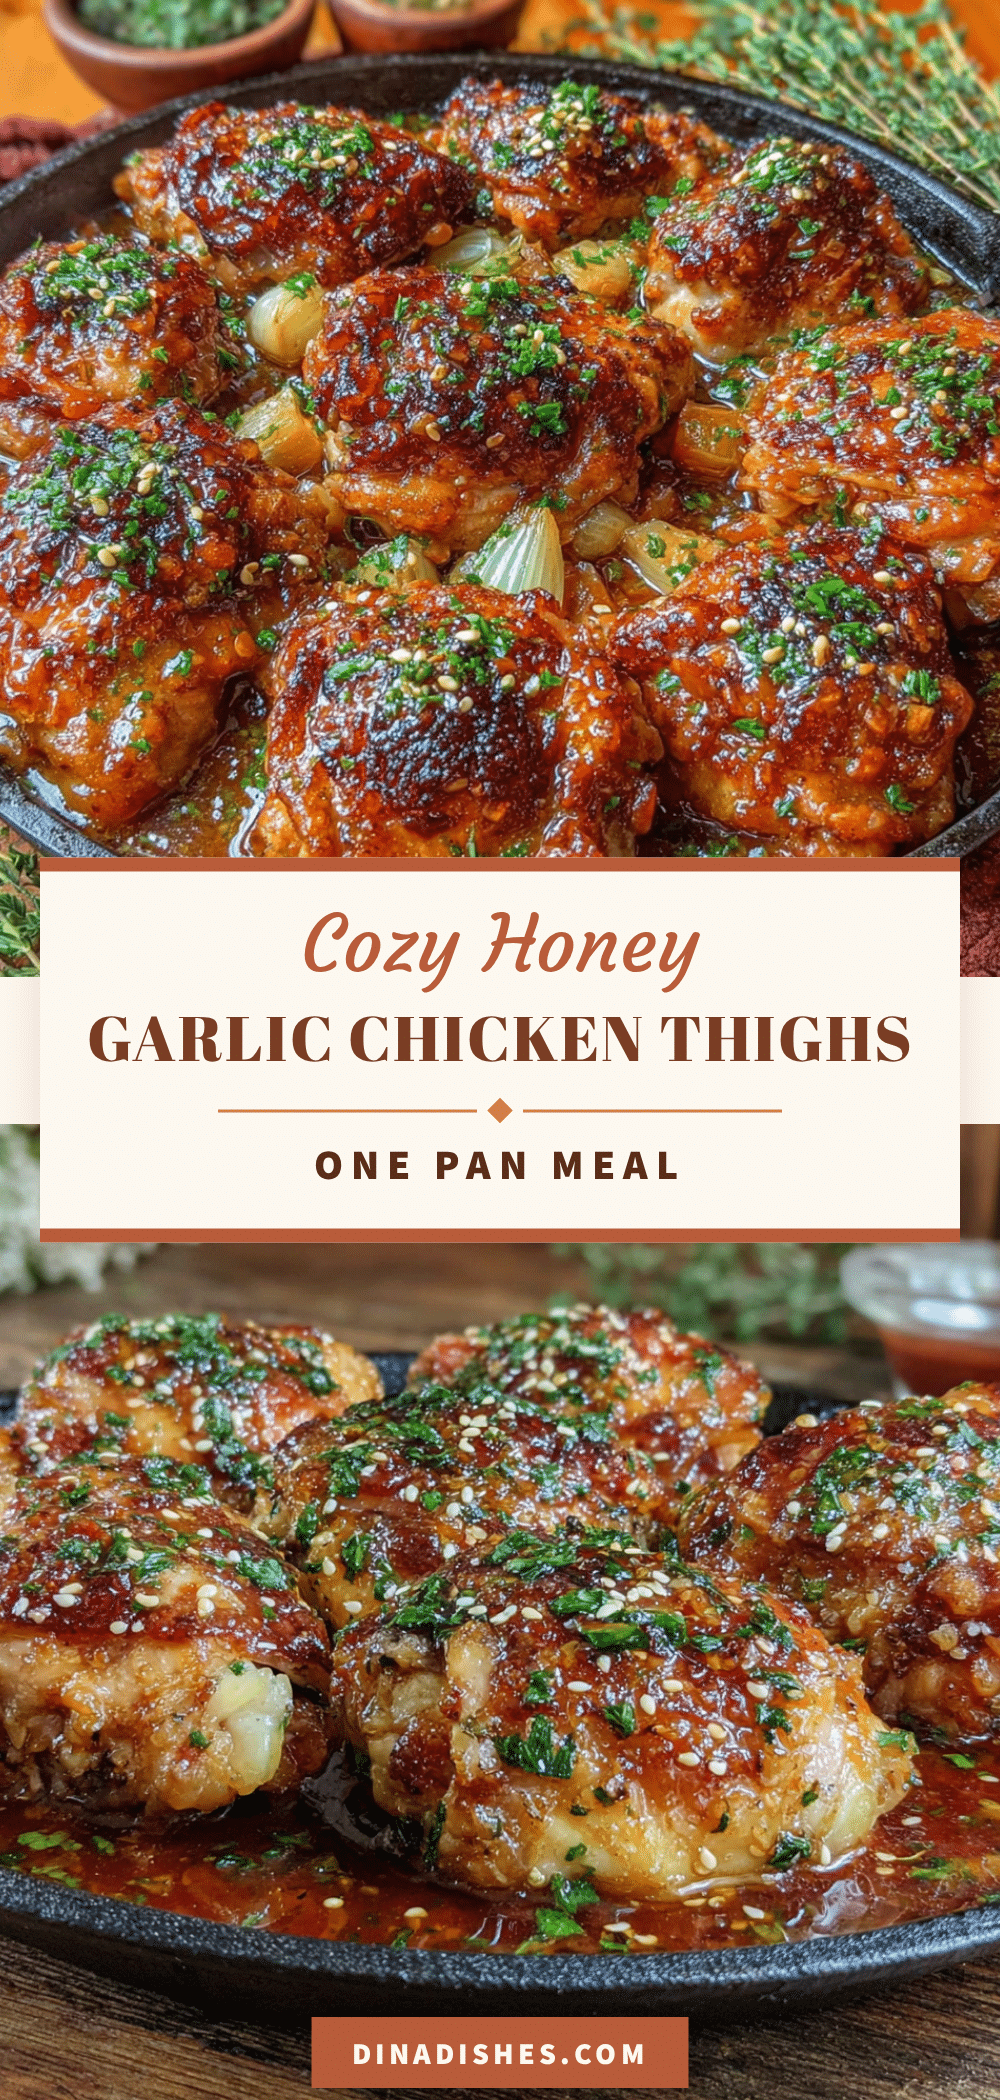
Cozy Honey Garlic Chicken Thighs: Best One Pan Meal

This cozy honey garlic chicken thighs recipe is a one-pan wonder with crispy skin, tender meat, and a glossy, sticky-sweet sauce. It’s quick, easy, and perfect for cozy nights.
- Prep Time: 10 minutes
- Cook Time: 25 minutes
- Total Time: 35 minutes
- Yield: 6 servings 1x
- Category: Main Course
- Cuisine: American
Ingredients
- 6 bone-in, skin-on chicken thighs (about 2 lbs or 900g)
- 1 teaspoon salt
- ½ teaspoon black pepper
- 1 tablespoon olive oil
- 6 cloves garlic, minced
- ⅓ cup honey (about 110g)
- ¼ cup low-sodium soy sauce (60ml)
- 2 tablespoons rice vinegar (30ml)
- 1 tablespoon brown sugar (12g)
- 1 teaspoon sesame oil (optional)
- ½ teaspoon red pepper flakes (optional)
- ¼ cup chicken broth (60ml)
- 2 green onions, sliced
- 1 tablespoon sesame seeds
Instructions
- Pat the chicken thighs dry with paper towels. Season both sides with salt and pepper. Let sit at room temperature for 10 minutes.
- In a small bowl, whisk together honey, soy sauce, rice vinegar, brown sugar, sesame oil (if using), and red pepper flakes (if using). Set aside.
- Heat a large skillet or cast iron pan over medium-high heat and add olive oil. Wait until the oil shimmers.
- Place chicken thighs skin-side down in the hot pan. Cook undisturbed for 5-6 minutes until skin is deep golden brown and crispy. Flip and cook the other side for 4 minutes.
- Transfer seared thighs to a plate. Leave rendered fat in the pan.
- Reduce heat to medium-low. Add minced garlic and stir constantly for 30 seconds until fragrant and just barely golden.
- Pour in chicken broth and scrape up browned bits from the pan. Let simmer for 1 minute.
- Pour honey-soy mixture into the pan. Stir to combine and bring to a gentle simmer.
- Return chicken to the pan, skin-side up. Spoon some sauce over the tops.
- Reduce heat to low, cover, and cook for 10 minutes. Remove lid, baste chicken with sauce, and simmer uncovered for 5-7 minutes until sauce is thick and glossy and chicken reaches 165°F (74°C) internally.
- Remove from heat. Let rest in sauce for 5 minutes. Garnish with sliced green onions and sesame seeds.
Notes
Pat chicken dry for crispy skin. Watch garlic closely to avoid burning. Let sauce reduce properly for a sticky glaze. Use a meat thermometer for perfect doneness.
Nutrition
- Serving Size: 1 chicken thigh with
- Calories: 380
- Sugar: 20
- Sodium: 720
- Fat: 18
- Saturated Fat: 5
- Carbohydrates: 22
- Protein: 28
Keywords: honey garlic chicken, one pan meal, chicken thighs, easy dinner, comfort food, sticky chicken