The neighborhood Halloween party was in six hours and I’d completely forgotten. Everyone else would be bringing elaborate themed desserts—I’d seen the photos on the group chat. There was a witch’s cauldron cake, some kind of graveyard brownie situation, and a pumpkin cheesecake that looked like it took three days. I had a stick of butter, some flour, and a vague memory of a sugar cookie recipe my grandmother used to make. Oh, and a ghost-shaped cookie cutter I’d bought on a whim last October and shoved in the back of a drawer. Honestly, I was ready to just grab a bag of candy and call it a night.
But then I remembered these light ghost-shaped sugar cookies with royal icing I’d seen floating around Pinterest. They looked so simple—almost too simple. I mean, how impressive could a plain sugar cookie be next to a witch’s cauldron? I figured I’d give it a shot anyway, because at least it was something. I mixed the dough in a panic, spilled flour on my shirt, and accidentally used salted butter instead of unsalted. Classic me.
The dough came together in about ten minutes. I rolled it out, cut the little ghost shapes, and popped them in the oven. While they baked, I whisked up a quick batch of royal icing—just powdered sugar, meringue powder, and water. Nothing fancy. I decorated them in a hurry, giving each ghost a pair of wonky eyes and a wobbly little mouth. Some of them looked more like friendly blobs than actual ghosts, but I didn’t have time to be precious about it.
You know that feeling when you bring the underdog dish to a party and everyone ignores it at first? That’s what I expected. But when I set those cookies down on the dessert table, something weird happened. People stopped. They picked them up. They actually smiled. By the end of the night, the witch’s cauldron cake was barely touched and my little ghost cookies were completely gone. Someone asked me for the recipe. I think I mumbled something about salted butter and panic. That night, I realized something important: sometimes the simplest things win, and winning is a lot sweeter when you almost didn’t try at all.
Why You’ll Love This Recipe
These light ghost-shaped sugar cookies with royal icing are the kind of recipe that makes you look like you planned ahead—even when you absolutely did not. I’ve tested this dough at least a dozen times to get the texture just right: soft in the middle, slightly crisp at the edges, and sturdy enough to hold a layer of royal icing without crumbling. Here’s why this version stands out from the rest:
- Quick & Easy: From start to finish, these cookies come together in under an hour. The dough requires no chilling, which is a game-changer when you’re short on time or patience.
- Simple Ingredients: You probably already have everything in your pantry. No fancy extracts, no specialty flours—just butter, sugar, eggs, and a few basics.
- Perfect for Halloween: These are the ultimate last-minute party contribution. They’re festive without being fussy, and kids absolutely love decorating them.
- Crowd-Pleaser: I’ve brought these to three separate Halloween gatherings now, and every single time, they disappear before the elaborate desserts. There’s something about a cute little ghost that people can’t resist.
- Unbelievably Delicious: The flavor is classic buttery sugar cookie with a hint of vanilla. The royal icing adds just the right amount of sweetness without overwhelming the cookie itself.
What makes this recipe different is the texture. Most sugar cookie recipes turn out either too dense or too fragile. I spent weeks tweaking the butter-to-flour ratio and the baking time to get that perfect balance—soft enough to enjoy, firm enough to decorate. Plus, the royal icing sets up glossy and smooth, which makes these cookies look professional even when your decorating skills are, let’s say, a work in progress.
This isn’t just another Halloween cookie. It’s the one that makes you close your eyes after the first bite because it tastes like childhood and effortlessness all at once. It’s comfort food for the spooky season—made with simple ingredients, zero stress, and a whole lot of heart.
What Ingredients You Will Need
This recipe uses simple, wholesome ingredients to create a sugar cookie that’s light, tender, and perfectly sweet. The ingredient list is short because the magic is in the method, not the complexity.
For the Cookies
- Unsalted butter, softened (1 cup / 226g) — I prefer using unsalted so I can control the salt level. If you only have salted, just reduce the added salt by half.
- Granulated sugar (1 cup / 200g) — Regular white sugar works best here. It gives the cookies that classic sweet flavor and helps them spread just enough.
- Large egg (1, at room temperature) — Room temperature eggs incorporate more evenly into the butter mixture. If you forgot to take yours out, place it in a bowl of warm water for 5 minutes.
- Vanilla extract (1½ teaspoons) — Pure vanilla makes a noticeable difference in flavor. I’m partial to Nielsen-Massey, but any good-quality brand works.
- All-purpose flour (2½ cups / 312g) — Spoon and level your flour for the most accurate measurement. Scooping directly from the bag can pack in too much flour and make the cookies dense.
- Baking powder (1 teaspoon) — This gives the cookies a slight lift so they’re not flat or tough.
- Salt (½ teaspoon) — Balances the sweetness and enhances the buttery flavor.
For the Royal Icing
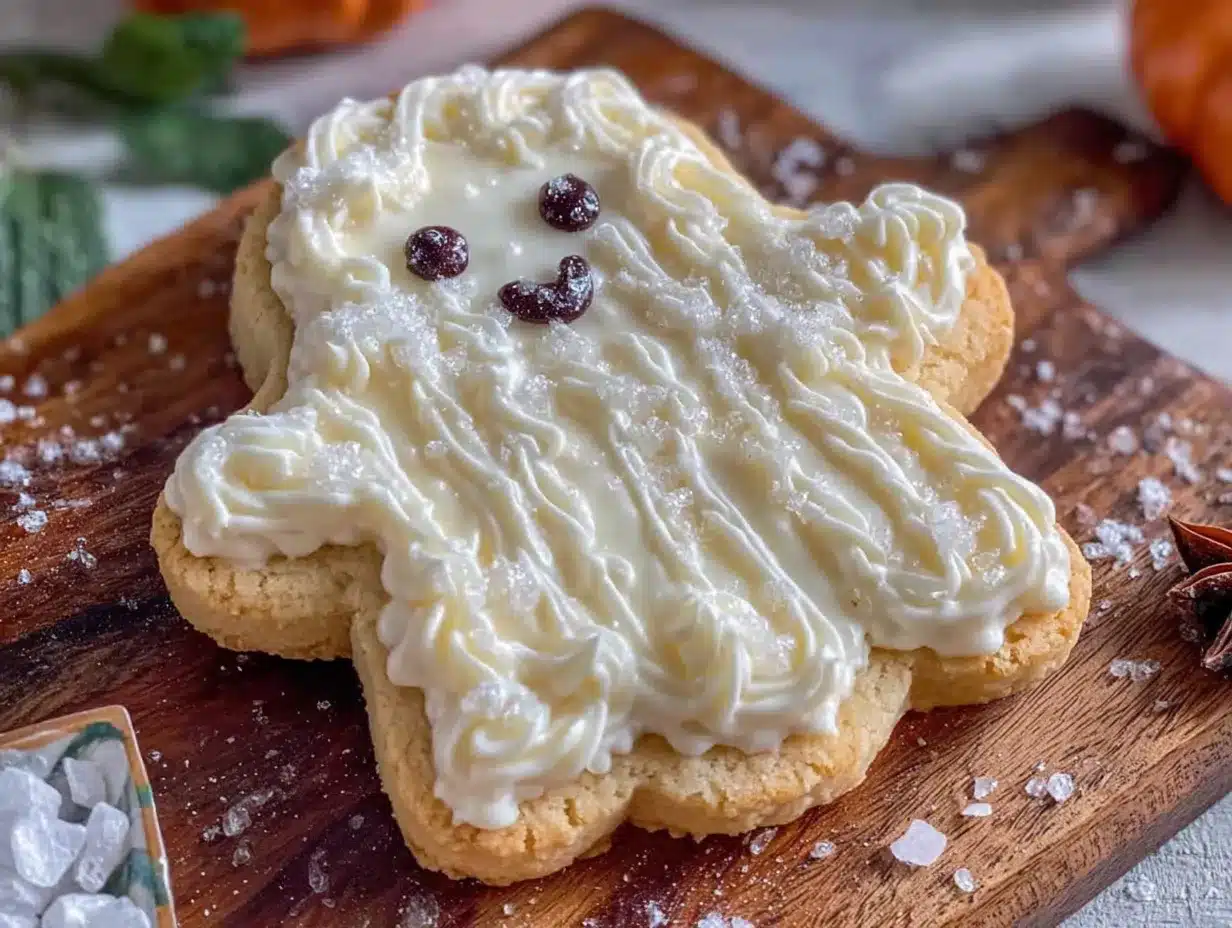
- Powdered sugar (2 cups / 240g) — Also called confectioners’ sugar. Sift it if you want an extra-smooth icing, though I’ve skipped this step in a pinch and it was fine.
- Meringue powder (2 tablespoons) — This is what gives royal icing its structure and glossy finish. You can find it at most craft stores or online. (If you don’t have it, see the variation section below.)
- Water (3–4 tablespoons) — Add slowly. The consistency should be thick enough to hold a ribbon trail for about 10 seconds when you drizzle it back into the bowl.
- Vanilla extract (½ teaspoon, optional) — Adds a hint of flavor to the icing. Leave it out if you want pure white ghosts.
- Black gel food coloring (for the ghost faces) — A tiny dot goes a long way. I prefer gel over liquid because it doesn’t thin out the icing.
Equipment Needed
You don’t need a professional bakery setup for these cookies. Here’s what I use and what you can substitute if you’re improvising:
- Stand mixer or hand mixer — I use my KitchenAid for the cookie dough, but a hand mixer works just as well. You could even cream the butter and sugar by hand if you need a little arm workout.
- Rolling pin — A standard rolling pin is fine. If you don’t have one, a clean wine bottle works in a pinch (I’ve done this).
- Ghost-shaped cookie cutter — This is the star of the show. I found mine at a craft store for about $3. Any small to medium ghost shape works.
- Baking sheets — Two standard half-sheet pans. Line them with parchment paper for easy cleanup.
- Piping bags or squeeze bottles — For the royal icing. I actually prefer small squeeze bottles for the outline and flood consistency. Disposable piping bags with a #2 tip also work beautifully.
- Cooling rack — Essential for letting the cookies cool completely before icing. Stackable racks save space.
Preparation Method
- Preheat your oven to 350°F (175°C). Line two baking sheets with parchment paper. This is one of those small steps that makes a big difference—the parchment prevents sticking and helps the cookies bake evenly.
- Cream the butter and sugar. In a large mixing bowl, beat the softened butter and granulated sugar together on medium speed until the mixture is light and fluffy, about 2-3 minutes. You’ll know it’s ready when it looks pale and a little bit airy. Scrape down the sides of the bowl once or twice during this process.
- Add the egg and vanilla. Crack the egg into the butter mixture and add the vanilla extract. Beat on low speed until just combined. Don’t overmix here—you’re not trying to incorporate air, just blend everything together. The mixture might look slightly curdled at this point, and that’s totally fine.
- Mix the dry ingredients separately. In a medium bowl, whisk together the flour, baking powder, and salt. This ensures the leavening agent is evenly distributed so you don’t get one cookie that puffs up like a balloon while another stays flat.
- Combine wet and dry ingredients. Gradually add the flour mixture to the butter mixture, mixing on low speed. Stop as soon as the dough comes together. If there are a few streaks of flour left, finish mixing by hand with a spatula. Overmixing develops gluten and makes cookies tough.
- Roll out the dough. Lightly flour your work surface and rolling pin. Place the dough on the surface and roll it to about ¼-inch thickness. If the dough feels sticky, dust a little more flour on top. Rotate the dough occasionally to prevent sticking. Pro tip: roll between two sheets of parchment paper for zero mess and easy transfer.
- Cut the ghost shapes. Press your ghost cookie cutter firmly into the dough and lift straight up. Transfer the cut shapes to your prepared baking sheets, spacing them about 1½ inches apart. They won’t spread much, so you can fit quite a few on one sheet.
- Bake for 8-10 minutes. The cookies are done when the edges are just barely golden. The centers will look slightly pale and soft—that’s what you want. Overbaked sugar cookies turn dry and crumbly. Let them cool on the baking sheet for 2 minutes, then transfer to a cooling rack to cool completely.
- Make the royal icing. In a medium bowl, combine the powdered sugar and meringue powder. Add 3 tablespoons of water and whisk until smooth. The icing should be thick enough to hold a ribbon trail on the surface for about 10 seconds. If it’s too thick, add water a teaspoon at a time. If it’s too thin, add more powdered sugar.
- Outline the ghosts. Transfer about half the icing to a piping bag fitted with a #2 tip (or a squeeze bottle with a small opening). Pipe an outline around the edge of each cookie. This creates a barrier that will hold the flood icing inside.
- Flood the ghosts. Thin the remaining icing with a teaspoon of water to create a flood consistency—it should flow smoothly off a spoon. Transfer to another piping bag or squeeze bottle. Fill in the outlined area, using a toothpick to spread the icing into corners and pop any air bubbles.
- Add the faces. While the white icing is still wet, use a toothpick dipped in black gel food coloring to draw two eyes and a mouth on each ghost. You can also outline the eyes with black icing if you prefer a cleaner look. Let the cookies set at room temperature for 2-3 hours, or until the icing is firm to the touch.
Cooking Tips & Techniques
I’ve made these light ghost-shaped sugar cookies with royal icing at least ten times, and I’ve learned a few things the hard way. Here are my best tips for getting it right every time:
Don’t skip the creaming step. I know it’s tempting to just dump everything in the bowl and mix, but properly creaming the butter and sugar creates tiny air pockets that give the cookies their tender texture. If you rush this, your cookies will be denser and flatter. Set a timer for 2 minutes and let the mixer do the work.
Chill if you have time, but it’s not required. Most sugar cookie recipes insist on chilling the dough for hours. This one doesn’t need it—the dough is firm enough to roll immediately. However, if your kitchen is very warm or your butter got too soft, a 15-minute chill in the fridge makes the dough easier to handle.
The royal icing consistency is everything. Too thick and it won’t spread. Too thin and it will run off the cookie. Here’s my test: dip a spoon into the icing and lift it up. The ribbon of icing that falls back into the bowl should disappear into the surface within about 10 seconds. If it disappears immediately, add more powdered sugar. If it sits on top like a blob, add more water.
Work in batches with the icing. Royal icing dries out fast. Keep the bowl covered with a damp paper towel while you’re working, and only fill your piping bag with as much as you’ll use in 10-15 minutes. I learned this lesson when my icing crusted over halfway through decorating and I had to make a second batch.
Let the cookies cool completely. I once tried to ice cookies that were still slightly warm. The icing melted into a sad puddle and the ghost faces turned into abstract art. Wait at least 30 minutes after baking, or until the cookies feel completely room temperature.
Use a toothpick for details. Drawing ghost faces with a piping tip takes practice. I find it much easier to dip a toothpick in black gel coloring and dot the eyes and mouth directly onto the wet white icing. The color bleeds slightly, which gives the ghosts a cute, slightly spooky look.
Variations & Adaptations
One of the best things about this recipe is how easy it is to adapt. Here are some variations I’ve tried and loved:
Gluten-Free Version: Substitute the all-purpose flour with a 1:1 gluten-free baking flour blend. I’ve tested this with Bob’s Red Mill and King Arthur’s gluten-free blends, and both worked well. The cookies are slightly more delicate, so handle them gently when transferring to the baking sheet.
Dairy-Free Option: Swap the butter for a plant-based butter stick (not the spreadable kind in a tub). I like Miyoko’s or Country Crock Plant Butter. The texture is nearly identical, and honestly, I couldn’t taste a difference.
No Meringue Powder? You can make royal icing with fresh egg whites instead. Use 2 large egg whites in place of the meringue powder and water. Note: this version isn’t safe for pregnant people or those with compromised immune systems because the egg whites aren’t cooked. Stick with meringue powder if you’re serving a crowd.
Different Shapes: This dough works with any cookie cutter. I’ve made pumpkins, bats, and even little cat faces using the same recipe. The baking time stays the same as long as the cookies are roughly the same thickness.
Flavor Twists: Add ½ teaspoon of almond extract along with the vanilla for a subtle nutty flavor. Or swap the vanilla for lemon extract and add a teaspoon of lemon zest to the dough for bright, citrusy ghosts. I tried a batch with peppermint extract last December and they were perfect for a winter-themed party.
Colored Icing: Divide the royal icing into small bowls and tint each one with gel food coloring. Purple, orange, and green ghosts are a fun twist on the traditional white. Just keep a separate bowl of white icing for the outlines.
Serving & Storage Suggestions
These cookies are best served at room temperature, once the royal icing has fully set. The icing should be firm and dry to the touch, which usually takes about 2-3 hours at room temperature. If you’re in a humid environment, it might take longer—be patient.
For presentation, I like to arrange the ghosts on a white platter so the shapes really pop. A sprinkle of edible glitter or a dusting of powdered sugar around the edges adds a magical touch without overwhelming the design. If you’re bringing them to a party, stack them in a single layer in a decorative box or on a tray covered with parchment paper.
Storage: Place the decorated cookies in an airtight container, separating layers with parchment paper. They’ll stay fresh at room temperature for up to 5 days. Do not refrigerate—the humidity in the fridge can make the icing sticky and the cookies soft.
Freezing: You can freeze the undecorated cookies for up to 3 months. Bake and cool them completely, then layer them in a freezer-safe container with parchment paper between each layer. When you’re ready to decorate, thaw them at room temperature for about an hour, then ice as usual. The texture remains perfect.
Reheating: These cookies don’t need reheating, but if you prefer a slightly warm cookie, pop one in the microwave for 5-7 seconds. Be careful—the icing can get sticky if overheated.
Flavor Development: Here’s a little secret: these cookies actually taste better the day after baking. The flavors meld together, and the texture becomes even more tender. If you can resist eating them all on day one, you’re in for a treat on day two.
Nutritional Information & Benefits
Each ghost-shaped sugar cookie (with royal icing) contains approximately:
- Calories: 120
- Fat: 5g
- Carbohydrates: 18g
- Protein: 1g
- Sugar: 12g
These numbers are estimates and will vary based on your specific ingredients and portion sizes. The cookies are relatively light compared to many Halloween treats, which tend to be loaded with extra butter and sugar. The royal icing adds sweetness without the heaviness of a cream cheese or buttercream frosting.
Health Highlights: The butter in this recipe provides a small amount of vitamin A, and the eggs contribute protein and B vitamins. While these aren’t health food, they’re a more balanced option than many store-bought Halloween cookies that contain preservatives and artificial flavors. Making them at home means you control exactly what goes in.
Dietary Considerations: This recipe contains gluten, dairy, and eggs. For gluten-free and dairy-free options, see the variations section above. The royal icing made with meringue powder is safe for most diets, including those avoiding raw eggs.
I personally love that these cookies feel indulgent without being overwhelming. One or two satisfy that Halloween sweet tooth without sending you into a sugar coma—which means you can enjoy them and still have room for that witch’s cauldron cake if you want.
Conclusion
These light ghost-shaped sugar cookies with royal icing have become my go-to Halloween recipe for one simple reason: they work. They work when you’re in a rush, when you’re low on ingredients, and when you’re convinced everyone else’s desserts will outshine yours. They work because they’re simple, because they’re cute, and because deep down, everyone loves a cookie that looks like a friendly little ghost.
I hope you give these a try, whether you’re scrambling for a last-minute party contribution or just want a fun afternoon project with the kids. Don’t stress about making the icing perfect—my best batches were the ones where the ghosts had crooked eyes and lopsided smiles. That’s what gives them character.
If you make these, I’d love to hear how they turned out. Leave a comment below and tell me about your decorating adventures. Did you add sprinkles? Did your ghosts turn out spooky or silly? Did anyone ask you for the recipe? (Spoiler: they will.) Happy baking, and may your Halloween be filled with buttery, sugary, ghost-shaped goodness.
Frequently Asked Questions
Can I make the dough ahead of time?
Absolutely. Wrap the dough tightly in plastic wrap and refrigerate for up to 3 days. Let it sit at room temperature for about 10 minutes before rolling, as it will be quite firm straight from the fridge. You can also freeze the dough for up to 2 months.
Why did my royal icing turn out too runny?
This usually happens when too much water is added. Fix it by whisking in more powdered sugar, a tablespoon at a time, until the icing reaches the right consistency. Remember, it’s easier to thin icing than to thicken it, so add water slowly.
Can I use store-bought royal icing instead?
You can, but the texture won’t be the same. Store-bought icings are often thinner and don’t set as firmly. If you’re in a real pinch, a simple glaze made from powdered sugar and milk works as a quick substitute, though it won’t have the same glossy finish.
How do I prevent the cookies from spreading too much?
Make sure your butter is softened but not melted. If your kitchen is very warm, chill the cut-out cookies on the baking sheet for 10 minutes before baking. Also, avoid greasing the baking sheet—parchment paper is better for preventing spread.
Can I double this recipe?
Yes, it doubles beautifully. Just be sure to cream the butter and sugar in batches if your mixer bowl isn’t large enough to handle double the volume. The baking time stays the same, though you may need to bake in additional batches.
PrintLight Ghost-Shaped Sugar Cookies Easy Royal Icing Recipe

These light ghost-shaped sugar cookies with royal icing are the perfect last-minute Halloween treat. Soft in the middle, slightly crisp at the edges, and decorated with a simple glossy icing, they’re easy to make and always a crowd-pleaser.
- Prep Time: 15 minutes
- Cook Time: 10 minutes
- Total Time: 25 minutes (plus 2-3 hours for icing to set)
- Yield: 24 servings 1x
- Category: Dessert
- Cuisine: American
Ingredients
- 1 cup (226g) unsalted butter, softened
- 1 cup (200g) granulated sugar
- 1 large egg, at room temperature
- 1½ teaspoons vanilla extract
- 2½ cups (312g) all-purpose flour
- 1 teaspoon baking powder
- ½ teaspoon salt
- 2 cups (240g) powdered sugar
- 2 tablespoons meringue powder
- 3–4 tablespoons water
- ½ teaspoon vanilla extract (optional)
- Black gel food coloring
Instructions
- Preheat your oven to 350°F (175°C). Line two baking sheets with parchment paper.
- In a large mixing bowl, beat the softened butter and granulated sugar together on medium speed until light and fluffy, about 2-3 minutes. Scrape down the sides of the bowl once or twice.
- Add the egg and vanilla extract. Beat on low speed until just combined.
- In a medium bowl, whisk together the flour, baking powder, and salt.
- Gradually add the flour mixture to the butter mixture, mixing on low speed. Stop as soon as the dough comes together. Finish mixing by hand with a spatula if needed.
- Lightly flour your work surface and rolling pin. Roll the dough to about ¼-inch thickness. Rotate the dough occasionally to prevent sticking.
- Press a ghost-shaped cookie cutter firmly into the dough and lift straight up. Transfer the cut shapes to the prepared baking sheets, spacing them about 1½ inches apart.
- Bake for 8-10 minutes, until the edges are just barely golden. Let cool on the baking sheet for 2 minutes, then transfer to a cooling rack to cool completely.
- In a medium bowl, combine the powdered sugar and meringue powder. Add 3 tablespoons of water and whisk until smooth. The icing should be thick enough to hold a ribbon trail for about 10 seconds. Adjust consistency with more water or powdered sugar as needed.
- Transfer about half the icing to a piping bag fitted with a #2 tip (or a squeeze bottle). Pipe an outline around the edge of each cookie.
- Thin the remaining icing with a teaspoon of water to create a flood consistency. Transfer to another piping bag or squeeze bottle. Fill in the outlined area, using a toothpick to spread the icing into corners and pop any air bubbles.
- While the white icing is still wet, use a toothpick dipped in black gel food coloring to draw two eyes and a mouth on each ghost. Let the cookies set at room temperature for 2-3 hours, or until the icing is firm to the touch.
Notes
The dough requires no chilling, making it perfect for last-minute baking. For best results, ensure the butter is softened but not melted. Royal icing dries quickly, so keep the bowl covered with a damp paper towel while decorating. Cookies taste even better the day after baking.
Nutrition
- Serving Size: 1 cookie
- Calories: 120
- Sugar: 12
- Sodium: 75
- Fat: 5
- Saturated Fat: 3
- Carbohydrates: 18
- Protein: 1
Keywords: ghost cookies, sugar cookies, Halloween cookies, royal icing, easy sugar cookies, ghost-shaped cookies, Halloween dessert


