“Why can’t we just crush the cookies with our hands?” my nephew asked, eyeing the food processor with suspicion. I started to explain why that wouldn’t work — something about even crumbs and proper texture — then stopped. Honestly? I had no good reason. I was just used to doing it the “right” way. So I handed him the bag of Oreos and a rolling pin. Ten minutes later, he had the most perfectly uneven, wonderfully chunky cookie crumbs I’d ever seen. And you know what? Those lumps made the truffles better. Each bite had these little pockets of cookie crunch that my “proper” method never achieved.
That Tuesday afternoon, standing in my messy kitchen with chocolate smudged on my nephew’s cheek, I learned something important. Sometimes the best cooking happens when you let go of being the expert. These black cat Oreo truffles were supposed to be just another Halloween treat for the blog. Instead, they became the recipe that taught me to trust the helpers more than the rules.
Maybe you’ve been there — hovering over a kid in the kitchen, ready to jump in and “fix” whatever they’re doing. I mean, I do it all the time. But this time, I kept my mouth shut. And what came out of that bowl was honestly better than anything I’d made alone. These little black cat truffles have become our family’s official Halloween tradition. They’re spooky, they’re sweet, and they’re so simple that even the littlest hands can help. Let me show you how we make them.
Why You’ll Love This Recipe
As someone who has tested this recipe with three different age groups (including my notoriously picky 6-year-old neighbor), I can tell you this is the Halloween treat that actually works. No complicated steps, no expensive ingredients, and zero baking required. Here’s why these black cat Oreo truffles deserve a spot on your Halloween table:
- Budget-Friendly: A single package of Oreos, some cream cheese, and melting chocolate — that’s it. You probably already have most of these ingredients in your pantry.
- No-Bake Wonder: Perfect for hot October afternoons when you don’t want to turn on the oven. Plus, no risk of burning or overbaking.
- Kid-Approved: My nephew literally cried when we finished the batch. Not sad tears — happy ones. He was that proud of what we made together.
- Customizable: Use white chocolate for ghost truffles, orange for pumpkins, or keep them black for these adorable cats. The base recipe stays the same.
- Make-Ahead Friendly: These freeze beautifully. I always stash a batch in the freezer for last-minute Halloween parties or classroom treats.
What makes this recipe different from other truffle recipes you’ll find? It’s the texture. Most recipes call for perfectly smooth, food-processed crumbs. But after that afternoon with my nephew, I started leaving some chunks. The result is a truffle that’s creamy on the inside with these delightful little cookie bits that surprise you. Plus, the black cat design is so simple that even toddlers can help with the eyes and whiskers. It’s the kind of recipe that makes everyone feel like a kitchen hero.
What Ingredients You Will Need
This recipe uses simple, everyday ingredients to create something that looks way more impressive than it actually is. I’ve tested these ingredients with different brands and substitutions, so I’ll share what works best.
For the Truffle Base
- 1 package (14.3 oz) Oreo cookies — Regular Oreos work best. Don’t use Double Stuf; the extra filling makes the truffles too soft. I’ve tried both, trust me on this one.
- 8 oz cream cheese, softened to room temperature — Full-fat cream cheese gives the best texture. Low-fat works but makes the truffles slightly less creamy. Let it sit out for at least 30 minutes before starting.
For the Coating and Decoration
- 12 oz black candy melts or dark chocolate wafers — I prefer Wilton brand candy melts for the smoothest coating. If using dark chocolate, add 1 teaspoon of coconut oil to help it thin out.
- 48 small candy eyes — You can find these at any craft store or online. They’re usually in the cake decorating section.
- Black licorice strings or black decorating gel — For the whiskers. I actually prefer the gel because it’s easier for kids to control. The Wilton black decorating gel is my go-to.
- Optional: Pink candy melts or pink frosting — For little pink noses. My niece insisted on pink noses, and honestly, they make the cats cuter.
Ingredient Tips from My Kitchen
Let me save you some trial and error. First, if you’re using store-brand sandwich cookies instead of Oreos, that’s totally fine. Just know they might be slightly sweeter or less chocolatey. I’ve used the Great Value brand from Walmart and they work perfectly. Second, make sure your cream cheese is truly softened. Cold cream cheese leaves lumps that don’t mix in properly. I learned this the hard way when my first batch had weird cream cheese streaks throughout. Not pretty.
For the candy coating, here’s something I discovered after three batches: black candy melts can be tricky. They tend to thicken faster than white or pink melts. If your coating gets too thick, add a teaspoon of vegetable shortening (not oil) to thin it out. The shortening helps maintain that smooth, dip-able consistency without making the coating greasy.
Equipment Needed
You don’t need fancy equipment for these truffles. Here’s what I use:
- Mixing bowls — One large bowl for the truffle mixture, one smaller microwave-safe bowl for melting chocolate
- Rolling pin or food processor — I actually use both now. The rolling pin for the kids to crush cookies (they love it), and the food processor for when I’m in a hurry. A sturdy ziplock bag works too if you’re crushing by hand.
- Baking sheet lined with parchment paper — For setting the truffles. Make sure it fits in your refrigerator.
- Small cookie scoop or tablespoon — For portioning. A #50 scoop (about 1.5 tablespoons) makes perfectly sized truffles.
- Toothpicks or dipping fork — For coating the truffles. I actually prefer toothpicks because they leave smaller holes. My sister uses chopsticks and swears by them.
- Piping bag or small zip-top bag — For the decorating gel. Snip off a tiny corner for precise control.
If you don’t have a food processor, don’t worry. A rolling pin and some elbow grease work just as well. I actually prefer the texture when we crush them by hand — those irregular chunks add character. Plus, it’s a great way to get kids involved without worrying about sharp blades.
Preparation Method
Let me walk you through exactly how we make these. I’ll include all the little details I wish someone had told me the first time.
Step 1: Crush the Oreos
Place the entire package of Oreos (cream filling and all) into a large ziplock bag. Seal it tight — I mean really tight, because cookie dust gets everywhere. Let your kids go to town with a rolling pin. My nephew likes to pretend he’s Thor. Aim for a mix of fine crumbs and small chunks. You want about 3 cups of crushed cookies total. If using a food processor, pulse about 15 times until you get that same texture. Don’t over-process or you’ll end up with Oreo dust that makes the truffles too dense.
Step 2: Mix with Cream Cheese
In a large bowl, beat the softened cream cheese with a spatula until it’s smooth and creamy. Add the crushed Oreos and mix until everything is well combined. This takes about 2 minutes of honest mixing. The mixture should hold together when pressed — like wet sand. If it’s too crumbly, add another tablespoon of cream cheese. Too sticky? Add a few more crushed cookies. I’ve had to adjust both ways depending on the brand of cookies I used.
Step 3: Shape the Truffles
Scoop out about 1.5 tablespoons of the mixture and roll it between your palms to form a ball. Place each ball on the parchment-lined baking sheet. You should get about 24 truffles from this recipe. Here’s a trick I learned: slightly damp hands prevent the mixture from sticking to your palms. Just wet your hands, shake off the excess, and roll. It makes the process so much smoother.
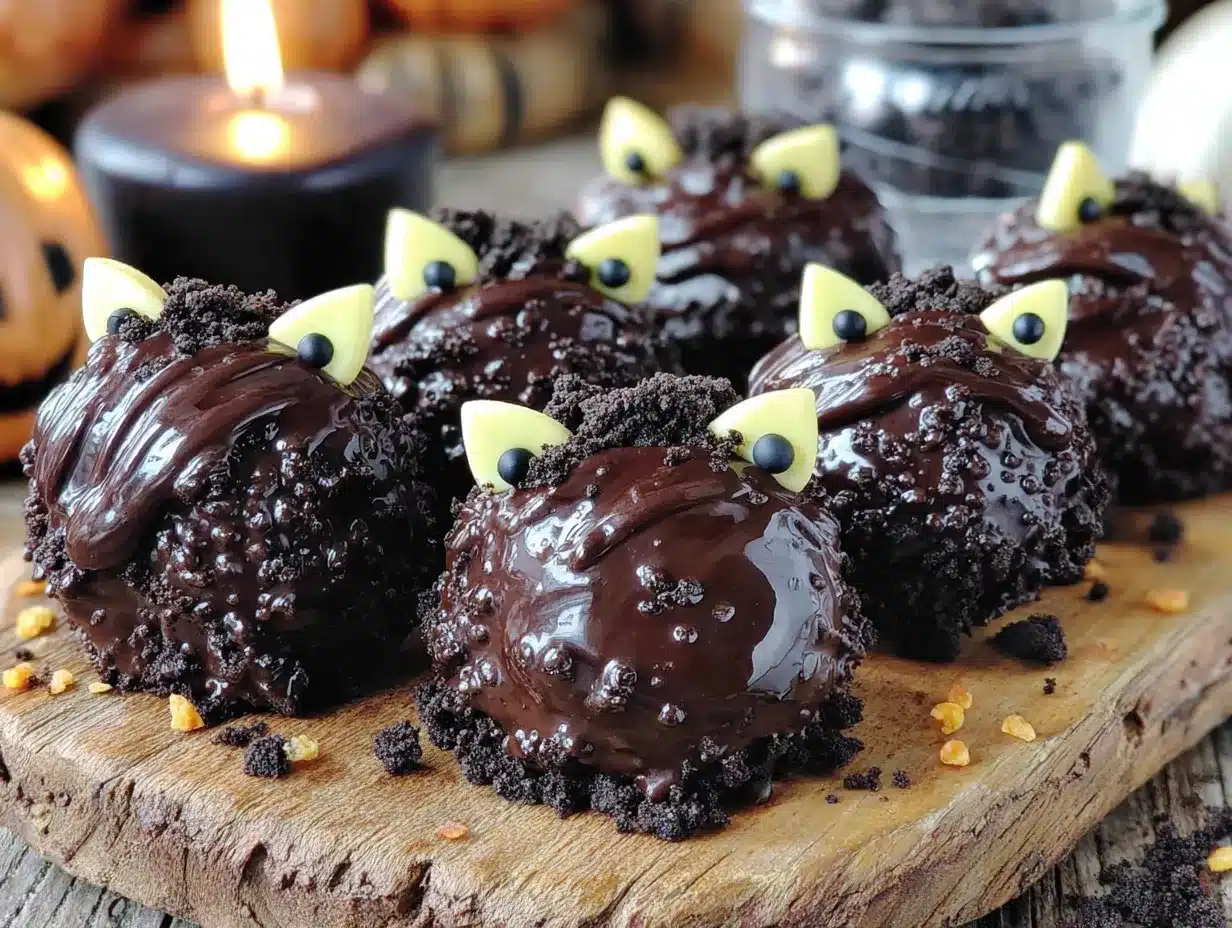
For the cat ears, pinch a small amount of mixture between your thumb and forefinger to create two little points on top of each ball. Don’t worry about making them perfect — cats have differently shaped ears anyway. My first batch looked more like aliens than cats, but once they were decorated, nobody noticed.
Step 4: Chill the Truffles
Place the baking sheet in the refrigerator for at least 30 minutes. This is crucial. Cold truffles hold their shape when you dip them in the chocolate coating. If you skip this step, your truffles will fall apart in the warm chocolate. I learned this the hard way when I got impatient and ended up with chocolate soup.
Step 5: Melt the Coating
Place the black candy melts in a microwave-safe bowl. Microwave in 30-second intervals, stirring between each, until completely smooth. This usually takes about 2 minutes total. Be careful not to overheat — burnt chocolate gets grainy and unusable. If your coating seems too thick, add 1 teaspoon of vegetable shortening and stir until smooth.
Step 6: Dip the Truffles
Remove the truffles from the refrigerator. Using a toothpick or dipping fork, lower each truffle into the melted coating. Gently tap the toothpick against the side of the bowl to let excess chocolate drip off. Place the coated truffle back on the parchment paper. Work quickly — the truffles warm up fast and can start to soften. I usually work in batches of 6, keeping the rest in the fridge.
Step 7: Add the Faces
While the coating is still wet, press two candy eyes into each truffle. Let the coating set for about 5 minutes, then use the black decorating gel to draw whiskers and a little mouth. If you’re using pink noses, dot a tiny bit of pink candy melt or frosting between the eyes before adding the whiskers. The faces are what make these cats come alive, so take your time here. My niece spends forever on each face, and honestly, that’s the best part.
Step 8: Set and Serve
Return the decorated truffles to the refrigerator for another 15-20 minutes to fully set the coating. Once firm, they’re ready to serve. Store any leftovers in an airtight container in the refrigerator for up to a week.
Cooking Tips & Techniques
After making these truffles about a dozen times (not kidding, my family can’t get enough), I’ve collected some tips that make the process smoother and the results better.
The Temperature Trap
The biggest mistake people make is not letting the cream cheese soften properly. Cold cream cheese creates lumps that never fully incorporate. Set it out 30-45 minutes before starting. If you forget (I do, constantly), microwave it for 10 seconds. Just 10 seconds. Any longer and you’ll have melted cream cheese soup.
The Chocolate Coating Trick
Black candy melts are notorious for seizing up. They get thick and clumpy faster than any other color. Here’s what I do: I melt them in a tall, narrow cup instead of a wide bowl. The deeper container means I can dip the truffles more easily without the chocolate cooling too quickly on the sides. Plus, less chocolate waste. If your coating does start to thicken, pop it back in the microwave for 10 seconds and stir. Don’t add water — water is the enemy of melted chocolate.
Getting the Ears Right
This took me a few tries to figure out. The ears need to be pronounced enough that they survive the dipping process. I make them about 1/4 inch tall and fairly thick at the base. Think cat ears, not rabbit ears. After dipping, I sometimes need to reshape the ears gently with my fingers while the coating is still wet. It’s a quick adjustment that makes a big difference.
Timing Your Work
I’ve found it’s easiest to make the truffle mixture and shape the balls one day, then dip and decorate the next. This breaks the process into manageable chunks, especially if you’re making these with kids. The shaped truffles can sit in the fridge for up to 24 hours before dipping. Just cover them loosely with plastic wrap so they don’t dry out.
Variations & Adaptations
One of the best things about this recipe is how flexible it is. Here are some variations I’ve tried and loved:
Ghost Truffles
Skip the black coating and use white candy melts instead. Shape the truffles into slightly pointed ovals (like ghost shapes) instead of balls. Use the black decorating gel to draw two little eyes and a small “O” mouth. My kids actually prefer these to the black cats. They’re less messy to make because white coating doesn’t show fingerprints.
Pumpkin Truffles
Use orange candy melts and shape the truffles into slightly flattened balls. Before the coating sets, press a small piece of green licorice into the top for a stem. Add a tiny green leaf if you’re feeling fancy. These are perfect for Thanksgiving leftovers too.
Gluten-Free Version
Use gluten-free sandwich cookies instead of Oreos. I’ve tested this with the Glutino brand and they work perfectly. Just note that gluten-free cookies tend to be more crumbly, so you might need to add an extra tablespoon of cream cheese to help the mixture hold together.
White Chocolate Drizzle
After the black coating sets, drizzle melted white chocolate over the tops. It looks like little stars in the night sky. My sister does this and her truffles always win the Halloween bake-off at her office.
Serving & Storage Suggestions
These truffles are best served cold, straight from the refrigerator. The coating stays snappy and the inside stays creamy. I like to arrange them on a black platter (to match the cat theme) with some Halloween sprinkles scattered around.
For parties, I’ve found that placing them on a bed of crushed Oreo crumbs makes them look like they’re sitting in dirt. It’s a cute effect that kids love. Just make sure the crumbs are fresh — stale crumbs don’t have that dark, rich color.
Storage is simple: keep them in an airtight container in the refrigerator for up to a week. They actually taste better on day two, once the flavors have had time to meld together. For longer storage, freeze them for up to 3 months. Place them in a single layer on a baking sheet, freeze until solid, then transfer to a freezer bag. Thaw in the refrigerator overnight before serving.
One thing to note: if you’re taking these to a party, keep them cold until the last minute. They can sit at room temperature for about an hour, but any longer and the coating might start to soften or sweat. I learned this the hard way at a Halloween block party when my beautiful cats turned into sad, smudgy blobs.
Nutritional Information & Benefits
Let’s be real — these are a treat, not a health food. But here’s the breakdown per truffle (based on 24 servings):
- Calories: Approximately 180
- Total Fat: 10g
- Saturated Fat: 6g
- Carbohydrates: 22g
- Sugar: 16g
- Protein: 2g
- Sodium: 95mg
The cream cheese does add some calcium and protein, which is more than you’d get from a plain candy bar. And because each truffle is individually portioned, it’s easier to control how many you eat. At least in theory. I’ve definitely eaten four in one sitting without shame.
For those with dietary concerns: these contain dairy, wheat, and soy (from the Oreos). They’re not suitable for vegans or those with celiac disease unless you use the substitutions mentioned above. The gluten-free version using Glutino cookies works well and tastes nearly identical.
Conclusion
These black cat Oreo truffles have become so much more than just a Halloween recipe in our house. They’re the treat my nephew asks for every time he visits. They’re the thing my niece proudly brings to her classroom party. And they’re the recipe that taught me to step back and let the kids take the lead in the kitchen.
I’m not going to pretend these are fancy or complicated. They’re not. But that’s exactly why they work. Simple ingredients, simple steps, and a result that looks like you spent hours. The best recipes are the ones that bring people together, and honestly, these little black cats do that better than anything I’ve ever made.
I’d love to hear how yours turn out. Did your kids come up with their own face designs? Did you try a different color? Drop a comment below and share your Halloween creations. And if you’re looking for other easy Halloween treats, check out my spiderweb cookies or these pumpkin patch brownies — both are just as kid-friendly and just as delicious.
Happy Halloween, and happy cooking!
Frequently Asked Questions
Can I make these Oreo truffles ahead of time?
Absolutely! You can make them up to a week in advance and store them in the refrigerator. For best results, wait to add the candy eyes and decorating gel until the day you’re serving them. The gel can sometimes bleed into the coating if stored for too long.
Why did my chocolate coating crack?
This usually happens when the truffles are too cold when you dip them. If the truffles are straight from the freezer, the temperature shock can cause the coating to crack. Let them sit at room temperature for 5-10 minutes before dipping. Also, make sure your coating isn’t too hot — warm coating on cold truffles creates cracks.
Can I use different cookie flavors?
Yes! Golden Oreos make great ghost truffles. Mint Oreos add a fun flavor twist for Christmas. Just avoid Double Stuf or any cookie with extra filling, as it throws off the texture balance. I’ve also used chocolate wafer cookies in a pinch, but you’ll need to add extra sugar since they’re less sweet than Oreos.
How do I get the ears to stay pointy after dipping?
The key is making the ears thick enough at the base. Think of them as little pyramids, not triangles. After dipping, gently pinch the ears back into shape while the coating is still wet. If they flatten completely, you can add a small dot of melted coating to rebuild them.
My truffle mixture is too sticky. What did I do wrong?
This usually means the cream cheese was too soft or you used too much of it. Add more crushed Oreos, one tablespoon at a time, until the mixture holds together without sticking to your hands. If you’ve already shaped them into balls, just pop them in the fridge for an extra 15 minutes before dipping — the cold will firm them up.
PrintHomemade Black Cat Oreo Truffles: Easy Halloween Treat

These adorable black cat Oreo truffles are a no-bake Halloween treat that’s perfect for making with kids. Creamy Oreo and cream cheese truffles are dipped in black chocolate and decorated with cute cat faces.
- Prep Time: 30 minutes
- Cook Time: 0 minutes
- Total Time: 1 hour 15 minutes (includes chilling time)
- Yield: 24 truffles 1x
- Category: Dessert
- Cuisine: American
Ingredients
- 1 package (14.3 oz) Oreo cookies (regular, not Double Stuf)
- 8 oz cream cheese, softened to room temperature
- 12 oz black candy melts or dark chocolate wafers
- 48 small candy eyes
- Black licorice strings or black decorating gel (for whiskers)
- Optional: Pink candy melts or pink frosting (for noses)
Instructions
- Crush the entire package of Oreos (cream filling included) in a large ziplock bag using a rolling pin, or pulse in a food processor about 15 times, until you have a mix of fine crumbs and small chunks (about 3 cups total).
- In a large bowl, beat the softened cream cheese with a spatula until smooth and creamy. Add the crushed Oreos and mix until well combined, about 2 minutes. The mixture should hold together like wet sand when pressed.
- Scoop about 1.5 tablespoons of the mixture and roll into balls. Place on a parchment-lined baking sheet. Pinch two small points on top of each ball to form cat ears. You should get about 24 truffles.
- Refrigerate the truffles for at least 30 minutes until firm.
- Melt the black candy melts in a microwave-safe bowl in 30-second intervals, stirring between each, until completely smooth (about 2 minutes total). If too thick, stir in 1 teaspoon vegetable shortening.
- Remove truffles from refrigerator. Using a toothpick or dipping fork, dip each truffle into the melted coating. Tap gently to remove excess chocolate, then place back on parchment paper. Work in batches of 6, keeping remaining truffles chilled.
- While coating is still wet, press two candy eyes onto each truffle. Let set for 5 minutes, then use black decorating gel to draw whiskers and a mouth. Add a tiny pink nose if desired.
- Return decorated truffles to refrigerator for 15-20 minutes to fully set the coating. Serve cold. Store in an airtight container in the refrigerator for up to 1 week.
Notes
For best results, use regular Oreos (not Double Stuf). Ensure cream cheese is fully softened to avoid lumps. Black candy melts can thicken quickly; add vegetable shortening if needed. Truffles can be made ahead and stored in the refrigerator for up to 1 week, or frozen for up to 3 months. For gluten-free version, use gluten-free sandwich cookies like Glutino brand.
Nutrition
- Serving Size: 1 truffle
- Calories: 180
- Sugar: 16
- Sodium: 95
- Fat: 10
- Saturated Fat: 6
- Carbohydrates: 22
- Protein: 2
Keywords: Halloween treats, Oreo truffles, black cat truffles, no-bake desserts, kid-friendly recipes, easy Halloween desserts


