My sister-in-law, Rachel, swore she hated taco dip. For years. Every potluck, every game day gathering, every family barbecue — she’d walk right past it with this little crinkle of her nose. “It’s just cold ground beef and melted cheese on a plate,” she’d say. “I don’t get the hype.” Then last October, I brought this Pumpkin Patch Taco Dip to our annual fall get-together. I made it mostly for myself, honestly — the kids were bouncing off the walls, and I needed something I could throw together in twenty minutes without thinking too hard. I set it out on the counter, carved a little pumpkin to hold the tortilla chips, and walked away to referee a dispute over who got to hold the baby. When I came back twenty minutes later, Rachel was standing at the counter, chip in hand, with this look on her face like she’d been caught sneaking cookies before dinner. “Okay,” she said, not quite meeting my eyes. “This is different.” Different, she said! I watched her go back for seconds. Then thirds. The woman practically licked the bowl.
Let me tell you, that moment was pure gold. Not because I was right — though, I mean, I was — but because this dip has a way of sneaking up on people. It’s not trying to be fancy. It’s not complicated. It’s just… good. The kind of good that makes you forget you were ever skeptical in the first place. And maybe you’ve been there, right? You have that one dish you’re convinced you don’t like, until someone makes a version that changes your whole mind. For Rachel, it was taco dip. For my own kids, it was anything with beans in it. But this dip? It got them both.
That’s the thing about this recipe. It’s built for real life — for Tuesday nights when you’re tired, for weekends when the kids have friends over, for those moments when you need something that feels special but doesn’t cost a fortune or take all afternoon. It’s got that cozy fall vibe without being fussy, and it uses ingredients that won’t make you wince at the checkout. I’ve been making it for three years now, and it’s become our go-to for everything from Halloween parties to lazy Sunday football. Every time I make it, someone asks for the recipe. And every time, I think about Rachel standing at that counter, caught in the act of proving herself wrong.
Why You’ll Love This Recipe
This isn’t just another taco dip recipe. I’ve tested this thing more times than I can count — through picky toddler phases, through surprise dinner guests, through one particularly chaotic birthday party where I forgot to thaw the ground beef and had to get creative. Each time, it came through. Here’s why this one is different:
- Budget-Friendly: This whole dip costs around $8 to make, and it feeds a crowd. No fancy ingredients, no trips to specialty stores. Just smart, affordable staples that stretch beautifully.
- Kid-Approved: My own kids went from “what’s that orange stuff?” to asking for it by name. The pumpkin puree blends right in — they have no idea it’s in there, and honestly, that’s the point.
- Quick & Easy: Twenty minutes from start to finish. No baking, no complicated steps. You can literally make this while the kids are washing their hands for dinner.
- Perfect for Fall Gatherings: It’s got that seasonal twist that makes it feel special for Halloween parties, Thanksgiving appetizers, or any autumn get-together. But honestly? We make it year-round.
- Customizable: I’ll show you all the ways to tweak it for your family’s taste. Spicier, milder, loaded with extra veggies — you’re in control.
- Crowd-Pleaser: I’ve served this at parties where half the guests claimed they didn’t like pumpkin. Every single bowl came back empty. It’s that good.
What really sets this apart is the texture. Most taco dips are either too soupy or too stiff. This one hits that perfect creamy-yet-hearty middle ground, thanks to the pumpkin puree working its magic. And the flavor? It’s not pumpkin-y at all — it just adds this subtle richness that makes the whole thing taste more… complete. Like a taco dip that finally grew up, but without losing any of the fun.
What Ingredients You Will Need
This recipe uses simple, everyday ingredients that work together to create something surprisingly special. Most of these are pantry staples, and the ones that aren’t are easy to find and affordable. Let me walk you through each one.
- 1 can (15 oz) pumpkin puree — Not pumpkin pie filling! Make sure you grab 100% pure pumpkin. I like Libby’s for its consistent texture, but store brands work just fine. This is the secret ingredient that adds body and a subtle sweetness without overpowering anything.
- 1 lb ground beef — Go for 80/20 for the best flavor. If you’re watching your budget, ground turkey works great too — just add a tablespoon of oil to keep it from drying out. I’ve also used leftover taco meat from taco night, and it’s perfect.
- 1 packet taco seasoning — Store-bought is fine, but I actually prefer making my own with chili powder, cumin, garlic powder, onion powder, paprika, and a pinch of cayenne. It’s cheaper and you can control the salt. I’ll share my exact blend in the tips section.
- 8 oz cream cheese, softened — Full-fat gives the creamiest result, but reduced-fat works in a pinch. Just let it come to room temperature so it blends smoothly — cold cream cheese will leave lumps.
- 1 cup sour cream — Regular or light, both work. Greek yogurt is a great swap if you want extra protein and tang. I’ve done it many times and nobody notices.
- 1 cup shredded cheddar cheese — Sharp cheddar gives the most flavor, but a Mexican blend is lovely too. Shred your own if you can — pre-shredded cheese has anti-caking agents that prevent it from melting as smoothly.
- 1/2 cup salsa — Use your favorite. I go with a medium-heat restaurant-style salsa for the best texture. Avoid chunky salsa with big pieces — it can make the dip uneven.
- Tortilla chips, for serving — Scoop-style chips are ideal for dipping. I also love serving this with carrot sticks and bell pepper strips for a lighter option.
Optional garnishes: Chopped green onions, sliced black olives, diced tomatoes, fresh cilantro, or a drizzle of sour cream. These aren’t necessary, but they make it look pretty for parties.
Ingredient Selection Tips: When choosing your pumpkin puree, look for cans that feel heavy for their size — that means they’re full. And if you’re using fresh pumpkin, make sure it’s a sugar pumpkin, not a carving pumpkin. Carving pumpkins are watery and bland. But honestly? Canned is easier, cheaper, and more consistent. I use it every time.
Substitution Guidance: Need this vegetarian? Skip the beef and add a can of drained black beans or lentils. Want it dairy-free? Use dairy-free cream cheese and sour cream alternatives. The pumpkin puree actually helps bind everything together, so dairy-free versions hold up surprisingly well. I’ve also made this with ground chicken and even chopped mushrooms — all delicious.
Equipment Needed
You don’t need much for this recipe, which is part of its charm. Here’s what you’ll need:
- Large skillet — For browning the ground beef. A 12-inch non-stick skillet works best, but any large pan will do. I’ve used my old cast iron and it adds a nice depth of flavor.
- Mixing bowl — Medium-sized, for combining the creamy ingredients. A glass or ceramic bowl works well because it doesn’t react with the acidity in the salsa.
- Spatula or wooden spoon — For stirring and breaking up the meat. I prefer a wooden spoon because it doesn’t scratch my pans.
- Serving dish — A shallow bowl or pie plate works beautifully. I like to use a white dish so the orange color pops. For fall parties, I sometimes serve it in a hollowed-out mini pumpkin — it’s adorable and always gets compliments.
- Measuring cups and spoons — For accuracy, though honestly, this recipe is forgiving enough that you can eyebit most things.
Budget-Friendly Options: Don’t have a fancy serving dish? A regular dinner plate works fine. No mixer? A fork and some elbow grease will get that cream cheese smooth. I once made this at a friend’s cabin with nothing but a camping skillet and a plastic bowl. Turned out perfect. The equipment matters way less than the technique.
Maintenance Tip: If you use a cast iron skillet for browning the beef, make sure to dry it thoroughly after washing to prevent rust. And if you’re serving in a hollowed pumpkin, don’t let it sit out for more than two hours — pumpkins are porous and can get soggy.
Preparation Method
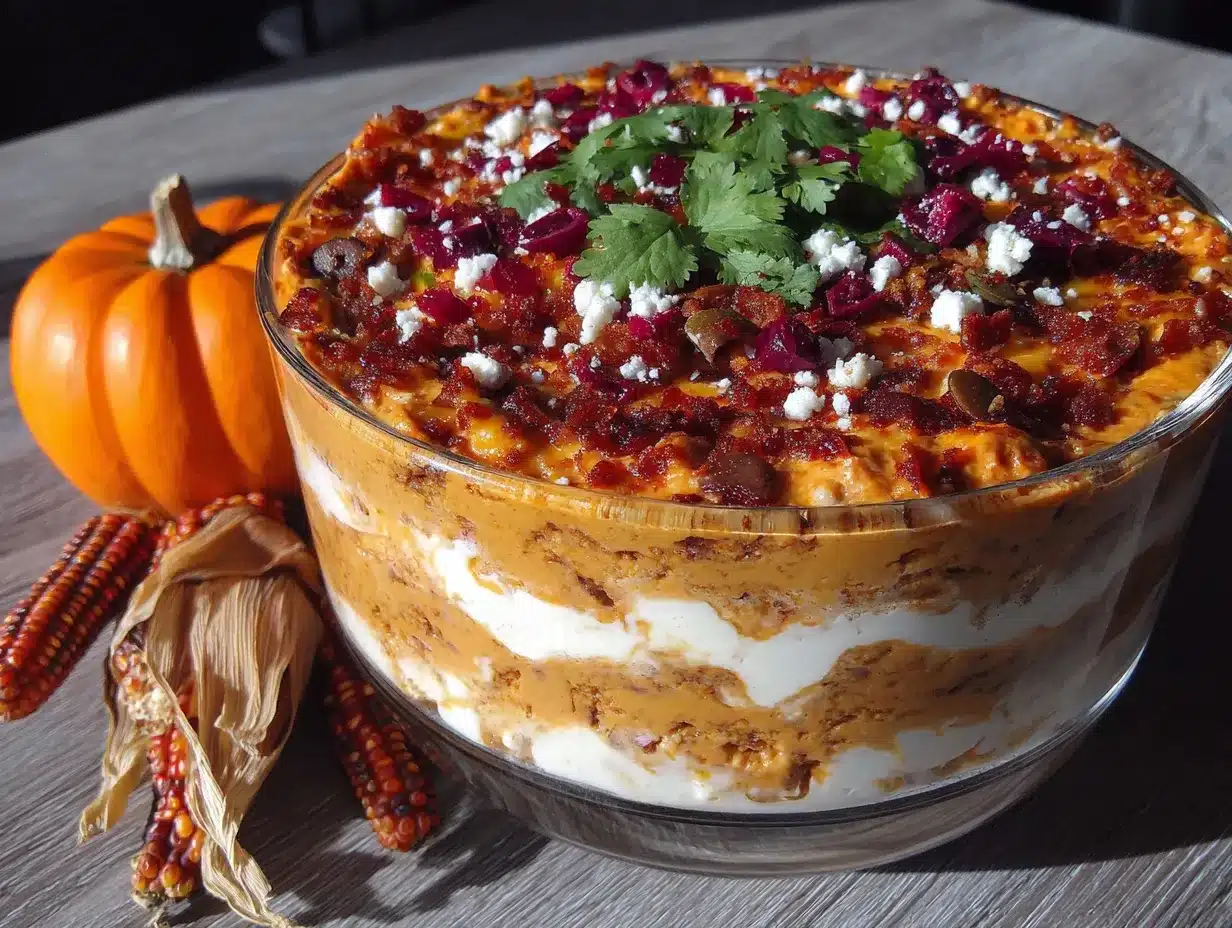
This comes together fast, so I like to have everything prepped before I start. Trust me — it makes the whole process smoother, especially if you’ve got kids circling the kitchen asking when dinner’s ready.
- Brown the ground beef. Heat your skillet over medium-high heat. Add the ground beef and cook, breaking it up with your spatula, until it’s browned and no longer pink — about 6 to 8 minutes. You’ll know it’s ready when you don’t see any pink and the juices run clear. Drain off any excess fat, leaving about a tablespoon in the pan for flavor. If you’re using lean beef, you might not need to drain at all.
- Season the meat. Sprinkle the taco seasoning over the cooked beef and add 1/4 cup of water. Stir everything together and let it simmer for 2 to 3 minutes, until the liquid thickens and coats the meat. The kitchen will start smelling incredible right about now. If you’re using homemade seasoning, adjust the salt to taste — some blends are saltier than others.
- Soften the cream cheese. While the beef is cooking, take your cream cheese out of the fridge and cut it into cubes. Let it sit on the counter while you prep everything else. If you forgot to take it out ahead of time (I do this all the time), microwave it in 10-second bursts until it’s soft but not melted. About 20 seconds usually does it.
- Mix the creamy base. In your mixing bowl, combine the softened cream cheese, sour cream, and pumpkin puree. Stir until everything is smooth and well combined. The mixture should be a uniform pale orange color with no streaks of white. If it looks lumpy, keep stirring — it’ll come together. This is where the magic starts.
- Add the salsa. Stir in the salsa until it’s fully incorporated. Don’t worry if the mixture looks a little loose at this point — it will thicken as it sits. The salsa adds both flavor and moisture, so don’t skip it.
- Combine everything. Add the seasoned ground beef to the creamy pumpkin mixture and stir until everything is evenly distributed. Make sure every scoop gets some beef. Fold in half of the shredded cheddar cheese, reserving the rest for the top.
- Transfer to serving dish. Spoon the dip into your serving dish and spread it into an even layer. Sprinkle the remaining cheddar cheese over the top. If you’re serving it warm (which I recommend), you can pop it in the microwave for 30 seconds to melt the cheese, or just let the residual heat from the dip do the work.
- Garnish and serve. Add your optional toppings — green onions, olives, tomatoes, whatever you like. Arrange the tortilla chips around the dip and serve immediately. Watch it disappear.
Sensory Cues: When you’re browning the beef, listen for that satisfying sizzle — it should be loud and steady. If it’s quiet, your pan isn’t hot enough. When you add the seasoning, the smell should be warm and spicy, with cumin and chili leading the way. The finished dip should be thick enough to hold a chip upright without dripping everywhere, but soft enough to scoop easily. If it’s too thick, stir in a tablespoon of milk or water. Too thin? Let it sit for 5 minutes — the pumpkin puree absorbs moisture and thickens as it rests.
Personal Efficiency Tip: I like to brown the beef while I’m letting the cream cheese soften. That way, by the time the beef is seasoned and ready, the cream cheese is perfect for mixing. It’s a small timing trick that saves you from standing around waiting.
Cooking Tips & Techniques
I’ve made this dip at least thirty times, and I’ve learned a few things the hard way. Here’s what I wish someone had told me from the start.
Don’t overmix the creamy base. I know it’s tempting to keep stirring until it’s perfectly smooth, but overmixing can make the cream cheese grainy. Just stir until everything comes together — a few small lumps are totally fine and will disappear as the dip sits.
Let the dip rest before serving. This is the tip that changed everything for me. If you let the finished dip sit for 10 to 15 minutes before serving, the flavors meld together and the texture becomes perfectly creamy. I once served it straight from the mixing bowl because the kids were hungry, and it was good. But the next day when I had leftovers? It was amazing. Patience pays off.
Watch your heat. When you’re browning the beef, medium-high is your friend. Too low and the meat steams instead of browning. Too high and you’ll burn the seasoning. You want a nice, even sizzle — not a frantic sputter. And when you add the taco seasoning, reduce the heat to medium so the spices don’t burn.
Common Mistake: Using pumpkin pie filling. I cannot stress this enough — do not grab the wrong can. Pumpkin pie filling has sugar and spices already added. It will make your dip sweet instead of savory. I’ve done it once. It was… memorable. Not in a good way. Check the label twice.
Timing and Multitasking Strategy: Here’s my game plan for busy evenings. While the beef browns, cube the cream cheese and measure out your other ingredients. While the seasoned beef simmers, mix the creamy base. By the time the beef is done, everything else is ready to go. Total active time? Maybe 15 minutes. The rest is just stirring and assembling.
For Consistency: If you’re making this for a party, double the recipe. It disappears fast. And if you’re worried about it being too spicy for kids, use a mild taco seasoning and a gentle salsa. You can always add heat later with hot sauce or sliced jalapeños on the side.
Variations & Adaptations
This recipe is incredibly forgiving, and I’ve tried more variations than I can count. Here are some of my favorites.
Vegetarian Version: Swap the ground beef for two cans of drained black beans or one can of lentils. Mash them slightly before adding to the creamy base so they hold together better. I’ve also used crumbled tofu seasoned with taco spices — it’s surprisingly good and adds protein without the cost of meat.
Spicy Southwest Twist: Add a drained can of corn and a can of diced green chiles to the mix. Use pepper jack cheese instead of cheddar and a hot salsa. This version has a nice kick without being overwhelming. My brother-in-law requests this version every time he comes over.
Loaded Baked Potato Taco Dip: This one’s a little extra, but it’s worth it. Add 1/2 cup of cooked, crumbled bacon and 1/2 cup of diced green onions to the dip. Top with extra cheese and a drizzle of sour cream. It tastes like a loaded baked potato and a taco had a beautiful baby. My kids call it “the fancy one.”
Dairy-Free Adaptation: Use dairy-free cream cheese and sour cream alternatives. I’ve had good luck with Kite Hill and Tofutti brands. The pumpkin puree helps keep everything creamy, so you won’t miss the dairy as much as you’d think. Just make sure your taco seasoning doesn’t have any hidden dairy ingredients.
Slow Cooker Method: Brown the beef and mix everything together, then transfer to a small slow cooker. Cook on low for 2 to 3 hours, stirring occasionally. This is perfect for parties — just set it out with chips and let people help themselves. The dip stays warm and creamy for hours.
Personal Favorite Variation: I once added a tablespoon of adobo sauce from a can of chipotle peppers. It gave the dip this amazing smoky heat that paired beautifully with the pumpkin. Just be careful — a little goes a long way. Start with a teaspoon and taste as you go.
Serving & Storage Suggestions
This dip is versatile when it comes to serving. Here’s how I like to do it.
Serving Temperature: I prefer this dip warm, but it’s also delicious at room temperature. If you’re serving it warm, microwave it for 30-second intervals until heated through, or keep it in a small slow cooker on warm. For room temperature, just let it sit out for about 20 minutes after making it — the flavors actually get better.
Presentation Ideas: For fall parties, I love serving this in a hollowed-out mini pumpkin. Cut the top off a small sugar pumpkin, scoop out the seeds, and fill it with dip. It’s a showstopper and costs almost nothing. For everyday meals, a simple shallow bowl works perfectly. Arrange tortilla chips in a circle around the dip and scatter some extra cheese and green onions on top for color.
What to Serve With It: Obviously, tortilla chips are the classic choice. But I also love serving this with crunchy vegetables — carrot sticks, bell pepper strips, cucumber rounds, and celery all work beautifully. For a heartier option, spread it on warm flour tortillas and roll them up for pinwheels. My kids love when I serve it with those little mini sweet peppers cut in half — they’re perfect for scooping.
Storage Instructions: Leftovers keep well in an airtight container in the refrigerator for up to 4 days. The flavors actually meld together and get even better overnight. I’ve been known to make this a day ahead for parties on purpose.
Reheating Methods: The best way to reheat is in the microwave, stirring every 30 seconds until warm. You can also reheat it in a skillet over low heat, stirring frequently. If it seems thick after refrigerating, stir in a tablespoon of milk or water to loosen it up. Don’t reheat it more than once — the texture starts to break down.
Freezer Tips: This dip freezes surprisingly well. Transfer it to a freezer-safe container and freeze for up to 3 months. Thaw overnight in the refrigerator, then reheat gently. The texture might be slightly softer after freezing, but the flavor is still fantastic. I like to freeze it in individual portions for quick lunches or snacks.
How Flavors Develop: Here’s something interesting — this dip tastes different at different stages. Right after making it, the pumpkin flavor is most noticeable. After a few hours in the fridge, the flavors mellow and blend together. By day two, it’s perfectly balanced and the pumpkin is barely detectable. So if you’re serving it to pumpkin skeptics, make it a day ahead.
Nutritional Information & Benefits
Let’s talk numbers. Per serving (about 1/4 cup of dip, not including chips), here’s what you’re looking at:
- Calories: Approximately 180-200
- Protein: 12-14 grams
- Fat: 14-16 grams
- Carbohydrates: 6-8 grams
- Fiber: 2-3 grams
- Sugar: 3-4 grams
- Sodium: 400-500 mg (varies by seasoning and salsa)
Health Benefits: The pumpkin puree is the real hero here. It’s packed with vitamin A (great for eye health), fiber (keeps you full), and antioxidants. Plus, it adds volume and creaminess without a ton of calories. The ground beef provides iron and B vitamins, while the dairy adds calcium and protein. It’s not health food, but it’s certainly not junk food either.
Dietary Considerations: This recipe is naturally gluten-free (just check your taco seasoning label). It’s also nut-free and egg-free. For a lower-fat version, use reduced-fat cream cheese, light sour cream, and lean ground beef. For a lower-carb option, serve with vegetable sticks instead of chips. And if you’re watching your sodium, use homemade taco seasoning and low-sodium salsa.
Potential Allergens: This recipe contains dairy (cream cheese, sour cream, cheddar cheese). It does not contain common allergens like nuts, eggs, soy, or shellfish. However, always check your ingredient labels, especially for taco seasoning and salsa, which can sometimes contain hidden allergens.
Personal Wellness Perspective: I’m not a nutritionist, but I’m a mom who thinks about what goes into my family’s bodies. This dip makes me feel good because it uses real ingredients — no weird additives, no artificial flavors. The pumpkin adds nutrition that most dips don’t have. And honestly? When my kids are eating something with vegetables (yes, pumpkin counts) and protein, I feel a lot better about them having seconds.
Conclusion
This Pumpkin Patch Taco Dip has become a staple in our home for good reason. It’s affordable, it’s easy, and it pleases just about everyone who tries it — even the skeptics. Whether you’re feeding your family on a Tuesday night or bringing something to a fall potluck, this dip delivers. It’s the kind of recipe that makes you look like you put in way more effort than you actually did, and honestly, isn’t that the best kind of recipe?
I’d love for you to try this and make it your own. Maybe you’ll add extra spice, or go heavy on the veggies, or serve it in a pumpkin like I do sometimes. The beauty of this recipe is that it’s forgiving enough to adapt to whatever you have on hand and whatever your family loves. Don’t be afraid to experiment — some of my best variations came from mistakes or last-minute substitutions.
If you make this dip, I’d love to hear about it. Drop a comment below and tell me how it turned out, what variations you tried, or how your family reacted. Did you have a Rachel in your life who got converted? I want to know. And if you took a photo, tag me on social media — I love seeing your creations. Until next time, happy cooking, and remember: the best recipes are the ones that bring people together around the table, even if that table is covered in chips and dip.
Frequently Asked Questions
Can I make this dip ahead of time?
Absolutely. This dip actually tastes better when made a day ahead. Just prepare it completely, cover it, and refrigerate. When you’re ready to serve, let it sit at room temperature for 15 minutes, then microwave in 30-second intervals until warm. The flavors meld together beautifully overnight.
Can I use fresh pumpkin instead of canned?
You can, but I don’t recommend it for this recipe. Canned pumpkin puree has a consistent texture and moisture level that’s hard to replicate with fresh. If you do use fresh, make sure it’s a sugar pumpkin (not a carving pumpkin), roast it until tender, and puree it until very smooth. You may need to drain off excess liquid before using.
Is this dip spicy? Will my kids eat it?
This dip is mild by default. The pumpkin puree actually mellows out the spices, so it’s very kid-friendly. If your family is sensitive to spice, use a mild taco seasoning and a gentle salsa. You can always add heat later with hot sauce for the adults. My own kids have been eating this since they were toddlers with no complaints.
How do I make this dip thicker or thinner?
If your dip is too thin, let it sit for 10 to 15 minutes — the pumpkin puree absorbs moisture and thickens naturally. You can also stir in an extra tablespoon of cream cheese. If it’s too thick, stir in a tablespoon of milk or water until it reaches your desired consistency. The dip should be scoopable but not runny.
Can I double this recipe for a party?
Yes, and I often do. Double all the ingredients and use a larger serving dish. If you’re using a slow cooker, a doubled batch fits perfectly in a 3-quart cooker. Just be aware that leftovers will keep for up to 4 days, so you might be eating taco dip for a while — not that that’s a bad thing.
What’s the best way to reheat leftovers?
The microwave is your friend here. Transfer the dip to a microwave-safe bowl and heat in 30-second intervals, stirring between each, until warm. You can also reheat it in a skillet over low heat, stirring frequently. If the dip seems thick after refrigeration, add a splash of milk or water to loosen it up.
Pin This Recipe!

Perfect Pumpkin Patch Taco Dip: Easy Budget Recipe

This creamy, savory taco dip gets a fall twist with pumpkin puree. It’s budget-friendly, kid-approved, and ready in 20 minutes—perfect for parties, game days, or weeknight snacks.
- Prep Time: 10 minutes
- Cook Time: 10 minutes
- Total Time: 20 minutes
- Yield: 8 servings 1x
- Category: Appetizer
- Cuisine: Mexican-American
Ingredients
- 1 can (15 oz) pumpkin puree (not pumpkin pie filling)
- 1 lb ground beef (80/20 recommended)
- 1 packet taco seasoning (or homemade blend)
- 8 oz cream cheese, softened
- 1 cup sour cream
- 1 cup shredded cheddar cheese
- 1/2 cup salsa (medium-heat restaurant-style preferred)
- Tortilla chips, for serving
- Optional garnishes: chopped green onions, sliced black olives, diced tomatoes, fresh cilantro, or a drizzle of sour cream
Instructions
- Brown the ground beef in a large skillet over medium-high heat, breaking it up with a spatula, until no longer pink (6-8 minutes). Drain excess fat, leaving about 1 tablespoon in the pan.
- Sprinkle taco seasoning over the cooked beef and add 1/4 cup water. Stir and simmer for 2-3 minutes until liquid thickens and coats the meat.
- While beef cooks, cut cream cheese into cubes and let soften at room temperature (or microwave in 10-second bursts until soft).
- In a mixing bowl, combine softened cream cheese, sour cream, and pumpkin puree. Stir until smooth and uniform in color.
- Stir in salsa until fully incorporated.
- Add seasoned ground beef to the creamy mixture and stir until evenly distributed. Fold in half of the shredded cheddar cheese.
- Transfer dip to a serving dish and spread into an even layer. Sprinkle remaining cheddar cheese on top. Microwave for 30 seconds to melt cheese if desired, or let residual heat do the work.
- Garnish with optional toppings and serve immediately with tortilla chips.
Notes
Use 100% pure pumpkin puree, not pumpkin pie filling. Let the dip rest for 10-15 minutes before serving for best flavor and texture. For a vegetarian version, substitute ground beef with drained black beans or lentils. For a dairy-free version, use dairy-free cream cheese and sour cream alternatives. The dip can be made a day ahead and refrigerated; flavors meld and improve overnight.
Nutrition
- Serving Size: 1/4 cup (about 4 oz)
- Calories: 190
- Sugar: 3
- Sodium: 450
- Fat: 15
- Saturated Fat: 8
- Carbohydrates: 7
- Fiber: 2
- Protein: 13
Keywords: pumpkin taco dip, fall appetizer, easy taco dip, budget recipe, game day dip, Halloween dip, pumpkin dip