Linda wasn’t trying to impress me. I’d stopped by her place on a rainy Tuesday afternoon to drop off a book I’d borrowed, and the smell hit me before I even got through the screen door. Warm, spicy, almost floral—like autumn had been distilled into a single scent. She was pulling this pie out of the oven, the gingersnap crust already crackling at the edges, and she just shrugged when I asked what was for dinner. “Oh, it’s nothing,” she said, wiping flour on her jeans. “Just something I threw together.”
I stood there in her mudroom, rain dripping off my jacket, watching her set this gorgeous pie on the counter like it was no big deal. And that’s when it clicked—the best recipes never come from someone trying to show off. They come from people like Linda, who’ve been making the same thing for so long it’s muscle memory. She didn’t have a fancy recipe card or a blog post. She just knew how the filling should look when it’s ready, how the crust should smell when it’s done. I asked if I could watch her make it sometime, and she laughed. “There’s nothing to watch,” she said. But I knew better.
I’ve been making this pumpkin pie with gingersnap crust ever since that rainy Tuesday. It’s become my go-to for Thanksgiving, for cozy Sunday dinners, for those days when you just need something warm and sweet to make the world feel right. And honestly? It’s the easiest pie you’ll ever make. The gingersnap crust gives it this deep, molasses-y warmth that regular pastry just can’t match. The filling is silky and spiced just right. And the whole thing comes together in under an hour. Maybe you’ve been there—standing in someone’s kitchen, watching them make something extraordinary look effortless. That’s this pie. And now it’s yours.
Why You’ll Love This Recipe
Let me tell you why this pumpkin pie with gingersnap crust is the one you’ll keep coming back to. I’ve tested this recipe at least a dozen times, tweaking the spice blend, adjusting the bake time, even trying different brands of gingersnaps. This version? It’s the one that got my picky-eating nephew to ask for seconds. The one that made my neighbor, a retired pastry chef, email me for the recipe.
- Quick & Easy: From start to table in about 55 minutes. Most of that is hands-off baking time, so you can get the rest of dinner ready while it works its magic.
- Simple Ingredients: You probably have most of this in your pantry right now. Canned pumpkin, eggs, cream, sugar, spices. The gingersnaps are the only “special” ingredient, and they’re at every grocery store.
- Perfect for Family Meals: This isn’t just a holiday pie. It’s for Tuesday night dessert, for potlucks, for when the kids need something warm after a cold day. It pleases everyone without breaking the bank.
- Crowd-Pleaser: I’ve served this to kids, grandparents, and everyone in between. The gingersnap crust adds just enough kick to keep adults happy, but it’s mild enough that little ones love it too.
- Unbelievably Delicious: The texture is what gets me every time. That smooth, velvety filling against the crunchy, spiced crust. It’s comfort food at its finest.
What makes this version different from all the other pumpkin pie recipes out there? It’s the crust, honestly. Most recipes use regular pastry, which can get soggy and bland. The gingersnap crust stays crunchy, adds incredible flavor, and doesn’t require any rolling or chilling. You just crush, mix, and press. It’s foolproof. And the filling? I’ve dialed in the spice blend so it’s warm without being overpowering. Not too sweet, not too heavy. Just right.
This is the kind of pie that makes you close your eyes after the first bite. It’s comfort food reimagined—faster, easier, but with the same soul-soothing satisfaction. Perfect for impressing guests without stress, or turning a simple family dinner into something memorable.
What Ingredients You Will Need
This recipe uses simple, wholesome ingredients to deliver bold flavor and satisfying texture without the fuss. Most of these are pantry staples, which makes this pie perfect for those last-minute baking urges.
For the Gingersnap Crust
- 2 cups (about 200g) gingersnap cookie crumbs — I recommend Nabisco or Anna’s brand for consistent texture. You can crush them in a food processor or by hand in a zip-top bag with a rolling pin.
- 5 tablespoons (70g) unsalted butter, melted — Use real butter here, not margarine. It gives the crust that rich flavor and helps it hold together.
- 2 tablespoons (25g) granulated sugar — Just a touch to balance the spices. (Skip this if your gingersnaps are already very sweet.)
- Pinch of salt — Enhances all the flavors.
For the Pumpkin Filling
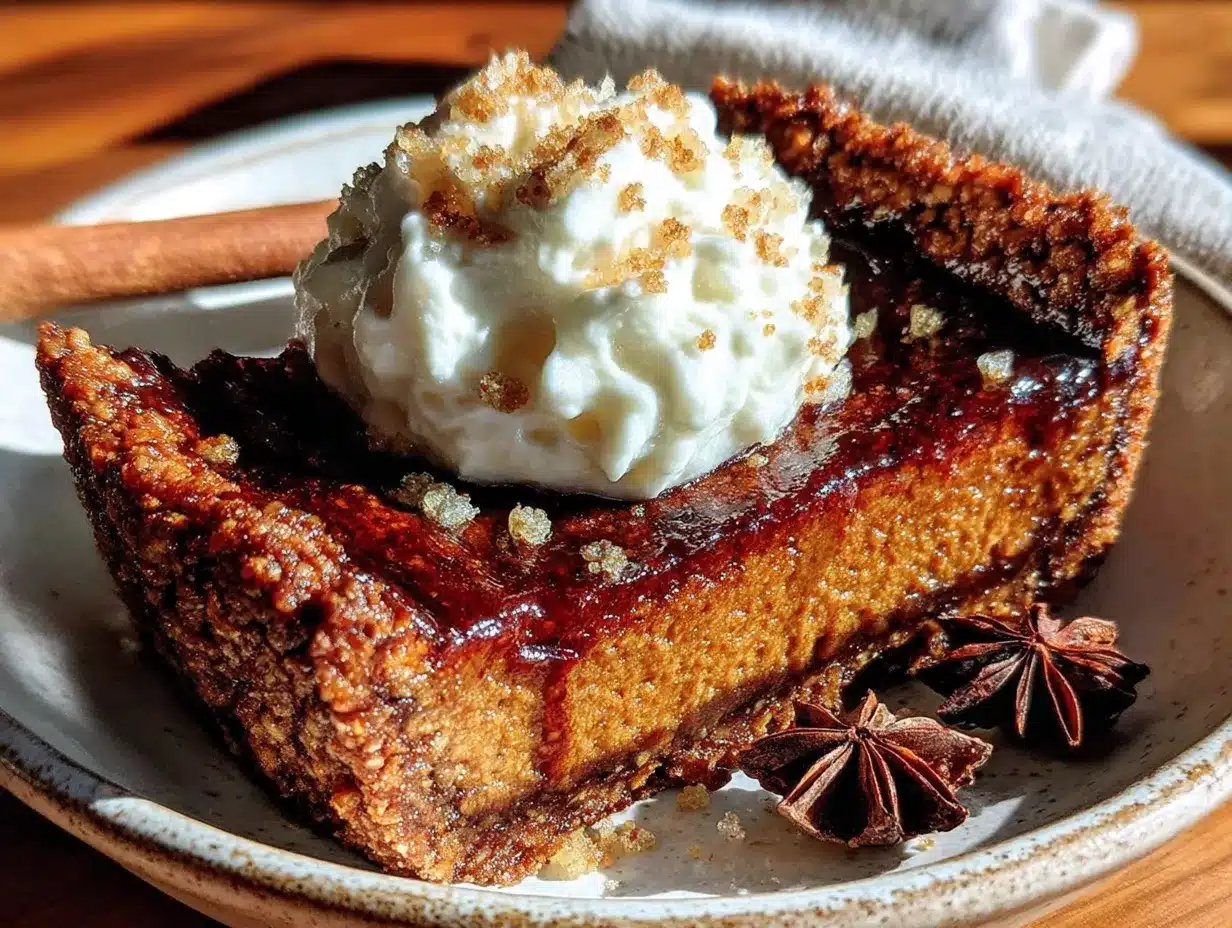
- 1 can (15 oz or 425g) pumpkin puree — Not pumpkin pie filling! Look for 100% pure pumpkin. Libby’s is my go-to brand.
- 3/4 cup (150g) granulated sugar — Adds sweetness without making it cloying.
- 1/4 cup (50g) packed light brown sugar — Adds depth and a hint of molasses that pairs beautifully with the gingersnap crust.
- 2 large eggs — Room temperature works best for a smooth filling.
- 1 cup (240ml) heavy cream — For that silky, luxurious texture. You can substitute half-and-half if you want a lighter pie, but the filling won’t be as rich.
- 1 teaspoon vanilla extract — Pure vanilla, not imitation, if you can swing it.
- 1 1/2 teaspoons ground cinnamon — The backbone of the spice blend.
- 1/2 teaspoon ground ginger — Adds warmth that echoes the crust.
- 1/4 teaspoon ground nutmeg — Freshly grated if you have it, but pre-ground works fine.
- 1/4 teaspoon ground cloves — Just a pinch—cloves are potent.
- 1/4 teaspoon salt — Balances the sweetness and brings out the pumpkin flavor.
Equipment Needed
You don’t need a fancy kitchen to make this pie. Here’s what you’ll need:
- 9-inch pie plate — Glass or ceramic works best. Metal can work, but you might need to adjust bake time slightly.
- Food processor or zip-top bag and rolling pin — For crushing the gingersnaps. I’ve done it both ways, and honestly, the bag-and-rolling-pin method is oddly satisfying.
- Medium mixing bowl — For the crust ingredients.
- Large mixing bowl — For the filling.
- Whisk — A good sturdy one for smoothing out the filling.
- Measuring cups and spoons — For accuracy. Baking is a science, after all.
- Rubber spatula — For scraping every last bit of filling into the crust.
- Cooling rack — Lets the pie cool evenly so the filling sets properly.
If you don’t have a food processor, no worries. I’ve made this crust more times with a rolling pin than with a machine. Just put the cookies in a sturdy zip-top bag, seal it, and go to town. It’s a great way to work out any frustrations, honestly.
Preparation Method
- Preheat your oven to 350°F (175°C). Position the rack in the center of the oven. While it’s heating up, start on the crust.
- Make the gingersnap crust. Crush the gingersnap cookies into fine crumbs. You should have about 2 cups. In a medium bowl, combine the crumbs, melted butter, sugar, and salt. Stir with a fork until every crumb is coated and the mixture looks like wet sand. It should clump together when you squeeze a handful.
- Press the crust into the pie plate. Dump the crumb mixture into your 9-inch pie plate. Use the bottom of a measuring cup or a flat-bottomed glass to press it firmly and evenly across the bottom and up the sides. Don’t forget the sides—press them to about 1/4-inch thickness. Take your time here; a well-packed crust holds together better.
- Pre-bake the crust. Pop the crust into the preheated oven for 8-10 minutes, until it’s fragrant and just starting to darken at the edges. Don’t over-bake it, or it might burn during the final bake. Set it aside to cool slightly while you make the filling.
- Make the pumpkin filling. In a large bowl, whisk together the pumpkin puree, granulated sugar, and brown sugar until smooth. Add the eggs one at a time, whisking well after each. Pour in the heavy cream and vanilla, and whisk until everything is combined and silky.
- Add the spices. Sprinkle the cinnamon, ginger, nutmeg, cloves, and salt over the filling. Whisk until fully incorporated. The filling should be smooth and a beautiful deep orange color. Give it a taste—yes, you can taste raw egg mixture, but you’ll get a sense of the spice balance. It should taste warm and aromatic, not overpowering.
- Pour the filling into the crust. Place the pre-baked crust on a baking sheet (this catches any spills and makes it easier to move). Slowly pour the filling into the crust, stopping about 1/4 inch from the top. It will puff up slightly as it bakes, so leave room.
- Bake the pie. Carefully transfer the baking sheet with the pie to the oven. Bake at 350°F (175°C) for 45-50 minutes. The edges should be set and slightly puffed, while the center should still have a slight jiggle when you gently shake the pan. This jiggle is key—it means the filling will set to a silky, creamy texture rather than becoming rubbery.
- Cool completely. Remove the pie from the oven and place it on a cooling rack. Let it cool at room temperature for at least 2 hours. The filling will continue to set as it cools. Don’t rush this step—if you cut into it while it’s still warm, you’ll get a runny mess.
- Chill before serving. For the best texture, refrigerate the pie for at least 4 hours, or overnight. Cold pie slices cleanly and the flavors meld together beautifully. Serve chilled or at room temperature, with whipped cream if you’re feeling fancy.
Cooking Tips & Techniques
I’ve made this pumpkin pie with gingersnap crust more times than I can count, and I’ve learned a few things the hard way. Let me save you some trouble.
Don’t skip the pre-bake. I tried skipping it once because I was in a hurry. Big mistake. The crust got soggy and never fully crisped up. That 8-10 minute pre-bake makes all the difference. It gives the crust a head start so it stays crunchy even after the wet filling goes in.
Watch for the jiggle. This is the number one mistake people make with pumpkin pie. They over-bake it because they think it needs to be completely firm. It doesn’t. The center should wobble like Jell-O when you gently shake the pan. It will set as it cools. Over-baked pumpkin pie cracks and turns rubbery. Trust the jiggle.
Room temperature ingredients matter. Cold eggs and cold cream can make the filling lumpy. I learned this the hard way when I pulled a pie out of the oven with little streaks of unincorporated cream. Take the eggs and cream out of the fridge about 30 minutes before you start. Your filling will be smooth as silk.
Crush the cookies evenly. If you have big chunks of cookie in the crust, it won’t hold together well. Aim for fine, uniform crumbs. I like to pulse them in the food processor until they look like sand. If you’re using the bag method, really go to town with that rolling pin.
Use a baking sheet. I can’t tell you how many times I’ve spilled filling while transferring a pie to the oven. Putting the pie plate on a baking sheet before pouring in the filling is a game-changer. It catches drips and makes it so much easier to handle.
Variations & Adaptations
One of the best things about this pumpkin pie with gingersnap crust is how easily it adapts to different tastes and dietary needs. Here are some variations I’ve tried and loved.
Gluten-Free Version: Use gluten-free gingersnap cookies for the crust. Several brands make them, and the texture is just as good. The filling is naturally gluten-free, so you’re good there.
Dairy-Free Version: Substitute the butter in the crust with melted coconut oil or a vegan butter stick. For the filling, use full-fat coconut cream instead of heavy cream. It adds a subtle coconut flavor that actually pairs beautifully with the spices.
Spice It Up: If you like things on the bolder side, add 1/4 teaspoon of black pepper and a pinch of cayenne to the filling. It sounds weird, I know, but it adds this amazing warmth that complements the pumpkin and ginger. I tried this after reading about colonial-era pumpkin pies, and it’s become my secret weapon.
Maple Pumpkin Pie: Replace the granulated sugar with 3/4 cup of pure maple syrup. Reduce the heavy cream to 3/4 cup to account for the extra liquid. The maple flavor is incredible with the gingersnap crust.
Mini Pies: Use a muffin tin instead of a pie plate. Press the crust into greased muffin cups, fill with the pumpkin mixture, and bake for about 20-25 minutes. These are perfect for parties or for portion control (if you’re into that sort of thing).
Serving & Storage Suggestions
This pie is best served chilled or at room temperature. I like to let it sit out for about 15 minutes after taking it from the fridge—it takes the chill off just enough without making the filling too soft.
What to serve with it: A dollop of lightly sweetened whipped cream is the classic choice, and for good reason. The cool, airy cream balances the rich, spiced filling. If you want to get fancy, try a scoop of vanilla ice cream or a drizzle of caramel sauce. For a warm drink pairing, coffee or spiced chai tea are perfect.
Storage: Cover the pie loosely with plastic wrap or foil and store it in the refrigerator. It will keep for up to 4 days. The crust stays surprisingly crunchy for the first 2 days, then softens slightly. It’s still delicious, just different.
Freezing: This pie freezes beautifully. Let it cool completely, then wrap it tightly in plastic wrap and a layer of foil. Freeze for up to 2 months. To serve, thaw it in the refrigerator overnight. The texture will be just like fresh.
Reheating: If you prefer warm pie, place individual slices in a 300°F (150°C) oven for 10-15 minutes. Or microwave a slice for about 20 seconds. The crust won’t be as crunchy, but the warm filling is pure comfort.
One thing I love about this pie is that the flavors actually get better after a day or two in the fridge. The spices meld together, the pumpkin deepens, and the whole thing becomes more cohesive. So don’t be afraid to make it a day ahead.
Nutritional Information & Benefits
Here’s the approximate nutritional breakdown for one slice (based on 8 servings):
- Calories: 380
- Total Fat: 22g
- Saturated Fat: 12g
- Cholesterol: 105mg
- Sodium: 320mg
- Total Carbohydrates: 44g
- Dietary Fiber: 3g
- Sugars: 28g
- Protein: 5g
Pumpkin is packed with vitamin A (great for your eyes and immune system) and fiber, which helps with digestion. The ginger in the crust has anti-inflammatory properties, and cinnamon can help regulate blood sugar. So while this is definitely a treat, it’s not completely empty calories.
If you’re watching your sugar intake, you can reduce the sugar in the filling to 1/2 cup total. The pie will be less sweet, but the pumpkin and spice flavors will shine through more. For a lower-fat option, use half-and-half instead of heavy cream.
As always, this recipe contains dairy, eggs, and gluten (from the cookies). If you have allergies, check the variations section for substitutions.
Conclusion
This pumpkin pie with gingersnap crust is the kind of recipe that becomes a tradition. It’s easy enough for a Tuesday night, special enough for Thanksgiving, and affordable enough that you don’t feel guilty making it just because. The gingersnap crust is the star—it adds so much flavor and texture without any extra work. And the filling? Silky, spiced, and absolutely perfect.
I love this pie because it reminds me of that rainy Tuesday at Linda’s house, of the smell that pulled me in and the casual way she shared something extraordinary. That’s what good food does—it connects us, it comforts us, it makes ordinary days feel special.
So go ahead and make this pie. Customize it with your favorite spices, serve it with whipped cream or ice cream, and don’t be afraid to make it your own. When you do, come back and let me know how it turned out. Leave a comment below, share a photo, or tell me about your own kitchen story. I’d love to hear from you.
Happy baking, friends. You’ve got this.
Frequently Asked Questions
Can I use fresh pumpkin instead of canned?
Absolutely. If you have a sugar pumpkin (not a carving pumpkin), roast it until tender, scoop out the flesh, and puree it in a food processor. You’ll need about 1 3/4 cups of puree. Just make sure to drain off any excess liquid—fresh pumpkin can be more watery than canned.
Why did my crust fall apart?
This usually happens when the crust isn’t packed firmly enough or there isn’t enough butter. Make sure you’re pressing the crumbs firmly into the pie plate, especially in the corners. And measure your butter accurately—if you’re short, the crust won’t hold together.
Can I make this pie ahead of time?
Yes! In fact, I recommend it. This pie tastes even better after a day in the fridge. You can make it up to 2 days ahead, or freeze it for up to 2 months. Just follow the storage instructions above.
How do I know when the pie is done?
The edges should be set and slightly puffed, and the center should jiggle like Jell-O when you gently shake the pan. If the center is still liquid-y, give it another 5 minutes. If it’s completely firm, you’ve over-baked it. Trust the jiggle!
Can I use a different cookie for the crust?
Sure! Graham crackers, shortbread cookies, or even vanilla wafers would work. The flavor will be different, but the technique is the same. Just make sure you have 2 cups of fine crumbs and adjust the sugar based on how sweet the cookies are.
Pin This Recipe!
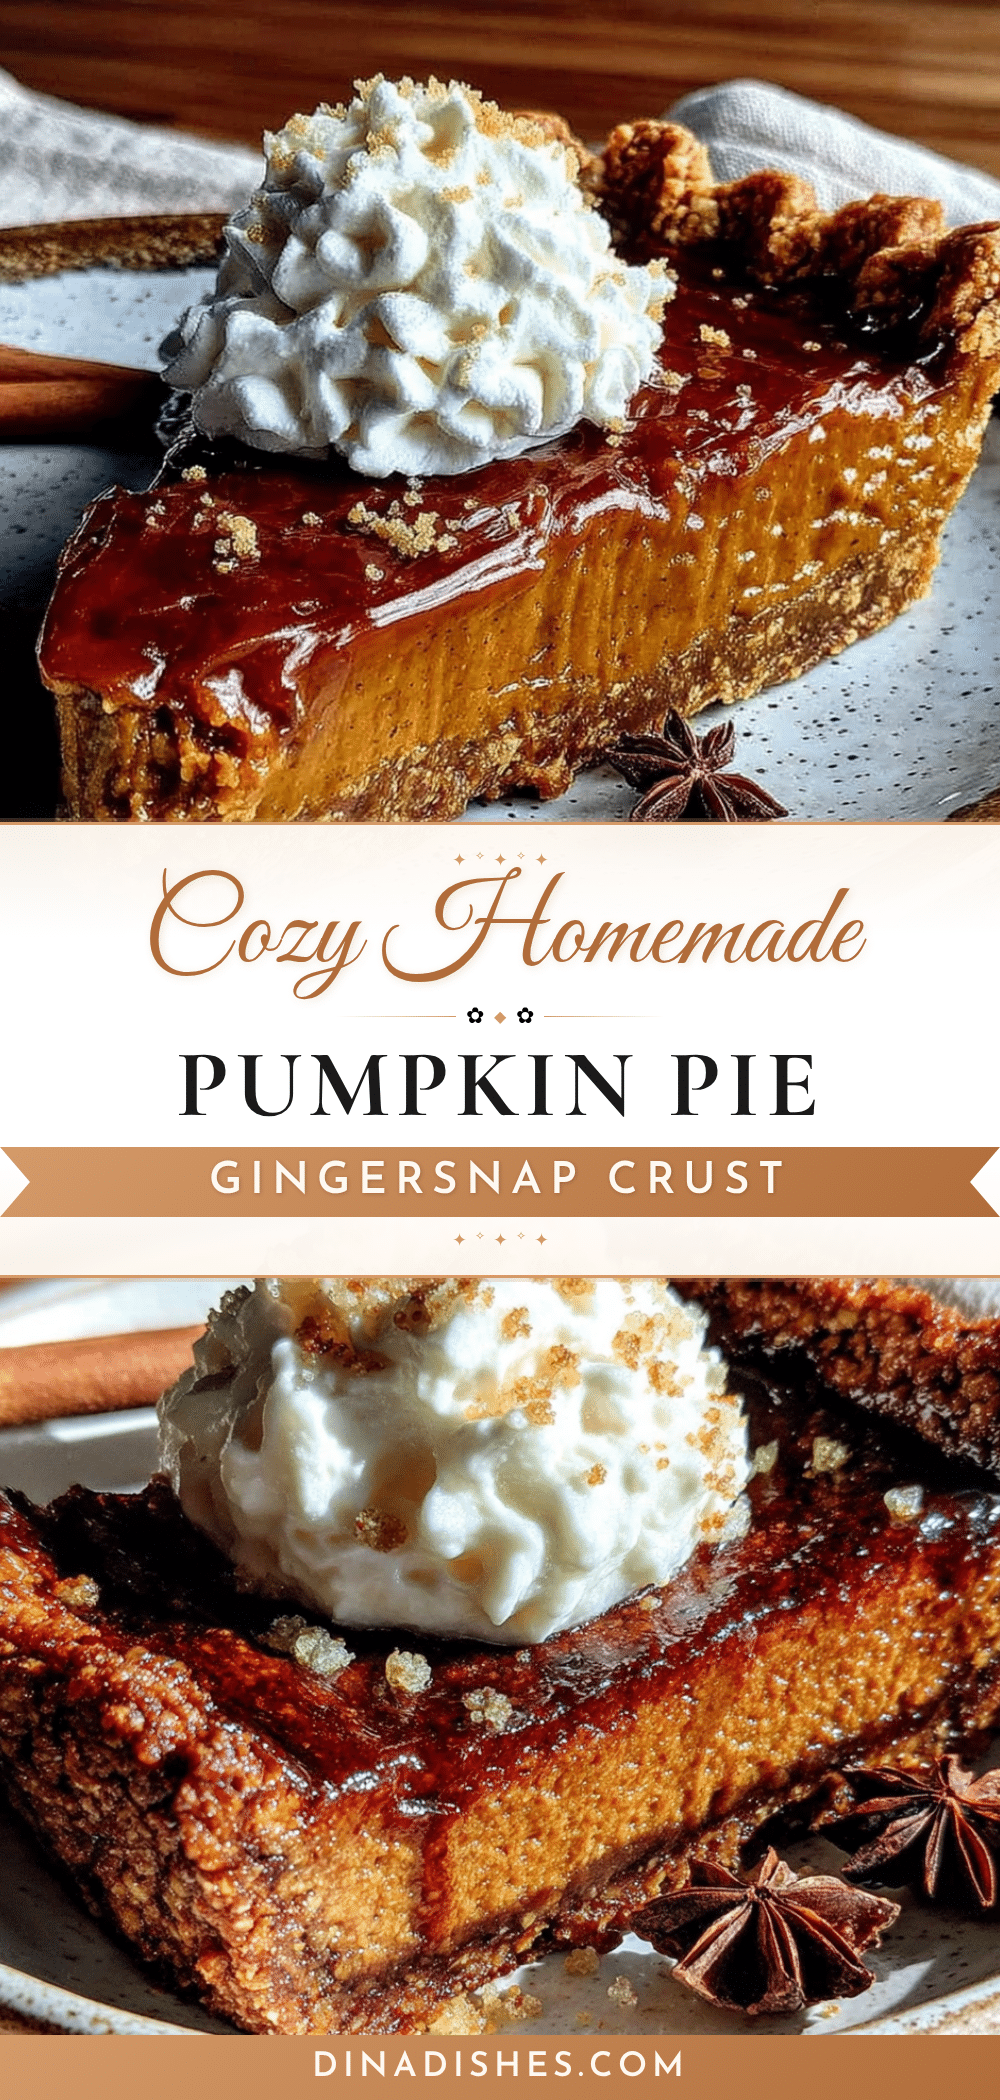
Best Easy Pumpkin Pie with Gingersnap Crust
This pumpkin pie with a crunchy gingersnap crust is quick, easy, and perfect for any occasion. The silky, spiced filling pairs beautifully with the molasses-y crust, making it a crowd-pleaser that comes together in under an hour.
- Prep Time: 15 minutes
- Cook Time: 50 minutes
- Total Time: 1 hour 5 minutes
- Yield: 8 servings 1x
- Category: Dessert
- Cuisine: American
Ingredients
- 2 cups (about 200g) gingersnap cookie crumbs
- 5 tablespoons (70g) unsalted butter, melted
- 2 tablespoons (25g) granulated sugar
- Pinch of salt
- 1 can (15 oz or 425g) pumpkin puree
- 3/4 cup (150g) granulated sugar
- 1/4 cup (50g) packed light brown sugar
- 2 large eggs, room temperature
- 1 cup (240ml) heavy cream
- 1 teaspoon vanilla extract
- 1 1/2 teaspoons ground cinnamon
- 1/2 teaspoon ground ginger
- 1/4 teaspoon ground nutmeg
- 1/4 teaspoon ground cloves
- 1/4 teaspoon salt
Instructions
- Preheat your oven to 350°F (175°C). Position the rack in the center of the oven.
- Make the gingersnap crust: Crush the gingersnap cookies into fine crumbs (about 2 cups). In a medium bowl, combine the crumbs, melted butter, sugar, and salt. Stir with a fork until every crumb is coated and the mixture looks like wet sand. It should clump together when squeezed.
- Press the crust into a 9-inch pie plate. Use the bottom of a measuring cup or a flat-bottomed glass to press it firmly and evenly across the bottom and up the sides to about 1/4-inch thickness.
- Pre-bake the crust for 8-10 minutes, until fragrant and just starting to darken at the edges. Set aside to cool slightly.
- Make the pumpkin filling: In a large bowl, whisk together the pumpkin puree, granulated sugar, and brown sugar until smooth. Add the eggs one at a time, whisking well after each. Pour in the heavy cream and vanilla, and whisk until combined and silky.
- Add the spices: Sprinkle the cinnamon, ginger, nutmeg, cloves, and salt over the filling. Whisk until fully incorporated. The filling should be smooth and a deep orange color.
- Pour the filling into the crust: Place the pre-baked crust on a baking sheet. Slowly pour the filling into the crust, stopping about 1/4 inch from the top.
- Bake the pie at 350°F (175°C) for 45-50 minutes. The edges should be set and slightly puffed, while the center should still have a slight jiggle when gently shaken.
- Cool completely: Remove the pie from the oven and place it on a cooling rack. Let it cool at room temperature for at least 2 hours.
- Chill before serving: Refrigerate the pie for at least 4 hours, or overnight. Serve chilled or at room temperature, with whipped cream if desired.
Notes
Don’t skip the pre-bake—it keeps the crust crunchy. Watch for the jiggle in the center to avoid over-baking. Room temperature ingredients ensure a smooth filling. Crush cookies evenly for a cohesive crust. Use a baking sheet to catch spills.
Nutrition
- Serving Size: 1 slice
- Calories: 380
- Sugar: 28
- Sodium: 320
- Fat: 22
- Saturated Fat: 12
- Carbohydrates: 44
- Fiber: 3
- Protein: 5
Keywords: pumpkin pie, gingersnap crust, easy pumpkin pie, Thanksgiving dessert, fall dessert


