I was standing in line at the hardware store last December—honestly, the last place on earth I expected to get cooking advice. The guy in front of me was holding a single lightbulb and a bag of Oreos, which I thought was a weird combination until he turned around and said, “You look like you’re dreading Christmas baking.” He wasn’t wrong. I had a list of twelve recipes to make for the cookie exchange, and my oven had been acting temperamental all week. “Forget the oven,” he said, holding up the Oreos. “My wife makes these truffle balls every year. No bake, no stress, and people fight over them.” That was it. A stranger in a hardware store, a lightbulb, and a bag of cookies changed my entire holiday baking game. These Easy No-Bake Christmas Oreo Truffle Balls are now the first thing I make every December, and let me tell you—they save my sanity every single time. Maybe you’ve been there, staring at a hot oven and a counter full of flour while the kids are hyped up on candy canes? This recipe was made for that exact moment. It’s the kind of recipe you keep making because it actually works when everything else feels chaotic.
Why You’ll Love This Recipe
I’ve tested a lot of truffle recipes over the years, and this one wins every time. Not because it’s fancy, but because it’s foolproof. I mean, I’ve made these while wrapping presents, watching a movie, and even while half-asleep on a Tuesday night. They always turn out perfect.
- Quick & Easy: Ready in under 30 minutes of active time. No oven, no stove, no waiting for dough to chill for hours. Just mix, roll, and dip.
- Simple Ingredients: You only need five ingredients, and three of them are probably in your pantry right now. No special trips to the gourmet store.
- Perfect for Christmas: These truffle balls look like little holiday gems on a platter. They’re ideal for cookie exchanges, gift boxes, or just keeping on the counter for when you need a quick chocolate fix.
- Crowd-Pleaser: I’ve brought these to parties where people didn’t even know I made them—they just disappeared. Kids love them, adults love them, and nobody can eat just one.
- Unbelievably Delicious: The texture is creamy, rich, and perfectly chocolatey. The Oreo crumb gives it that slight crunch, while the cream cheese makes it melt-in-your-mouth smooth. It’s comfort food in a bite-sized form.
What makes this recipe different from the rest? It’s the ratio. I spent a few batches getting the cream cheese to Oreo ratio just right—too much cream cheese and they’re too soft, too little and they’re dry. This version is the Goldilocks of truffle balls. Plus, you can customize them in a million ways without messing up the texture. It’s the kind of recipe that makes you look like a hero with almost zero effort. Honestly, that’s my favorite kind of recipe.
What Ingredients You Will Need
This recipe uses simple, everyday ingredients to create something that tastes way more complicated than it is. You probably already have most of these in your kitchen, which is exactly the point when you’re busy during the holidays.
- Oreo Cookies (14.3 oz / 405g package): You’ll need the regular Oreos, not the double-stuf or thin ones. The regular ones have the perfect crumb-to-cream ratio. I prefer the classic, but any variety works as long as you use the whole cookie—filling and all.
- Cream Cheese (8 oz / 226g), softened: This is the secret to the creamy texture. Make sure it’s at room temperature so it blends smoothly. I use full-fat Philadelphia cream cheese for the best consistency, but Neufchâtel (reduced-fat) works too—just expect a slightly softer truffle.
- Vanilla Extract (1 teaspoon): A little vanilla rounds out the flavor and makes the chocolate taste more complex. Use pure vanilla extract if you have it, but imitation works fine in a pinch.
- White Chocolate Melting Wafers (12 oz / 340g): These are for coating the truffles. I like Ghirardelli or Wilton melting wafers because they melt smoothly and set firmly. You can also use white chocolate chips, but they need a bit of coconut oil (about 1 teaspoon per cup) to thin them out for dipping.
- Christmas Sprinkles (about 1/4 cup / 45g): Red, green, and white sprinkles make these look festive. You can use any shape—round jimmies, star-shaped, or even crushed candy canes for a peppermint twist.
A quick note on substitutions: If you’re dairy-free, use a dairy-free cream cheese alternative like Kite Hill, and choose a vegan white chocolate. The texture will be slightly different, but still delicious. For a gluten-free version, use gluten-free Oreos (they taste identical, I promise). I’ve tested both, and they work great.
Equipment Needed
You don’t need a fancy kitchen to make these truffle balls. Here’s what I use, along with a few alternatives if you’re working with limited tools.
- Food Processor: This makes crushing the Oreos into fine crumbs effortless. If you don’t have one, put the cookies in a zip-top bag and crush them with a rolling pin. It’s a little more work, but totally doable.
- Mixing Bowl: Any medium-sized bowl works. I prefer glass or stainless steel because they’re easy to clean.
- Electric Hand Mixer or Wooden Spoon: A hand mixer makes blending the cream cheese and crumbs foolproof, but a sturdy wooden spoon works if you’re patient. Just make sure the cream cheese is really soft.
- Cookie Scoop (about 1 tablespoon / 15ml): This is my favorite tool for uniform truffles. If you don’t have one, use a regular tablespoon and shape them by hand.
- Baking Sheet Lined with Parchment Paper: You’ll need this to set the truffles after dipping. Parchment paper prevents sticking and makes cleanup a breeze.
- Microwave-Safe Bowl or Double Boiler: For melting the white chocolate. I use the microwave in 30-second bursts, but a double boiler gives you more control if you’re nervous about burning the chocolate.
- Fork or Dipping Tool: A regular dinner fork works fine for dipping. You can also buy special dipping tools, but honestly, a fork does the job.
I’ve made these with just a bowl, a spoon, and my hands before—it’s messy but it works. Don’t let missing equipment stop you.
Preparation Method

Here’s the step-by-step process. I’ve included all the little details I wish someone had told me the first time I made these.
- Crush the Oreos: Place the entire package of Oreos (filling and all) into your food processor. Pulse until you have fine crumbs that look like dark sand. If you’re using the bag method, put the cookies in a zip-top bag, seal it, and go to town with a rolling pin until no large chunks remain. You want a consistent crumb—big pieces will make the truffles lumpy. This takes about 2-3 minutes with a food processor, or 5-7 minutes by hand.
- Mix the base: In a medium mixing bowl, combine the Oreo crumbs with the softened cream cheese and vanilla extract. Use your hand mixer on low speed (or a wooden spoon) until everything comes together into a thick, fudgy dough. It should look like a dark, uniform paste with no streaks of white cream cheese. If it feels too dry, add another tablespoon of cream cheese. If it’s too sticky, add a few more crushed Oreos. Trust your hands here—the dough should hold together when pressed but not be greasy. This takes about 2 minutes with a mixer.
- Chill the dough: Cover the bowl with plastic wrap and refrigerate for at least 30 minutes. This step is non-negotiable—chilled dough is much easier to roll into balls. If you skip this, the truffles will be too soft to dip and will fall apart in the chocolate. I’ve made that mistake, and it’s a mess. You can chill it for up to 24 hours if you want to prep ahead.
- Roll into balls: Once the dough is firm, use your cookie scoop or a tablespoon to portion out the dough. Roll each portion between your palms into a smooth ball, about 1 inch (2.5 cm) in diameter. Place each ball on the parchment-lined baking sheet. You should get about 24 truffles. If the dough starts to get sticky as you work, pop the baking sheet back in the fridge for 10 minutes. This step takes about 10-15 minutes.
- Freeze the balls: Place the baking sheet with the rolled truffle balls in the freezer for 15-20 minutes. This firms them up even more, which makes dipping much cleaner. They should be firm to the touch but not rock-hard. If you freeze them too long, the chocolate may crack when you dip them.
- Melt the white chocolate: While the truffle balls are freezing, melt your white chocolate wafers in a microwave-safe bowl. Heat in 30-second intervals, stirring well after each, until the chocolate is smooth and fully melted. Be careful not to overheat—white chocolate burns easily and turns grainy. If it’s too thick for dipping, stir in 1 teaspoon of coconut oil or vegetable shortening to thin it out.
- Dip the truffles: Remove the truffle balls from the freezer. Working one at a time, drop a truffle into the melted white chocolate. Use a fork to gently roll it around until fully coated. Lift it out with the fork, tap the fork on the edge of the bowl to let excess chocolate drip off, and place it back on the parchment-lined sheet. Work quickly—the cold truffles will help the chocolate set fast. If the chocolate starts to thicken, reheat it for 15 seconds in the microwave.
- Add sprinkles: While the chocolate is still wet, sprinkle your Christmas sprinkles over the top of each truffle. Do this immediately after dipping—once the chocolate sets, the sprinkles won’t stick. I like to sprinkle them on rather than rolling the truffles in sprinkles to keep the white chocolate visible.
- Set and serve: Let the truffles sit at room temperature until the chocolate is completely set, about 30 minutes. If you’re in a hurry, you can pop them in the fridge for 10 minutes. Once set, they’re ready to serve or store.
Cooking Tips & Techniques
I’ve made these truffles at least a dozen times, and I’ve learned a few things the hard way. Here’s what I wish I knew from the start.
- Don’t overmix the dough: When you combine the Oreo crumbs and cream cheese, stop as soon as it comes together. Overmixing can make the truffles dense and greasy. You want them fudgy, not heavy.
- Chill is your best friend: I cannot stress this enough—chill the dough before rolling, and freeze the balls before dipping. I once skipped the freezing step because I was in a hurry, and half the truffles fell apart in the chocolate. It was a disaster. Cold truffles make for smooth, easy dipping.
- Use a deep bowl for dipping: A tall, narrow bowl (like a coffee mug or a small glass measuring cup) makes dipping much easier. You can submerge the truffle completely without having to roll it around as much.
- Tap off excess chocolate: After dipping, tap the fork gently on the edge of the bowl to let the extra chocolate drip off. This prevents puddles of chocolate from forming around the base of the truffle. Nobody wants a chocolate skirt on their truffle.
- Work in small batches: Don’t take all the truffle balls out of the freezer at once. Work with 4-5 at a time, keeping the rest frozen. This ensures they stay cold and firm while you dip.
- Fix cracked chocolate: If the chocolate cracks on a truffle, don’t panic. Just dip it again quickly. A double coat actually looks beautiful and adds extra crunch.
Variations & Adaptations
One of the best things about this recipe is how easy it is to change up. Here are a few variations I’ve tried and loved.
- Peppermint Twist: Add 1/2 teaspoon of peppermint extract to the dough along with the vanilla. Crush a few candy canes and mix them into the Oreo crumbs before adding the cream cheese. Top the truffles with crushed candy canes instead of sprinkles. It tastes like a peppermint mocha in ball form.
- Dark Chocolate Lovers: Swap the white chocolate coating for dark or semi-sweet melting wafers. The bitterness of dark chocolate balances the sweetness of the Oreo filling beautifully. I use 60% cacao for a rich, grown-up flavor.
- Vegan Version: Use dairy-free cream cheese (like Kite Hill or Tofutti) and vegan white chocolate. The texture is slightly softer, so freeze the truffle balls for an extra 10 minutes before dipping. They taste just as indulgent.
- Gluten-Free: Use gluten-free Oreos (they’re certified gluten-free and taste identical). Everything else in the recipe is naturally gluten-free. I’ve served these to gluten-sensitive friends and they couldn’t tell the difference.
- Cookie Butter Twist: Replace 2 tablespoons of the cream cheese with cookie butter (like Biscoff spread). It adds a spiced, caramel-like flavor that’s incredible during the holidays. Just be careful not to add too much, or the dough will be too soft.
My personal favorite variation is the peppermint one. I made it last Christmas for a party, and someone asked if I bought them from a bakery. I just smiled and said, “Hardware store secret.”
Serving & Storage Suggestions
These truffle balls are incredibly versatile when it comes to serving and storing. Here’s how I handle them.
- Serving Temperature: Serve them chilled or at room temperature. I prefer them straight from the fridge—they’re firmer and the chocolate has a satisfying snap. If you’re serving them at a party, take them out 10-15 minutes before so they soften slightly.
- Presentation: Arrange them on a festive platter or in a decorative tin lined with parchment paper. For gift-giving, place them in small cellophane bags tied with a red ribbon. They look stunning and make thoughtful homemade gifts.
- Complementary Dishes: These truffles pair beautifully with a cup of hot cocoa, coffee, or even a glass of cold milk. For a dessert board, serve them alongside sugar cookies, gingerbread, and fresh berries.
- Storage: Store the truffles in an airtight container in the refrigerator for up to 2 weeks. Layer them between sheets of parchment paper to prevent sticking. They actually taste better after a day or two—the flavors meld together and the texture becomes even creamier.
- Freezing: You can freeze the truffles (undipped or fully coated) for up to 3 months. Place them in a single layer on a baking sheet, freeze until solid, then transfer to a freezer-safe bag or container. To thaw, move them to the refrigerator overnight. If freezing undipped truffles, dip them straight from the freezer—no need to thaw first.
- Reheating: These are best enjoyed cold, so no reheating needed. If the chocolate coating gets a little dull after refrigeration, let them sit at room temperature for 10 minutes to bring back the shine.
Nutritional Information & Benefits
Let’s be real—these are a treat, not a health food. But knowing what’s in them helps you enjoy them mindfully.
| Nutrient | Per Truffle (approx.) |
|---|---|
| Calories | 150 |
| Total Fat | 9g |
| Saturated Fat | 5g |
| Carbohydrates | 17g |
| Sugar | 13g |
| Protein | 2g |
| Sodium | 95mg |
- Health Benefits: The cream cheese provides a small amount of calcium and protein. Dark chocolate variations add antioxidants. But honestly, the biggest benefit here is the joy they bring—sometimes that’s the healthiest thing you can eat.
- Dietary Considerations: This recipe can be made gluten-free and vegan with simple substitutions. It’s naturally nut-free (check your Oreo packaging to be sure), but the white chocolate coating may be processed in facilities that handle tree nuts.
- Allergens: Contains dairy (cream cheese, white chocolate) and wheat (Oreos). If you’re serving a crowd, label them clearly or make a separate batch with allergen-free ingredients.
I’m not a nutritionist, but I’ve learned that balance is key. Enjoy these truffles as part of a holiday spread, and don’t stress about the numbers. They’re meant to be savored.
Conclusion
These Easy No-Bake Christmas Oreo Truffle Balls are the recipe I keep coming back to year after year. They’re quick, they’re forgiving, and they make people genuinely happy. Whether you’re a seasoned baker or someone who’s never turned on an oven, you can make these. And honestly, that’s the magic of them. I love that a random conversation in a hardware store led to a recipe that now feels like a holiday tradition in my kitchen. It’s proof that the best recipes don’t come from fancy cookbooks—they come from real life, from people who just want to make something good without the stress. So go ahead, give these a try. Customize them with your favorite sprinkles or flavors, and make them your own. And if you do, I’d love to hear about it—drop a comment below or tag me in your photos. Happy holidays, and happy truffle-making!
Frequently Asked Questions
Can I use double-stuf Oreos for this recipe?
You can, but the texture will be slightly softer because there’s more cream filling. If you use double-stuf, reduce the cream cheese by about 1 tablespoon to compensate. The truffles will still taste great, just a bit creamier.
Why did my white chocolate seize up?
White chocolate is sensitive to heat and moisture. If it seizes (becomes thick and grainy), you probably overheated it or got a drop of water in the bowl. To fix it, stir in 1 teaspoon of coconut oil or vegetable shortening and microwave for 10 seconds. If it doesn’t smooth out, start fresh with new chocolate.
Can I make these truffles ahead of time for Christmas?
Absolutely. You can make the dough up to 3 days in advance and keep it in the fridge. Or, fully prepare the truffles and store them in an airtight container in the refrigerator for up to 2 weeks. They actually taste better after a day or two.
How do I keep the truffles from sticking to my hands when rolling?
Lightly wet your hands with cold water or dust them with a tiny bit of powdered sugar. The moisture or sugar creates a barrier so the dough doesn’t stick. Just don’t use too much water, or the dough will get soggy.
Can I freeze the truffles after dipping them in chocolate?
Yes, you can. Place the fully set truffles in a single layer in a freezer-safe container, separated by parchment paper. Freeze for up to 3 months. Thaw them in the refrigerator overnight before serving. The chocolate may develop a slight bloom (white spots) after freezing, but they’ll still taste delicious.
Pin This Recipe!

Easy No-Bake Oreo Truffle Balls: Best Christmas Treat
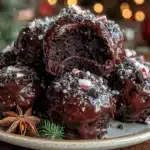
These no-bake Oreo truffle balls are a quick and easy Christmas treat made with just five ingredients. They’re creamy, rich, and perfect for cookie exchanges or holiday gift boxes.
- Prep Time: 30 minutes
- Cook Time: 0 minutes
- Total Time: 1 hour 15 minutes
- Yield: 24 truffles
- Category: Dessert
- Cuisine: American
Ingredients
- Oreo Cookies (14.3 oz / 405g package)
- Cream Cheese (8 oz / 226g), softened
- Vanilla Extract (1 teaspoon)
- White Chocolate Melting Wafers (12 oz / 340g)
- Christmas Sprinkles (about 1/4 cup / 45g)
Instructions
- Crush the Oreos: Place the entire package of Oreos (filling and all) into your food processor. Pulse until you have fine crumbs that look like dark sand. If using the bag method, put the cookies in a zip-top bag, seal it, and crush with a rolling pin until no large chunks remain.
- Mix the base: In a medium mixing bowl, combine the Oreo crumbs with the softened cream cheese and vanilla extract. Use your hand mixer on low speed (or a wooden spoon) until everything comes together into a thick, fudgy dough. It should look like a dark, uniform paste with no streaks of white cream cheese. If it feels too dry, add another tablespoon of cream cheese. If it’s too sticky, add a few more crushed Oreos.
- Chill the dough: Cover the bowl with plastic wrap and refrigerate for at least 30 minutes. This step is non-negotiable—chilled dough is much easier to roll into balls. You can chill it for up to 24 hours if you want to prep ahead.
- Roll into balls: Once the dough is firm, use your cookie scoop or a tablespoon to portion out the dough. Roll each portion between your palms into a smooth ball, about 1 inch (2.5 cm) in diameter. Place each ball on the parchment-lined baking sheet. You should get about 24 truffles. If the dough starts to get sticky as you work, pop the baking sheet back in the fridge for 10 minutes.
- Freeze the balls: Place the baking sheet with the rolled truffle balls in the freezer for 15-20 minutes. This firms them up even more, which makes dipping much cleaner. They should be firm to the touch but not rock-hard.
- Melt the white chocolate: While the truffle balls are freezing, melt your white chocolate wafers in a microwave-safe bowl. Heat in 30-second intervals, stirring well after each, until the chocolate is smooth and fully melted. Be careful not to overheat—white chocolate burns easily and turns grainy. If it’s too thick for dipping, stir in 1 teaspoon of coconut oil or vegetable shortening to thin it out.
- Dip the truffles: Remove the truffle balls from the freezer. Working one at a time, drop a truffle into the melted white chocolate. Use a fork to gently roll it around until fully coated. Lift it out with the fork, tap the fork on the edge of the bowl to let excess chocolate drip off, and place it back on the parchment-lined sheet. Work quickly—the cold truffles will help the chocolate set fast. If the chocolate starts to thicken, reheat it for 15 seconds in the microwave.
- Add sprinkles: While the chocolate is still wet, sprinkle your Christmas sprinkles over the top of each truffle. Do this immediately after dipping—once the chocolate sets, the sprinkles won’t stick.
- Set and serve: Let the truffles sit at room temperature until the chocolate is completely set, about 30 minutes. If you’re in a hurry, you can pop them in the fridge for 10 minutes. Once set, they’re ready to serve or store.
Notes
Chill the dough before rolling and freeze the balls before dipping for best results. Use a deep bowl for dipping to make it easier. Work in small batches to keep the truffles cold. If the chocolate cracks, dip again quickly for a double coat.
Nutrition
- Serving Size: 1 truffle
- Calories: 150
- Sugar: 13
- Sodium: 95
- Fat: 9
- Saturated Fat: 5
- Carbohydrates: 17
- Protein: 2
Keywords: no-bake, Oreo truffles, Christmas treats, easy dessert, holiday baking, white chocolate truffles