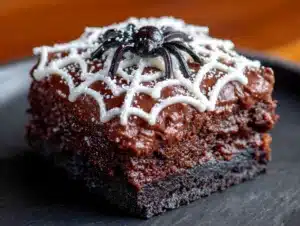
I swore I hated themed desserts. For years. The kind with food coloring, with names like “spiderweb” or “ghostly,” the ones that show up on Pinterest boards with perfectly piped designs and matching sprinkles. I’d scroll past them, muttering something about gimmicks and artificial colors. Then last October, my neighbor Sarah texted me a photo from her kid’s classroom party — a pan of black and white cheesecake bars with a spiderweb pattern on top — and said, “I made these ‘just for the kids’ and ate three. What have you done to me?”
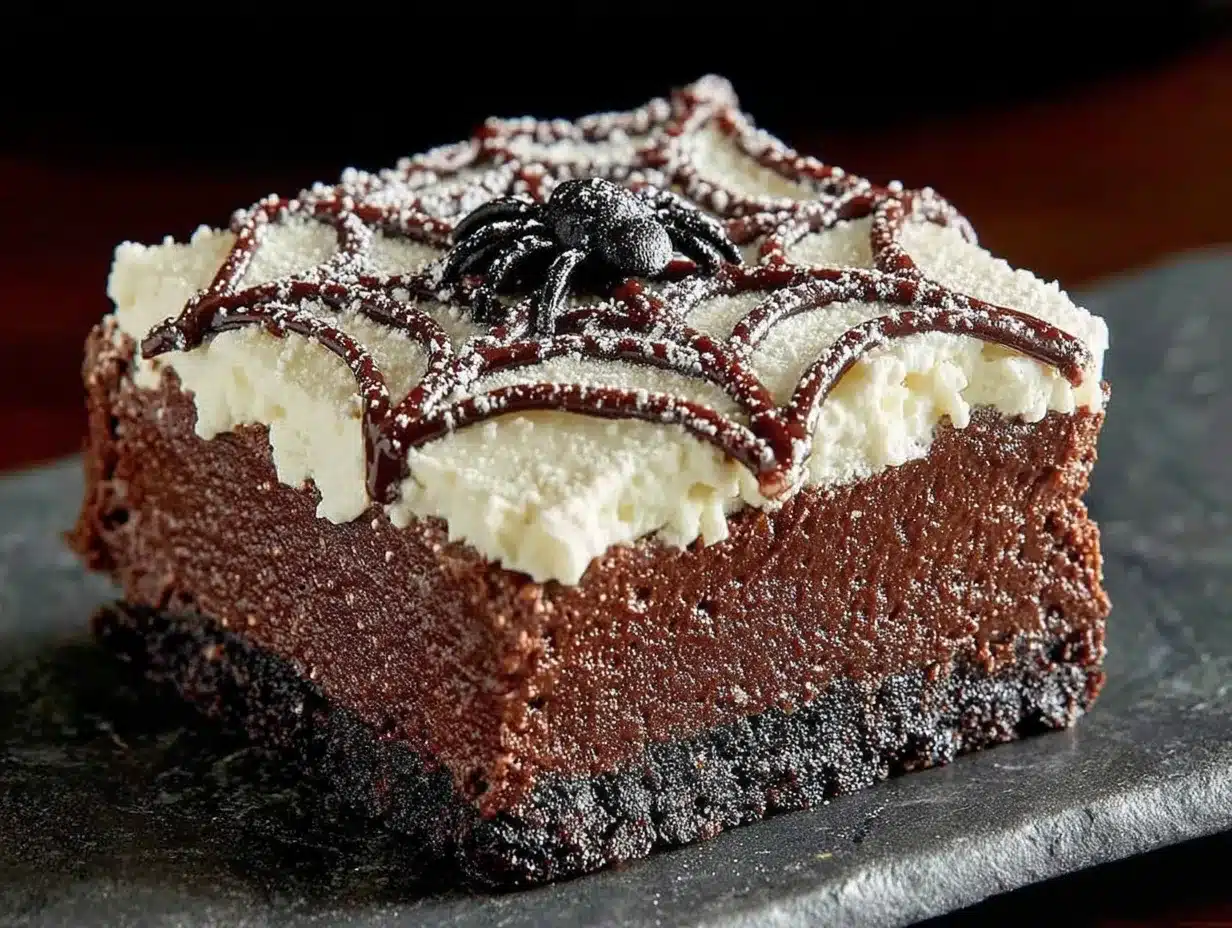
Honestly, I hadn’t done anything. But I knew exactly what she meant. There’s something about the combination of a dark, almost-black chocolate crust, a creamy vanilla cheesecake layer, and that dramatic web of black cocoa swirled across the top that just works. It’s not just a gimmick — it’s genuinely delicious. The black cocoa gives it a deep, Oreo-cookie flavor without being too sweet, and the cheesecake part is tangy and smooth. The spiderweb is just for fun, but let me tell you, it’s the kind of fun that makes you feel like a kitchen wizard.
I made my first batch that weekend. I used a cracked 9×13 pan I’d picked up at a thrift store, and I forgot to bring the cream cheese to room temperature, so the filling had tiny lumps. My kids didn’t care. They stood on stools at the counter, watching me drag a toothpick through the batter, gasping as the web appeared. My youngest said, “Mom, you’re a witch. A good witch.” And that was it. I was converted. These Kid-Friendly Black Velvet Spiderweb Cheesecake Bars are now my go-to for school parties, Halloween get-togethers, and random Tuesday afternoons when we need a little magic. Maybe you’ve been there — rolling your eyes at the idea of “holiday baking” until you actually taste it and realize you were wrong the whole time.
Why You’ll Love This Recipe
These cheesecake bars aren’t just another Halloween dessert. They’re the kind of recipe that makes you look like you spent hours in the kitchen when really, you didn’t. Here’s why they work so well for busy families:
- Kid-Friendly & Fun: The spiderweb design is incredibly easy to create, and kids love helping with the swirling part. It’s a guaranteed crowd-pleaser for classroom parties, playdates, or family movie nights.
- Simple Ingredients: No weird, hard-to-find items. You probably have most of these in your pantry right now — cream cheese, butter, sugar, eggs, vanilla, and Oreo cookies for the crust.
- Make-Ahead Magic: These bars actually taste better after a few hours in the fridge. You can make them a day or two before your event, which is a lifesaver during the busy holiday season.
- Budget-Friendly: A single batch makes 16 generous bars, and the cost per serving is minimal. Perfect for feeding a crowd without breaking the bank.
- Unbelievably Delicious: The black cocoa crust is rich and slightly bitter, which balances the sweet, tangy cheesecake filling perfectly. The texture is creamy, dense, and utterly satisfying.
What makes this recipe different from all the others? It’s the black cocoa powder. Regular cocoa just doesn’t give you that deep, dramatic color or that distinct Oreo-like flavor. I tested this with natural cocoa first, and the bars were brown, not black, and the flavor was flat. Black cocoa is the secret weapon here. It’s what makes these bars feel special without any artificial food coloring. Plus, the technique for the spiderweb is foolproof — I’ve taught it to my 8-year-old, and she nails it every time. This isn’t just another version of cheesecake bars. It’s your best version.
What Ingredients You Will Need
This recipe uses simple, wholesome ingredients to deliver a showstopping dessert without any fuss. Most of these are pantry staples, and the few specialty items are easy to find at your local grocery store.
For the Black Velvet Crust
- 24 Oreo cookies (regular, not double-stuf) — crushed into fine crumbs (you can use a food processor or a zip-top bag and a rolling pin)
- 5 tablespoons unsalted butter, melted — use salted butter if that’s all you have, just reduce the added salt slightly
- 2 tablespoons black cocoa powder (I recommend Rodelle or King Arthur Flour brands for the best color and flavor)
- Pinch of salt — optional, but it balances the sweetness
For the Cheesecake Filling
- 24 ounces (680g) cream cheese, softened to room temperature — this is crucial for a smooth, lump-free filling. Leave it out for at least 2 hours
- 1 cup (200g) granulated sugar
- 3 large eggs, room temperature — cold eggs can cause the filling to curdle
- 1 teaspoon vanilla extract — pure vanilla is best, but imitation works fine
- 1/4 cup (60ml) sour cream — adds moisture and tanginess. Greek yogurt works as a substitute
- 1 tablespoon all-purpose flour — helps stabilize the cheesecake and prevents cracking
For the Spiderweb Topping
- 2 tablespoons black cocoa powder
- 2 tablespoons hot water
- 1/4 cup (60ml) sweetened condensed milk — this creates a smooth, pourable paste. You can also use heavy cream mixed with a little powdered sugar
Substitution Guidance
If you need a gluten-free option, use gluten-free chocolate sandwich cookies for the crust. For a dairy-free version, use vegan cream cheese and butter alternatives — just note that the texture may be slightly softer. The black cocoa powder is non-negotiable for the color, but if you can’t find it, you can use regular dark cocoa powder mixed with a drop of black food coloring (gel works best).
Equipment Needed
You don’t need a fancy kitchen to make these bars. Here’s what you’ll need:
- 9×13-inch baking pan — glass or metal works fine. If using a dark non-stick pan, reduce the oven temperature by 25°F to prevent over-browning
- Parchment paper — for easy removal. Leave a 2-inch overhang on two opposite sides
- Food processor or zip-top bag — for crushing the Oreos. A rolling pin works great if you don’t have a processor
- Electric hand mixer or stand mixer — for beating the cream cheese. A whisk and some elbow grease will also work, but it takes longer
- Medium mixing bowls — one for the crust, one for the filling
- Spatula — for scraping the bowl and smoothing the filling
- Small piping bag or zip-top bag — for the spiderweb topping. A squeeze bottle also works
- Toothpick or skewer — for creating the web pattern
I’ve made these bars with a cheap hand mixer I bought at a discount store, and they turned out perfectly. Don’t stress if you don’t have every tool — a whisk and a steady hand are all you really need.
Preparation Method
Let’s walk through this step by step. I’ll include all the little details that make the difference between good cheesecake bars and great ones.
Step 1: Prepare the Crust
Preheat your oven to 325°F (160°C). Line your 9×13-inch pan with parchment paper, leaving an overhang on two sides. This will let you lift the bars out cleanly later. In a food processor, pulse the Oreo cookies (filling and all) until they form fine crumbs. You should have about 2 cups of crumbs. Transfer to a medium bowl, add the black cocoa powder and salt, and pour in the melted butter. Stir with a fork until the mixture looks like wet sand — all the crumbs should be coated. Press this mixture firmly into the bottom of the prepared pan. Use the bottom of a measuring cup to get it even and compact. Bake for 10 minutes, then set aside to cool while you make the filling. The crust will firm up as it bakes, creating a solid base for the cheesecake.
Step 2: Make the Cheesecake Filling
In a large mixing bowl, beat the softened cream cheese with an electric mixer on medium speed until it’s smooth and creamy — about 2 minutes. Scrape down the sides of the bowl with a spatula. Add the sugar and beat for another 2 minutes, until the mixture is light and fluffy. Add the eggs one at a time, beating on low speed after each addition just until combined. Over-beating at this stage can incorporate too much air, which leads to cracks. Add the vanilla extract, sour cream, and flour, and mix on low until just combined. The batter should be smooth, thick, and pale. Pour the filling over the cooled crust and spread it evenly with a spatula. Tap the pan gently on the counter a few times to release any air bubbles.
Step 3: Prepare the Spiderweb Topping
In a small bowl, whisk together the black cocoa powder and hot water until you have a smooth, dark paste. Add the sweetened condensed milk and whisk until fully combined. The mixture should be thick but pourable — like thin pancake batter. If it’s too thick, add a few drops of water. Transfer this mixture to a small piping bag or a zip-top bag with a tiny corner snipped off. You can also use a squeeze bottle with a small tip.
Step 4: Create the Spiderweb Pattern
This is the fun part. Pipe concentric circles of the black cocoa mixture on top of the cheesecake filling. Start in the center and work your way outward, spacing the circles about 1 inch apart. You should have 4 to 5 circles. Then, take a toothpick or a skewer and drag it from the center of the pan outward toward the edge, through all the circles. Wipe the toothpick clean, then drag from the edge back toward the center, but between the lines you just made. Alternate this pattern all the way around the pan — about 8 to 10 lines total. You’ll see the spiderweb appear as you drag. Don’t over-swirl, or the pattern will become muddy. Less is more here.
Step 5: Bake the Cheesecake Bars
Place the pan in the preheated oven and bake for 35 to 40 minutes. The edges should be set and slightly puffed, but the center should still jiggle slightly when you gently shake the pan. This is the sweet spot — a fully set center means over-baked cheesecake. Turn off the oven, crack the door open, and let the cheesecake cool in the oven for 1 hour. This gradual cooling helps prevent cracks. After an hour, remove the pan from the oven and let it cool completely on a wire rack. Then, cover with plastic wrap and refrigerate for at least 4 hours, or overnight. This chilling time is essential for clean slices.
Step 6: Slice and Serve
Once the cheesecake is fully chilled, use the parchment overhang to lift the entire block out of the pan. Place it on a cutting board. Use a sharp knife dipped in hot water and wiped clean between cuts for the cleanest slices. Cut into 16 bars (4 rows by 4 rows). For a cleaner look, you can trim the edges first. Serve cold or at room temperature.
Cooking Tips & Techniques
I’ve made these bars at least a dozen times, and I’ve learned a few things the hard way. Here are my best tips for success:
- Room temperature ingredients are non-negotiable. Cold cream cheese creates lumps that won’t bake out. Cold eggs can cause the filling to separate. Trust me, I once tried to speed things up by microwaving the cream cheese, and it turned into a grainy mess. Just plan ahead.
- Don’t over-mix the filling. Once the eggs go in, mix on low speed and stop as soon as everything is combined. Too much air in the batter leads to cracks and a puffy, soufflé-like texture instead of the dense, creamy cheesecake we want.
- The water bath is optional. Many cheesecake recipes call for a water bath to prevent cracking, but I’ve found that this recipe doesn’t need one. The flour in the filling and the gradual cooling in the oven do the job just fine. Plus, a water bath can make the crust soggy.
- Use a light hand with the spiderweb. I got too enthusiastic my first time and dragged the toothpick through the batter like I was drawing a map. The result was a muddy mess. Gentle, even strokes are the key.
- Chill overnight for the best texture. Four hours is the minimum, but overnight is ideal. The flavors meld, the texture firms up perfectly, and the bars slice like a dream. Plus, it’s one less thing to do on party day.
Variations & Adaptations
One of the best things about this recipe is how easy it is to adapt. Here are some of my favorite variations:
- Pumpkin Spice Version: Add 1/2 cup of pumpkin puree and 1 teaspoon of pumpkin pie spice to the cheesecake filling. Reduce the sugar to 3/4 cup. The pumpkin adds a lovely fall flavor and a slightly denser texture. My family loves this version for Thanksgiving.
- Peppermint Holiday Bars: For Christmas, add 1/2 teaspoon of peppermint extract to the filling and crush some candy canes to sprinkle on top before serving. The red and white against the black crust is stunning.
- Gluten-Free Adaptation: Use gluten-free chocolate sandwich cookies for the crust. The filling is naturally gluten-free, so this is an easy swap that doesn’t change the flavor at all.
- White Chocolate Swirl: Melt 1/2 cup of white chocolate chips and drizzle it over the cheesecake before adding the spiderweb. Use a toothpick to swirl it into the web for a marbled effect. It’s extra decadent.
- Mini Bar Version: Make these in a mini muffin tin for bite-sized treats. Press the crust into the cups, fill with cheesecake batter, and bake for 12-15 minutes. The spiderweb pattern is trickier on a small scale, but you can just pipe a small dot on top of each bar.
I’ve tried the pumpkin version for a fall potluck, and it was gone in minutes. The kids loved the “Halloween” colors, and the adults appreciated the seasonal twist. Don’t be afraid to experiment — this recipe is forgiving.
Serving & Storage Suggestions
These bars are incredibly versatile when it comes to serving. Here’s how I like to do it:
- Serving Temperature: I prefer them cold, straight from the fridge. The texture is firm and creamy, and the crust stays crisp. If you like a softer cheesecake, let them sit at room temperature for 15 minutes before serving.
- Presentation: Arrange the bars on a platter and garnish with a few candy spiders or edible glitter for a festive touch. A dusting of black cocoa powder on the plate adds drama. For a less spooky look, top each bar with a small dollop of whipped cream and a fresh raspberry.
- Complementary Dishes: These bars pair beautifully with a hot cup of coffee or a glass of cold milk. For a dessert spread, serve them alongside chocolate-dipped strawberries or a simple vanilla ice cream.
- Storage: Store leftover bars in an airtight container in the refrigerator for up to 5 days. Place a sheet of parchment paper between layers to prevent sticking. The flavor actually improves after a day or two as the ingredients meld.
- Freezing: These bars freeze beautifully. Wrap individual bars tightly in plastic wrap, then place them in a freezer-safe bag or container. They’ll keep for up to 3 months. To thaw, transfer to the refrigerator overnight. I love having a stash in the freezer for unexpected guests or last-minute school events.
One note on reheating: don’t. These are meant to be served cold. If you absolutely must have them warm, pop a single bar in the microwave for 10 seconds, but be warned — the crust will soften.
Nutritional Information & Benefits
Let’s be real — these are a treat, not a health food. But that doesn’t mean they can’t have a place in a balanced diet. Here’s a rough estimate per bar (based on 16 servings):
| Nutrient | Amount per Bar |
|---|---|
| Calories | 285 |
| Total Fat | 18g |
| Saturated Fat | 10g |
| Cholesterol | 75mg |
| Sodium | 210mg |
| Total Carbohydrates | 28g |
| Dietary Fiber | 1g |
| Sugars | 20g |
| Protein | 5g |
The cream cheese provides a good amount of protein and calcium, and the black cocoa powder is rich in antioxidants. If you’re watching your sugar intake, you can reduce the sugar in the filling by 1/4 cup without affecting the texture too much. For a lower-fat option, use reduced-fat cream cheese — just note that the texture will be slightly less creamy.
These bars are not gluten-free (unless you use the adapted crust), and they contain dairy and eggs. If you’re serving a crowd with allergies, make sure to label them clearly. I always bring a small card with the ingredients listed when I take these to a school party.
Conclusion
So there you have it — a dessert that started as a skeptical eye-roll and ended as a beloved family tradition. These Kid-Friendly Black Velvet Spiderweb Cheesecake Bars are proof that sometimes the best recipes are the ones you least expect to love. They’re fun without being fussy, impressive without being complicated, and delicious without being over-the-top sweet.
I hope you give them a try, whether it’s for a Halloween party, a classroom celebration, or just a random Tuesday when you need a little magic. Customize them however you like — add pumpkin, swap in peppermint, or keep them classic. The spiderweb pattern is forgiving, the flavor is crowd-pleasing, and the joy on your kids’ faces when they see that web appear is absolutely priceless.
If you make these, I’d love to hear about it. Drop a comment below and tell me how they turned out, or share a photo on social media and tag me. Did you try a variation? Did your kids help with the swirling? Let’s keep the conversation going. And if you’re looking for more family-friendly desserts, check out my easy no-bake chocolate cookies — they’re another favorite in our house.
Happy baking, and remember — the best kitchen moments are the messy, imperfect, delicious ones. Enjoy every bite.
Frequently Asked Questions
Can I make these cheesecake bars without a food processor?
Absolutely. Place the Oreo cookies in a large zip-top bag, seal it, and crush them with a rolling pin or the bottom of a heavy pan. It takes a few minutes and is a great way to get kids involved — just make sure the bag is well-sealed to avoid a crumb explosion.
Why did my cheesecake filling crack?
Cracks usually happen from over-baking or sudden temperature changes. Make sure to pull the cheesecake out when the center is still slightly jiggly, and let it cool gradually in the oven with the door cracked open. Also, avoid over-mixing the batter once the eggs are added.
Can I use a different type of cookie for the crust?
Yes, but the color and flavor will change. Chocolate wafer cookies or chocolate graham crackers work well, but the crust won’t be as dark. For the black velvet effect, black cocoa powder is essential. If you use a lighter cookie, add an extra tablespoon of black cocoa to the crust mixture.
How far in advance can I make these bars?
You can make them up to 3 days in advance. Store them tightly covered in the refrigerator. They actually taste better after a day or two as the flavors meld. For longer storage, freeze individual bars for up to 3 months.
My spiderweb pattern turned into a muddy mess. What went wrong?
This usually happens from over-swirling or using too much of the black cocoa mixture. Keep your circles light and spaced out, and only drag the toothpick through once per line. Wipe the toothpick clean after each drag. Less is definitely more when it comes to creating a clean web pattern.
Pin This Recipe!
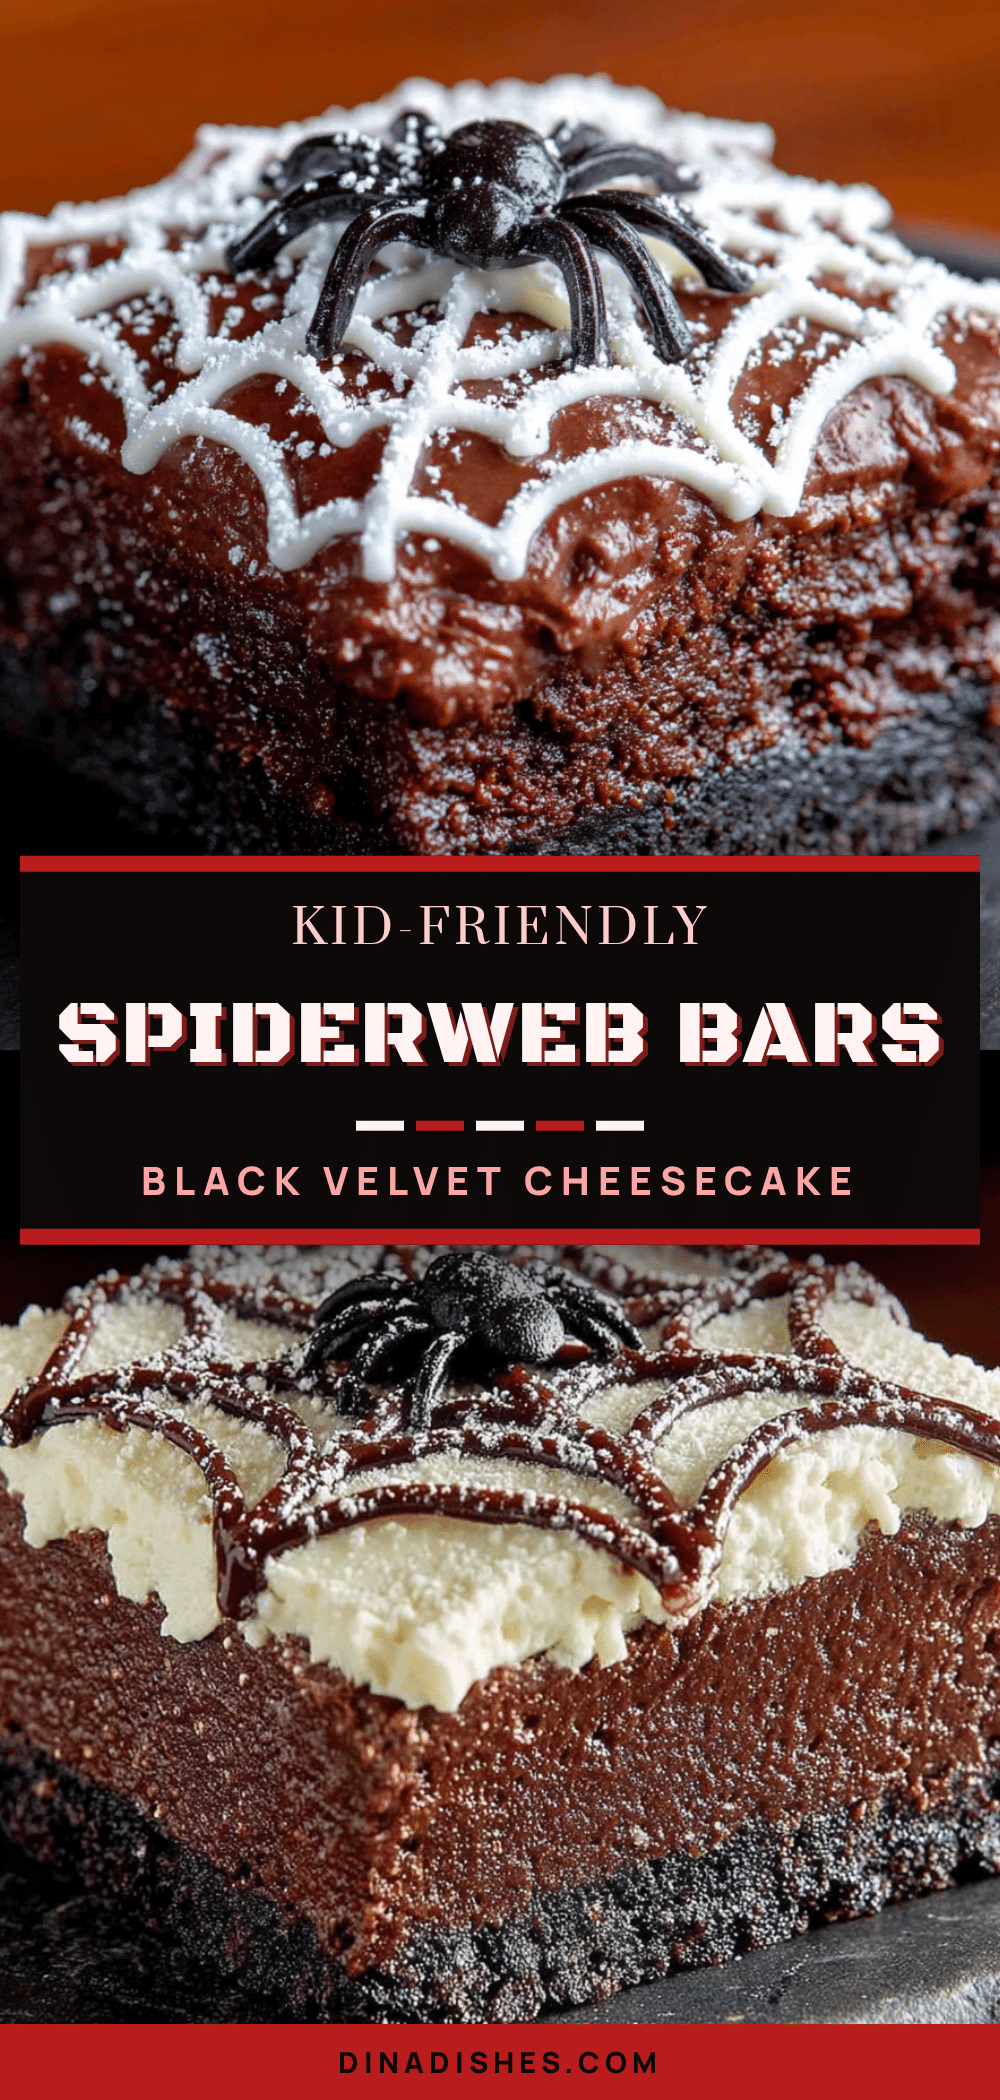
Kid-Friendly Black Velvet Spiderweb Cheesecake Bars
These creamy cheesecake bars feature a dark Oreo crust, a tangy vanilla filling, and a dramatic spiderweb pattern made with black cocoa. They’re fun to make with kids, budget-friendly, and perfect for Halloween parties or any occasion that calls for a little magic.
- Prep Time: 20 minutes
- Cook Time: 40 minutes
- Total Time: 5 hours (includes cooling and chilling)
- Yield: 16 bars 1x
- Category: Dessert
- Cuisine: American
Ingredients
- 24 Oreo cookies (regular, not double-stuf)
- 5 tablespoons unsalted butter, melted
- 2 tablespoons black cocoa powder
- Pinch of salt
- 24 ounces (680g) cream cheese, softened to room temperature
- 1 cup (200g) granulated sugar
- 3 large eggs, room temperature
- 1 teaspoon vanilla extract
- 1/4 cup (60ml) sour cream
- 1 tablespoon all-purpose flour
- 2 tablespoons black cocoa powder
- 2 tablespoons hot water
- 1/4 cup (60ml) sweetened condensed milk
Instructions
- Preheat oven to 325°F (160°C). Line a 9×13-inch baking pan with parchment paper, leaving an overhang on two sides.
- In a food processor, pulse Oreo cookies (filling and all) until fine crumbs form. Transfer to a bowl, add 2 tablespoons black cocoa powder and a pinch of salt, then pour in melted butter. Stir until mixture resembles wet sand.
- Press the crust mixture firmly into the bottom of the prepared pan. Bake for 10 minutes, then set aside to cool.
- In a large bowl, beat softened cream cheese with an electric mixer on medium speed until smooth (about 2 minutes). Add sugar and beat for another 2 minutes until light and fluffy.
- Add eggs one at a time, beating on low speed after each addition just until combined. Add vanilla extract, sour cream, and flour, mixing on low until just combined.
- Pour the filling over the cooled crust and spread evenly. Tap the pan gently on the counter to release air bubbles.
- In a small bowl, whisk together 2 tablespoons black cocoa powder and 2 tablespoons hot water until smooth. Add sweetened condensed milk and whisk until combined. Transfer to a piping bag or zip-top bag with a tiny corner snipped off.
- Pipe concentric circles of the black cocoa mixture on top of the cheesecake filling, starting from the center and spacing circles about 1 inch apart.
- Using a toothpick or skewer, drag from the center outward through all the circles. Wipe the toothpick clean, then drag from the edge back toward the center between the previous lines. Repeat around the pan to create a spiderweb pattern.
- Bake for 35-40 minutes, until edges are set but center still jiggles slightly. Turn off the oven, crack the door open, and let the cheesecake cool in the oven for 1 hour.
- Remove from oven and cool completely on a wire rack. Cover with plastic wrap and refrigerate for at least 4 hours, preferably overnight.
- Use the parchment overhang to lift the cheesecake out of the pan. Cut into 16 bars using a sharp knife dipped in hot water and wiped clean between cuts.
Notes
Room temperature ingredients are crucial for a smooth filling. Don’t over-mix once eggs are added. The water bath is optional; the flour in the filling and gradual cooling help prevent cracks. Chill overnight for best texture. For gluten-free, use gluten-free chocolate sandwich cookies. For dairy-free, use vegan cream cheese and butter alternatives.
Nutrition
- Serving Size: 1 bar
- Calories: 285
- Sugar: 20
- Sodium: 210
- Fat: 18
- Saturated Fat: 10
- Carbohydrates: 28
- Fiber: 1
- Protein: 5
Keywords: cheesecake bars, spiderweb, Halloween, black cocoa, Oreo crust, kid-friendly, no-bake crust, make-ahead