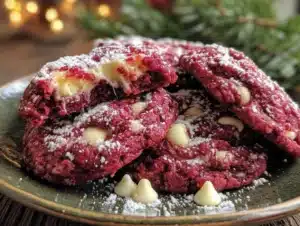
Megan wasn’t trying to impress anyone that afternoon. I’d stopped by to pick up a book I’d lent her months ago—the one I’d honestly given up on ever seeing again—and the smell hit me before I even got through the front door. Something warm and sweet and just a little bit buttery, with a hint of something almost… chocolatey, but different. She was standing at the kitchen counter in her favorite stained apron, casually scraping dough off a spatula, and there they were. The most brilliant green cookies I’d ever seen, studded with red and white chips, sitting on a cooling rack like they were no big deal.
“Oh, those?” she said when I asked, barely looking up. “Just some cookies I threw together for the kids’ class party.” Just some cookies. I mean, honestly. I took one bite and I think I actually let out a little sound—you know the one, that embarrassing hum of approval you can’t quite control. The cookie was soft, almost cakey, with that subtle red velvet flavor peeking through the white chocolate, and the green was so perfect it looked like something from a holiday magazine. But the best part? Megan had no idea she’d made something extraordinary.
That’s the thing about the best recipes, isn’t it? They don’t come from a fancy test kitchen or a chef with a TV show. They come from a tired mom in a stained apron who’s just trying to get through a Tuesday. And that, right there, is why I’ve been making these Grinch cookies ever since. They remind me that you don’t need a special occasion or a complicated technique to make something that stops someone in their tracks. Maybe you’ve been there—standing in your own kitchen, not thinking much of what you’re making, only to have someone act like you’ve just handed them gold. These cookies are that moment, over and over again.
Why You’ll Love This Recipe
Let me tell you why these Grinch cookies have become a staple in my house, and I think they’ll become one in yours too. I’ve tested this recipe at least six times—yes, six—to get the texture just right. The first batch came out too flat. The second was too dry. But by the third, I had it dialed in, and now it’s the only version I’ll make. Here’s what makes it special:
- Quick & Easy: From start to finish, you’re looking at about 25 minutes. Mix the dough, chill it for 10 minutes (don’t skip that!), scoop, bake, and done. Perfect for those after-school baking sessions or last-minute holiday parties.
- Simple Ingredients: No weird extracts or specialty flours here. You probably have most of this in your pantry right now. The red velvet comes from a box of cake mix—yes, I said it—and the green is just a few drops of food coloring.
- Perfect for the Holidays: These cookies scream Christmas, but honestly? I’ve made them for Valentine’s Day (pink and red chips), St. Patrick’s Day, and even a random Tuesday in July. They’re that versatile.
- Crowd-Pleaser: My kids fight over the last one. My husband sneaks them from the tin when he thinks I’m not looking. And at the school bake sale, they sold out in 20 minutes. Kids and adults alike go crazy for that soft, cakey texture.
- Unbelievably Delicious: The combo of white chocolate chips and red velvet cake mix is next-level. The white chocolate adds a creamy sweetness that balances the subtle cocoa flavor, and the green color makes them fun without being over-the-top.
What sets these apart from every other Grinch cookie recipe out there? It’s the technique. I use a little trick—chilling the dough briefly before baking—that keeps them from spreading into flat, sad discs. And I’ve learned that the ratio of cake mix to butter is everything. Too much butter and they’re greasy. Too little and they’re dry. This version? It’s just right. Honestly, it’s the kind of cookie that makes you close your eyes after the first bite. Comfort food reimagined—faster, simpler, but with the same soul-soothing satisfaction.
What Ingredients You Will Need
This recipe uses simple, mostly pantry-staple ingredients to deliver that signature soft, cakey texture and festive look. The magic really comes from using a boxed red velvet cake mix as the base—it gives you that subtle cocoa flavor and beautiful red flecks without any extra work.
- Red velvet cake mix (15.25 oz box) – I prefer Duncan Hines or Betty Crocker for the best texture. The moisture content varies between brands, so stick with one you trust.
- Large eggs (2, room temperature) – Room temperature eggs mix more evenly into the dough. If you’re in a hurry, pop them in a bowl of warm water for 5 minutes.
- Vegetable oil (1/3 cup) – Use a neutral oil like canola or avocado. Don’t substitute butter here—the oil keeps the cookies soft and cakey.
- Green food coloring (gel or liquid, about 8-10 drops) – Gel coloring gives a more vibrant green without thinning the dough. I use Wilton’s “Leaf Green” for that perfect Grinch shade.
- White chocolate chips (1 cup) – I recommend Ghirardelli or Toll House for chips that hold their shape and melt smoothly. Avoid white baking morsels that are labeled “white morsels”—they don’t have cocoa butter and taste waxy.
- Red velvet chips or red candy melts (1/2 cup, optional) – These add extra red flecks and a pop of color. If you can’t find them, just use more white chocolate chips.
- Powdered sugar (1/4 cup, for rolling) – This gives the cookies a soft, crackly top. Don’t skip it—it’s what makes them look bakery-style.
Substitution Guidance: If you’re gluten-free, use a gluten-free red velvet cake mix (King Arthur makes a good one). For a dairy-free version, swap the white chocolate chips for dairy-free white chocolate and use a dairy-free cake mix. The texture will be slightly different, but still delicious. In summer, I’ve even added a handful of fresh raspberries (chopped small) for a fun twist—just fold them in gently at the end.
Equipment Needed
You don’t need a fancy kitchen to pull these off, which is part of the beauty. Here’s what you’ll need:
- Large mixing bowl – Any medium-to-large bowl will work. I use my grandmother’s old ceramic one, but glass or stainless steel is fine.
- Electric mixer (hand or stand) – A hand mixer works perfectly. If you’re mixing by hand, just be prepared for a bit of arm work—the dough is thick.
- Rubber spatula – For scraping down the sides and folding in the chips.
- Baking sheets (2) – Light-colored aluminum sheets give the most even baking. Dark sheets can cause the bottoms to brown too fast.
- Parchment paper or silicone baking mat – Non-stick is essential here. These cookies are soft and can stick to bare pans.
- Cookie scoop (1.5 tablespoon size) – For evenly sized cookies. A regular spoon works, but the scoop makes them uniform and professional-looking.
- Cooling rack – Letting them cool completely on a rack prevents soggy bottoms.
- Small bowl – For the powdered sugar rolling station.
If you don’t have a cookie scoop, just use two spoons to drop rounded tablespoons of dough. And if you don’t have parchment paper, lightly grease your baking sheet with cooking spray—just watch the bottoms so they don’t burn.
Preparation Method
- Preheat your oven to 350°F (175°C). Line two baking sheets with parchment paper or silicone mats. This is non-negotiable—trust me, I learned the hard way when my first batch stuck like glue to an ungreased pan.
- In your large mixing bowl, combine the red velvet cake mix, eggs, and vegetable oil. Beat with an electric mixer on medium speed for about 2 minutes, until the dough is smooth and thick. It should be slightly sticky but hold together when pressed. Scrape down the sides of the bowl with your rubber spatula halfway through.
- Add the green food coloring. Start with 6 drops of gel coloring and mix on low. If the color isn’t vibrant enough, add 2-3 more drops. I usually end up using about 8 drops total. The dough should be a bright, Grinch-green—remember, it will lighten slightly as it bakes.
- Fold in the white chocolate chips and red velvet chips (if using). Use your rubber spatula for this. Don’t overmix—just fold until the chips are evenly distributed. You want chunks of chocolate in every bite.
- Chill the dough for 10 minutes. This is the step I almost skipped the first time, and my cookies spread into thin, crispy pancakes. Chilling firms up the butter (or oil) and prevents spreading. Cover the bowl with plastic wrap or a clean kitchen towel and pop it in the fridge.
- While the dough chills, pour the powdered sugar into a small bowl. You’ll use this for rolling. I like to sift it first to remove any lumps, but if you’re in a hurry, just give it a quick stir.
- Scoop the dough into rounded tablespoons (about 1.5 tablespoons each). Roll each ball between your palms to form a smooth sphere—this takes about 5 seconds per ball. Then roll each ball in the powdered sugar until fully coated. The sugar should stick generously; it creates that beautiful crackly top as the cookies bake.
- Place the dough balls on the prepared baking sheets, spacing them about 2 inches apart. They will spread a little, but not much. I fit 12 cookies per sheet.
- Bake for 8-10 minutes. The cookies are done when the edges are set and the tops look slightly cracked. The centers will still look soft and puffy—that’s perfect. Don’t overbake! They continue cooking on the hot pan after you pull them out. For softer cookies, bake for 8 minutes. For slightly firmer ones, go to 10.
- Let the cookies cool on the baking sheet for 5 minutes. This is crucial—they’re too delicate to move right away. After 5 minutes, transfer them to a wire cooling rack to cool completely. The powdered sugar will set into that gorgeous crackly top.
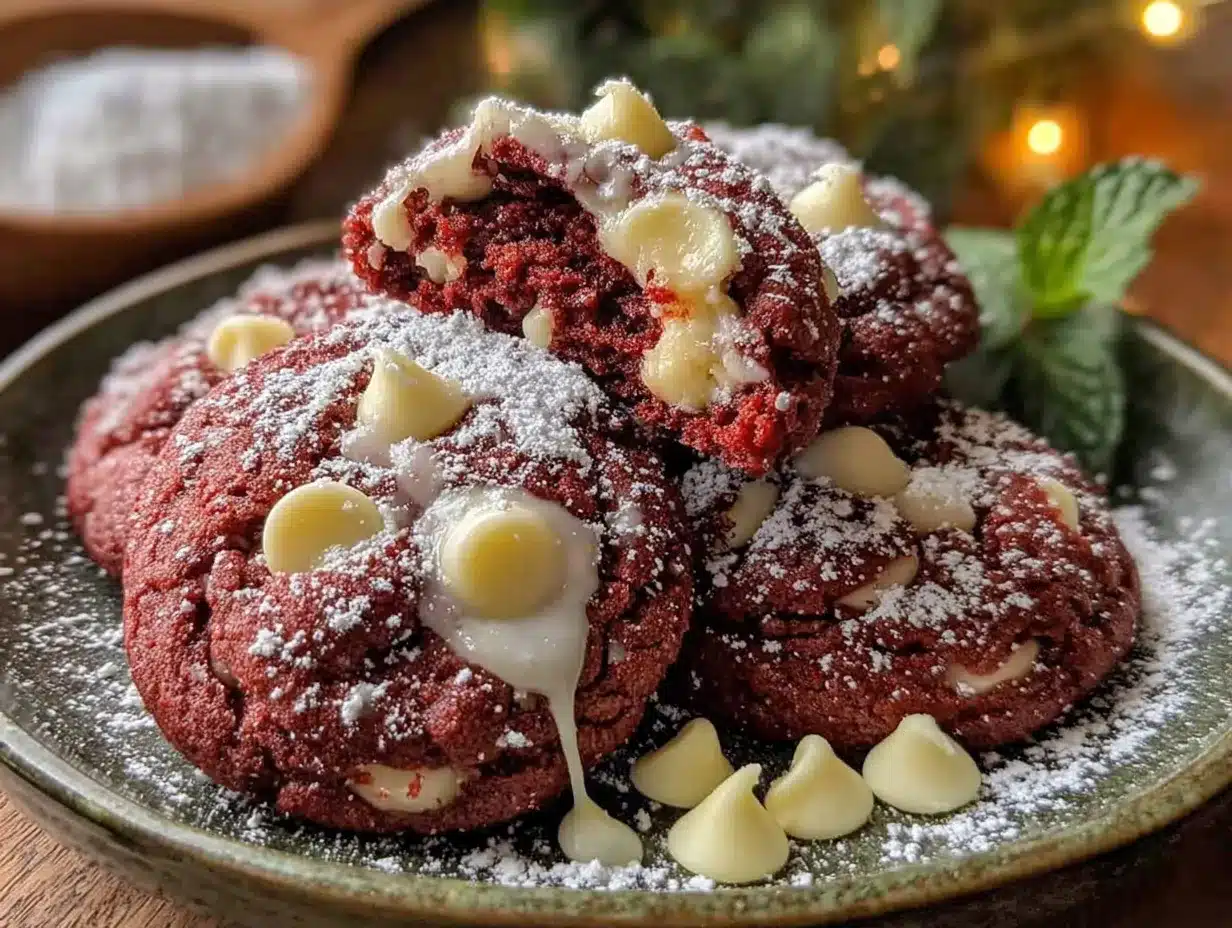
Sensory Cue: When they’re done, your kitchen will smell like a bakery—warm, buttery, with a hint of cocoa. The cookies should look bright green with little white and red flecks, and the tops should have a delicate, sugary crust. If you press one gently, it should spring back slightly. That’s how you know they’re perfect.
Cooking Tips & Techniques
I’ve made these cookies enough times to have a few battle scars—and a few hard-won lessons. Here’s what I’ve learned so you don’t have to make the same mistakes.
Don’t overmix the dough. I know it’s tempting to keep beating until everything is perfectly smooth, but overmixing develops the gluten and makes the cookies tough. Mix just until the ingredients come together, then stop. The first time I made these, I got distracted and mixed for an extra minute, and the cookies came out dense and chewy instead of soft and cakey.
Use gel food coloring, not liquid. Liquid coloring adds extra moisture to the dough, which can throw off the texture and make the cookies spread more. Gel coloring is concentrated, so you use less and get a more vibrant color. I learned this after my first batch turned out a sad, pale green that looked more like moss than the Grinch.
Chill the dough—no shortcuts. I know 10 minutes feels like forever when you’re hungry, but it makes a huge difference. The cold dough holds its shape in the oven, giving you thick, puffy cookies instead of flat discs. One time I skipped the chilling because I was in a rush, and I ended up with cookies that spread into each other. They still tasted good, but they weren’t pretty.
Rotate the baking sheets halfway through. If you’re baking two sheets at once, swap their positions (top to bottom, front to back) at the 5-minute mark. Ovens have hot spots, and this ensures even baking. I forgot to do this once, and one batch came out golden on the bottom while the other was barely done.
Let them cool on the pan. I know you want to eat them immediately—I do too. But moving them too soon can cause them to crumble or break. That 5-minute rest on the hot pan allows them to set without overbaking. Use that time to scoop the next batch or clean up your mixing bowl.
Variations & Adaptations
One of the best things about this recipe is how easy it is to tweak. Here are a few variations I’ve tried and loved:
- Peppermint Grinch Cookies: Add 1/2 teaspoon of peppermint extract along with the food coloring, and swap the white chocolate chips for crushed candy canes (about 1/2 cup). The minty crunch is amazing for Christmas. Just be careful—peppermint extract is strong, so don’t add more than 1/2 teaspoon.
- Gluten-Free Version: Use a gluten-free red velvet cake mix (I’ve had good luck with King Arthur’s). The texture will be slightly more crumbly, but the flavor is still spot-on. Add an extra tablespoon of oil to compensate for the drier mix.
- Vegan Adaptation: Replace the eggs with two flax eggs (2 tablespoons ground flaxseed mixed with 6 tablespoons water, let sit for 5 minutes) and use vegan white chocolate chips. The cookies will be a little denser but still delicious. I tried this for a friend’s holiday party and nobody even noticed the difference.
- Extra Chocolatey: Add 1/4 cup of mini chocolate chips along with the white chocolate chips. The double-chocolate effect is incredible—my kids beg for this version.
- Lemon Grinch Cookies: Use a lemon cake mix instead of red velvet, add green food coloring, and fold in white chocolate chips. The lemon-white chocolate combo is surprisingly good and perfect for spring or summer.
My personal favorite variation? The peppermint one. I made it last December for a cookie exchange, and I came home with an empty tin and three requests for the recipe. Something about that cool mint against the sweet white chocolate just works.
Serving & Storage Suggestions
These cookies are best served at room temperature, straight from the cooling rack. The powdered sugar top gives them a beautiful, bakery-style finish, so I like to arrange them on a festive platter or in a cookie tin lined with parchment paper. For Christmas, I’ll add a few sprigs of rosemary or cranberries around the plate for color.
They pair beautifully with a cold glass of milk (obviously), a hot cup of cocoa, or even a mug of strong coffee. The sweetness of the white chocolate balances well with a slightly bitter drink. My husband likes them with eggnog during the holidays—I have to admit, that combo is pretty great.
Storage: Keep these cookies in an airtight container at room temperature for up to 5 days. Layer them with parchment paper between each layer to prevent sticking. The powdered sugar may absorb a little moisture over time, but they’ll still taste fresh.
Freezing: These freeze beautifully. Place the cooled cookies in a single layer on a baking sheet and freeze for 1 hour, then transfer to a freezer-safe bag or container. They’ll keep for up to 3 months. To thaw, just leave them at room temperature for about 20 minutes. I’ve also frozen the unbaked dough balls—just scoop, roll in powdered sugar, and freeze on a sheet pan. Then pop the frozen dough balls into a bag and bake straight from frozen, adding 2 minutes to the bake time.
Reheating: If you want that just-baked warmth, pop a cookie in the microwave for 8-10 seconds. It softens the white chocolate chips and makes the cookie taste fresh from the oven. Don’t overdo it, or the sugar top can get sticky.
One thing I love about these cookies is that the flavors actually develop over time. Day two, they’re even softer and the white chocolate has mellowed into the dough. If you can resist eating them all on day one, you’re in for a treat.
Nutritional Information & Benefits
Let’s be real—these are a treat, not a health food. But here’s the approximate nutritional breakdown per cookie (based on 24 cookies):
| Nutrient | Amount per Cookie |
|---|---|
| Calories | 165 |
| Total Fat | 8g |
| Saturated Fat | 3g |
| Cholesterol | 18mg |
| Sodium | 210mg |
| Total Carbohydrates | 22g |
| Sugars | 14g |
| Protein | 2g |
On the plus side, red velvet cake mix contains a small amount of cocoa, which is rich in antioxidants. White chocolate chips provide a little calcium, and the eggs add protein. But honestly, I make these because they make people happy, not because they’re a superfood. Everything in moderation, right? If you’re looking for a slightly lighter option, you can use a sugar-free cake mix and sugar-free white chocolate chips—the texture will be a bit different, but the flavor is still there.
Potential allergens: These cookies contain wheat (gluten), dairy (white chocolate chips), and eggs. If you have allergies, check the cake mix label—some brands may contain soy or other allergens. The vegan and gluten-free variations above are great alternatives.
Conclusion
These Grinch cookies are more than just a pretty face. They’re the kind of recipe that makes you look like a baking superstar without spending hours in the kitchen. The soft, cakey texture, the brilliant green color, the sweet bursts of white chocolate—every bite is a little celebration. And the best part? You can make them with your kids, take them to a party, or just keep them all to yourself (no judgment here).
I love that this recipe came from a simple moment—a friend making cookies for a class party, not trying to impress anyone. That’s the kind of cooking I believe in: real food for real people, made with love and a little bit of luck. I hope you’ll try these and make them your own. Add extra chips, switch up the color, or double the batch—whatever feels right.
I’d love to hear how they turn out! Drop a comment below and let me know if your family loved them as much as mine does. Did you try a variation? Did your kids fight over the last one? Share your story—I read every comment and I’ll answer any questions you have. Happy baking, friends!
Frequently Asked Questions
Can I use a different cake mix flavor?
Absolutely! While red velvet gives that classic flavor and color, you can use vanilla, chocolate, or even lemon cake mix. Just adjust the food coloring accordingly—for a traditional Grinch look, you’ll want to add green coloring to any white or yellow cake mix.
Why did my cookies spread too much?
This usually happens if the dough wasn’t chilled long enough or if your baking sheet was too warm. Make sure to chill the dough for at least 10 minutes, and let your baking sheets cool completely between batches. Also, check that you’re using the right amount of cake mix—too much oil can cause spreading.
Can I make these cookies ahead of time?
Yes! You can bake them up to 5 days ahead and store them in an airtight container. Or, freeze the unbaked dough balls for up to 3 months. Bake from frozen, adding 2 minutes to the bake time. They’re perfect for holiday prep.
How do I get the cookies to be perfectly round?
After scooping the dough, roll each ball firmly between your palms until smooth. This creates a uniform shape that bakes into a round cookie. If they come out slightly irregular, you can gently nudge them into shape with a spoon while they’re still warm on the baking sheet.
Can I use natural food coloring instead of gel?
You can, but the color won’t be as vibrant. Liquid food coloring adds extra moisture, so you may need to add an extra tablespoon of cake mix to compensate. Start with 10-12 drops and adjust from there. Gel coloring is definitely the better choice for that bright, Grinch-green color.
Pin This Recipe!

Best Grinch Cookies with Red Velvet & White Chocolate Chips
These soft, cakey Grinch cookies are made with red velvet cake mix, white chocolate chips, and a vibrant green color. They’re quick, easy, and perfect for holiday baking or any occasion.
- Prep Time: 15 minutes
- Cook Time: 10 minutes
- Total Time: 25 minutes
- Yield: 24 cookies 1x
- Category: Dessert
- Cuisine: American
Ingredients
- 1 box (15.25 oz) red velvet cake mix (e.g., Duncan Hines or Betty Crocker)
- 2 large eggs, room temperature
- 1/3 cup vegetable oil (e.g., canola or avocado)
- 8–10 drops green food coloring (gel preferred, e.g., Wilton Leaf Green)
- 1 cup white chocolate chips (e.g., Ghirardelli or Toll House)
- 1/2 cup red velvet chips or red candy melts (optional)
- 1/4 cup powdered sugar (for rolling)
Instructions
- Preheat oven to 350°F (175°C). Line two baking sheets with parchment paper or silicone mats.
- In a large mixing bowl, combine red velvet cake mix, eggs, and vegetable oil. Beat with an electric mixer on medium speed for about 2 minutes until smooth and thick. Scrape down sides halfway through.
- Add green food coloring, starting with 6 drops of gel. Mix on low, adding 2-3 more drops if needed until dough is bright green (about 8 drops total).
- Fold in white chocolate chips and red velvet chips (if using) with a rubber spatula until evenly distributed. Do not overmix.
- Chill dough for 10 minutes. Cover bowl with plastic wrap or a towel and refrigerate.
- While dough chills, pour powdered sugar into a small bowl. Sift if desired.
- Scoop dough into rounded tablespoons (about 1.5 tablespoons each). Roll each ball between palms to form a smooth sphere, then roll in powdered sugar until fully coated.
- Place dough balls on prepared baking sheets, spacing 2 inches apart. Fit about 12 per sheet.
- Bake for 8-10 minutes. Edges should be set and tops slightly cracked; centers will look soft and puffy. Do not overbake.
- Let cookies cool on baking sheet for 5 minutes, then transfer to a wire cooling rack to cool completely.
Notes
Chilling the dough is essential to prevent spreading. Use gel food coloring for vibrant color. For softer cookies, bake 8 minutes; for firmer, bake 10. Cookies can be stored in an airtight container at room temperature for up to 5 days or frozen for up to 3 months.
Nutrition
- Serving Size: 1 cookie
- Calories: 165
- Sugar: 14
- Sodium: 210
- Fat: 8
- Saturated Fat: 3
- Carbohydrates: 22
- Protein: 2
Keywords: Grinch cookies, red velvet cookies, white chocolate chips, Christmas cookies, easy cookie recipe, cake mix cookies