The neighborhood potluck was in six hours and I’d completely forgotten. I mean, completely. I was standing in my kitchen at 2 PM on a Saturday, staring at a half-empty fridge, trying to remember what day it was. Everyone else would be bringing those elaborate dishes—the ones they’d probably started the night before. You know the type. I had a block of cheddar, some random cheese ends, a box of pasta, and about an hour before I needed to start getting ready. Honestly, panic doesn’t even cover it.
I grabbed the milk, found some butter that was still good, and started grating whatever cheese I could find. The cheddar was obvious, but I also had some mozzarella that was about to turn, a sad little wedge of Gruyère from a party last month, and a forgotten block of cream cheese in the back. It felt like a desperate move, not a recipe. I just threw it all together, hoping for the best, and tossed it in the oven while I frantically cleaned the kitchen. The timer went off, I pulled it out, and it looked… golden. Really golden.
At the potluck, I put my dish next to a fancy truffle mac that someone had clearly spent a whole day on. I almost apologized before anyone even tried mine. Then my neighbor, a guy named Tom who never says much, took a bite. He just closed his eyes for a second. That was it. The dish was gone in twenty minutes, and three different people asked me for the recipe. I had to admit I didn’t really have one—I just used whatever was in the fridge. That accidental, panicked creation is the exact recipe I’m sharing today. It’s the one I keep coming back to, not because it’s fancy, but because it works every single time.
Why You’ll Love This Recipe
Let me be real with you—I’ve tested a lot of mac and cheese recipes. Some were too dry, some were a gluey mess, and some just didn’t have enough flavor. This Wholesome Baked Four-Cheese Mac and Cheese is the one that finally stuck. It’s the recipe I developed after that potluck panic, tweaking it until it was just right. It’s been tested by my family, my picky neighbor Tom, and even a few friends who swear they don’t like “healthy” food. It passed every test.
- Quick & Easy: From start to table in under 45 minutes. Perfect for those nights when you need comfort food fast.
- Simple Ingredients: No weird processed cheese sauce packets here. You probably have most of these in your fridge right now.
- Perfect for Weeknights or Holidays: It’s fancy enough for a Christmas dinner table but simple enough for a Tuesday.
- Crowd-Pleaser: I’ve watched kids go back for thirds right next to adults who claimed they were “watching their carbs.” It’s that good.
- Unbelievably Delicious: The combination of four cheeses creates a depth of flavor that one cheese just can’t do. It’s creamy, it’s rich, and it has that perfect golden top.
What makes this different from every other recipe out there? It’s the method. Instead of a complicated béchamel that can break, we’re using a simple stovetop sauce that gets finished in the oven. The cream cheese is the secret weapon—it adds a silky texture and a slight tang that cuts through the richness. It’s not just another version of mac and cheese; it’s the version that makes you close your eyes after the first bite. It’s comfort food that feels indulgent but uses real, wholesome ingredients. No guilt, just pure satisfaction.
What Ingredients You Will Need
This recipe uses simple, wholesome ingredients to deliver that big, bold flavor without any fuss. Most of these are pantry staples or things you might already have on hand. Here’s what you’ll need to grab.
For the Pasta
- 1 pound (450g) elbow macaroni (or any short pasta like cavatappi or shells—I like Barilla for its texture)
For the Cheese Sauce
- 4 tablespoons (56g) unsalted butter (Kerrygold is my go-to for flavor)
- 1/4 cup (30g) all-purpose flour (spooned and leveled—don’t scoop from the bag)
- 3 cups (720ml) whole milk (warm, not cold—this prevents lumps)
- 1 cup (240ml) heavy cream (adds that extra richness, but half-and-half works too)
- 1 teaspoon salt (plus more for the pasta water)
- 1/2 teaspoon black pepper
- 1/2 teaspoon garlic powder
- 1/4 teaspoon smoked paprika (optional, but it adds a lovely warmth)
The Four Cheeses
- 2 cups (8 oz or 225g) sharp cheddar cheese, shredded (this is the backbone—use a good one like Cabot or Tillamook)
- 1 cup (4 oz or 115g) Gruyère cheese, shredded (it melts like a dream and adds nuttiness)
- 1 cup (4 oz or 115g) mozzarella cheese, shredded (for that perfect stretch)
- 4 oz (115g) cream cheese, softened (the secret ingredient for creaminess—use Philadelphia full-fat for best results)
For the Topping
- 1/2 cup (60g) panko breadcrumbs (they stay crunchier than regular breadcrumbs)
- 2 tablespoons (28g) unsalted butter, melted
- 1/4 cup (25g) grated Parmesan cheese (adds a salty, crispy finish)
Ingredient Tip: Shred your own cheese from blocks. The pre-shredded stuff has anti-caking agents that prevent it from melting smoothly. I learned this the hard way after a few gritty sauces. Also, for a lighter version, you can swap the heavy cream for evaporated milk—it’s still creamy but lower in fat.
Equipment Needed
You don’t need a lot of fancy gear for this one. Here’s what I use every time:
- Large pot (for boiling pasta—a 6-quart is perfect)
- Large skillet or saucepan (for making the cheese sauce—I use a 4-quart stainless steel one)
- 9×13-inch (3-quart) baking dish (glass or ceramic works best for even heating)
- Wooden spoon or silicone spatula (for stirring the sauce without scratching your pan)
- Box grater or food processor (for shredding cheese—honestly, a box grater is faster to clean)
- Small bowl (for mixing the topping)
- Whisk (to keep the sauce smooth and lump-free)
Budget Tip: If you don’t have a 9×13 dish, you can use a 10-inch cast-iron skillet. Just be careful—it’s heavy! I’ve also used a disposable aluminum pan for potlucks, and it works fine. For the whisk, a cheap dollar-store one does the job, but a balloon whisk makes it easier.
Preparation Method
Alright, let’s get cooking. This whole thing comes together in about 40 minutes. Here’s the step-by-step.
- Preheat your oven to 375°F (190°C). Get that going first so it’s ready. While it heats, bring a large pot of salted water to a boil. I use about a tablespoon of salt—it seasons the pasta from the inside out.
- Cook the pasta. Add the elbow macaroni and cook according to package directions until al dente. Usually 7-8 minutes. You want it firm because it will cook more in the oven. Drain it, but don’t rinse it—you want that starch to help the sauce stick. Set it aside.
- Start the cheese sauce. In a large skillet or saucepan over medium heat, melt the 4 tablespoons of butter. Once it’s bubbly, whisk in the flour. Cook this mixture, stirring constantly, for about 1-2 minutes. It should smell a little nutty and look like wet sand. This is your roux—don’t let it brown.
- Add the milk and cream. Slowly pour in the warm milk and heavy cream while whisking. Keep whisking until the mixture is smooth and starts to thicken, about 3-4 minutes. It should coat the back of a spoon. If you see lumps, just whisk harder—they’ll usually break up.
- Season the base. Stir in the salt, pepper, garlic powder, and smoked paprika. Taste it here—it should be slightly salty because the cheese will add more.
- Melt in the cheeses. Reduce the heat to low. Add the shredded cheddar, Gruyère, and mozzarella in handfuls, stirring after each addition until melted. Then add the softened cream cheese and stir until completely smooth. The sauce will be thick and glossy. Take it off the heat.
- Combine pasta and sauce. Pour the cooked pasta into the sauce and stir until every piece is coated. Don’t be shy—get in there with a spatula to make sure nothing is stuck at the bottom.
- Transfer to baking dish. Pour the mac and cheese into your greased 9×13 dish. Spread it into an even layer.
- Make the topping. In a small bowl, mix the panko breadcrumbs, melted butter, and grated Parmesan until the crumbs are all moist. Sprinkle this evenly over the top of the mac and cheese.
- Bake. Place the dish on the middle rack of your oven. Bake for 20-25 minutes, until the top is golden brown and the edges are bubbly. Let it rest for 5-10 minutes before serving—this lets the sauce set so it doesn’t turn into a soupy mess on the plate.
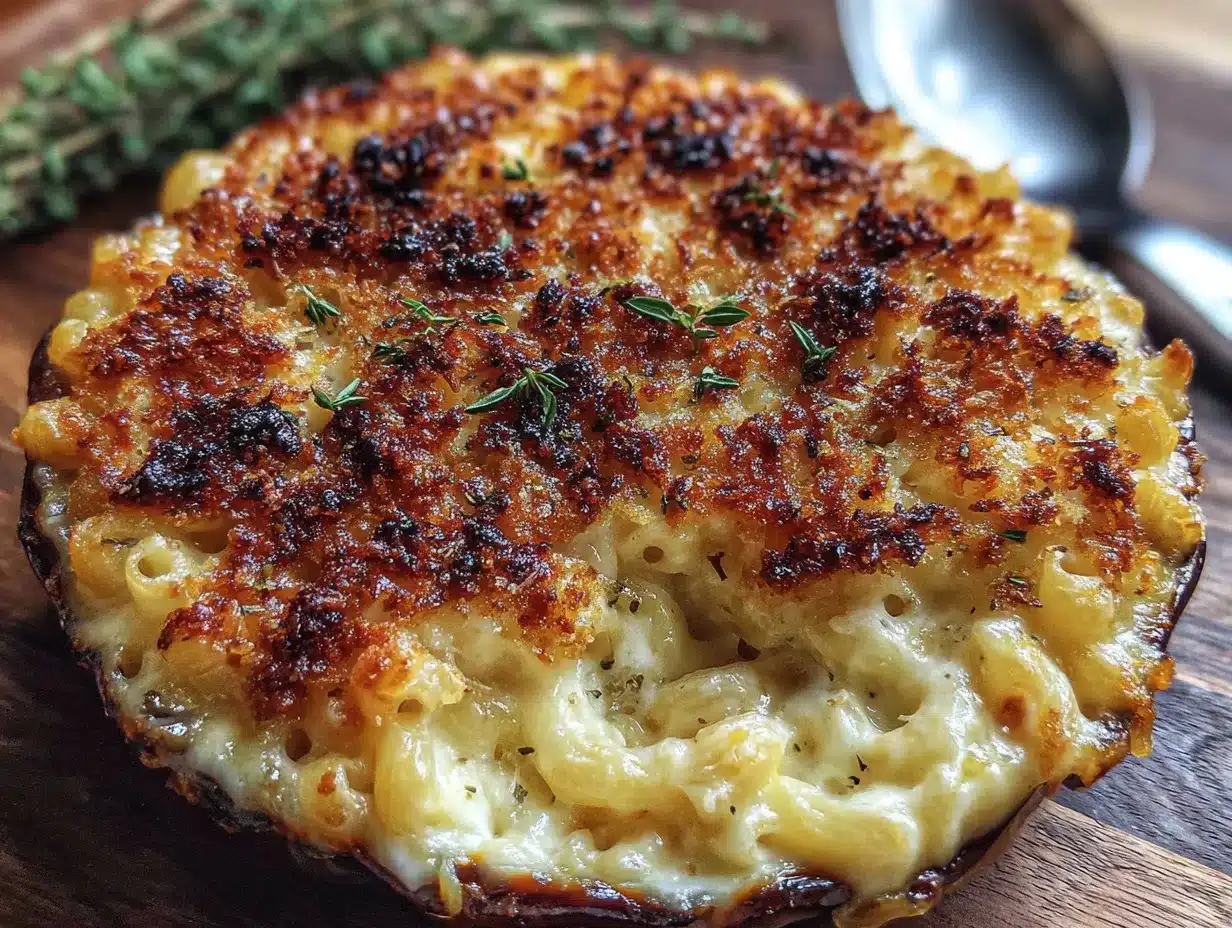
Sensory Cue: When it comes out of the oven, you should see the sauce bubbling around the edges, and the top will be a beautiful golden brown with darker spots from the cheese. The smell is ridiculous—buttery, cheesy, and a little smoky from the paprika.
Cooking Tips & Techniques
I’ve made this recipe more times than I can count, and I’ve definitely made some mistakes along the way. Here’s what I’ve learned so you don’t have to.
- Don’t overcook the pasta. I know it’s tempting to let it go a little longer, but al dente is key. Mushy pasta in baked mac and cheese is a tragedy. Trust me, I’ve been there.
- Warm your milk and cream. Cold liquid into a hot roux can cause lumps that are hard to whisk out. I just microwave the milk for about 45 seconds before adding it. Saves a headache.
- Low heat for melting cheese. If your heat is too high, the cheese can separate and turn greasy. Keep it on low and be patient. It’s worth those extra two minutes.
- Let it rest. I know it’s hard to wait, but that 10-minute rest is crucial. The sauce thickens up as it cools slightly. If you serve it right away, it will be runny. I learned this when I served it immediately for a dinner party and ended up with a puddle on everyone’s plate.
- Toast your breadcrumbs first. For an even crunchier topping, you can toast the panko in a dry skillet for 2-3 minutes before mixing with the butter. It’s a small step that makes a big difference.
- Double the recipe. If you’re feeding a crowd, this recipe doubles perfectly. Just use a larger dish or two 9×13 pans. I’ve done this for Thanksgiving, and it was the first empty dish on the table.
Variations & Adaptations
This recipe is a great base, but don’t be afraid to play with it. Here are some ways I’ve changed it up over the years.
- Gluten-Free Version: Swap the all-purpose flour for a 1:1 gluten-free flour blend, and use gluten-free pasta. The sauce might be a tad thinner, but it still works beautifully. I’ve done this for a friend with celiac, and she didn’t even notice the difference.
- Add Some Protein: Stir in 2 cups of cooked, shredded chicken or crispy bacon bits before baking. I once added leftover rotisserie chicken and broccoli, and it turned into a full meal. My kids called it “the good mac.”
- Spice It Up: Add 1/4 teaspoon of cayenne pepper or a diced jalapeño to the sauce for a kick. I did this on a whim one night, and my husband now requests it that way every time.
- Veggie Boost: Mix in 1 cup of steamed broccoli florets, sautéed mushrooms, or roasted butternut squash cubes. The squash blends right into the sauce and adds sweetness. It’s a sneaky way to get extra veggies in.
- Different Cheese Combos: Try using smoked gouda, fontina, or even a little blue cheese for a bolder flavor. I did a version with smoked gouda and bacon for a game day party, and it was gone in ten minutes.
Serving & Storage Suggestions
This mac and cheese is best served warm, right after that 10-minute rest. The top is crispy, the inside is creamy, and it’s just perfect. Here’s how to handle leftovers.
- Serving Temperature: Serve it hot, but not straight-from-the-oven hot—let it sit for those 5-10 minutes. It will be easier to scoop and won’t burn anyone’s mouth.
- What to Serve With: A simple green salad with a lemon vinaigrette cuts through the richness beautifully. I also love it with roasted vegetables like asparagus or Brussels sprouts. For a heartier meal, pair it with grilled chicken or meatloaf.
- Storage: Let any leftovers cool completely, then transfer to an airtight container. It will keep in the fridge for up to 4 days. The flavors actually get better after a day—the cheese sauce settles and becomes even creamier.
- Reheating: The oven is best. Place leftovers in a small baking dish, add a splash of milk, cover with foil, and bake at 350°F (175°C) for 15-20 minutes. The microwave works in a pinch, but it can make the pasta a little soft. If you use the microwave, do 30-second intervals and stir in between.
- Freezing: This mac and cheese freezes well for up to 3 months. Assemble it completely, but don’t bake it. Wrap the dish tightly in plastic wrap and then foil. When you’re ready, thaw it in the fridge overnight and bake as directed, adding 10-15 minutes to the time.
Nutritional Information & Benefits
I’m not a nutritionist, but I do care about what I put in my body. This recipe uses whole milk, real cheese, and butter—ingredients that are actually good for you in moderation. Here’s a rough estimate per serving (based on 8 servings).
- Calories: ~520
- Protein: 22g
- Fat: 32g
- Carbohydrates: 38g
- Fiber: 2g
- Sugar: 6g
Health Benefits: Cheese is a good source of calcium and protein, which are important for bone health and muscle repair. The milk adds vitamin D and B12. Using whole ingredients means you’re avoiding the preservatives and stabilizers found in boxed mixes. It’s comfort food you can feel good about eating. For a lighter option, you can use 2% milk and reduce the butter by a tablespoon—it still tastes amazing.
Dietary Notes: This recipe contains gluten and dairy. For a gluten-free version, see the variations section. It is not suitable for a vegan diet, but you could try a cashew-based cheese sauce for a plant-based alternative.
Conclusion
This Wholesome Baked Four-Cheese Mac and Cheese is more than just a recipe—it’s my go-to for everything from a quiet weeknight dinner to a holiday feast. It came from a moment of panic, but it turned into something I genuinely love making. It’s creamy, it’s cheesy, and it has that perfect crunchy top that makes everyone fight over the corner pieces.
I really hope you give this a try. Don’t be afraid to make it your own—swap the cheeses, add some veggies, or throw in some bacon. The base is solid, and it’s meant to be played with. When you make it, I’d love to hear how it turned out. Leave a comment below and tell me what variations you tried. Did you add broccoli? Did you use smoked gouda? I want to know! And if you loved it, share it with a friend who needs a little comfort food in their life. Happy cooking, friend—you’ve got this.
Frequently Asked Questions
Can I use pre-shredded cheese for this recipe?
You can, but I really don’t recommend it. Pre-shredded cheese has anti-caking agents like cellulose that stop it from melting smoothly. Your sauce might turn out a little grainy. Shredding your own cheese from a block takes five extra minutes and makes a huge difference in texture.
Can I make this mac and cheese ahead of time?
Absolutely. You can assemble the whole dish (without the topping) up to 24 hours in advance. Cover it and keep it in the fridge. When you’re ready to bake, add the topping and bake for 30-35 minutes since it will be starting from cold.
Why did my cheese sauce turn out lumpy?
Lumpy sauce usually happens for two reasons. Either the milk was too cold when you added it to the roux, or the heat was too high. Next time, warm your milk first and keep the heat on low when you add the cheese. A good whisking can usually fix small lumps.
How do I get a super crispy topping?
For the crunchiest top, toast your panko breadcrumbs in a dry skillet for 2-3 minutes before mixing them with the butter. You can also broil the mac and cheese for the last 2 minutes of baking—just watch it closely so it doesn’t burn.
Can I freeze this mac and cheese?
Yes! It freezes beautifully. Assemble the mac and cheese completely, but don’t bake it. Wrap the dish tightly in plastic wrap and then foil. Freeze for up to 3 months. To bake, thaw it in the fridge overnight, then bake as directed, adding 10-15 minutes to the cooking time.
Pin This Recipe!
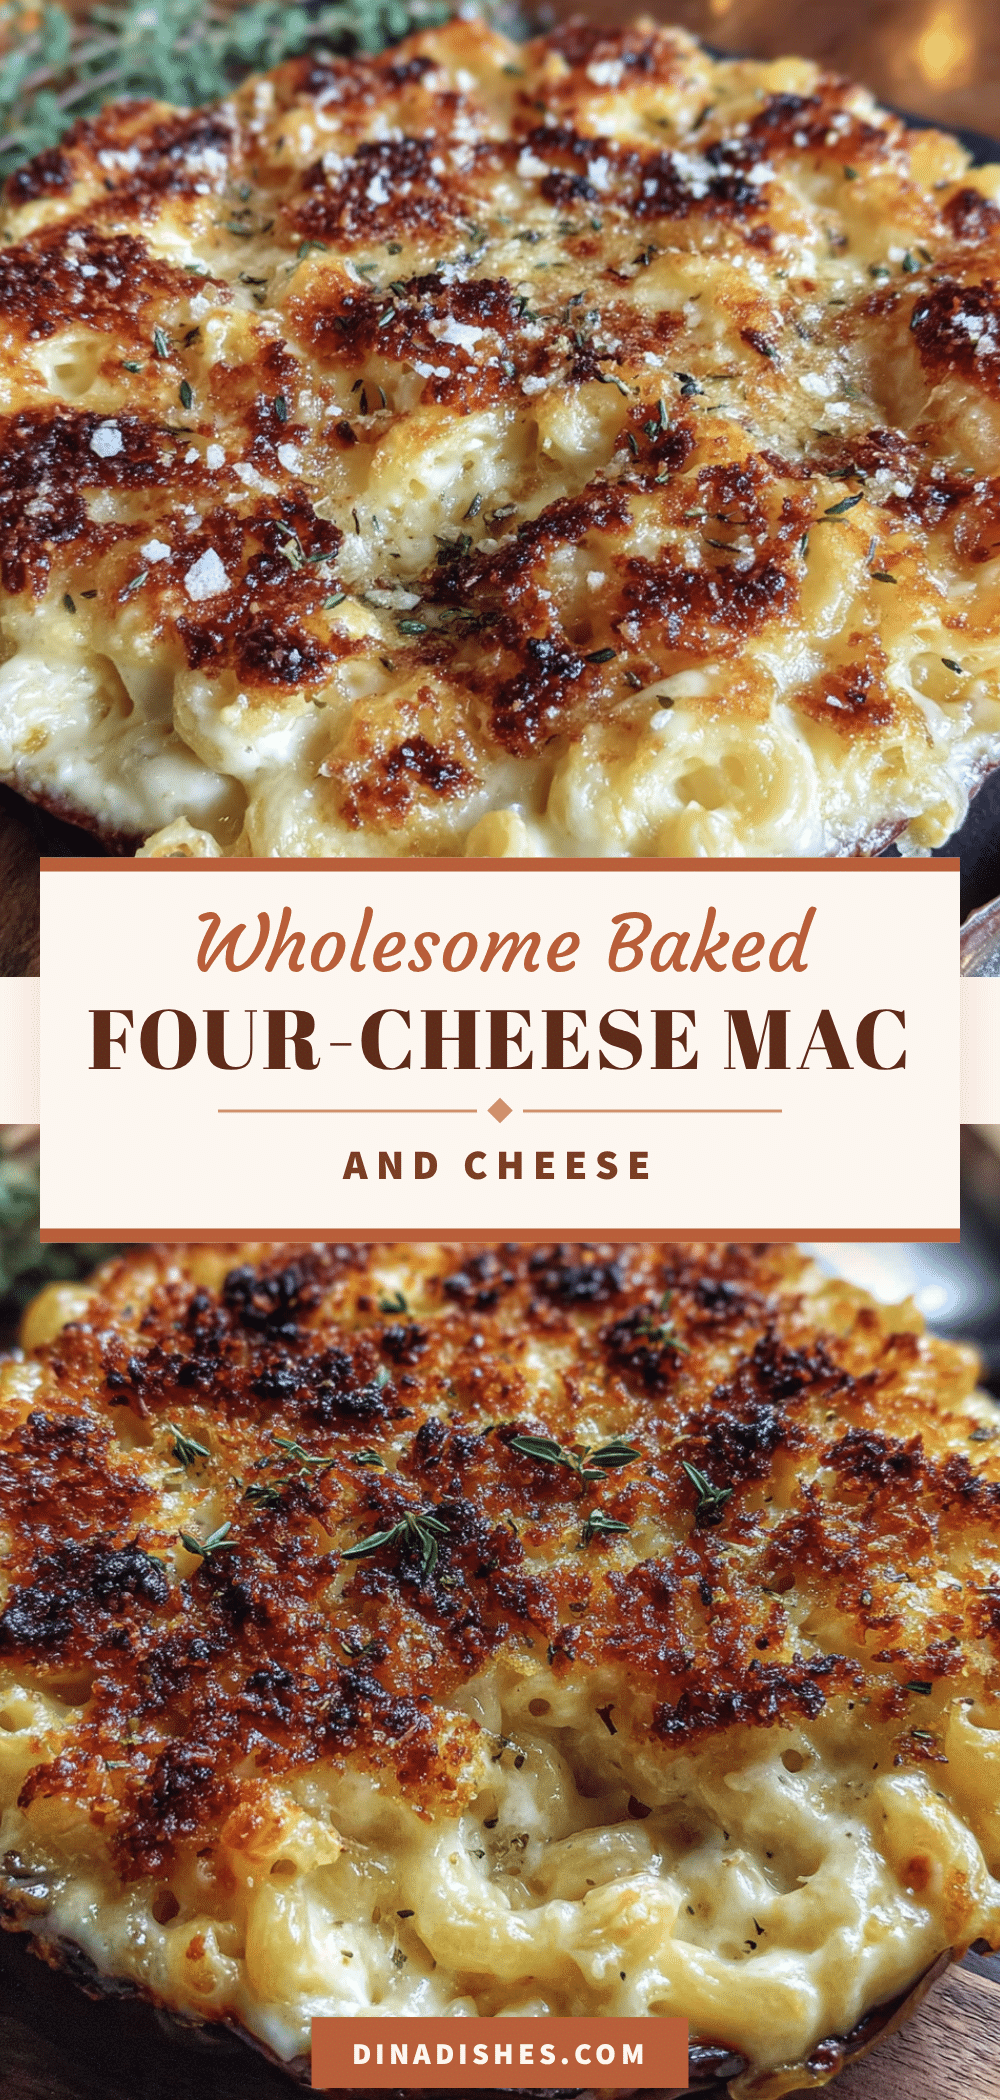
Wholesome Baked Four-Cheese Mac and Cheese: Easy Homemade

This Wholesome Baked Four-Cheese Mac and Cheese is the ultimate comfort food, born from a moment of panic but perfected into a creamy, cheesy, and crowd-pleasing dish. With a simple stovetop sauce and a golden, crunchy panko topping, it’s ready in under 45 minutes and uses real, wholesome ingredients.
- Prep Time: 15 minutes
- Cook Time: 30 minutes
- Total Time: 45 minutes
- Yield: 8 servings 1x
- Category: Main Course
- Cuisine: American
Ingredients
- 1 pound (450g) elbow macaroni (or any short pasta like cavatappi or shells)
- 4 tablespoons (56g) unsalted butter
- 1/4 cup (30g) all-purpose flour
- 3 cups (720ml) whole milk, warm
- 1 cup (240ml) heavy cream
- 1 teaspoon salt
- 1/2 teaspoon black pepper
- 1/2 teaspoon garlic powder
- 1/4 teaspoon smoked paprika (optional)
- 2 cups (8 oz or 225g) sharp cheddar cheese, shredded
- 1 cup (4 oz or 115g) Gruyère cheese, shredded
- 1 cup (4 oz or 115g) mozzarella cheese, shredded
- 4 oz (115g) cream cheese, softened
- 1/2 cup (60g) panko breadcrumbs
- 2 tablespoons (28g) unsalted butter, melted
- 1/4 cup (25g) grated Parmesan cheese
Instructions
- Preheat your oven to 375°F (190°C). Bring a large pot of salted water to a boil.
- Cook the elbow macaroni according to package directions until al dente (about 7-8 minutes). Drain, but do not rinse. Set aside.
- In a large skillet or saucepan over medium heat, melt the 4 tablespoons of butter. Whisk in the flour and cook, stirring constantly, for 1-2 minutes until it smells nutty and looks like wet sand (do not let it brown).
- Slowly pour in the warm milk and heavy cream while whisking. Continue whisking until the mixture is smooth and thickens, about 3-4 minutes, until it coats the back of a spoon.
- Stir in the salt, pepper, garlic powder, and smoked paprika. Taste and adjust seasoning if needed.
- Reduce heat to low. Add the shredded cheddar, Gruyère, and mozzarella in handfuls, stirring after each addition until melted. Then add the softened cream cheese and stir until completely smooth. Remove from heat.
- Pour the cooked pasta into the sauce and stir until every piece is evenly coated.
- Transfer the mac and cheese to a greased 9×13-inch (3-quart) baking dish and spread into an even layer.
- In a small bowl, mix the panko breadcrumbs, melted butter, and grated Parmesan until the crumbs are moist. Sprinkle evenly over the top.
- Bake on the middle rack for 20-25 minutes, until the top is golden brown and the edges are bubbly. Let rest for 5-10 minutes before serving.
Notes
Shred your own cheese from blocks for the smoothest sauce. Warm the milk and cream before adding to the roux to prevent lumps. Let the mac and cheese rest for 5-10 minutes after baking to allow the sauce to set. For a gluten-free version, use a 1:1 gluten-free flour blend and gluten-free pasta. To make ahead, assemble without the topping, cover, and refrigerate for up to 24 hours; add topping and bake for 30-35 minutes. Freezes well for up to 3 months (assemble but do not bake, wrap tightly, thaw overnight, then bake with extra time).
Nutrition
- Serving Size: 1 serving (about 1 c
- Calories: 520
- Sugar: 6
- Sodium: 680
- Fat: 32
- Saturated Fat: 18
- Carbohydrates: 38
- Fiber: 2
- Protein: 22
Keywords: baked mac and cheese, four cheese mac and cheese, homemade mac and cheese, easy mac and cheese, comfort food, creamy mac and cheese, panko topping