It was 11:47 PM on a random Wednesday in October, and I had a desperate need to make a pie. Not just any pie—a pumpkin pie. But here’s the thing about late-night baking: you don’t have what you think you have. I was certain there was a standard pie crust in the freezer, but when I opened the door, all I found was a bag of pecans, some butter, and a block of cream cheese staring back at me like they were daring me to make it work.
The craving was specific. I wanted that silky, spiced pumpkin filling—the kind that wobbles just right when you cut into it. But I also wanted something crunchy, something salty to cut through all that sweetness. So I grabbed the pecans, crushed them with the bottom of a measuring cup (my rolling pin was buried somewhere behind the slow cooker), and mixed them with butter and a pinch of salt. I pressed it into the pan with my fingers, thinking, “This is either going to be genius or a complete disaster.”
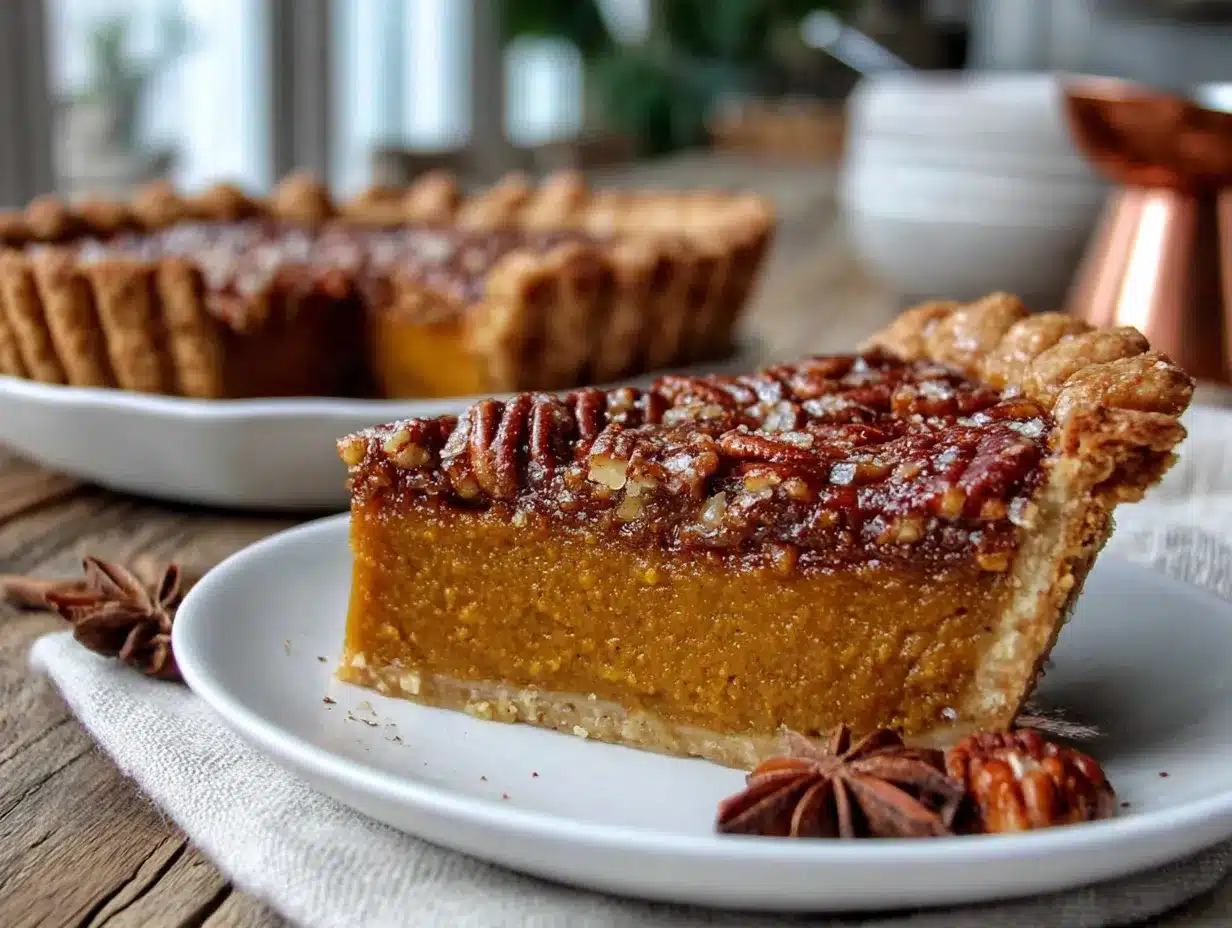
Honestly, I forgot to pre-bake the crust. I was so tired I just poured the filling right in and hoped for the best. When it came out of the oven, the kitchen smelled like Thanksgiving had exploded—warm cinnamon, nutmeg, and toasted nuts. The crust held together perfectly, and that salty-sweet combo? Let me tell you, I almost ate the whole thing standing over the counter at midnight. That’s how this Classic Pumpkin Pie with Easy Salted Pecan Crust was born. It’s the pie I make every fall now, and I think you’re going to love it too.
Why You’ll Love This Recipe
I’ve tested this pumpkin pie more times than I care to admit. I’ve made it with store-bought crust, with homemade pastry, with gluten-free flour—you name it. But this version with the salted pecan crust? It’s the one that gets requested every single year. Here’s why it works so well:
- Quick & Easy : The crust comes together in under 10 minutes with just three ingredients. No chilling, no rolling, no fuss.
- Simple Ingredients : You probably have most of these in your pantry right now. Canned pumpkin, eggs, spices, and that bag of pecans you bought for holiday baking.
- Perfect for Thanksgiving : This pie is made for the holiday table. It travels well, slices cleanly, and looks gorgeous with a dollop of whipped cream.
- Crowd-Pleaser : I brought this to a Friendsgiving last year, and someone asked for the recipe before they even finished their first slice. The salty-sweet thing just works on everyone.
- Unbelievably Delicious : The pecan crust adds this incredible crunch and toasty flavor that regular pastry just can’t match. Plus, the salt cuts through the sweetness of the filling perfectly.
What makes this recipe different from all the other pumpkin pies out there is that crust. It’s not just a gimmick—it actually makes the pie better. The nuts toast as they bake, releasing oils that soak into the filling just a little bit around the edges. It’s the kind of detail that makes people close their eyes after the first bite. I’m not kidding.
This is comfort food reimagined. It’s still that classic pumpkin pie you grew up loving, but with a texture and flavor that feels special. It’s perfect for impressing guests without spending all day in the kitchen. And honestly? It’s the pie that made me stop buying pre-made crusts forever.
What Ingredients You Will Need
This recipe uses simple, wholesome ingredients to deliver that classic pumpkin pie flavor with an unforgettable crunch. Most of these are pantry staples, which makes this pie perfect for last-minute holiday baking or a random Wednesday night craving.
For the Salted Pecan Crust
- 1 ½ cups pecan halves (use raw, unsalted pecans for best control over salt level)
- 3 tablespoons unsalted butter, melted (I prefer Kerrygold for its rich flavor)
- ½ teaspoon flaky sea salt (Maldon is my go-to, but any flaky salt works)
- 2 tablespoons granulated sugar (optional—adds a hint of sweetness to balance the salt)
For the Pumpkin Filling
- 1 can (15 oz) pumpkin puree (not pumpkin pie filling—make sure it’s 100% pumpkin. Libby’s is my favorite brand for consistent texture)
- 1 can (14 oz) sweetened condensed milk (this gives the filling that silky, creamy texture without extra work)
- 2 large eggs, room temperature (cold eggs can make the filling lumpy)
- 1 teaspoon vanilla extract (pure, not imitation, if you have it)
- 1 ½ teaspoons ground cinnamon
- ½ teaspoon ground ginger
- ½ teaspoon ground nutmeg (freshly grated if you’re feeling fancy)
- ¼ teaspoon ground cloves
- ¼ teaspoon salt
Substitution Guidance
For a dairy-free version, use coconut oil instead of butter in the crust and full-fat coconut milk in place of the sweetened condensed milk (you’ll need to add ⅓ cup sugar to compensate). If you’re out of pecans, walnuts work beautifully here too—just note they have a slightly more bitter edge. For a gluten-free option, this recipe is naturally gluten-free as written since there’s no flour in the crust.
I’ve also tried this with a mix of pecans and almonds, and it was fantastic. The almonds add even more crunch, though the flavor is a bit milder. If you’re buying pecans specifically for this, look for ones that smell fresh and nutty—rancid pecans will ruin the whole pie.
Equipment Needed
- 9-inch pie dish (glass or ceramic works best—metal can get too hot and burn the crust)
- Food processor (for grinding the pecans into a coarse meal. If you don’t have one, a rolling pin and a sturdy bag will do the job)
- Mixing bowls (one large, one medium)
- Whisk (for smoothing out the filling)
- Measuring cups and spoons
- Spatula (for scraping every last bit of filling into the crust)
- Cooling rack (essential for even cooling—don’t skip this)
I’ve made this pie with a cheap food processor from a garage sale, and it worked just fine. If you’re grinding the pecans by hand, put them in a ziplock bag, wrap it in a kitchen towel, and go to town with a rolling pin. It takes about 5 minutes and is surprisingly satisfying. Just don’t overdo it—you want some texture, not pecan dust.
Preparation Method
- Preheat your oven to 350°F (175°C). Position a rack in the middle of the oven. While it’s heating, start on the crust.
- Make the pecan crust. Add the pecan halves to your food processor and pulse until they’re finely ground but still have some texture—think coarse sand. You don’t want pecan butter here, so keep an eye on it. Transfer the ground pecans to a medium bowl. Add the melted butter, salt, and sugar (if using). Stir until everything is well combined and the mixture holds together when you press it between your fingers.
- Press the crust into the pie dish. Dump the pecan mixture into your 9-inch pie dish. Using your fingers and the bottom of a measuring cup, press it firmly into the bottom and up the sides. Try to make it even—about ¼ inch thick. Don’t worry if the edges are a little rustic; that’s part of the charm. Place the crust in the refrigerator while you make the filling (this helps it set up).
- Make the pumpkin filling. In a large bowl, whisk together the pumpkin puree and sweetened condensed milk until smooth. Add the eggs one at a time, whisking well after each addition. Stir in the vanilla extract.
- Add the spices. In a small bowl, combine the cinnamon, ginger, nutmeg, cloves, and salt. Sprinkle this over the pumpkin mixture and whisk until everything is evenly incorporated. The filling should be smooth, thick, and a beautiful warm orange color.
- Assemble the pie. Remove the crust from the refrigerator. Pour the filling into the crust, spreading it evenly with a spatula. The filling should come almost to the top of the crust.
- Bake the pie. Place the pie on the middle rack of your preheated oven. Bake for 50-60 minutes, or until the edges are set and the center still jiggles slightly when you gently shake the pan. A knife inserted about 1 inch from the edge should come out clean. The center will continue to set as it cools.
- Cool completely. Transfer the pie to a cooling rack and let it cool to room temperature, about 2 hours. Don’t rush this—if you cut into it while it’s warm, the filling will be runny. Once cooled, you can serve it immediately or refrigerate it for later.
Pro tip: If the edges of the crust start browning too quickly, loosely cover them with strips of aluminum foil or a pie shield ring. I forgot to do this once and ended up with slightly burnt edges—still delicious, but not as pretty.
Cooking Tips & Techniques
I’ve made this pie maybe a dozen times now, and I’ve learned a few things the hard way. First, don’t over-process the pecans. I made that mistake once—got distracted by a phone call—and ended up with pecan butter that wouldn’t hold together. You want visible bits of pecan in there. It’s what gives the crust that amazing texture.
Another thing: let your eggs come to room temperature. Cold eggs can seize up the filling and create little lumps that won’t smooth out no matter how much you whisk. I usually take mine out of the fridge about 30 minutes before I start baking. If I forget, I put them in a bowl of warm water for 5 minutes.
Here’s something nobody tells you about pumpkin pie: the filling will puff up in the oven and then settle as it cools. Don’t panic if it looks like it’s going to overflow. It won’t. And whatever you do, don’t open the oven door in the first 30 minutes of baking. The temperature drop can cause the filling to crack.
For the most even bake, I like to rotate the pie halfway through. My oven has a hot spot in the back right corner, so this step is non-negotiable for me. If you’ve never tested your oven for hot spots, now’s the time. Just put a tray of bread slices on the rack and see which ones toast faster.
One last thing: let the pie cool completely before slicing. I know it’s hard to wait, but a warm pumpkin pie is a runny pumpkin pie. Trust me on this. I’ve served warm pie to guests before, and while nobody complained, the slices were definitely not Instagram-worthy.
Variations & Adaptations
This recipe is pretty forgiving, so feel free to make it your own. Here are some variations I’ve tried and loved:
Maple Pecan Crust
Swap the granulated sugar in the crust for 2 tablespoons of maple syrup. It adds a deeper, more complex sweetness that pairs beautifully with the pumpkin. Just reduce the melted butter slightly to account for the extra liquid.
Spiced Pumpkin Filling
Add ¼ teaspoon of cardamom and a pinch of black pepper to the spice mix. The cardamom adds a floral note, and the pepper gives a subtle warmth that most people can’t quite identify but love. I tried this after reading about it in an old cookbook, and it’s become my go-to.
Dairy-Free Version
Use coconut oil instead of butter in the crust and full-fat coconut milk in place of the sweetened condensed milk. You’ll need to add about ⅓ cup of sugar to the filling to make up for the lost sweetness. The texture is slightly less creamy but still delicious.
Gluten-Free Option
This recipe is naturally gluten-free since there’s no flour in the crust. Just make sure your vanilla extract and spices are certified gluten-free if that’s a concern for you.
Chocolate-Pecan Crust
Add 2 tablespoons of cocoa powder to the pecan mixture before pressing it into the pan. The chocolate adds a rich, almost mocha-like flavor that’s incredible with the pumpkin. I made this for a Halloween party once, and it disappeared in minutes.
Serving & Storage Suggestions
This pie is best served at room temperature or slightly chilled. I personally prefer it cold—the filling firms up beautifully and the crust stays crunchy. A dollop of lightly sweetened whipped cream is the classic choice, but I’ve also served it with a scoop of vanilla ice cream and a drizzle of caramel sauce. Both are fantastic.
For storage, cover the pie loosely with plastic wrap or aluminum foil and keep it in the refrigerator. It will stay fresh for up to 4 days. The crust will soften slightly over time, but it still tastes amazing. I actually think the flavors meld together even more after a day in the fridge.
To reheat, pop individual slices in a 300°F oven for about 10 minutes. This warms the filling without melting the crust. I don’t recommend microwaving—it makes the crust soggy and the filling rubbery.
This pie also freezes beautifully. Wrap it tightly in plastic wrap, then a layer of foil, and freeze for up to 3 months. Thaw overnight in the refrigerator before serving. I’ve done this for Thanksgiving prep, and nobody could tell it wasn’t fresh-baked.
If you’re serving this at a holiday gathering, make it a day ahead. The extra time in the fridge actually improves the texture and makes slicing much cleaner. Plus, it’s one less thing to worry about on the big day.
Nutritional Information & Benefits
Per slice (based on 8 servings): approximately 380 calories, 22g fat, 42g carbohydrates, 7g protein, 3g fiber, 28g sugar. These are estimates and will vary based on specific ingredients and serving size.
Pumpkin is packed with vitamin A—one serving provides over 200% of your daily needs. It’s also a good source of fiber and potassium. The pecans add healthy fats and magnesium, which is great for muscle function and sleep quality. So while this is definitely a treat, it’s not completely without nutritional merit.
If you’re watching your sugar intake, you can reduce the sweetened condensed milk by a quarter cup and add an extra egg to maintain the texture. The pie won’t be as sweet, but the spices and salty crust will still make it satisfying.
This recipe is naturally gluten-free and can be made dairy-free with the substitutions listed above. It contains nuts and eggs, so keep that in mind if you’re serving someone with allergies.
FAQs
Can I use homemade pumpkin puree instead of canned?
Absolutely. Just make sure to strain it well—homemade pumpkin tends to be more watery than canned. Spread the puree on a paper towel-lined plate for about 15 minutes to remove excess moisture before using.
Why did my crust fall apart?
Probably not enough butter. The pecan mixture should hold together when pressed. If it’s too crumbly, add another tablespoon of melted butter and stir again. Also, make sure you’re pressing it firmly into the pan—really pack it down.
Can I make this pie ahead of time?
Yes! This pie actually tastes better the next day. Make it up to 2 days in advance, keep it covered in the fridge, and serve cold or at room temperature.
How do I know when the pie is done?
The edges should be set and slightly puffed, while the center should jiggle just a little when you shake the pan. A knife inserted about an inch from the edge should come out clean. The center will continue to set as it cools.
Can I use a different nut for the crust?
Walnuts are the best substitute—they have a similar fat content and toast up nicely. Almonds work too, but they’re harder and may need a few extra pulses in the food processor. Avoid using macadamia nuts; they’re too oily and won’t hold together.
Conclusion
This Classic Pumpkin Pie with Easy Salted Pecan Crust is the kind of recipe that feels both familiar and new at the same time. It’s still the pumpkin pie you know and love, but that salty, crunchy crust takes it to a whole other level. I’ve made it for Thanksgiving, for random fall dinners, and for that one late night when I just couldn’t sleep without a slice of pie.
What I love most about this recipe is how forgiving it is. The crust doesn’t require any special skills, the filling comes together in one bowl, and the result is always impressive. It’s the kind of pie that makes people think you spent hours in the kitchen when really, you just threw some pecans in a food processor and called it a day.
I’d love to hear how yours turns out! Leave a comment below and let me know if you tried any variations—I’m always looking for new ideas. And if you share it on social media, tag me so I can see your beautiful pie. Happy baking, friends!
Pin This Recipe!
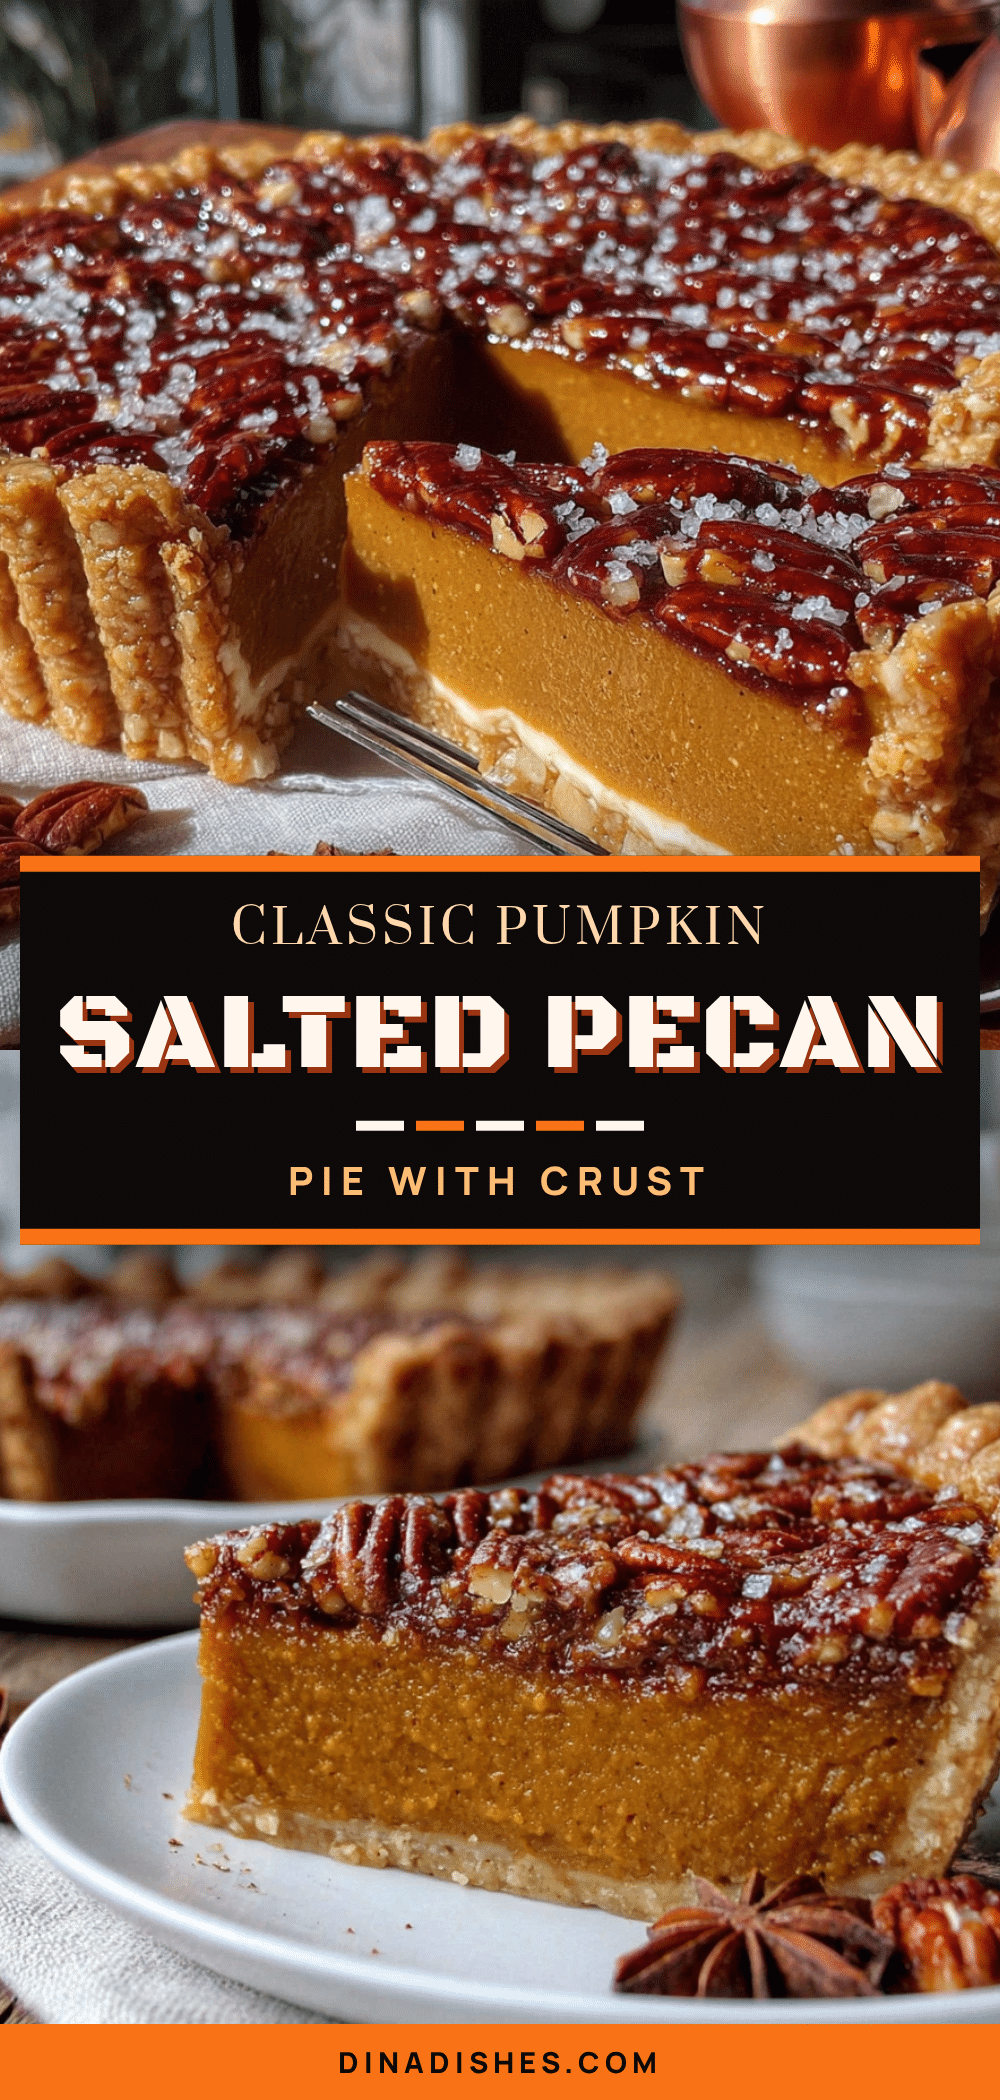
Classic Pumpkin Pie with Easy Salted Pecan Crust
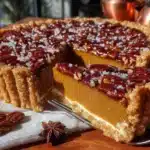
A classic pumpkin pie with a crunchy, salty pecan crust that adds incredible texture and flavor. Perfect for Thanksgiving or any fall gathering, this easy recipe comes together quickly with simple ingredients.
- Prep Time: 15 minutes
- Cook Time: 55 minutes
- Total Time: 2 hours 10 minutes (including cooling)
- Yield: 8 servings 1x
- Category: Dessert
- Cuisine: American
Ingredients
- 1 ½ cups pecan halves (raw, unsalted)
- 3 tablespoons unsalted butter, melted
- ½ teaspoon flaky sea salt
- 2 tablespoons granulated sugar (optional)
- 1 can (15 oz) pumpkin puree (100% pumpkin)
- 1 can (14 oz) sweetened condensed milk
- 2 large eggs, room temperature
- 1 teaspoon vanilla extract (pure)
- 1 ½ teaspoons ground cinnamon
- ½ teaspoon ground ginger
- ½ teaspoon ground nutmeg
- ¼ teaspoon ground cloves
- ¼ teaspoon salt
Instructions
- Preheat your oven to 350°F (175°C). Position a rack in the middle of the oven.
- Make the pecan crust: Add the pecan halves to your food processor and pulse until they’re finely ground but still have some texture—think coarse sand. Transfer to a medium bowl. Add the melted butter, salt, and sugar (if using). Stir until well combined and the mixture holds together when pressed.
- Press the crust into the pie dish: Dump the pecan mixture into a 9-inch pie dish. Using your fingers and the bottom of a measuring cup, press it firmly into the bottom and up the sides, about ¼ inch thick. Place the crust in the refrigerator while you make the filling.
- Make the pumpkin filling: In a large bowl, whisk together the pumpkin puree and sweetened condensed milk until smooth. Add the eggs one at a time, whisking well after each addition. Stir in the vanilla extract.
- Add the spices: In a small bowl, combine the cinnamon, ginger, nutmeg, cloves, and salt. Sprinkle over the pumpkin mixture and whisk until evenly incorporated.
- Assemble the pie: Remove the crust from the refrigerator. Pour the filling into the crust, spreading it evenly with a spatula.
- Bake the pie: Place the pie on the middle rack and bake for 50-60 minutes, until the edges are set and the center still jiggles slightly when shaken. A knife inserted about 1 inch from the edge should come out clean.
- Cool completely: Transfer the pie to a cooling rack and let it cool to room temperature, about 2 hours. Serve immediately or refrigerate for later.
Notes
If the edges of the crust start browning too quickly, loosely cover them with strips of aluminum foil or a pie shield ring. Let the pie cool completely before slicing to avoid runny filling. For best results, make a day ahead and refrigerate.
Nutrition
- Serving Size: 1 slice (1/8 of pie)
- Calories: 380
- Sugar: 28
- Sodium: 320
- Fat: 22
- Saturated Fat: 8
- Carbohydrates: 42
- Fiber: 3
- Protein: 7
Keywords: pumpkin pie, pecan crust, salted pecan, Thanksgiving dessert, fall baking, easy pie recipe