The woman at the antique shop looked like she hadn’t smiled in a decade. I was just killing time between errands, running my fingers along a row of dusty canning jars, when she suddenly spoke up from behind the counter. “You know what that shelf needs?” she asked, not waiting for my answer. “A bowl of my pumpkin seeds. The smoky kind.” I blinked at her—this tiny, no-nonsense woman with flour on her sleeve and a no-fuss attitude. She told me her name was Margaret, and she’d been selling vintage Pyrex for thirty years, but what she really wanted to talk about was how to make pumpkin seeds that actually stay crispy. Not chewy. Not burnt. Crispy. Honestly, I almost walked out. But something about the way she said “smoky” made me stop and listen.
She scribbled the method on a scrap of brown paper bag—I still have it tucked in my recipe box. Margaret’s trick wasn’t complicated, but it was specific. She insisted on boiling the seeds first, then tossing them with a touch of liquid smoke and flaky sea salt before roasting low and slow. “Most people rush it,” she grumbled, “and then they wonder why their seeds taste like cardboard.” I took her advice home, made a batch that very afternoon, and let me tell you—I nearly ate the whole bowl standing over the counter. The crunch was perfect. The smoky salt clung to every crevice. Maybe you’ve been there, buying a bag of pumpkin seeds from the store and feeling a little let down. I know I had. But these crispy smoky sea salt pumpkin seeds? They changed everything.
I’ve been making Margaret’s version every fall since that day. It’s become my go-to snack for football games, cozy movie nights, and honestly, just Tuesday afternoons when I need a salty crunch. The best part is how simple it is—you probably have most of the ingredients in your pantry right now. And the smell? Oh, the smell. It fills your whole kitchen with this warm, toasty, campfire-like aroma that makes everyone wander in asking what you’re baking. I keep coming back to this recipe because it’s one of those rare things that feels both rustic and refined. It’s proof that the best recipes often come from the most unexpected places.
Why You’ll Love This Recipe
Let me be honest with you—I’ve tested a lot of pumpkin seed recipes over the years. Some were too oily. Some were so bland I wondered why I bothered. Others burned before they even had a chance to crisp up. But this recipe? It’s the one I keep coming back to, and I think you’ll feel the same way. Here’s why these crispy smoky sea salt pumpkin seeds stand out from the crowd.
- Quick & Easy: From start to finish, you’re looking at about 45 minutes, with only 10 minutes of active prep. The oven does most of the work for you.
- Simple Ingredients: You only need pumpkin seeds, butter or oil, liquid smoke, and flaky sea salt. That’s it. No fancy grocery runs required.
- Perfect for Fall: Whether you’re carving pumpkins for Halloween, hosting a Thanksgiving gathering, or just craving something seasonal, these seeds fit right in.
- Crowd-Pleaser: I’ve brought these to potlucks and watched grown adults hover around the bowl like seagulls. Kids love them too—they’re way better than anything from a bag.
- Unbelievably Delicious: The smoky flavor combined with the satisfying crunch and the way the salt hits your tongue? It’s next-level snacking. You’ll find yourself making excuses to eat them.
What makes this recipe different from all the others is the boiling step. I know it sounds extra, but trust me—it’s the secret to getting that shatteringly crisp texture without drying out the seeds. Most recipes skip this, and that’s why their seeds turn out chewy or tough. I’ve tested it both ways, and the difference is night and day. Plus, the liquid smoke adds a depth of flavor you just can’t get from paprika or chipotle powder alone. It’s subtle but unmistakable—like someone built a tiny campfire right in your kitchen.
This isn’t just another pumpkin seed recipe. It’s the kind of snack that makes you close your eyes after the first bite. It’s comfort food in its simplest, crunchiest form—healthier than chips, faster than homemade crackers, and way more satisfying than anything you’d buy at the store. Perfect for impressing guests without breaking a sweat, or for turning a quiet afternoon into something that feels a little special.
What Ingredients You Will Need
This recipe uses simple, wholesome ingredients to create that bold smoky flavor and satisfying crunch. Most of these are pantry staples, but I’ve included a few notes to help you pick the best options. Here’s what you’ll need.
- Fresh pumpkin seeds (1 ½ cups): You can scoop these straight from a pumpkin or buy them pre-packaged at the store. If you’re using fresh ones, rinse them well and pick off any stringy pumpkin flesh. I prefer using seeds from sugar pumpkins or pie pumpkins—they tend to be plumper and more tender. But honestly, even seeds from carving pumpkins work fine.
- Unsalted butter (2 tablespoons, melted): Butter gives these seeds a rich, toasty flavor that oil just can’t match. I use unsalted so I can control the salt level. If you’re dairy-free, feel free to swap in coconut oil or avocado oil—the texture will be slightly different, but still delicious.
- Liquid smoke (1 teaspoon): This is the magic ingredient. A little goes a long way, so don’t be tempted to add more. I recommend using hickory-flavored liquid smoke for that classic barbecue vibe. Mesquite works too if you want a bolder, earthier taste. You can find it in most grocery stores near the barbecue sauces.
- Flaky sea salt (1 teaspoon, plus more for finishing): Flaky salt like Maldon or Jacobsen is key here. It dissolves slowly on your tongue and gives you those little bursts of salty goodness. Regular table salt will work in a pinch, but it won’t give you the same texture or pop. Trust me on this one.
- Smoked paprika (½ teaspoon, optional): This isn’t strictly necessary, but I love adding it for an extra layer of smoky color and flavor. It also makes the seeds look prettier—that deep red-orange hue is really gorgeous against the pale green of the seeds.
- Garlic powder (¼ teaspoon, optional): If you want a savory kick, a tiny pinch of garlic powder works wonders. Just don’t overdo it—you want the smoky salt to be the star.
When it comes to selecting pumpkin seeds, look for ones that are clean and free of cracks. If you’re buying them pre-packaged, check the expiration date—old seeds can taste stale or rancid. I’ve had good luck with brands like Anthony’s or Food to Live for bulk seeds. And if you’re carving pumpkins, don’t throw those seeds away! Just separate them from the pulp, rinse them in a colander, and pat them dry before using. It’s one of my favorite frugal kitchen tricks.
For substitutions, you can use olive oil instead of butter for a dairy-free version, though the flavor will be milder. If you don’t have liquid smoke, try adding a pinch of chipotle powder or an extra ¼ teaspoon of smoked paprika—it won’t be exactly the same, but it’ll still be tasty. And if you only have fine sea salt, just use a little less, about ¾ teaspoon, and sprinkle a bit more on top after roasting.
Equipment Needed
You don’t need much fancy equipment for this recipe, which is part of what makes it so great. Here’s what you’ll want to have on hand.
- Medium saucepan: For boiling the seeds. Any pot will do, but I prefer one with a heavy bottom to distribute heat evenly.
- Colander or fine-mesh strainer: For draining the boiled seeds. A fine-mesh strainer works best because the seeds are small and can slip through a regular colander.
- Baking sheet: A rimmed baking sheet is ideal—it keeps the seeds from rolling off. I use a half-sheet pan (18×13 inches) for even roasting.
- Parchment paper or silicone baking mat: This prevents sticking and makes cleanup a breeze. I’ve forgotten it before and ended up scrubbing seeds off the pan—learn from my mistake.
- Mixing bowl: For tossing the seeds with butter and seasonings. A medium-sized bowl works perfectly.
- Kitchen towel or paper towels: For drying the seeds after boiling. You want them as dry as possible before they hit the oven.
- Spatula or wooden spoon: For stirring the seeds halfway through baking. I prefer a silicone spatula because it doesn’t scratch the pan.
If you don’t have a silicone baking mat, parchment paper is a perfectly good alternative. And if you’re really in a pinch, you can use a greased baking sheet—just watch the seeds closely so they don’t stick. I’ve also made these in a cast iron skillet before, and they turned out beautifully crispy. The skillet holds heat well and gives the seeds an extra toasty edge. Just keep an eye on them because they can brown faster in cast iron.
Preparation Method
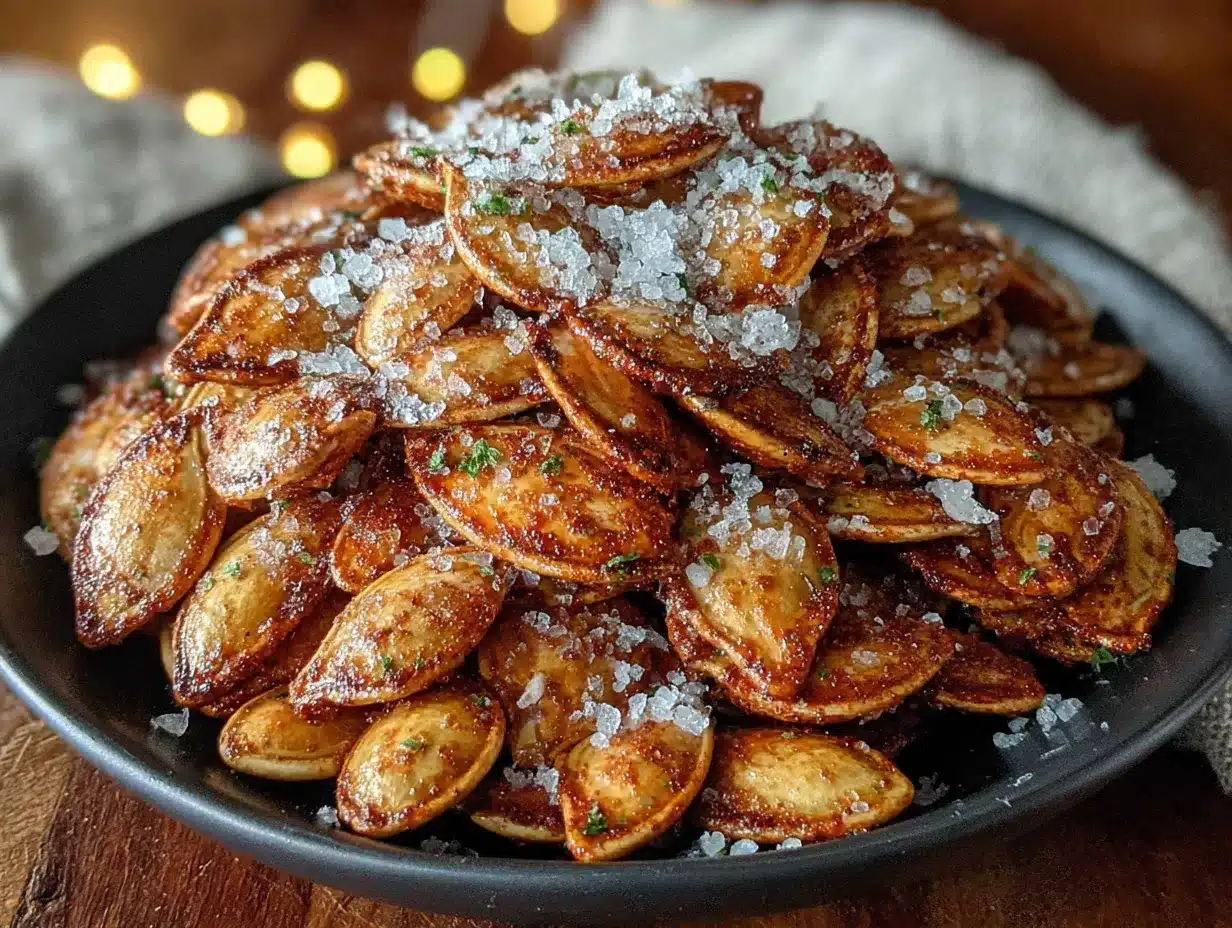
Alright, let’s get to the fun part. I’m going to walk you through every step so you end up with perfectly crispy smoky sea salt pumpkin seeds. Trust the process—especially the boiling part. It makes all the difference.
- Preheat your oven to 300°F (150°C). Line a rimmed baking sheet with parchment paper or a silicone baking mat. Set it aside for now.
- Rinse the pumpkin seeds in a colander under cold running water. Pick out any bits of pumpkin flesh or stringy pulp. Don’t worry if a little bit sticks—it’ll come off during boiling. I usually spend about 2 minutes on this step.
- Bring a medium saucepan of water to a boil. Add about 4 cups of water and a generous pinch of salt. Once it’s bubbling, add the pumpkin seeds and let them boil for exactly 10 minutes. This softens the outer shell just enough that the seeds will crisp up beautifully in the oven instead of turning tough. Set a timer—don’t guess on this one.
- Drain the seeds in your colander or fine-mesh strainer. Shake off as much water as possible. Then, spread them out on a clean kitchen towel or a layer of paper towels. Pat them dry gently—you want them mostly dry, but a little moisture is okay. Let them sit for 5 minutes to air-dry a bit more.
- Transfer the dried seeds to a medium mixing bowl. Add the melted butter (or oil), liquid smoke, flaky sea salt, smoked paprika (if using), and garlic powder (if using). Stir everything together with a spatula until every seed is coated. I like to use my hands for this—it’s messier but more thorough. Just make sure the butter isn’t too hot.
- Spread the seasoned seeds in a single layer on your prepared baking sheet. Try not to overlap them too much—crowding leads to steaming instead of roasting. If you have extra seeds, use a second baking sheet or roast them in batches.
- Roast for 25 minutes, then pull the pan out and give the seeds a good stir with your spatula. This helps them cook evenly. Return the pan to the oven and roast for another 10 to 15 minutes. The seeds are done when they’re golden brown and smell deeply toasty. They’ll firm up more as they cool, so don’t wait until they look fully crunchy in the oven.
- Remove from the oven and let cool completely on the baking sheet. This takes about 20 minutes. As they cool, you’ll hear a satisfying little crackling sound—that’s the crunch developing. Once they’re cool, sprinkle with an extra pinch of flaky sea salt if you like things salty.
- Transfer to a bowl and serve, or store in an airtight container. Try not to eat them all before anyone else gets a chance—I speak from experience.
A few things to watch for: If your seeds look wet when they go into the oven, they’ll take longer to crisp up. Pat them as dry as you can manage. Also, ovens vary, so start checking at the 30-minute mark. You’re looking for a deep golden color and that irresistible nutty aroma. If they start to smell burnt, pull them out immediately—they’ll continue cooking from residual heat.
Cooking Tips & Techniques
After making these crispy smoky sea salt pumpkin seeds more times than I can count, I’ve picked up a few tricks that make the process smoother and the results more consistent. Here are my best tips.
Don’t skip the boil. I know it’s tempting to just toss raw seeds in butter and roast them, but boiling is the secret to that shatteringly crisp texture. The hot water softens the seed coat just enough that the inside puffs up slightly during roasting, creating a light, airy crunch. Without it, the seeds tend to be dense and chewy. I learned this the hard way after making three batches of disappointing seeds in one afternoon.
Dry your seeds thoroughly. After boiling, those seeds are holding onto a surprising amount of water. If you skip the drying step, they’ll steam instead of roast, and you’ll end up with soggy seeds. I like to spread them on a towel and let them sit for a full 10 minutes. Sometimes I even pat them with a second towel if they still feel damp.
Watch your oven like a hawk. Every oven runs a little differently. My old oven used to run hot, and I’d burn a batch before I even realized what was happening. Now I set a timer for 25 minutes and then check every 5 minutes after that. The seeds go from perfectly golden to burnt in what feels like seconds, so don’t wander off.
Let them cool completely. This is the hardest part, I know. But if you eat them straight out of the oven, they’ll seem soft and almost chewy. As they cool, the moisture evaporates and the seeds firm up into that perfect crunch. I’ve ruined the texture more than once by diving in too early. Just walk away for 20 minutes—I promise it’s worth it.
Season in layers. I add salt both before and after roasting. The first round infuses the seeds with flavor from the inside, while the final sprinkle gives you those little bursts of salty goodness on the surface. It’s a small thing, but it makes a big difference in how the seeds taste.
Variations & Adaptations
One of the things I love most about this recipe is how easy it is to tweak. Once you’ve got the basic method down, you can play around with flavors and make it your own. Here are some variations I’ve tried and loved.
- Spicy Chipotle Version: Add ½ teaspoon of chipotle powder and a pinch of cayenne pepper to the seasoning mix. The smoky heat pairs beautifully with the salt. I made this for a game day party and watched people reach for the bowl again and again.
- Sweet and Smoky: Stir in 1 tablespoon of maple syrup or brown sugar along with the butter. The sweetness caramelizes in the oven and creates a crunchy, candied coating. Just be careful—the sugar can burn if you leave them in too long. Check them at the 20-minute mark.
- Herb Garden: Toss in 1 teaspoon of dried rosemary, thyme, or oregano along with the other seasonings. Fresh herbs work too, but use about double the amount. I love this version with a bowl of warm soup on a chilly evening.
- Garlic Lovers: Increase the garlic powder to ½ teaspoon and add ¼ teaspoon of onion powder. It gives the seeds a savory, almost everything-bagel vibe. My husband requests this version every single time.
- Cheesy Twist: After roasting, toss the warm seeds with 2 tablespoons of finely grated Parmesan cheese. The cheese melts slightly and clings to the seeds, adding a salty, umami kick. It’s dangerously addictive.
If you’re avoiding dairy, skip the butter and use avocado oil or melted coconut oil instead. For a nut-free option, these seeds are naturally nut-free, so you’re good there. And if you want to cut down on sodium, use just ½ teaspoon of salt in the seasoning and skip the final sprinkle. The liquid smoke adds plenty of flavor on its own.
Serving & Storage Suggestions
These crispy smoky sea salt pumpkin seeds are incredibly versatile. I serve them warm or at room temperature, straight from the baking sheet or piled into a pretty bowl. They’re perfect for snacking on their own, but they also shine as a topping for salads, soups, or even roasted vegetables. I love sprinkling them over a bowl of butternut squash soup—the crunch and smoky flavor take it to another level.
For a party, I like to set out a bowl with a few other snacks like spiced nuts, dried fruit, and maybe some cheese and crackers. They always disappear first. And if you’re packing lunches, these seeds make a great addition to a snack box alongside apple slices, cheese cubes, and a handful of dark chocolate chips.
Storing: Once the seeds are completely cool, transfer them to an airtight container. They’ll stay fresh at room temperature for up to 2 weeks. I keep mine in a glass jar on the counter, but a zip-top bag works just fine. The key is making sure they’re fully cooled before sealing—any trapped moisture will make them soft.
Freezing: You can freeze these seeds for up to 3 months. Just pop them in a freezer-safe bag or container, and thaw them at room temperature when you’re ready to eat. They might lose a tiny bit of crunch, but a quick 5-minute stint in a 300°F oven will revive them.
Reheating: If your seeds have gone a little soft (it happens), spread them on a baking sheet and warm them in a 300°F oven for 5 to 7 minutes. Let them cool again, and they’ll be almost as crispy as the day you made them. I’ve done this more times than I care to admit.
Nutritional Information & Benefits
Pumpkin seeds are a nutritional powerhouse, and these crispy smoky sea salt pumpkin seeds let you enjoy them in a delicious, snackable form. Here’s a rough breakdown per ¼-cup serving (based on using butter and the full amount of salt).
- Calories: Approximately 180
- Protein: 8 grams
- Fat: 15 grams (mostly healthy unsaturated fats)
- Carbohydrates: 4 grams
- Fiber: 2 grams
- Sodium: 250 milligrams (varies with salt amount)
Pumpkin seeds are packed with magnesium, zinc, and iron—three minerals that many of us don’t get enough of. Magnesium supports muscle function and sleep, zinc is great for immune health, and iron helps carry oxygen through your body. They’re also a good source of plant-based protein and healthy fats, which makes them a satisfying snack that keeps you full between meals.
If you’re watching your sodium, feel free to reduce the salt or use a salt substitute. And if you have a seed allergy, obviously skip this one. But for most people, these seeds are a wholesome, nutrient-dense treat that feels indulgent without being unhealthy. I love knowing that my snack is doing something good for my body while also satisfying that salty-crunchy craving.
Conclusion
So there you have it—crispy smoky sea salt pumpkin seeds that are everything you want in a snack: crunchy, savory, smoky, and just salty enough. This recipe came from the most unexpected place (thank you, Margaret and your antique shop wisdom), but it’s become a staple in my kitchen every fall. I hope you give it a try and make it your own.
Feel free to play around with the seasonings—add more heat, go sweet, or keep it classic. That’s the beauty of a simple recipe like this. And if you come up with a variation you love, I’d honestly love to hear about it. Drop a comment below and tell me how yours turned out. Did you add something unexpected? Did you burn the first batch like I did? (No judgment here.) Share your wins and your oopses—that’s how we all get better in the kitchen.
Now go grab those pumpkin seeds and get roasting. Your kitchen is about to smell amazing, and you’re about to have the best snack of the season. Happy cooking, friends!
Frequently Asked Questions
Can I use store-bought pumpkin seeds instead of fresh ones?
Absolutely. If you’re using pre-packaged pumpkin seeds (often called pepitas), just skip the rinsing step. You’ll still want to boil them for 10 minutes to get that crispy texture. Keep in mind that store-bought seeds are often already roasted and salted, so you may want to reduce the salt you add.
Why did my pumpkin seeds turn out chewy instead of crispy?
This usually happens for one of two reasons: you skipped the boiling step, or you didn’t dry the seeds thoroughly before roasting. The boiling softens the seed coat so it can crisp up properly, and drying ensures they roast instead of steam. Also, make sure you’re roasting at a low temperature (300°F) and giving them enough time.
Can I make these in an air fryer?
Yes! Air fryers work great for pumpkin seeds. Set the temperature to 300°F and cook for 12 to 15 minutes, shaking the basket halfway through. Keep a close eye on them because air fryers run hot. The boiling and drying steps are still important for the best texture.
How long do these seeds stay fresh?
Stored in an airtight container at room temperature, they’ll stay crispy and delicious for up to 2 weeks. If they start to lose their crunch, just pop them in a 300°F oven for 5 minutes to revive them. I don’t recommend storing them in the fridge—the humidity can make them soft.
Can I double this recipe?
Definitely. Just make sure you spread the seeds in a single layer on your baking sheet. If you’re doubling, use two baking sheets and rotate them halfway through the roasting time. You may need to add a few extra minutes to the cooking time since the oven will be more crowded.
Pin This Recipe!
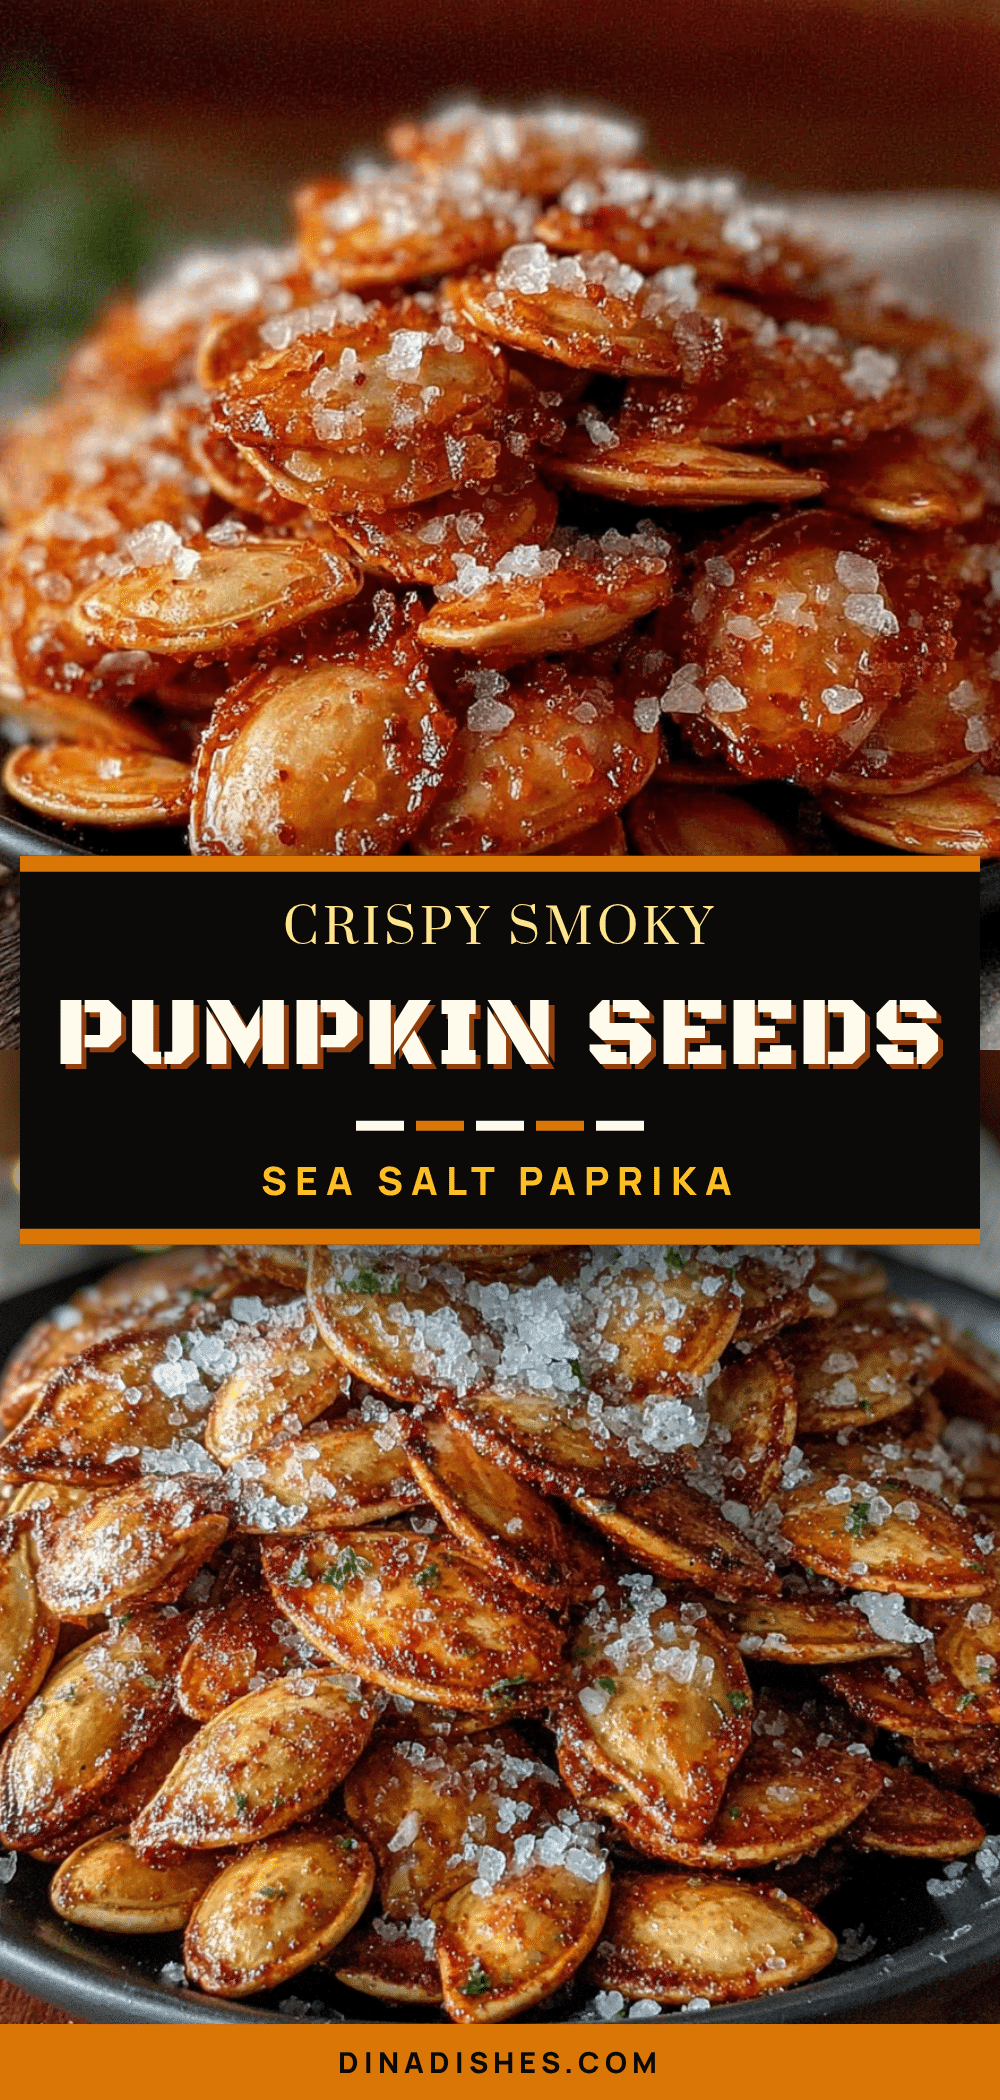
Crispy Smoky Sea Salt Pumpkin Seeds

These crispy smoky sea salt pumpkin seeds are a perfect fall snack, featuring a shatteringly crunchy texture and a deep, campfire-like smoky flavor from liquid smoke and flaky sea salt. Easy to make with simple ingredients, they’re a crowd-pleaser for game days, movie nights, or anytime you crave a salty, satisfying crunch.
- Prep Time: 10 minutes
- Cook Time: 35 minutes
- Total Time: 45 minutes
- Yield: 4 servings 1x
- Category: Snack
- Cuisine: American
Ingredients
- 1 ½ cups fresh pumpkin seeds (or store-bought pepitas)
- 2 tablespoons unsalted butter, melted (or coconut/avocado oil for dairy-free)
- 1 teaspoon liquid smoke (hickory or mesquite)
- 1 teaspoon flaky sea salt (e.g., Maldon), plus more for finishing
- ½ teaspoon smoked paprika (optional)
- ¼ teaspoon garlic powder (optional)
Instructions
- Preheat oven to 300°F (150°C). Line a rimmed baking sheet with parchment paper or a silicone baking mat.
- Rinse pumpkin seeds in a colander under cold water, removing any pumpkin flesh or stringy pulp.
- Bring a medium saucepan of water to a boil with a generous pinch of salt. Add seeds and boil for exactly 10 minutes.
- Drain seeds in a colander or fine-mesh strainer. Spread on a clean kitchen towel or paper towels and pat dry. Let air-dry for 5 minutes.
- Transfer dried seeds to a medium mixing bowl. Add melted butter, liquid smoke, flaky sea salt, smoked paprika (if using), and garlic powder (if using). Stir until all seeds are coated.
- Spread seasoned seeds in a single layer on the prepared baking sheet. Avoid overlapping.
- Roast for 25 minutes, then stir seeds. Continue roasting for another 10–15 minutes, until golden brown and fragrant.
- Remove from oven and let cool completely on the baking sheet (about 20 minutes). As they cool, they will become crunchy.
- Sprinkle with an extra pinch of flaky sea salt if desired. Transfer to a bowl and serve, or store in an airtight container.
Notes
Boiling the seeds is essential for a crispy texture—do not skip. Dry seeds thoroughly before roasting to prevent steaming. Ovens vary; start checking at 30 minutes. Let seeds cool completely before storing to maintain crunch. For a dairy-free version, use coconut or avocado oil instead of butter.
Nutrition
- Serving Size: 1/4 cup
- Calories: 180
- Sodium: 250
- Fat: 15
- Saturated Fat: 4
- Carbohydrates: 4
- Fiber: 2
- Protein: 8
Keywords: pumpkin seeds, crispy, smoky, sea salt, snack, fall, Halloween, Thanksgiving, easy, healthy


