My neighbor Brenda watched me hauling a grocery bag full of potatoes up the stairs to my apartment last November. She didn’t say anything at first. Then she just smiled and said, “Those better be for something good. Potatoes deserve a proper occasion.”
Brenda is in her seventies, a retired home economics teacher who grows herbs on her fire escape and still makes pie crust by feel rather than by recipe. We’d bonded over our shared love of cooking shows and the fact that we both firmly believe butter belongs in everything. That day, I told her about Friendsgiving—my first time hosting it, actually—and how I was panicking about what to bring that felt special but wasn’t complicated. She laughed and said, “You’re overthinking it. Take the thing everyone loves and make it bite-sized. People want to feel fed, not fancy.”
So I did. I took the loaded mashed potato recipe I’d been making for years—the one with sharp cheddar, crispy bacon, and a dollop of sour cream—and turned it into these little golden bites of comfort. Honestly, they were the first thing to disappear from the buffet table. Someone actually asked me if I catered. I mean, no. But that moment? That’s when I knew this recipe was something special.
These Cozy Loaded Mashed Potato Bites for Friendsgiving are exactly what you need when you want to show up with something that tastes like a hug. Maybe you’ve been there—staring at a potluck sign-up sheet, wondering what to bring that won’t get ignored. These little bites solve that problem. They’re warm, cheesy, and ridiculously easy to eat while holding a drink and catching up with friends. Brenda would approve.
Why You’ll Love This Recipe
Let me tell you why these mashed potato bites have become my absolute go-to for any gathering. I’ve tested this recipe at least half a dozen times—tweaking the cheese ratio, trying different binders, even testing them with sweet potatoes once (don’t do it, they fall apart). What I landed on is the version that works every single time.
- Quick & Easy : From start to finish, these come together in about 45 minutes. That includes boiling the potatoes. If you use leftover mashed potatoes, you’re looking at 20 minutes tops.
- Simple Ingredients : You probably have most of this in your kitchen right now. Potatoes, cheese, bacon, butter—nothing fancy, nothing expensive.
- Perfect for Friendsgiving : They’re portable, they stay warm in a slow cooker, and they don’t need a knife to eat. Your friends will thank you.
- Crowd-Pleaser : I’ve brought these to three different gatherings now, and every single time, someone asks for the recipe. Kids love them. Adults love them. Even my friend who “doesn’t like potatoes” ate four.
- Unbelievably Delicious : The outside gets slightly crispy from pan-frying, while the inside stays creamy and loaded with melty cheese and bacon. It’s the texture combo that makes these next-level.
What makes this recipe different from all the other potato bite recipes out there? Two things. First, I use a combination of cheddar and cream cheese in the mash. The cream cheese adds a tangy richness that keeps the bites from tasting flat. Second, I chill the mixture before forming the bites. This step is non-negotiable—it makes them hold their shape perfectly during cooking. No crumbling, no falling apart, no stress.
This recipe isn’t just good—it’s the kind that makes you close your eyes after the first bite. It’s comfort food reimagined for sharing, with the same soul-soothing satisfaction as a bowl of mashed potatoes but in a fun, party-ready form. Perfect for impressing your friends without spending all day in the kitchen.
What Ingredients You Will Need
This recipe uses simple, wholesome ingredients to deliver big flavor without the fuss. Most of these are pantry staples you probably already have on hand, especially if you’re a regular home cook.
- Russet potatoes (2 pounds, peeled and quartered) – These are my go-to for mashed potatoes because they’re starchy and fluffy. Yukon Golds work too, but they’ll give you a slightly denser texture.
- Sharp cheddar cheese (1 cup, shredded) – I recommend using a block of cheddar and shredding it yourself. Pre-shredded cheese has anti-caking agents that prevent it from melting smoothly. Cabot or Tillamook are my favorites.
- Cream cheese (4 ounces, softened) – This is my secret ingredient. It adds creaminess and a subtle tang that balances the richness of the cheddar.
- Bacon (6 strips, cooked and crumbled) – Thick-cut bacon gives you more texture. You can also use turkey bacon or vegetarian bacon bits if needed.
- Sour cream (¼ cup) – Adds moisture and a little tang. Full-fat works best, but Greek yogurt is a fine substitute.
- Butter (2 tablespoons, unsalted) – For richness. Salted butter works too—just adjust the added salt.
- Milk (¼ cup, warm) – Helps achieve that creamy consistency. Whole milk is ideal, but 2% works fine.
- Green onions (3 tablespoons, chopped) – For freshness and color. Chives work beautifully too.
- Egg (1 large, beaten) – This acts as a binder so the bites hold together during cooking.
- All-purpose flour (½ cup, for coating) – Helps create that golden, crispy exterior.
- Salt (1 teaspoon) – I prefer kosher salt for its clean flavor.
- Black pepper (½ teaspoon, freshly ground) – Freshly ground makes a difference here.
- Garlic powder (½ teaspoon) – Adds a subtle savory note without overwhelming the dish.
- Oil for frying (vegetable or canola, about ¼ cup) – You need enough to coat the bottom of your pan.
Equipment Needed
You don’t need a gourmet kitchen to make these bites, which is part of what I love about this recipe.
- Large pot – For boiling the potatoes. A 4-quart pot works well.
- Potato masher or ricer – I use a classic handheld masher. A ricer gives you an even smoother texture, but honestly, a fork works in a pinch.
- Mixing bowls – One large for the potato mixture, one small for the beaten egg.
- Baking sheet – For chilling the formed bites. Line it with parchment paper for easy removal.
- Large skillet or frying pan – A cast-iron skillet gives the best crispy crust, but a non-stick pan works great too.
- Spatula – For flipping the bites. A thin, flexible spatula works best.
- Paper towels – For draining excess oil after frying.
- Measuring cups and spoons – Accuracy matters with the flour and cheese.
If you don’t have a potato ricer, don’t stress. I’ve made these with a hand mixer before, and they turned out just fine. The texture is slightly different, but nobody complained. Budget-friendly tip: a basic potato masher costs around five dollars and will last you years.
Preparation Method
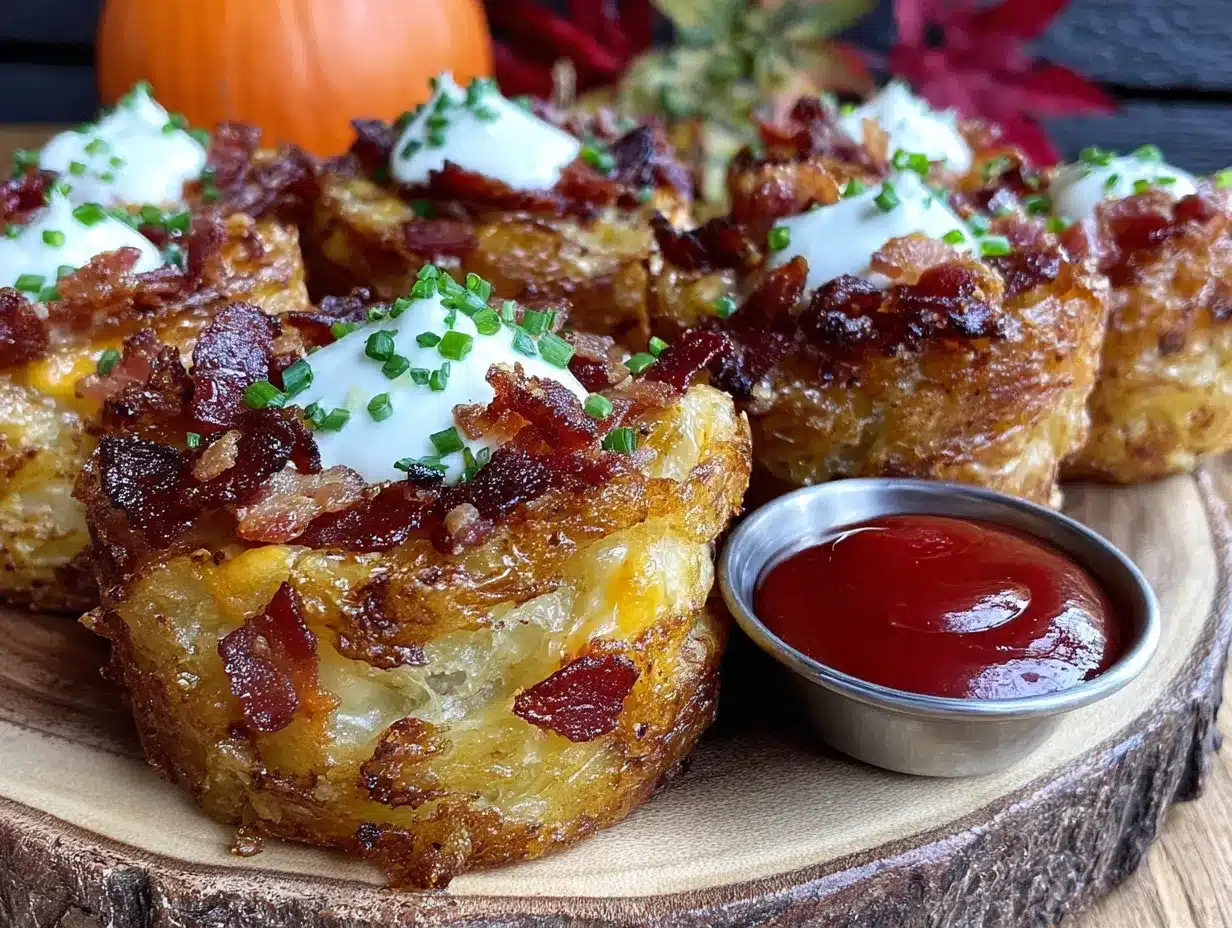
Alright, let’s get cooking. I’ll walk you through this step by step so you feel confident at every stage.
- Cook the potatoes. Place your peeled and quartered russet potatoes in a large pot and cover them with cold water by about an inch. Add a generous pinch of salt. Bring to a boil over high heat, then reduce to a simmer. Cook for 15 to 20 minutes, until the potatoes are fork-tender. You want them soft enough that a fork slides in easily but they’re not falling apart completely.
- Drain and mash. Drain the potatoes in a colander and let them sit for a minute to steam dry. This is important—excess water will make your mixture too wet. Return the potatoes to the pot or transfer to a large bowl. Add the butter and warm milk, then mash until smooth. I like to leave a few small lumps for texture, but you do you.
- Mix in the good stuff. Add the shredded cheddar, softened cream cheese, sour cream, crumbled bacon, green onions, garlic powder, salt, and pepper. Stir until everything is well combined. Taste and adjust seasoning if needed. Now add the beaten egg and mix thoroughly. The mixture should be thick and slightly sticky.
- Chill the mixture. Cover the bowl with plastic wrap and refrigerate for at least 30 minutes. I know it’s tempting to skip this step, but don’t. Chilling makes the mixture firm enough to shape into balls without them falling apart. If you’re short on time, pop it in the freezer for 15 minutes.
- Shape the bites. Scoop out about 1½ tablespoons of the mixture and roll it into a ball. You should get about 20 to 24 bites. Place them on a parchment-lined baking sheet. If the mixture sticks to your hands, lightly wet your palms with water.
- Chill again. Pop the formed bites back in the fridge for another 15 minutes. This second chill is what ensures they hold their shape during frying. Trust me on this one.
- Coat with flour. Place the flour in a shallow bowl. Roll each chilled bite in the flour, shaking off any excess. You want a light, even coating—not a thick crust.
- Heat the oil. In a large skillet, heat about ¼ inch of oil over medium heat. To test if it’s ready, drop a tiny piece of potato in—it should sizzle immediately.
- Fry the bites. Carefully place the coated bites in the hot oil, making sure not to overcrowd the pan. Cook for 3 to 4 minutes per side, until golden brown and crispy. Use a spatula to gently flip them. The smell at this point is absolutely incredible.
- Drain and serve. Transfer the cooked bites to a plate lined with paper towels to drain excess oil. Sprinkle with a little extra salt while they’re still hot. Serve immediately with sour cream or ranch dressing for dipping.
Your kitchen will smell like a cozy diner at this point. Honestly, it’s one of the best parts of making these.
Cooking Tips & Techniques
I’ve made mistakes so you don’t have to. Here’s what I’ve learned the hard way.
Don’t overwork the potatoes. When you mash them, stop as soon as they’re smooth. Over-mashing releases too much starch and turns them gummy. I learned this after making a batch that had the texture of glue. Not my finest moment.
Temperature matters. If your oil isn’t hot enough, the bites will absorb oil and become greasy. If it’s too hot, they’ll burn on the outside before the inside is warm. Medium heat is your friend. I use a thermometer to keep the oil around 350°F.
Batch frying is non-negotiable. I know it’s tempting to cram as many bites as possible into the pan to save time. Don’t. Overcrowding drops the oil temperature and leads to soggy, unevenly cooked bites. Give them space to breathe.
Double chilling is worth it. I can’t stress this enough. The first chill firms up the mixture so you can shape it. The second chill ensures the bites hold their shape during frying. I skipped the second chill once because I was in a hurry, and half my bites turned into potato blobs in the oil. Learn from my impatience.
Make ahead tip: You can prepare the bites up to step 6 (shaped and chilled) a day in advance. Keep them covered in the fridge, then coat and fry them just before serving. This is a lifesaver for Friendsgiving when you’re juggling multiple dishes.
Variations & Adaptations
One of the best things about this recipe is how flexible it is. Here are some ways to make it your own.
Vegetarian version: Skip the bacon and add ½ cup of finely chopped sautéed mushrooms. They add that same savory, umami flavor without the meat. I tried this for a vegetarian friend and honestly, I almost liked it better.
Spicy loaded bites: Add 1 finely chopped jalapeño (seeds removed unless you want heat) and ¼ teaspoon of cayenne pepper to the potato mixture. Top with a drizzle of sriracha ranch for dipping. These were a hit at my last game day party.
Loaded sweet potato bites: Swap the russet potatoes for sweet potatoes. The flavor is sweeter and earthier, so I recommend using smoked paprika instead of garlic powder and adding a pinch of cinnamon. They pair beautifully with a maple dijon dipping sauce.
Gluten-free option: Use almond flour or gluten-free all-purpose flour for coating. The texture is slightly different—a bit more delicate—but they still taste amazing. Just be gentle when flipping them.
Baked version: If you want to skip the frying, arrange the flour-coated bites on a parchment-lined baking sheet, spray lightly with cooking oil, and bake at 400°F for 15 to 18 minutes, flipping halfway through. They won’t be as crispy, but they’re still delicious and significantly lower in fat.
I personally love the spicy jalapeño version. There’s something about that little kick of heat against the creamy potato and sharp cheddar that just works. My husband calls them “danger bites” because you can’t stop eating them.
Serving & Storage Suggestions
These bites are best served warm, right after frying. The contrast between the crispy exterior and the creamy, cheesy interior is at its peak within the first 15 minutes. I like to arrange them on a large platter, sprinkle with extra chopped green onions, and serve with small bowls of sour cream and ranch dressing for dipping.
For Friendsgiving, they pair beautifully with almost anything. I’ve served them alongside a roasted turkey breast, a simple green salad, and a bowl of cranberry sauce for dipping. They also work as an appetizer before the main meal—just make sure you make enough, because they go fast.
Storage: Leftover bites (if you have any) can be stored in an airtight container in the refrigerator for up to 3 days. To reheat, place them on a baking sheet in a 350°F oven for about 8 to 10 minutes. The microwave works in a pinch, but they’ll lose their crispiness. I don’t recommend freezing them—the texture changes too much.
One thing I love about these bites is that the flavors actually get better after a day in the fridge. The garlic and cheese meld together in a way that’s even more delicious. I’ve been known to make a double batch just so I can have leftovers for lunch the next day.
Nutritional Information & Benefits
Let’s be real—these are comfort food, not health food. But that doesn’t mean they can’t fit into a balanced lifestyle. Here’s the approximate nutritional breakdown per serving (4 bites):
- Calories: 320
- Protein: 12g
- Carbohydrates: 28g
- Fat: 18g
- Fiber: 3g
- Sodium: 580mg
Potatoes often get a bad rap, but they’re actually a good source of vitamin C, potassium, and vitamin B6. The skin (if you leave it on) adds fiber. The dairy in this recipe provides calcium and protein. And honestly? Sometimes the best thing you can do for your mental health is eat something that makes you feel warm and happy. These bites do exactly that.
If you’re watching your sodium, use unsalted butter and reduce the added salt. You can also use low-fat cheese and sour cream, though the texture will be slightly less creamy.
Conclusion
These Cozy Loaded Mashed Potato Bites for Friendsgiving have become my signature dish, and I’m so excited to share them with you. They’re everything I want in a party food—easy to make, impossible to resist, and somehow both nostalgic and fresh at the same time.
I hope you make them for your next gathering, whether it’s Friendsgiving, a game day party, or just a Tuesday night that needs a little cheering up. Feel free to play around with the variations and make them your own. That’s the beauty of cooking—it’s never really about following rules. It’s about making something that feels like you.
If you try these, I’d love to hear about it. Drop a comment below and let me know how they turned out, what variations you tried, or if your friends ate them as fast as mine did. And if you’re looking for another crowd-pleasing appetizer, you might enjoy my crispy garlic chicken bites—they have that same addictive quality.
Until next time, happy cooking. And don’t forget the extra cheese.
Frequently Asked Questions
Can I use leftover mashed potatoes for this recipe?
Absolutely. In fact, this is one of the best uses for leftover mashed potatoes. Just make sure they’re not too wet. If your leftover mash seems loose, add a tablespoon of flour or an extra egg to help bind everything together.
Why did my potato bites fall apart in the pan?
This usually happens for one of two reasons: the mixture wasn’t chilled long enough, or you skipped the egg. The egg acts as a binder, so don’t leave it out. Make sure you chill both the mixture and the formed bites before frying.
Can I make these in an air fryer?
Yes! Preheat your air fryer to 375°F, spray the basket with oil, and arrange the bites in a single layer. Cook for 8 to 10 minutes, flipping halfway through. They won’t be quite as crispy as pan-fried, but they’re still delicious and much lower in oil.
How do I keep the bites warm for a party?
After frying, place them on a baking sheet in a 200°F oven. They’ll stay warm and crispy for up to 30 minutes. You can also keep them in a slow cooker on the “warm” setting, but they might lose some crispiness after an hour.
Can I freeze the uncooked bites?
Yes. After shaping and chilling the bites (step 6), place them on a baking sheet and freeze until solid. Transfer to a freezer bag. When ready to cook, thaw them in the refrigerator overnight, then coat with flour and fry as directed. They’ll keep for up to 2 months.
Pin This Recipe!
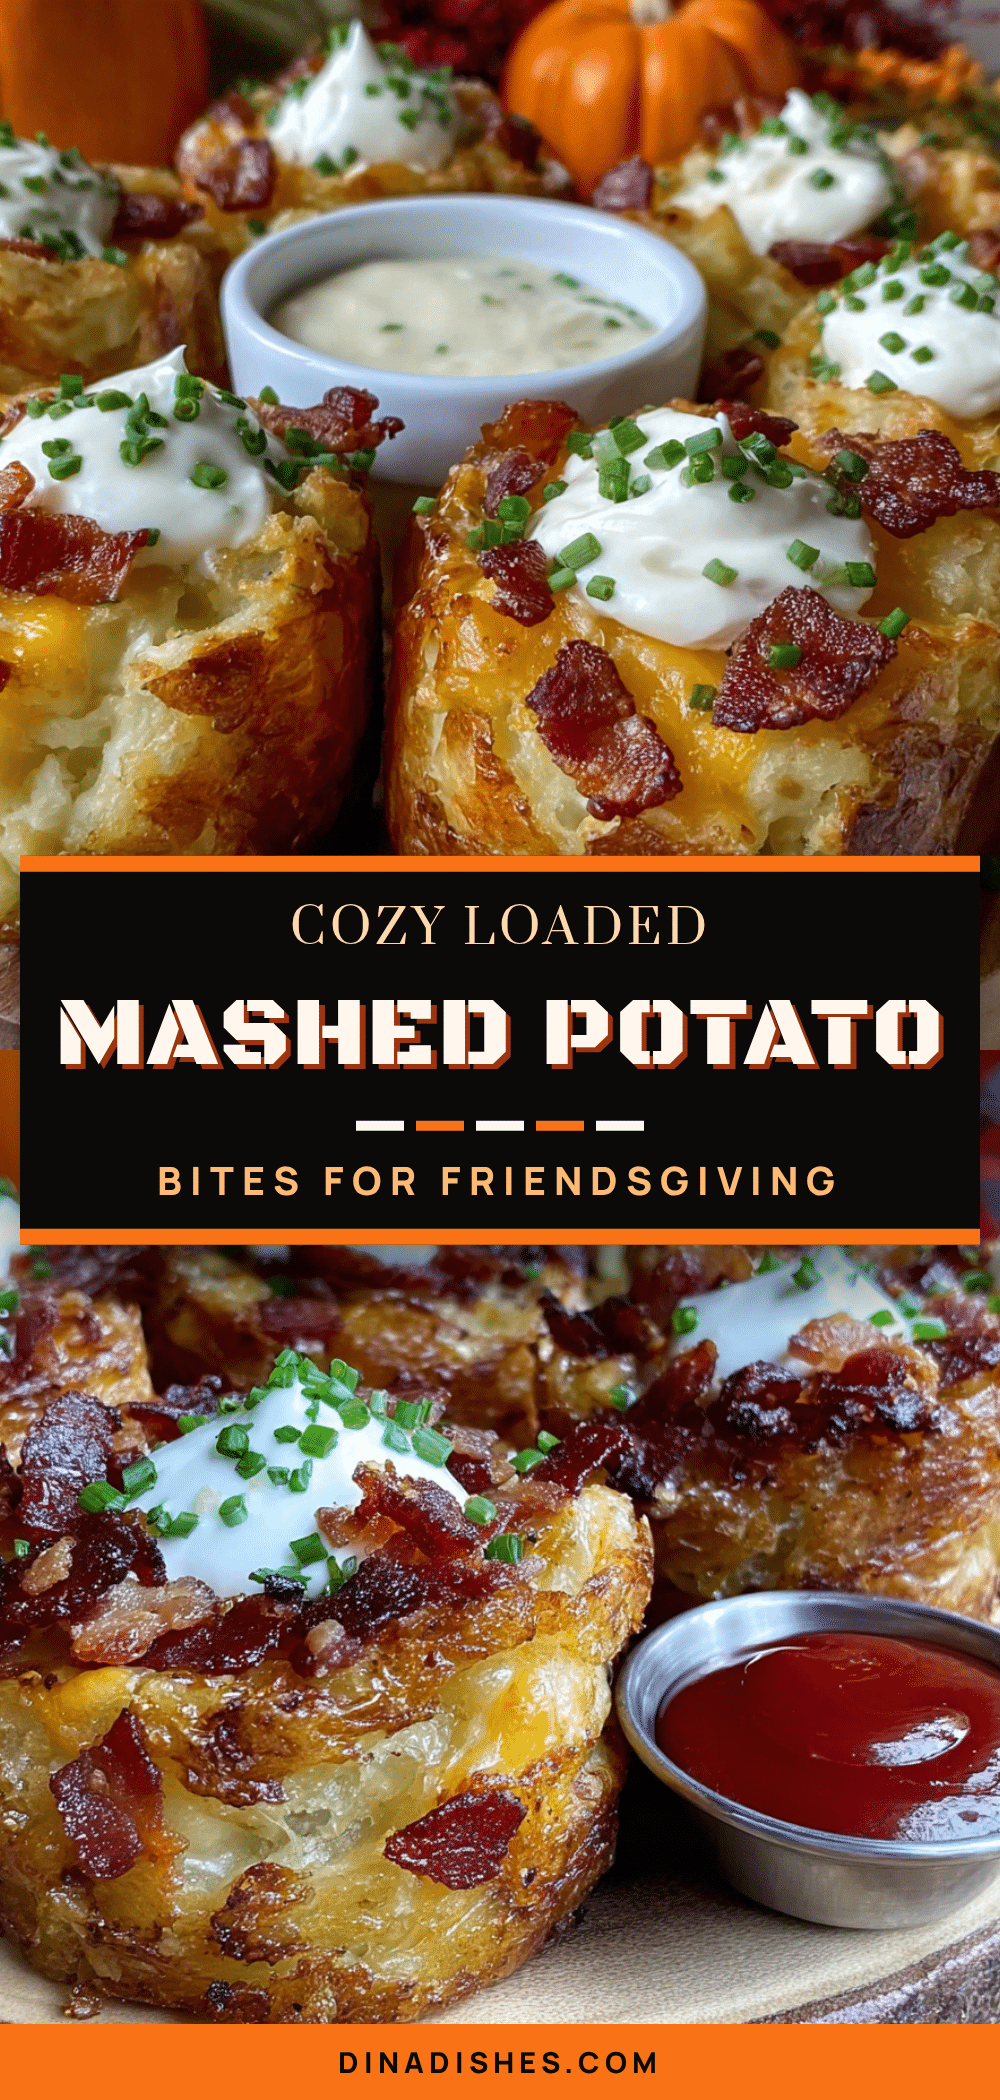
Cozy Loaded Mashed Potato Bites for Friendsgiving

These golden, crispy mashed potato bites are loaded with sharp cheddar, cream cheese, and bacon. Perfect for Friendsgiving or any gathering, they’re easy to make and impossible to resist.
- Prep Time: 30 minutes
- Cook Time: 20 minutes
- Total Time: 50 minutes
- Yield: 4 servings 1x
- Category: Appetizer
- Cuisine: American
Ingredients
- 2 pounds Russet potatoes, peeled and quartered
- 1 cup sharp cheddar cheese, shredded
- 4 ounces cream cheese, softened
- 6 strips bacon, cooked and crumbled
- ¼ cup sour cream
- 2 tablespoons unsalted butter
- ¼ cup warm milk
- 3 tablespoons green onions, chopped
- 1 large egg, beaten
- ½ cup all-purpose flour (for coating)
- 1 teaspoon kosher salt
- ½ teaspoon freshly ground black pepper
- ½ teaspoon garlic powder
- ¼ cup vegetable or canola oil (for frying)
Instructions
- Cook the potatoes: Place peeled and quartered russet potatoes in a large pot, cover with cold water by about an inch, and add a generous pinch of salt. Bring to a boil over high heat, then reduce to a simmer. Cook for 15 to 20 minutes until fork-tender.
- Drain and mash: Drain the potatoes in a colander and let them steam dry for a minute. Return to the pot or transfer to a large bowl. Add butter and warm milk, then mash until smooth, leaving a few small lumps for texture if desired.
- Mix in the good stuff: Add shredded cheddar, softened cream cheese, sour cream, crumbled bacon, green onions, garlic powder, salt, and pepper. Stir until well combined. Add the beaten egg and mix thoroughly. The mixture should be thick and slightly sticky.
- Chill the mixture: Cover the bowl with plastic wrap and refrigerate for at least 30 minutes (or freeze for 15 minutes if short on time).
- Shape the bites: Scoop out about 1½ tablespoons of the mixture and roll into a ball. You should get about 20 to 24 bites. Place on a parchment-lined baking sheet. If the mixture sticks to your hands, lightly wet your palms with water.
- Chill again: Refrigerate the formed bites for another 15 minutes to ensure they hold their shape during frying.
- Coat with flour: Place flour in a shallow bowl. Roll each chilled bite in the flour, shaking off any excess for a light, even coating.
- Heat the oil: In a large skillet, heat about ¼ inch of oil over medium heat. Test by dropping a tiny piece of potato in—it should sizzle immediately.
- Fry the bites: Carefully place the coated bites in the hot oil without overcrowding the pan. Cook for 3 to 4 minutes per side until golden brown and crispy. Use a spatula to gently flip them.
- Drain and serve: Transfer cooked bites to a plate lined with paper towels to drain excess oil. Sprinkle with a little extra salt while hot. Serve immediately with sour cream or ranch dressing for dipping.
Notes
Chilling the mixture and formed bites is essential to prevent them from falling apart during frying. For a make-ahead option, prepare up to step 6 (shaped and chilled) a day in advance. For a baked version, arrange flour-coated bites on a parchment-lined baking sheet, spray lightly with cooking oil, and bake at 400°F for 15-18 minutes, flipping halfway through. For an air fryer, cook at 375°F for 8-10 minutes, flipping halfway. Leftovers can be stored in an airtight container in the refrigerator for up to 3 days; reheat in a 350°F oven for 8-10 minutes.
Nutrition
- Serving Size: 4 bites
- Calories: 320
- Sugar: 2
- Sodium: 580
- Fat: 18
- Saturated Fat: 9
- Carbohydrates: 28
- Fiber: 3
- Protein: 12
Keywords: mashed potato bites, loaded potato bites, Friendsgiving appetizer, crispy potato bites, cheesy potato bites, bacon potato bites, party appetizer, comfort food


