My neighbor asked why I couldn’t just brown the butter first. I was in the middle of explaining my great-aunt’s snickerdoodle method—cream the butter, sugar, eggs, the whole traditional song and dance—when I stopped mid-sentence. Honestly, I had no good reason why not. I just assumed browning butter would make the cookies too greasy or, I don’t know, change the chemistry in some disastrous way. She shrugged and went back to watering her herbs, and I stood there holding a stick of butter feeling like a complete fraud.
That night, I tried it. I stood over the stove watching the butter foam and turn amber, smelling like toasted nuts and something almost caramel-like. I poured it into the mixer, still warm, and added the pumpkin puree. The dough came together in this glossy, fragrant mess that I was sure I’d ruined. But you know that feeling when something looks wrong but smells so right you have to see it through? That was this moment. I baked a test batch, and let me tell you—I actually laughed out loud when I pulled them from the oven. They were puffed, crackled, and smelled like autumn had taken physical form in my kitchen.
The texture was softer than a classic snickerdoodle, almost pillowy, with these crispy edges that had a deep, nutty flavor from the browned butter. The pumpkin didn’t make them cakey or heavy—it made them tender. I brought a plate over to my neighbor the next morning, and she just smiled. “Told you,” she said. And she was right. That moment of being wrong taught me more about trusting instinct in the kitchen than any recipe book ever did. These cookies have become my official “first day of fall” bake, and I keep making them because they remind me that sometimes the best ideas come from someone who isn’t overthinking it.
Why You’ll Love This Recipe
These Cozy Brown Butter Pumpkin Snickerdoodles aren’t just another pumpkin cookie. They are the result of a happy accident and a neighbor’s casual suggestion, and they deliver on every level. Here is why this recipe has earned a permanent spot in my fall baking rotation:
- Quick & Easy : From start to finish, these cookies come together in about 30 minutes. The dough requires no chilling, which means you can satisfy a pumpkin craving almost instantly.
- Simple Ingredients : You likely have everything in your pantry right now. No weird extracts, no specialty flours—just butter, sugar, pumpkin, and basic baking staples.
- Perfect for Cozy Evenings : These cookies were made for cold weather, rainy afternoons, and those days when you need a warm hug in food form. They pair perfectly with a mug of spiced tea or hot cider.
- Crowd-Pleaser : I have brought these to potlucks, cookie swaps, and casual get-togethers. They disappear fast. Kids love the cinnamon-sugar coating, and adults appreciate the sophisticated brown butter depth.
- Unbelievably Delicious : The combination of nutty browned butter, earthy pumpkin, and warm cinnamon is pure comfort. The texture is soft and chewy with slightly crisp edges—exactly what a snickerdoodle should be, but better.
What makes this recipe different from the rest is the browned butter technique. Most pumpkin snickerdoodles skip this step, and they end up tasting flat or one-dimensional. The browning process adds a toasty, almost butterscotch flavor that plays beautifully with the pumpkin and spices. It is not just another version—it is the version that makes you close your eyes after the first bite. This is comfort food reimagined: faster, more flavorful, and with the same soul-soothing satisfaction you crave on a slow evening at home.
What Ingredients You Will Need
This recipe uses simple, wholesome ingredients to deliver that deep, cozy flavor without any fuss. Most of these are pantry staples, which makes these cookies perfect for spontaneous baking sessions when the weather turns chilly.
For the Cookies
- Unsalted butter, 1 cup (2 sticks) — Browning requires unsalted so you can control the salt level. I prefer using a high-fat European-style butter like Kerrygold for richer flavor, but any good unsalted butter works.
- Granulated sugar, ¾ cup (150g) — Adds sweetness and helps create that signature crackly top.
- Light brown sugar, ½ cup (100g), packed — Adds moisture and a hint of molasses that complements the brown butter beautifully.
- Pumpkin puree, ½ cup (120g) — Use pure pumpkin, not pumpkin pie filling. Libby’s is my go-to brand for consistent texture and moisture content.
- Large egg, 1, room temperature — Helps bind the dough and adds richness.
- Vanilla extract, 1 teaspoon — Pure vanilla, not imitation, for the best flavor.
- All-purpose flour, 2 cups (250g) — Spoon and level for accuracy. Too much flour makes cookies dry.
- Cream of tartar, 2 teaspoons — This is non-negotiable for authentic snickerdoodle texture. It gives the cookies their characteristic tang and chewy center.
- Baking soda, 1 teaspoon — Helps the cookies spread and rise slightly.
- Salt, ½ teaspoon — Balances the sweetness and enhances the brown butter flavor.
- Ground cinnamon, 1 teaspoon — The backbone of snickerdoodle spice.
- Ground ginger, ½ teaspoon — Adds warmth without overpowering.
- Ground nutmeg, ¼ teaspoon — Freshly grated if you have it, for a more aromatic result.
- Ground cloves, ⅛ teaspoon — Just a pinch for depth.
For the Cinnamon-Sugar Coating
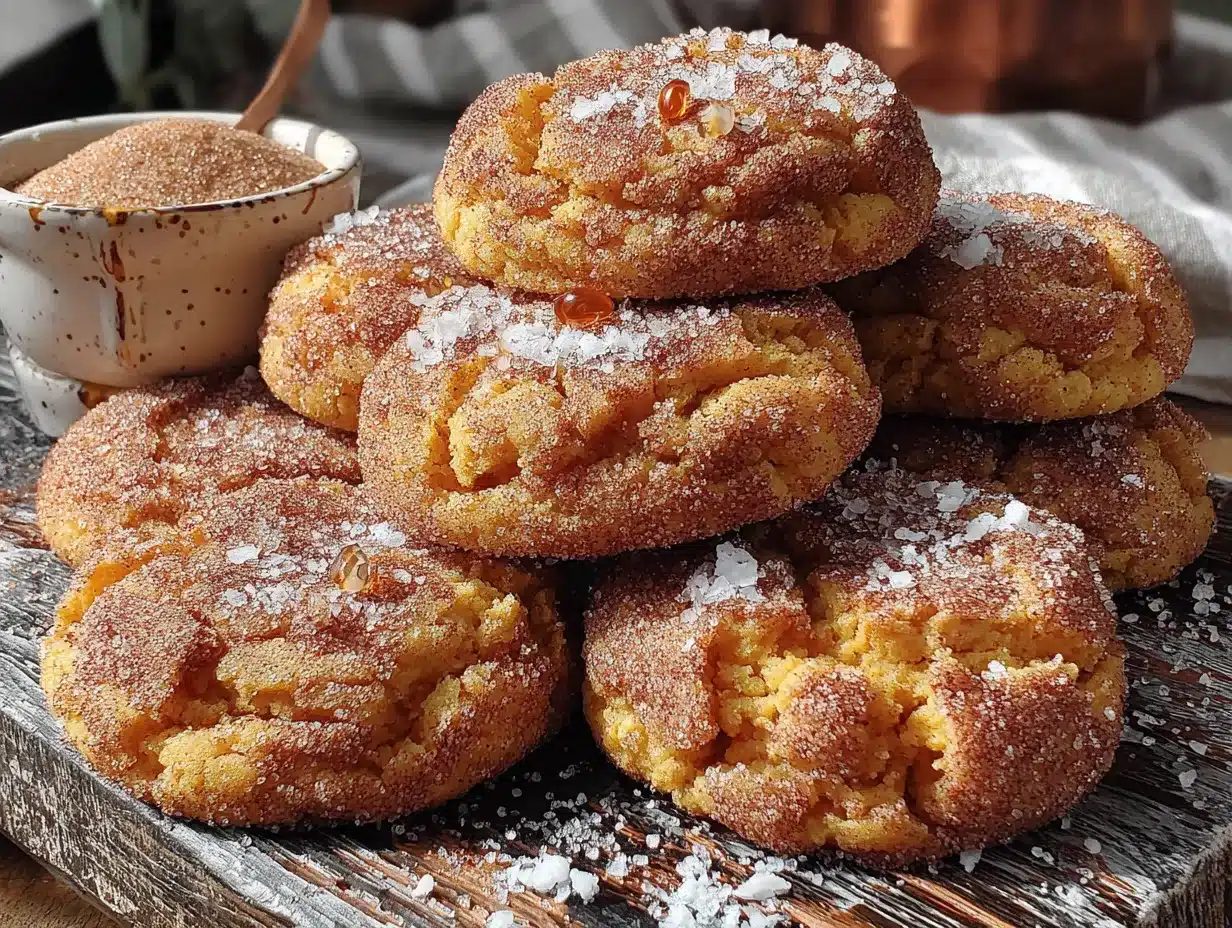
- Granulated sugar, ¼ cup (50g)
- Ground cinnamon, 2 tablespoons — Yes, this is more than you might expect. The generous coating is what makes these cookies so special.
Ingredient Substitution Notes
If you need a dairy-free option, you can use a high-quality vegan butter stick for browning. Keep in mind that vegan butter browns slightly differently and may not get as dark. For a gluten-free version, swap the all-purpose flour with a 1:1 gluten-free baking blend that contains xanthan gum. I have tested this with Bob’s Red Mill 1:1 and the texture was very close to the original. If you are out of cream of tartar, you can substitute with 1 teaspoon of lemon juice or white vinegar mixed into the wet ingredients, but the texture will be slightly less chewy.
Equipment Needed
- Large skillet or saucepan — A light-colored pan is best for browning butter so you can see the color change clearly. I use a stainless steel skillet for even heating.
- Electric mixer — A stand mixer with paddle attachment or a hand mixer works well. You can mix by hand, but the dough gets stiff and your arm will thank you for using a mixer.
- Mixing bowls — One medium, one large.
- Whisk — For combining dry ingredients evenly.
- Rubber spatula — For scraping every last bit of browned butter from the pan. Trust me, you don’t want to leave any behind.
- Baking sheets — Two standard half-sheet pans. Line them with parchment paper for easy cleanup.
- Cooling rack — Essential for letting the cookies set properly.
- Cookie scoop — A 1.5-tablespoon scoop ensures uniform cookies that bake evenly. If you don’t have one, use two spoons to portion the dough.
- Small bowl — For the cinnamon-sugar coating.
You don’t need any fancy equipment for this recipe. A good skillet and a mixer are the only things that make a real difference. If you don’t have a mixer, you can use a wooden spoon and some elbow grease—just make sure the butter isn’t too hot when you add it to the sugar.
Preparation Method
These cookies come together quickly, so read through the steps once before starting. The dough comes together in about 10 minutes, and baking takes another 10 to 12 minutes per batch.
Step 1: Brown the Butter
Place the 1 cup of unsalted butter in a light-colored skillet or saucepan over medium heat. Swirl the pan occasionally as the butter melts. It will foam up, then subside, and you will see brown specks forming at the bottom. This takes about 5 to 7 minutes. Watch closely—the butter can go from browned to burnt in seconds. When it smells nutty and the specks are a deep amber color, remove it from the heat immediately. Pour the browned butter into a heatproof bowl, making sure to scrape all those brown bits into the bowl. Let it cool for 10 minutes. It should be warm but not hot when you add it to the sugar.
Step 2: Combine Wet Ingredients
In a large mixing bowl, combine the cooled browned butter, ¾ cup granulated sugar, and ½ cup packed light brown sugar. Beat with an electric mixer on medium speed until well combined, about 1 minute. The mixture should look slightly grainy but uniform. Add the ½ cup pumpkin puree, 1 large egg, and 1 teaspoon vanilla extract. Beat on medium speed until smooth and creamy, about 2 minutes. The mixture might look slightly separated at first—that is normal. Keep beating until it comes together into a smooth, glossy batter.
Step 3: Combine Dry Ingredients
In a separate medium bowl, whisk together 2 cups all-purpose flour, 2 teaspoons cream of tartar, 1 teaspoon baking soda, ½ teaspoon salt, 1 teaspoon ground cinnamon, ½ teaspoon ground ginger, ¼ teaspoon ground nutmeg, and ⅛ teaspoon ground cloves. Whisk until everything is evenly distributed, about 30 seconds. This ensures you don’t bite into a pocket of baking soda later.
Step 4: Form the Dough
Gradually add the dry ingredients to the wet ingredients, mixing on low speed or folding with a spatula. Mix just until no streaks of flour remain. Do not overmix—this develops gluten and makes the cookies tough. The dough will be soft, slightly sticky, and very fragrant. It should hold together when pressed but not be dry. If it feels too wet, add one tablespoon of flour at a time. If it feels too dry, add one teaspoon of milk or water.
Step 5: Prepare the Coating
In a small bowl, stir together ¼ cup granulated sugar and 2 tablespoons ground cinnamon. Set aside.
Step 6: Shape and Coat the Cookies
Preheat your oven to 350°F (175°C). Line two baking sheets with parchment paper. Using a 1.5-tablespoon cookie scoop or two spoons, portion the dough into balls about 1.5 inches in diameter. Roll each ball between your palms until smooth—this helps the coating stick evenly. Drop each ball into the cinnamon-sugar mixture and roll to coat completely. Place the coated dough balls on the prepared baking sheets, spacing them about 2 inches apart. They will spread, so don’t crowd them.
Step 7: Bake
Bake one sheet at a time on the center rack for 10 to 12 minutes. The cookies should look puffed, crackled on top, and slightly golden around the edges. The centers will look soft and slightly underdone—that is exactly what you want. They will continue to set as they cool. If you overbake them, they will become dry and cakey instead of soft and chewy.
Step 8: Cool
Let the cookies cool on the baking sheet for 5 minutes. This allows them to firm up enough to transfer without breaking. Then, move them to a wire cooling rack to cool completely. The crackly top will set as they cool, creating that beautiful snickerdoodle texture. Repeat with the remaining dough.
Cooking Tips & Techniques
I have made these cookies at least a dozen times now, and I have learned a few things the hard way. Here are the tips that make the biggest difference:
Don’t skip cooling the browned butter. I made that mistake once—poured hot butter straight into the sugar and ended up with greasy, flat cookies. The butter needs to be warm but not hot, around 110°F to 120°F. If it is too hot, it will melt the sugar and change the dough structure. Let it sit for a full 10 minutes after browning.
Measure your pumpkin puree carefully. Too much pumpkin makes the dough sticky and the cookies cakey. Spoon the puree into your measuring cup and level it off. Don’t pack it down. If your pumpkin puree looks watery, blot it with a paper towel before measuring. Canned pumpkin can vary in moisture content between brands.
Use a cookie scoop for uniform size. This is the easiest way to ensure even baking. If your cookies are different sizes, some will overbake while others are underdone. A 1.5-tablespoon scoop is perfect for this recipe. If you don’t have one, use two spoons to portion equal amounts.
Chill the dough if it feels too soft. On a warm day or if your kitchen is humid, the dough might be too sticky to roll. Just pop it in the fridge for 15 to 20 minutes. It will firm up nicely without becoming too hard to shape. Do not chill for longer than 30 minutes, or the cookies won’t spread properly.
Rotate the baking sheet halfway through. Ovens have hot spots, and rotating the sheet at the 5-minute mark ensures even browning. I forgot to do this once and ended up with half-dark, half-pale cookies. Not a disaster, but not ideal.
Let them cool on the sheet. This is crucial. The cookies are very soft when they come out of the oven. If you try to move them immediately, they will fall apart. Five minutes on the sheet gives them time to set. After that, they transfer cleanly to a rack.
Variations & Adaptations
One of the best things about this recipe is how easily it adapts to different tastes and dietary needs. Here are a few variations I have tried and loved:
Vegan Brown Butter Pumpkin Snickerdoodles
Use a high-quality vegan butter stick for browning. I have tested this with Miyoko’s European Style Cultured Vegan Butter, and it browns beautifully. Replace the egg with a flax egg (1 tablespoon ground flaxseed mixed with 3 tablespoons water, let sit for 5 minutes). The texture is slightly less tender but still delicious. The cinnamon-sugar coating remains the same.
Gluten-Free Version
Swap the all-purpose flour with a 1:1 gluten-free baking blend that contains xanthan gum. I have had great results with Bob’s Red Mill 1:1 Gluten-Free Baking Flour. The cookies spread a bit more, so space them an extra inch apart. The texture is slightly more delicate but still soft and chewy.
Spiced Maple Variation
Replace the granulated sugar with ½ cup maple sugar and reduce the brown sugar to ¼ cup. Add 1 teaspoon of maple extract along with the vanilla. The maple flavor pairs beautifully with the brown butter and pumpkin. The cookies will be slightly darker and have a more complex sweetness.
Extra Pumpkin Spice
If you are a pumpkin spice enthusiast, increase the cinnamon to 2 teaspoons, add ½ teaspoon of allspice, and a pinch of cardamom. This creates a more aromatic, warming flavor profile that is perfect for holiday baking.
Chocolate-Dipped Version
After the cookies have cooled completely, melt ½ cup of dark chocolate chips with 1 teaspoon of coconut oil. Dip half of each cookie into the chocolate and place on parchment paper to set. The bitterness of dark chocolate contrasts beautifully with the sweet, spiced cookie. I made these for a cookie swap last December and they were the first to disappear.
Serving & Storage Suggestions
These cookies are best served slightly warm, when the edges are still crisp and the centers are soft and tender. I like to pair them with a mug of chai tea, hot apple cider, or a simple cup of black coffee. The warmth of the drink complements the spices in the cookie perfectly. For a more indulgent treat, serve them alongside a scoop of vanilla bean ice cream or a drizzle of caramel sauce.
They also make a wonderful addition to a fall dessert board. Arrange them with fresh apple slices, sharp cheddar cheese, roasted nuts, and a bowl of honey for a sweet-savory spread that impresses guests without much effort.
Storage: Store the cookies in an airtight container at room temperature for up to 5 days. Place a slice of bread in the container to keep them soft—the bread absorbs excess moisture and releases it slowly. Replace the bread slice every other day. Do not refrigerate the cookies, as the cold air will dry them out and make them crumbly.
Freezing: These cookies freeze beautifully. You can freeze the baked cookies in a single layer on a baking sheet, then transfer them to a freezer-safe bag or container. They will keep for up to 3 months. Thaw at room temperature for about 30 minutes before serving. You can also freeze the unbaked dough balls. Roll them, coat them in cinnamon-sugar, and place them on a parchment-lined baking sheet. Freeze until solid, then transfer to a freezer bag. Bake from frozen, adding 2 to 3 minutes to the baking time.
Reheating: To bring back that just-baked warmth, pop a cookie in the microwave for 10 seconds. For a crisper edge, reheat in a 300°F oven for 3 to 4 minutes. The flavors actually deepen after a day or two, so don’t be surprised if they taste even better on day two.
Nutritional Information & Benefits
Each cookie (based on 24 cookies per batch) contains approximately:
| Nutrient | Amount per Cookie |
|---|---|
| Calories | 165 |
| Total Fat | 8g |
| Saturated Fat | 5g |
| Carbohydrates | 22g |
| Sugar | 13g |
| Protein | 2g |
| Fiber | 1g |
| Sodium | 95mg |
While these are certainly a treat, the pumpkin puree adds a good dose of vitamin A and fiber. Pumpkin is rich in beta-carotene, which supports eye health and immune function. The cinnamon in the coating has anti-inflammatory properties and can help regulate blood sugar levels. Brown butter, in moderation, provides a small amount of vitamin A and healthy fats. That said, these cookies are meant to be enjoyed as a comforting indulgence, not a health food. I believe in balance—bake these for the joy they bring, savor every bite, and don’t overthink it.
Conclusion
These Cozy Brown Butter Pumpkin Snickerdoodles are more than just a cookie—they are a moment of warmth on a chilly day, a reminder that sometimes the best ideas come from unexpected places, and a way to fill your kitchen with the most incredible autumn aroma. The brown butter adds a depth of flavor that transforms a classic snickerdoodle into something genuinely special, and the pumpkin keeps everything soft and tender.
I hope you give this recipe a try, whether you are baking for a crowd or just for yourself on a quiet evening. Don’t be afraid to make it your own—add extra spices, try the chocolate-dipped version, or experiment with different flours. The best recipes are the ones that adapt to your life and your tastes.
If you make these cookies, I would love to hear about it. Leave a comment below and tell me how they turned out, or share your own variation. Did you add a pinch of cardamom? Dip them in white chocolate? I want to know! Tag me in your photos on social media—I am always looking for new baking inspiration. Until next time, happy baking, and may your kitchen always smell like browned butter and cinnamon.
Frequently Asked Questions
Can I use pumpkin pie spice instead of individual spices?
Yes, absolutely. Substitute 2 teaspoons of pumpkin pie spice for the cinnamon, ginger, nutmeg, and cloves listed in the recipe. The flavor will be slightly different—pumpkin pie spice often includes allspice and sometimes cardamom—but it will still be delicious. Just add it to the flour mixture along with the cream of tartar and baking soda.
Why do my cookies look flat and greasy?
This usually happens when the browned butter is too hot when mixed with the sugar. Let the butter cool for a full 10 minutes after browning. If it is still warm to the touch but not hot, it is ready. Another cause is overmixing the dough, which can break down the butter and make the cookies spread too much. Mix just until the flour disappears.
Can I make the dough ahead of time?
Yes, but with a caveat. You can refrigerate the dough for up to 24 hours, but let it sit at room temperature for 10 to 15 minutes before shaping and baking. Chilled dough will not spread as much, so the cookies will be thicker and slightly less crackly. If you want that classic snickerdoodle texture, bake the dough fresh. For longer storage, freeze the shaped dough balls as described in the storage section.
Can I use fresh pumpkin instead of canned?
You can, but you need to prepare it properly. Fresh pumpkin puree has much more water than canned. After roasting and pureeing the pumpkin, place it in a fine-mesh strainer lined with cheesecloth and let it drain for at least an hour. You may need to blot it with paper towels as well. Start with about 1 cup of fresh puree to end up with ½ cup of drained puree. The flavor is lovely, but the texture can be less consistent than canned.
How do I know when the butter is properly browned?
Look for three signs: color, smell, and sound. The butter will turn a deep amber color, like the color of a well-brewed cup of tea. It will smell nutty and toasty, almost like toasted hazelnuts. You will also hear the sizzling and popping subside as the water content evaporates. Once you see brown specks forming at the bottom of the pan and the butter smells fragrant, remove it from the heat immediately. It can go from perfect to burnt in less than 30 seconds.
Pin This Recipe!
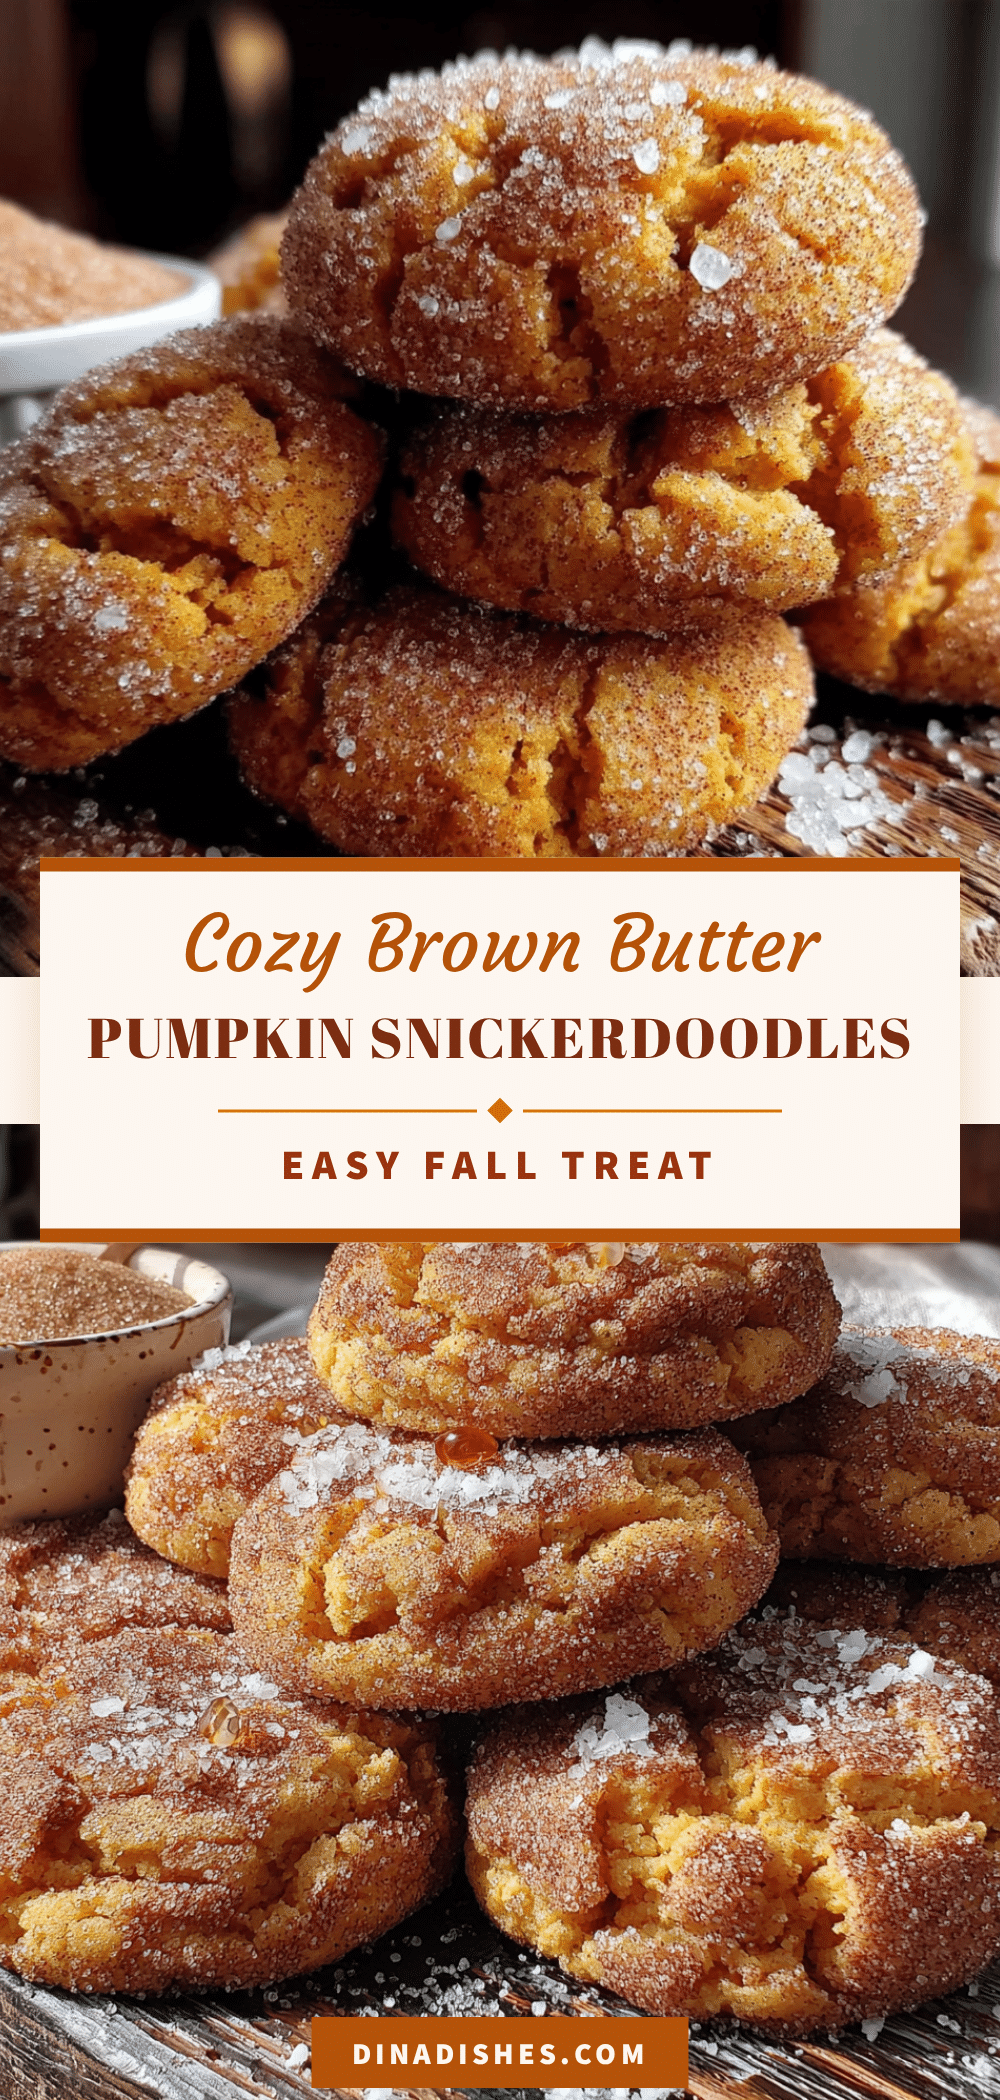
Cozy Brown Butter Pumpkin Snickerdoodles
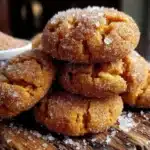
These soft, pillowy snickerdoodles feature nutty browned butter and pumpkin puree for a deep, cozy flavor. The dough comes together in about 30 minutes with no chilling required, making them perfect for spontaneous fall baking.
- Prep Time: 15 minutes
- Cook Time: 12 minutes
- Total Time: 27 minutes
- Yield: 24 cookies 1x
- Category: Dessert
- Cuisine: American
Ingredients
- 1 cup (2 sticks) unsalted butter
- ¾ cup (150g) granulated sugar
- ½ cup (100g) packed light brown sugar
- ½ cup (120g) pumpkin puree
- 1 large egg, room temperature
- 1 teaspoon vanilla extract
- 2 cups (250g) all-purpose flour
- 2 teaspoons cream of tartar
- 1 teaspoon baking soda
- ½ teaspoon salt
- 1 teaspoon ground cinnamon
- ½ teaspoon ground ginger
- ¼ teaspoon ground nutmeg
- ⅛ teaspoon ground cloves
- ¼ cup (50g) granulated sugar (for coating)
- 2 tablespoons ground cinnamon (for coating)
Instructions
- Brown the butter: Place 1 cup unsalted butter in a light-colored skillet over medium heat. Swirl occasionally as it melts. It will foam, then subside, and brown specks will form at the bottom (about 5-7 minutes). When it smells nutty and is deep amber, remove from heat immediately. Pour into a heatproof bowl, scraping all brown bits. Let cool for 10 minutes.
- Combine wet ingredients: In a large bowl, beat cooled browned butter, ¾ cup granulated sugar, and ½ cup packed brown sugar with an electric mixer on medium until combined (about 1 minute). Add pumpkin puree, egg, and vanilla. Beat until smooth and creamy (about 2 minutes).
- Combine dry ingredients: In a medium bowl, whisk together flour, cream of tartar, baking soda, salt, cinnamon, ginger, nutmeg, and cloves until evenly distributed (about 30 seconds).
- Form the dough: Gradually add dry ingredients to wet, mixing on low or folding with a spatula just until no streaks remain. Do not overmix. Dough should be soft, slightly sticky, and fragrant.
- Prepare coating: In a small bowl, stir together ¼ cup granulated sugar and 2 tablespoons cinnamon. Set aside.
- Shape and coat: Preheat oven to 350°F (175°C). Line two baking sheets with parchment. Using a 1.5-tablespoon scoop, portion dough into 1.5-inch balls. Roll each smooth, then coat in cinnamon-sugar. Place 2 inches apart on sheets.
- Bake: Bake one sheet at a time on center rack for 10-12 minutes. Cookies should look puffed, crackled on top, and slightly golden around edges. Centers will look soft—do not overbake.
- Cool: Let cookies cool on baking sheet for 5 minutes, then transfer to a wire rack to cool completely. Repeat with remaining dough.
Notes
Let browned butter cool for 10 minutes before using. Measure pumpkin puree carefully—do not pack. If dough is too soft, chill for 15-20 minutes. Rotate baking sheet halfway through for even browning. Let cookies cool on sheet for 5 minutes before transferring.
Nutrition
- Serving Size: 1 cookie
- Calories: 165
- Sugar: 13
- Sodium: 95
- Fat: 8
- Saturated Fat: 5
- Carbohydrates: 22
- Fiber: 1
- Protein: 2
Keywords: pumpkin snickerdoodles, brown butter cookies, fall cookies, easy pumpkin cookies, snickerdoodle recipe