My sister swore she hated peppermint bark. For years. Every December, she’d side-eye the tins of it that appeared on every counter, muttering something about toothpaste-flavored chocolate and why would anyone ruin perfectly good candy with mint? I never argued with her about it—I mean, why would I? More peppermint bark for me. But last Christmas, I made these cheesecake bars just for myself, honestly not even thinking about her, and found her standing at the kitchen counter at eleven o’clock at night, eating her third piece straight from the pan with a fork. She didn’t even try to hide it. She just looked at me and said, “These don’t count.”
I think that’s when I knew I had something special here. Not just because of my sister’s very grudging conversion, but because these bars did what no other peppermint dessert had done for her. They took that familiar holiday flavor and made it feel… cozy. Creamy. The kind of thing you want to eat curled up on the couch while snow falls outside your window. The crunchy peppermint pieces are still there, sure, but they’re balanced by this silky cheesecake layer and a buttery chocolate crust that just works.
Maybe you’ve had your own run-ins with peppermint bark that felt more like a flavor assault than a treat. Let me tell you—these bars are different. They’re the kind of dessert that makes you slow down. The kind where you close your eyes after the first bite and just breathe. I’ve been making them every holiday season since that night, and honestly, they’ve become my most-requested recipe. Even by people who “don’t like peppermint.”
Why You’ll Love This Recipe
Let me be real with you—I’ve tested a lot of cheesecake bar recipes over the years. Some turned out too dense. Some had a crust that crumbled into absolute chaos the second you tried to cut a clean slice. And some just didn’t have that thing—you know, the quality that makes you reach for another piece even when you’re full. These peppermint bark cheesecake bars? They’ve got it.
Here’s what makes them stand out:
- Quick & Easy: No water bath. No cracking drama. These bars come together in about 30 minutes of active prep, then the oven does the rest. Perfect for holiday baking when you’re already making seventeen other things.
- Simple Ingredients: You probably have most of this in your kitchen right now. Cream cheese, sugar, eggs, vanilla, chocolate cookies for the crust—nothing wild. The only special item is crushed peppermint candies, and those are everywhere in December.
- Perfect for Holiday Gatherings: These bars travel beautifully, slice cleanly, and look stunning on a dessert table. They’re great for cookie swaps, Christmas parties, or just a cozy night in with hot cocoa.
- Crowd-Pleaser: I’ve brought these to three different holiday dinners and watched people who claimed they “don’t do cheesecake” go back for seconds. The peppermint-chocolate combination is just that good.
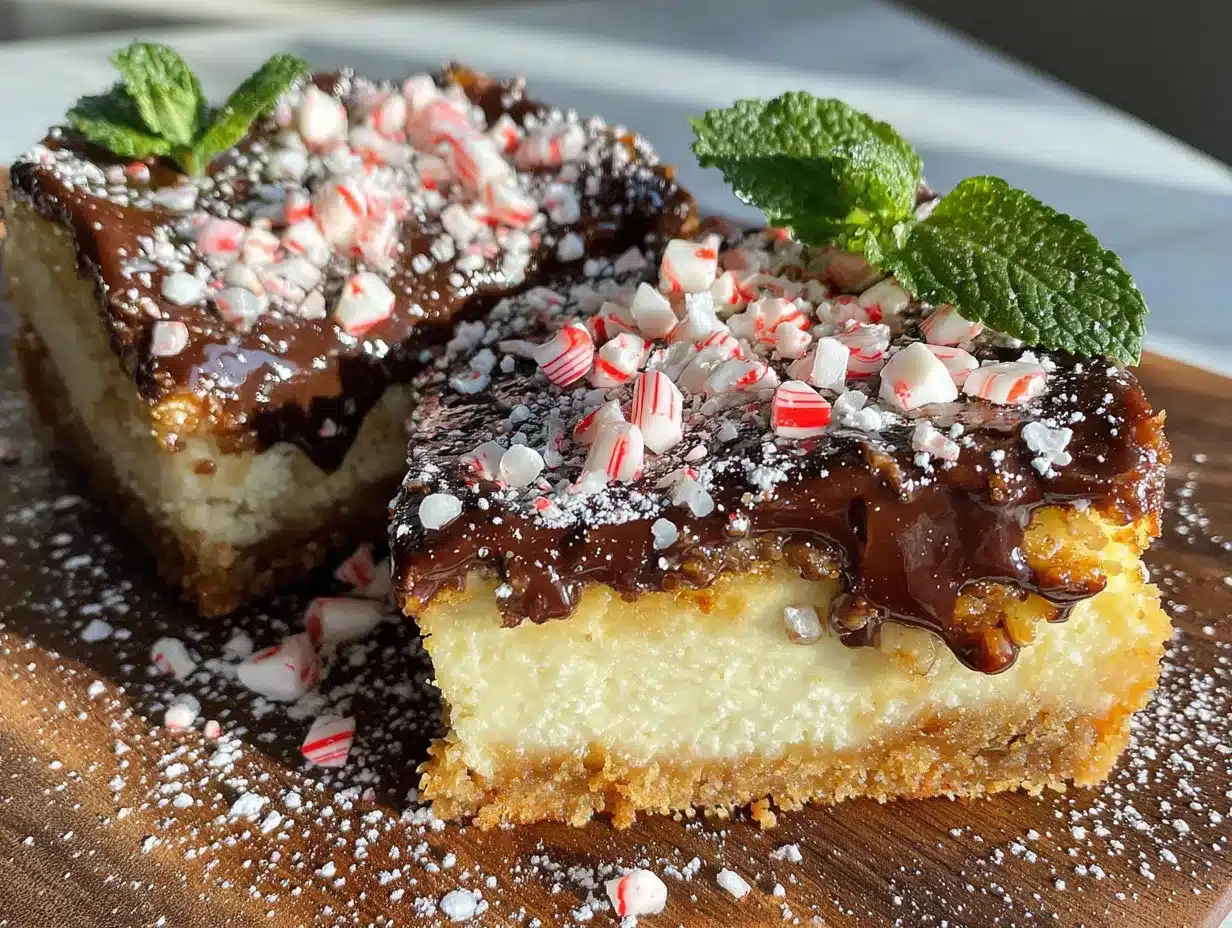
- Unbelievably Delicious: The texture is what gets me every time. That creamy, dense cheesecake layer against the crunchy chocolate crust, topped with a glossy chocolate ganache and those little bits of peppermint crunch. It’s next-level comfort food.
What makes this recipe different from all the other peppermint cheesecake bars out there? It’s the balance. I spent three batches getting the ratio of peppermint to chocolate to cheesecake exactly right. Too much peppermint and it tastes like a candy cane exploded in your mouth. Too little and what’s the point? This version hits that sweet spot where every flavor gets its moment. Plus, I add a little secret touch—a splash of vanilla extract in the cheesecake layer that rounds out the mint and makes everything taste more like a cozy holiday memory than a sugar bomb.
This isn’t just another holiday dessert. It’s the kind that makes people close their eyes after the first bite. It’s comfort food reimagined—familiar enough to feel like tradition, but special enough to become a new one.
What Ingredients You Will Need
This recipe uses simple, wholesome ingredients to deliver that bold peppermint-chocolate flavor and silky cheesecake texture without any fuss. Most of these are pantry staples during the holiday season, and I’ve included some substitution notes so you can adapt based on what you have on hand.
For the Chocolate Crust
- 2 cups chocolate cookie crumbs (about 24 Oreos or chocolate wafer cookies, finely crushed—I recommend removing the cream filling from Oreos for a cleaner crust)
- 5 tablespoons unsalted butter, melted (use salted butter in a pinch, just reduce any added salt)
- 2 tablespoons granulated sugar (optional—omit if using Oreos with filling, as they’re already sweet)
- Pinch of salt (balances the sweetness and enhances the chocolate flavor)
For the Cheesecake Layer
- 16 ounces cream cheese, softened (two standard blocks—full-fat gives the best texture, but reduced-fat works in a pinch)
- 3/4 cup granulated sugar
- 2 large eggs, room temperature (cold eggs can make the batter lumpy, so let them sit out for 30 minutes)
- 1 teaspoon vanilla extract (pure vanilla extract makes a noticeable difference here)
- 1/2 cup sour cream, room temperature (adds tanginess and makes the cheesecake extra creamy)
- 1/2 teaspoon peppermint extract (start with this amount and adjust to taste—it’s potent stuff)
- 1/4 cup all-purpose flour (helps stabilize the cheesecake and prevent cracking)
For the Chocolate Ganache Topping
- 1/2 cup heavy cream
- 1 cup semi-sweet chocolate chips (I prefer Ghirardelli or Guittard for that smooth melt)
- 1 tablespoon unsalted butter (adds shine and helps the ganache set smoothly)
For the Peppermint Topping
- 1/2 cup crushed peppermint candies or candy canes (about 6-8 regular candy canes—crush them in a sealed bag with a rolling pin)
- Optional: white chocolate drizzle (1/4 cup melted white chocolate chips for that classic bark look)
A quick note on peppermint extract—brands vary wildly in strength. I’ve used some that were so mild I needed a full teaspoon, and others where half a teaspoon was almost too much. Start with 1/2 teaspoon, taste your batter, and add more if you want a stronger mint kick. You can always add more, but you can’t take it out.
For the chocolate cookie crumbs, you can buy pre-made chocolate wafer crumbs in the baking aisle, but honestly, pulsing Oreos in a food processor is faster and tastes better. Just scrape out that white filling first unless you want an extra-sweet crust.
Equipment Needed
You don’t need a professional bakery setup for these bars, but having the right tools makes the process smoother. Here’s what I use:
- 9×9-inch baking pan (an 8×8 works too, your bars will just be slightly thicker—adjust baking time by 5 minutes)
- Parchment paper (non-negotiable for easy removal—let some hang over the edges as “handles”)
- Food processor or rolling pin (for crushing cookies and peppermint candies)
- Electric hand mixer or stand mixer (a whisk and some elbow grease works, but a mixer gives you that smooth, lump-free texture)
- Medium mixing bowls (at least two)
- Small saucepan or microwave-safe bowl (for the ganache)
- Spatula (for spreading and scraping every last bit of cheesecake batter)
- Measuring cups and spoons
If you don’t have a food processor, no worries. Put your cookies in a zip-top bag, seal it tight, and go to town with a rolling pin. It’s actually kind of therapeutic after a long day. Same for the peppermint candies—just make sure the bag is sealed well, or you’ll be picking minty dust off your kitchen floor. Ask me how I know.
One tip: use a metal baking pan, not glass. Metal conducts heat more evenly for the crust, and you’ll get cleaner slices. Glass pans can cause the edges to overbake while the center stays underdone.
Preparation Method
Alright, let’s make these bars. I’ve broken everything down step by step so you know exactly what to expect. Take your time with the first batch—once you’ve made them once, you’ll be able to do it from memory.
Step 1: Prep Your Pan and Preheat
Preheat your oven to 325°F (163°C). Line your 9×9-inch baking pan with parchment paper, leaving about 2 inches of overhang on two opposite sides. These will be your handles later. Lightly grease the parchment with butter or non-stick spray so nothing sticks.
Step 2: Make the Crust
In your food processor, pulse the chocolate cookies until they become fine crumbs. You want them uniform—no big chunks. Transfer to a medium bowl, add the melted butter, sugar (if using), and salt. Stir with a fork until the mixture looks like wet sand and holds together when you squeeze it.
Press this mixture firmly into the bottom of your prepared pan. I use the bottom of a flat measuring cup to really pack it down—this prevents a crumbly crust later. Bake for 10 minutes, then set aside to cool while you make the filling. Leave the oven on.
Step 3: Make the Cheesecake Filling
In a large bowl, beat the softened cream cheese with an electric mixer on medium speed until smooth and creamy—about 2 minutes. Scrape down the sides and bottom of the bowl with a spatula. Add the sugar and beat for another minute until combined.
Add the eggs one at a time, beating on low speed after each addition just until incorporated. Overmixing at this stage adds too much air, which can cause cracks. Add the vanilla extract, peppermint extract, and sour cream, mixing on low until just combined. Finally, fold in the flour with a spatula until you don’t see any white streaks.
The batter should be smooth, thick, and slightly glossy. Give it a taste—if you want more peppermint kick, add another 1/4 teaspoon of extract. Just remember the flavor will mellow slightly as it bakes.
Step 4: Assemble and Bake
Pour the cheesecake filling over the cooled crust and spread it evenly with a spatula. Give the pan a gentle tap on the counter to release any air bubbles. Bake for 35-40 minutes, or until the edges look set and the center jiggles slightly when you gently shake the pan—like Jell-O, not like soup.
Turn off the oven and crack the door open. Let the cheesecake bars sit in the warm oven for 15 minutes. This gradual cooling helps prevent cracks. Then transfer to a wire rack to cool completely at room temperature, about 1 hour.
Step 5: Make the Ganache
Once the bars are completely cool, make the ganache. Place the chocolate chips in a heat-safe bowl. Heat the heavy cream in a small saucepan over medium heat until it just starts to simmer—small bubbles around the edges, not a full boil. Pour the hot cream over the chocolate chips and let it sit for 2 minutes without stirring. Then gently whisk until smooth and shiny. Stir in the butter until melted.
Pour the ganache over the cooled cheesecake layer and spread it evenly. It should be thin enough to flow on its own, but if it’s too thick, warm it for 10 seconds in the microwave.
Step 6: Add the Peppermint Topping
While the ganache is still wet, sprinkle the crushed peppermint candies evenly over the top. If you’re adding a white chocolate drizzle, melt the white chocolate chips in the microwave in 20-second intervals, stirring between each, then drizzle with a fork or a piping bag.
Refrigerate the bars for at least 3 hours, or overnight. This is crucial—the cheesecake needs to be fully chilled to slice cleanly. I know it’s tempting to dig in, but trust me on this one.
Step 7: Slice and Serve
Use the parchment handles to lift the entire block out of the pan. Place on a cutting board and use a sharp knife to slice into 16 squares (4×4 grid). For clean cuts, wipe the knife clean between each slice with a damp paper towel. Let the bars sit at room temperature for 10 minutes before serving for the best texture.
Cooking Tips & Techniques
After making these bars more times than I can count, I’ve learned a few things the hard way. Here are my best tips to save you from the same mistakes.
Room temperature ingredients matter more than you think. Cold cream cheese creates lumps that no amount of beating will fully smooth out. Cold eggs can make the batter seize up. Set everything out on the counter 30-45 minutes before you start. If you forgot, you can soften cream cheese in the microwave in 10-second bursts, but be careful not to melt it.
Don’t overmix the cheesecake batter. I know it’s tempting to keep beating until it’s perfectly smooth, but too much air incorporation leads to cracks and a spongy texture. Mix just until each ingredient is incorporated, then stop. The flour helps stabilize things, but it can’t fix overmixed batter.
That gradual cooling step is your best friend. I used to skip this because I was impatient, and I paid for it with cracked cheesecake tops every single time. Leaving the bars in the turned-off oven with the door cracked for 15 minutes lets the temperature drop slowly, which prevents that sudden contraction that causes cracks. It’s a small step that makes a huge difference.
Chill before slicing. No exceptions. I learned this one the messy way. Cutting warm cheesecake bars is like trying to cut fudge with a spoon—it smears, it sticks, it breaks your heart. Three hours minimum in the fridge, and use a sharp knife that you wipe clean between cuts. If you’re in a hurry, pop them in the freezer for 45 minutes, but watch them—you don’t want frozen cheesecake.
Crush your peppermint candies to the right size. You want a mix of fine dust and small chunks. Too fine and it dissolves into the ganache. Too chunky and people are crunching on what feels like rocks. I put my candy canes in a bag and give them about 10 firm whacks with a rolling pin—not 5, not 20. It sounds silly, but the texture matters.
Variations & Adaptations
One of the best things about this recipe is how easy it is to tweak. Here are some variations I’ve tried and loved.
Gluten-Free Version: Use gluten-free chocolate sandwich cookies for the crust (there are several good brands now). The rest of the ingredients are naturally gluten-free, but double-check your peppermint candies—some contain wheat starch as a processing aid.
Dairy-Free Adaptation: This one takes a bit more work, but it’s doable. Use vegan cream cheese (I like Miyoko’s or Kite Hill), coconut cream instead of sour cream, and a dairy-free butter substitute. For the ganache, use full-fat coconut cream instead of heavy cream and dairy-free chocolate chips. The texture will be slightly different—a bit less firm—but the flavor is still fantastic.
Dark Chocolate Lover’s Version: Swap the semi-sweet chocolate chips in the ganache for dark chocolate (70% cacao or higher). The bitterness balances the sweet cheesecake beautifully. You might want to add an extra tablespoon of cream to keep the ganache smooth.
White Chocolate Peppermint: Use white chocolate chips for the ganache instead of semi-sweet. The result is sweeter and more traditional peppermint bark-style. Add a few drops of red food coloring to the cheesecake batter for a pink layer that looks stunning against the white.
No-Bake Version: For a lighter, no-oven option, use a no-bake cheesecake filling (cream cheese, powdered sugar, whipped cream, and peppermint extract) and chill the crust for 30 minutes before adding the filling. The texture is more mousse-like, but it’s perfect for when you don’t want to turn on the oven.
I once made a batch with crushed gingerbread cookies mixed into the crust instead of chocolate wafers, and topped it with a drizzle of caramel along with the peppermint. It was a little chaotic, honestly, but my friends still talk about it. Don’t be afraid to experiment—that’s how new traditions are born.
Serving & Storage Suggestions
These bars are best served slightly chilled but not straight-from-the-fridge cold. Let them sit at room temperature for about 10-15 minutes before serving. This softens the cheesecake layer just enough to make it creamy and luxurious, while the ganache stays firm and the crust holds its crunch.
For presentation, I like to arrange the bars on a white platter or a wooden board—the contrast with the dark chocolate and red peppermint pieces is gorgeous. A light dusting of powdered sugar or cocoa powder over the top adds a nice finishing touch. If you’re feeling fancy, add a tiny candy cane on each bar as a garnish.
These bars pair beautifully with a cup of hot coffee, a mug of spiced tea, or—let’s be honest—a glass of cold milk. For holiday gatherings, I serve them alongside a warm drink station with hot chocolate, peppermint mocha, and apple cider. They’re also fantastic crumbled over vanilla ice cream for an impromptu sundae.
Storage: Keep the bars in an airtight container in the refrigerator for up to 5 days. Layer them with parchment paper between each layer so the peppermint topping doesn’t stick. The flavor actually improves after a day or two—the peppermint mellows and melds with the cheesecake beautifully.
Freezing: These freeze like a dream. Wrap individual bars tightly in plastic wrap, then place them in a freezer-safe bag or container. They’ll keep for up to 3 months. To thaw, transfer to the refrigerator overnight or let sit at room temperature for about 30 minutes. Don’t microwave them—it ruins the texture.
One thing I love about this recipe is that the flavors develop over time. The peppermint becomes less sharp and more integrated, the cheesecake gets creamier, and the ganache sets to that perfect fudge-like consistency. Honestly, day two is my favorite.
Nutritional Information & Benefits
Let’s be real—these are a treat, not a health food. But here’s the estimated nutritional breakdown per bar (based on 16 servings):
| Nutrient | Amount Per Bar |
|---|---|
| Calories | 320 |
| Total Fat | 22g |
| Saturated Fat | 13g |
| Cholesterol | 75mg |
| Sodium | 200mg |
| Total Carbohydrates | 30g |
| Sugars | 22g |
| Protein | 5g |
That said, there are a few bright spots. Cream cheese provides calcium and a small amount of protein. Dark chocolate (if you use it) is rich in antioxidants. And peppermint has been shown to aid digestion—so there’s that! I like to think of these bars as a balanced indulgence. They’re meant to be enjoyed in moderation, savored slowly, and shared with people you love.
If you’re watching your sugar intake, you can reduce the sugar in the cheesecake layer to 1/2 cup without affecting the texture too much. The ganache and crust will still bring plenty of sweetness. For a lower-fat option, use reduced-fat cream cheese and skip the sour cream—the texture will be slightly less creamy, but still delicious.
As always, check your ingredients for potential allergens. This recipe contains dairy, gluten, and eggs. The peppermint candies may also be processed in facilities that handle nuts.
Conclusion
These peppermint bark cheesecake bars have become my go-to holiday dessert for a reason. They’re beautiful enough for a Christmas party, simple enough for a Tuesday night craving, and delicious enough to convert even the most stubborn peppermint skeptics. My sister now asks for them by name every December—and she still insists they “don’t count” as peppermint bark.
What I love most about this recipe is how adaptable it is. You can dress it up with white chocolate drizzle, keep it simple with just the ganache, or experiment with different crusts and toppings. It’s a recipe that grows with you, that you can make your own. And honestly, that’s the best kind of recipe to have in your collection.
I’d love to hear how these turn out for you. Did you add your own twist? Did you serve them at a holiday party? Did anyone in your life have a peppermint conversion story of their own? Drop a comment below and let me know—I read every single one. And if you share a photo on Pinterest or Instagram, tag me so I can see your beautiful creations.
Happy baking, friends. May your holidays be cozy, your kitchen warm, and your dessert plate always full.
Frequently Asked Questions
Can I use pre-crushed peppermint candies from a store?
Absolutely, if you can find them. Just check the texture—some pre-crushed brands are too fine and will dissolve into the ganache. You want pieces that still have a little crunch. If they’re too powdery, mix in some coarsely crushed candy canes for texture.
Why did my cheesecake layer crack on top?
Cracks usually happen from overmixing the batter or cooling the bars too quickly. Make sure your ingredients are at room temperature, mix on low speed after adding the eggs, and don’t skip that gradual cooling step in the turned-off oven. If cracks do appear, don’t worry—the ganache layer covers them completely.
Can I make these bars ahead of time for a party?
Yes, and I actually recommend it! These bars taste even better after a day or two in the fridge. Make them up to 3 days in advance, keep them covered in the refrigerator, and add the peppermint topping just before serving for the freshest crunch. The ganache and cheesecake flavors meld beautifully over time.
How do I get clean, neat slices?
Patience is key here. Chill the bars for at least 3 hours, preferably overnight. Use a long, sharp knife and wipe it clean with a damp paper towel between each cut. Run the knife under hot water and dry it before slicing for even cleaner edges. Let the bars sit at room temperature for 10 minutes before cutting so the cheesecake softens slightly.
Can I use peppermint oil instead of peppermint extract?
You can, but be very careful—peppermint oil is much more concentrated. Use just 1-2 drops, and stir it in thoroughly. Start with 1 drop, taste the batter, and add another if needed. Too much peppermint oil can make the bars taste medicinal, so err on the side of caution. Extract is more forgiving for this reason.
Pin This Recipe!
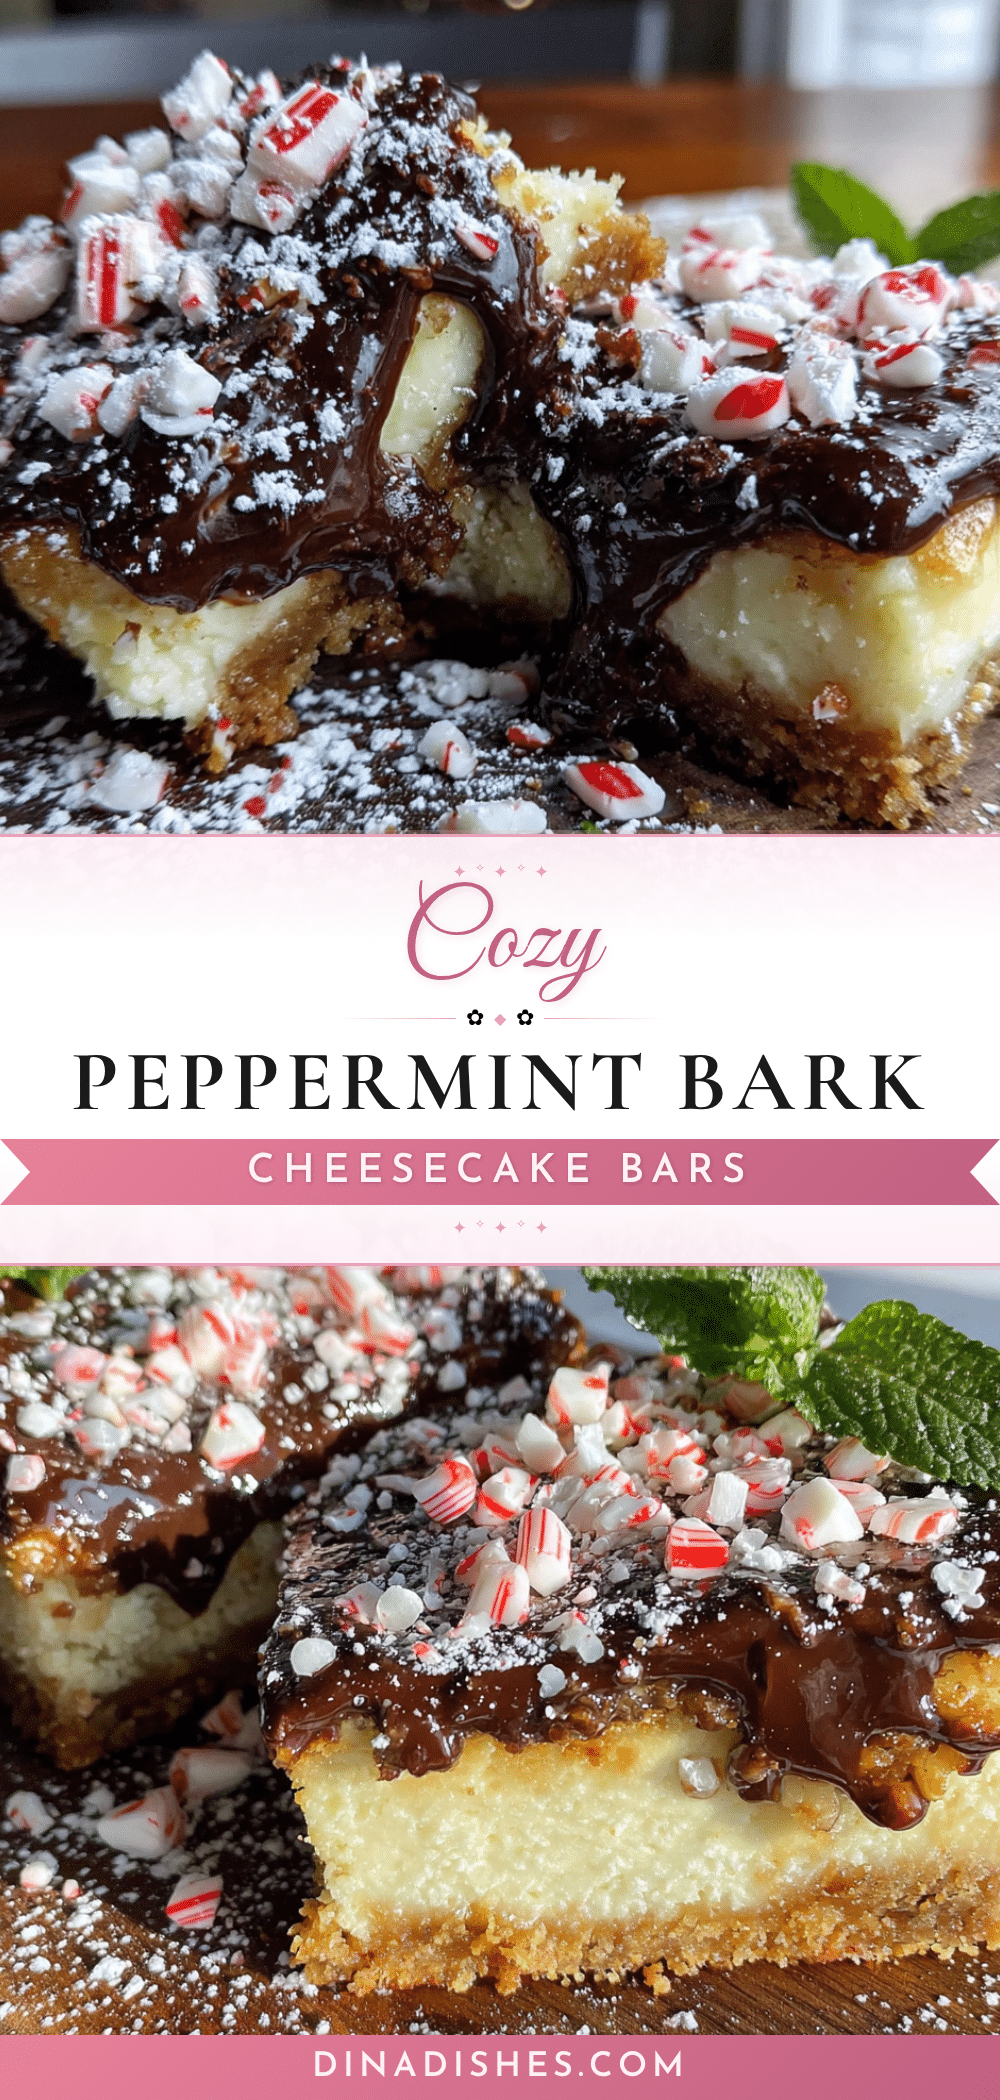
Easy Peppermint Bark Cheesecake Bars Recipe
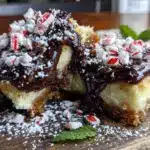
These creamy peppermint bark cheesecake bars feature a buttery chocolate crust, silky cheesecake layer, rich chocolate ganache, and crunchy peppermint topping. They’re the perfect holiday dessert that even peppermint skeptics will love.
- Prep Time: 30 minutes
- Cook Time: 40 minutes
- Total Time: 4 hours 10 minutes (includes cooling and chilling)
- Yield: 16 servings 1x
- Category: Dessert
- Cuisine: American
Ingredients
- 2 cups chocolate cookie crumbs (about 24 Oreos or chocolate wafer cookies, finely crushed)
- 5 tablespoons unsalted butter, melted
- 2 tablespoons granulated sugar (optional, omit if using Oreos with filling)
- Pinch of salt
- 16 ounces cream cheese, softened
- 3/4 cup granulated sugar
- 2 large eggs, room temperature
- 1 teaspoon vanilla extract
- 1/2 cup sour cream, room temperature
- 1/2 teaspoon peppermint extract
- 1/4 cup all-purpose flour
- 1/2 cup heavy cream
- 1 cup semi-sweet chocolate chips
- 1 tablespoon unsalted butter
- 1/2 cup crushed peppermint candies or candy canes (about 6–8 regular candy canes)
- Optional: 1/4 cup melted white chocolate chips for drizzle
Instructions
- Preheat oven to 325°F (163°C). Line a 9×9-inch baking pan with parchment paper, leaving overhang on two sides. Lightly grease the parchment.
- Make the crust: Pulse chocolate cookies in a food processor until fine crumbs. Transfer to a bowl, add melted butter, sugar (if using), and salt. Stir until mixture resembles wet sand. Press firmly into the bottom of the prepared pan. Bake for 10 minutes, then set aside to cool. Leave oven on.
- Make the cheesecake filling: In a large bowl, beat cream cheese with an electric mixer on medium speed until smooth, about 2 minutes. Add sugar and beat for 1 minute. Add eggs one at a time, beating on low after each addition. Add vanilla extract, peppermint extract, and sour cream, mixing on low until combined. Fold in flour with a spatula until no white streaks remain.
- Pour cheesecake filling over cooled crust and spread evenly. Tap pan gently on counter to release air bubbles. Bake for 35-40 minutes, until edges are set and center jiggles slightly. Turn off oven, crack door open, and let bars sit in warm oven for 15 minutes. Transfer to a wire rack to cool completely, about 1 hour.
- Make the ganache: Place chocolate chips in a heat-safe bowl. Heat heavy cream in a small saucepan over medium heat until it just simmers. Pour hot cream over chocolate chips, let sit for 2 minutes, then whisk until smooth. Stir in butter until melted. Pour ganache over cooled cheesecake layer and spread evenly.
- While ganache is still wet, sprinkle crushed peppermint candies evenly over the top. If using, drizzle melted white chocolate. Refrigerate bars for at least 3 hours, or overnight.
- Use parchment handles to lift the block out of the pan. Place on a cutting board and slice into 16 squares (4×4 grid) with a sharp knife, wiping clean between cuts. Let bars sit at room temperature for 10 minutes before serving.
Notes
Room temperature ingredients are crucial for a smooth cheesecake. Don’t overmix the batter to avoid cracks. Gradual cooling in the oven helps prevent cracking. Chill bars thoroughly before slicing for clean cuts. Peppermint extract strength varies; start with 1/2 teaspoon and adjust to taste. Bars can be stored in the refrigerator for up to 5 days or frozen for up to 3 months.
Nutrition
- Serving Size: 1 bar
- Calories: 320
- Sugar: 22
- Sodium: 200
- Fat: 22
- Saturated Fat: 13
- Carbohydrates: 30
- Fiber: 1
- Protein: 5
Keywords: peppermint bark, cheesecake bars, holiday dessert, Christmas dessert, peppermint cheesecake, chocolate ganache, easy dessert