The woman at the next table watched me for a good five minutes before she said anything. I was hunched over a notebook in a tiny coffee shop downtown, sketching out gingerbread house ideas with a leaky pen, and honestly—I was making a mess of it. The icing I’d tried the night before had been a disaster, all runny and sad, and my gingerbread walls were sliding apart like they’d given up on life. She finally leaned over and said, “You’re overthinking it, honey. Royal icing is about patience, not perfection.”
Her name was Margaret, and she’d been decorating cookies for her church bake sales for over forty years. She didn’t offer me a recipe right away—she just started talking about the way egg whites and sugar can turn into something almost magical if you give them the right attention. I told her about my crumbling gingerbread house, and she laughed. “That’s not the icing’s fault,” she said. “That’s you rushing.” She wrote her royal icing recipe on a napkin, and I still have that napkin tucked into my favorite cookbook, splattered with vanilla and good intentions.
This isn’t just any royal icing recipe. It’s the one that taught me that the perfect consistency comes from feeling, not measuring. It’s the one that finally held my gingerbread walls together, that let me pipe little snowflakes without them melting into puddles, that made my niece gasp when she saw the house I’d made for her birthday. If you’ve ever fought with runny icing or watched your gingerbread roof cave in, let me tell you—this recipe changes things. It’s the kind of recipe you keep coming back to, year after year, because it just works.
And honestly, the best part? It only takes about ten minutes to make.
Why You’ll Love This Recipe
I’ve tested a lot of royal icing recipes over the years. Some were too stiff, some were too thin, and some just tasted like powdered sugar and regret. This one hits the sweet spot—literally and figuratively. Here’s why it’s become my go-to for every gingerbread house project:
- Quick & Easy: You can whip this up in under 10 minutes with just a hand mixer. No heating, no candy thermometers, no fuss.
- Simple Ingredients: You probably already have everything in your pantry. Egg whites (or meringue powder), powdered sugar, and a splash of vanilla or lemon juice.
- Perfect for Gingerbread Houses: This icing dries hard and strong, holding even the heaviest candy roofs and gumdrop chimneys in place.
- Crowd-Pleaser: Kids love helping pipe it, and adults appreciate how forgiving it is. Plus, it tastes way better than the store-bought stuff.
- Unbelievably Versatile: Use it for cookies, as a glue for gingerbread structures, or even for detailed piping work on cakes.
What makes this recipe different from all the others? It’s the texture. I’ve learned that the secret is adding the liquid slowly and stopping at exactly the right moment. This icing is stiff enough to hold a peak but soft enough to pipe smoothly—no clogs, no splatters. It’s the kind of recipe that makes you feel like a pro, even if it’s your first time building a gingerbread house.
I still remember the first gingerbread house I made with this icing. It was lopsided, the roof was crooked, and I’d used way too many gumdrops. But when my nephew saw it, his eyes went wide. “It’s perfect,” he said. And you know what? It was. Because the icing held everything together, and the joy of making it was the real magic.
What Ingredients You Will Need
This recipe uses just a handful of ingredients, but each one plays a specific role. The key is using the right type and getting the proportions just right. Here’s what you’ll need:
- Meringue Powder (3 tablespoons) – This is the backbone of the icing. It gives it structure and stability. I prefer Wilton brand for consistent results, but any brand works. (If you can’t find meringue powder, you can use 2 large egg whites instead—just be aware that raw eggs carry a small risk of salmonella, so for kids or the elderly, stick with meringue powder.)
- Powdered Sugar (4 cups, sifted) – Sifting is non-negotiable here. Lumps in your sugar mean lumps in your icing, and nobody wants that. Use a fine-mesh sieve and take the extra minute. Trust me.
- Warm Water (about 5-6 tablespoons) – The amount varies depending on humidity and your meringue powder brand. Start with 4 tablespoons and add more a teaspoon at a time. You’re looking for a consistency that holds a stiff peak but still pipes easily.
- Vanilla Extract (1/2 teaspoon) – Pure vanilla extract adds a warm, sweet flavor. If you’re making white icing for a pristine look, use clear vanilla extract so it doesn’t tint the icing. I sometimes use almond extract for a different flavor profile—just a quarter teaspoon goes a long way.
- Cream of Tartar (1/4 teaspoon, optional) – This helps stabilize the meringue and gives the icing a bit more structure. I add it when I’m making icing for intricate piping work, like snowflakes or window details. It’s not essential, but it helps.
Ingredient Selection Tips: When buying meringue powder, check the expiration date. Old powder won’t whip up as well. For powdered sugar, avoid brands that contain cornstarch as an anti-caking agent—it can affect the texture. I’ve found that C&H and Domino work beautifully.
Substitution Guidance: If you’re out of meringue powder, use 2 large egg whites at room temperature. The icing will be slightly less stable, but it’ll still work. For a vegan version, use aquafaba (the liquid from a can of chickpeas)—3 tablespoons of aquafaba replaces 1 egg white. The flavor is neutral, and it whips up surprisingly well.
Seasonal Variations: In winter, I sometimes add a pinch of cinnamon or nutmeg to the icing for a festive twist. In summer, I skip the vanilla and use a tablespoon of fresh lemon juice instead—it adds brightness and helps the icing dry faster.
Equipment Needed
You don’t need a fancy kitchen to make great royal icing. Here’s what I use:
- Hand Mixer or Stand Mixer – A hand mixer works perfectly. If you’re using a stand mixer, use the whisk attachment. I’ve made this icing with a whisk and a strong arm before, and while it’s possible, your arm will hate you. Save yourself the trouble.
- Large Mixing Bowl – Glass or stainless steel works best. Avoid plastic bowls—they can retain grease, which prevents the meringue from whipping up properly.
- Fine-Mesh Sieve – For sifting the powdered sugar. This is one of those small steps that makes a big difference.
- Rubber Spatula – For scraping down the sides of the bowl and folding in any stubborn lumps.
- Piping Bags and Tips – I use disposable piping bags for easy cleanup. For gingerbread houses, a round tip (size 3 or 4) is perfect for outlining and gluing. A small star tip (size 16 or 18) is great for decorative borders.
- Damp Paper Towel – Keep one handy to cover your bowl of icing while you work. Royal icing dries out fast, and a damp towel prevents a crust from forming.
Budget-Friendly Options: You can make piping bags from sturdy zip-top bags—just snip off a tiny corner. It won’t give you the same precision as a metal tip, but it works in a pinch. Also, a whisk and a strong arm can replace a mixer if you’re patient.
Maintenance Tip: Clean your piping tips immediately after use. Soak them in warm, soapy water for a few minutes, then use a small brush to remove any dried icing. Royal icing sets like cement, and once it’s hard, it’s a pain to remove.
Preparation Method

Making royal icing is straightforward, but the details matter. Follow these steps carefully, and you’ll get perfect results every time.
- Prep Your Bowl: Make sure your mixing bowl and beaters are completely clean and dry. Any trace of grease or oil will prevent the meringue from whipping up. I wipe mine down with a little lemon juice on a paper towel just to be safe.
- Combine Dry Ingredients: In your mixing bowl, whisk together the meringue powder, sifted powdered sugar, and cream of tartar (if using). This helps distribute the meringue powder evenly before you add liquid.
- Add Water and Vanilla: Pour in 4 tablespoons of warm water and the vanilla extract. Start mixing on low speed to avoid a cloud of powdered sugar. Once the sugar is incorporated, increase to medium-high speed.
- Whip Until Stiff Peaks Form: Beat the mixture for 4-5 minutes. You’re looking for stiff, glossy peaks—when you lift the beaters, the icing should stand up straight without drooping. If it’s too stiff, add water 1 teaspoon at a time, beating for 30 seconds after each addition. If it’s too thin, add more sifted powdered sugar, 1 tablespoon at a time.
- Test the Consistency: This is the most important step. Dip a spoon into the icing and lift it up. The icing should form a firm peak that holds its shape. For gingerbread house assembly, you want a stiff consistency—like toothpaste. For piping details, you might want it slightly softer, like thick honey.
- Color the Icing (Optional): If you’re using gel food coloring, add it now. Gel colors are concentrated, so start with a tiny drop and mix thoroughly. Add more until you get the shade you want. Avoid liquid food coloring—it thins the icing and can ruin the consistency.
- Transfer to Piping Bags: Fit your piping bags with the desired tips. Fold down the top of the bag over your hand, fill it halfway with icing, then twist the top to seal. Use a twist tie or a rubber band to keep the bag closed.
- Keep Icing Covered: Any icing you’re not using immediately should be covered with a damp paper towel or plastic wrap pressed directly onto the surface. Royal icing forms a crust within minutes, and that crust can clog your piping tip.
Sensory Cues: When it’s done, the icing should look glossy and feel smooth when you rub a tiny bit between your fingers. It should not feel grainy—if it does, you need to beat it longer. The sound changes too—when it’s ready, the mixer makes a slightly different, thicker sound.
Troubleshooting: If your icing won’t whip up, it might be too warm. Pop the bowl in the fridge for 10 minutes and try again. If it’s too runny, you probably added too much water—add more sifted powdered sugar a tablespoon at a time. If it’s too stiff, add water a teaspoon at a time. Don’t panic—royal icing is forgiving.
Cooking Tips & Techniques
After years of making royal icing, I’ve learned a few things the hard way. Here are my best tips for success:
- Start with a Stiff Consistency: When you’re gluing gingerbread walls together, use stiff icing. It dries faster and holds better. I’ve had walls slide apart because I made the icing too thin. Learn from my mistakes.
- Let the Icing Rest: After whipping, let the icing sit for 5 minutes before using it. This allows any air bubbles to rise to the surface. Pop them with a toothpick before piping, or they’ll leave little craters in your work.
- Use a Damp Paper Towel: Keep a damp paper towel over your bowl of icing at all times. I can’t stress this enough. Royal icing dries out in minutes, and once it crusts, it’s useless for piping.
- Practice on Parchment: Before you pipe on your gingerbread house, practice on a piece of parchment paper. Draw some lines, dots, and swirls. It helps you get a feel for the pressure and speed.
- Work in Sections: When decorating a gingerbread house, work on one side at a time. Let the icing dry completely before moving to the next side. Otherwise, you’ll smudge your hard work.
- Multitasking Strategy: Make the icing first, then assemble your gingerbread house while the icing sets. By the time you’re done, the icing on the walls will be dry enough to add decorations.
Common Mistakes to Avoid: Don’t overbeat the icing—it can become too stiff and grainy. Don’t use cold water—warm water helps the meringue powder dissolve. And don’t skip sifting the powdered sugar—lumps are your enemy.
Variations & Adaptations
This recipe is incredibly versatile. Here are some of my favorite ways to change it up:
- Vegan Royal Icing: Replace the meringue powder with 3 tablespoons of aquafaba (chickpea liquid) per batch. Whip it the same way. The texture is slightly different—a bit softer—but it works beautifully. I’ve used it for gingerbread houses for my vegan friends, and nobody noticed the difference.
- Flavor Variations: Swap the vanilla for almond extract, peppermint extract, or lemon extract. Start with 1/4 teaspoon and adjust to taste. For a citrusy twist, use fresh lemon or orange juice instead of water—this also helps the icing dry faster.
- Color Variations: Divide the icing into separate bowls and color each with gel food coloring. I love making a batch of white icing for snow, green for wreaths, red for candy canes, and brown for gingerbread details. The kids love this part.
- Gluten-Free Version: This recipe is naturally gluten-free, but check your meringue powder label—some brands add wheat starch. Bob’s Red Mill makes a certified gluten-free meringue powder.
- Different Consistency for Different Uses: For flooding cookies, thin the icing with a few more drops of water until it’s like runny honey. For writing or outlining, keep it stiff. For gluing gingerbread houses, use the stiffest consistency possible.
Personal Variation: Last Christmas, I added a pinch of ground cardamom to the icing. It gave the gingerbread house a subtle, warm spice flavor that paired beautifully with the gingerbread. My family still talks about it.
Serving & Storage Suggestions
Once your gingerbread house is decorated, you’ll want to display it properly and store any leftover icing correctly.
- Serving Temperature: Gingerbread houses are best displayed at room temperature. Don’t refrigerate them—the humidity can make the icing soften and the gingerbread get soggy.
- Presentation Ideas: Place your gingerbread house on a cake stand or a large platter. Sprinkle powdered sugar around the base for a snowy effect. Add little gumdrop trees, marshmallow snowmen, or candy cane fences for extra charm.
- Storage for the House: A decorated gingerbread house will last for weeks if stored properly. Keep it in a cool, dry place away from direct sunlight. Cover it loosely with plastic wrap if you want to keep dust off, but leave some airflow to prevent moisture buildup.
- Storing Leftover Icing: Royal icing can be stored in an airtight container at room temperature for up to 2 weeks. Before using it again, beat it with a spoon or mixer to restore its texture. If it’s too stiff, add a drop of water.
- Freezing Icing: You can freeze royal icing for up to 3 months. Thaw it in the refrigerator overnight, then bring it to room temperature and beat it well before using.
- Reheating Tips: Don’t microwave royal icing—it’ll ruin the texture. If it’s too stiff, just beat it with a mixer and add a tiny bit of water.
How Flavors Develop: Royal icing actually tastes better after a day or two. The flavors meld together, and the sweetness mellows slightly. If you’re making it ahead of time for a party, make it the day before for the best flavor.
Nutritional Information & Benefits
Let’s be honest—royal icing is a treat, not a health food. But here’s what you should know:
- Estimated Nutritional Values (per 2-tablespoon serving): Calories: 120, Total Fat: 0g, Sodium: 5mg, Total Carbohydrates: 30g, Sugars: 29g, Protein: 0.5g. These are approximate and vary based on exact ingredients.
- Health Benefits of Key Ingredients: Meringue powder is made from dried egg whites, which are a good source of protein. Powdered sugar provides quick energy (though it’s mostly empty calories). The vanilla extract contains small amounts of antioxidants.
- Dietary Considerations: This recipe is gluten-free, nut-free, and soy-free (check your meringue powder label). For a vegan version, use aquafaba. For a lower-sugar version, you can try using powdered erythritol, but the texture will be different and it won’t dry as hard.
- Potential Allergens: Eggs (if using egg whites instead of meringue powder). Meringue powder is pasteurized, so it’s safe for most people, but check with your guests if they have egg allergies.
Personal Wellness Perspective: I believe in balance. This icing is for special occasions—gingerbread houses at Christmas, birthday cookies, holiday gifts. It’s not an everyday thing, and that’s okay. Enjoy it, savor it, and don’t stress about the sugar content. Life’s too short for guilt over a gingerbread house.
Conclusion
This royal icing recipe has been my faithful companion through countless gingerbread houses, cookie decorating sessions, and holiday baking marathons. It’s simple, reliable, and forgiving—everything you could want in a recipe. Whether you’re building your first gingerbread house or your fiftieth, this icing will hold your walls together, make your decorations shine, and give you that proud feeling when everyone gathers around to admire your work.
I’d love to hear how it goes for you. Did you add a special flavor? Did your kids take over the piping bag? Did you create a masterpiece that deserves its own Instagram post? Share your stories in the comments below—I read every single one, and honestly, they make my day. And if you have questions, ask away. I’ve made every mistake in the book, so I probably have an answer for you.
So go ahead, whip up a batch of this royal icing, and build something beautiful. Your gingerbread house is waiting, and it’s going to be amazing.
Frequently Asked Questions
Can I make this royal icing without a mixer?
Yes, you can whisk it by hand, but it takes about 10-12 minutes of vigorous whisking. Your arm will get a workout, but it’s doable. Make sure to whisk in one direction to incorporate as much air as possible.
How long does royal icing take to dry on a gingerbread house?
At room temperature, royal icing typically dries in 2-4 hours for thin lines. Thicker applications can take 8-12 hours or overnight. Low humidity speeds up drying, while high humidity slows it down.
Can I use this icing for cookies too?
Absolutely! This recipe works beautifully for decorating sugar cookies, gingerbread cookies, and cut-out cookies. For flooding (filling in large areas), thin the icing with a few drops of water until it’s the consistency of runny honey.
Why is my royal icing not getting stiff?
There are a few common culprits: your bowl or beaters might have grease residue, your meringue powder might be old, or you might have added too much water. Try wiping your bowl with lemon juice, using fresh meringue powder, or adding more sifted powdered sugar.
How do I fix royal icing that’s too thick?
Add water 1 teaspoon at a time, beating well after each addition, until you reach the desired consistency. Be careful not to add too much—you can always add more, but you can’t take it out.
Pin This Recipe!
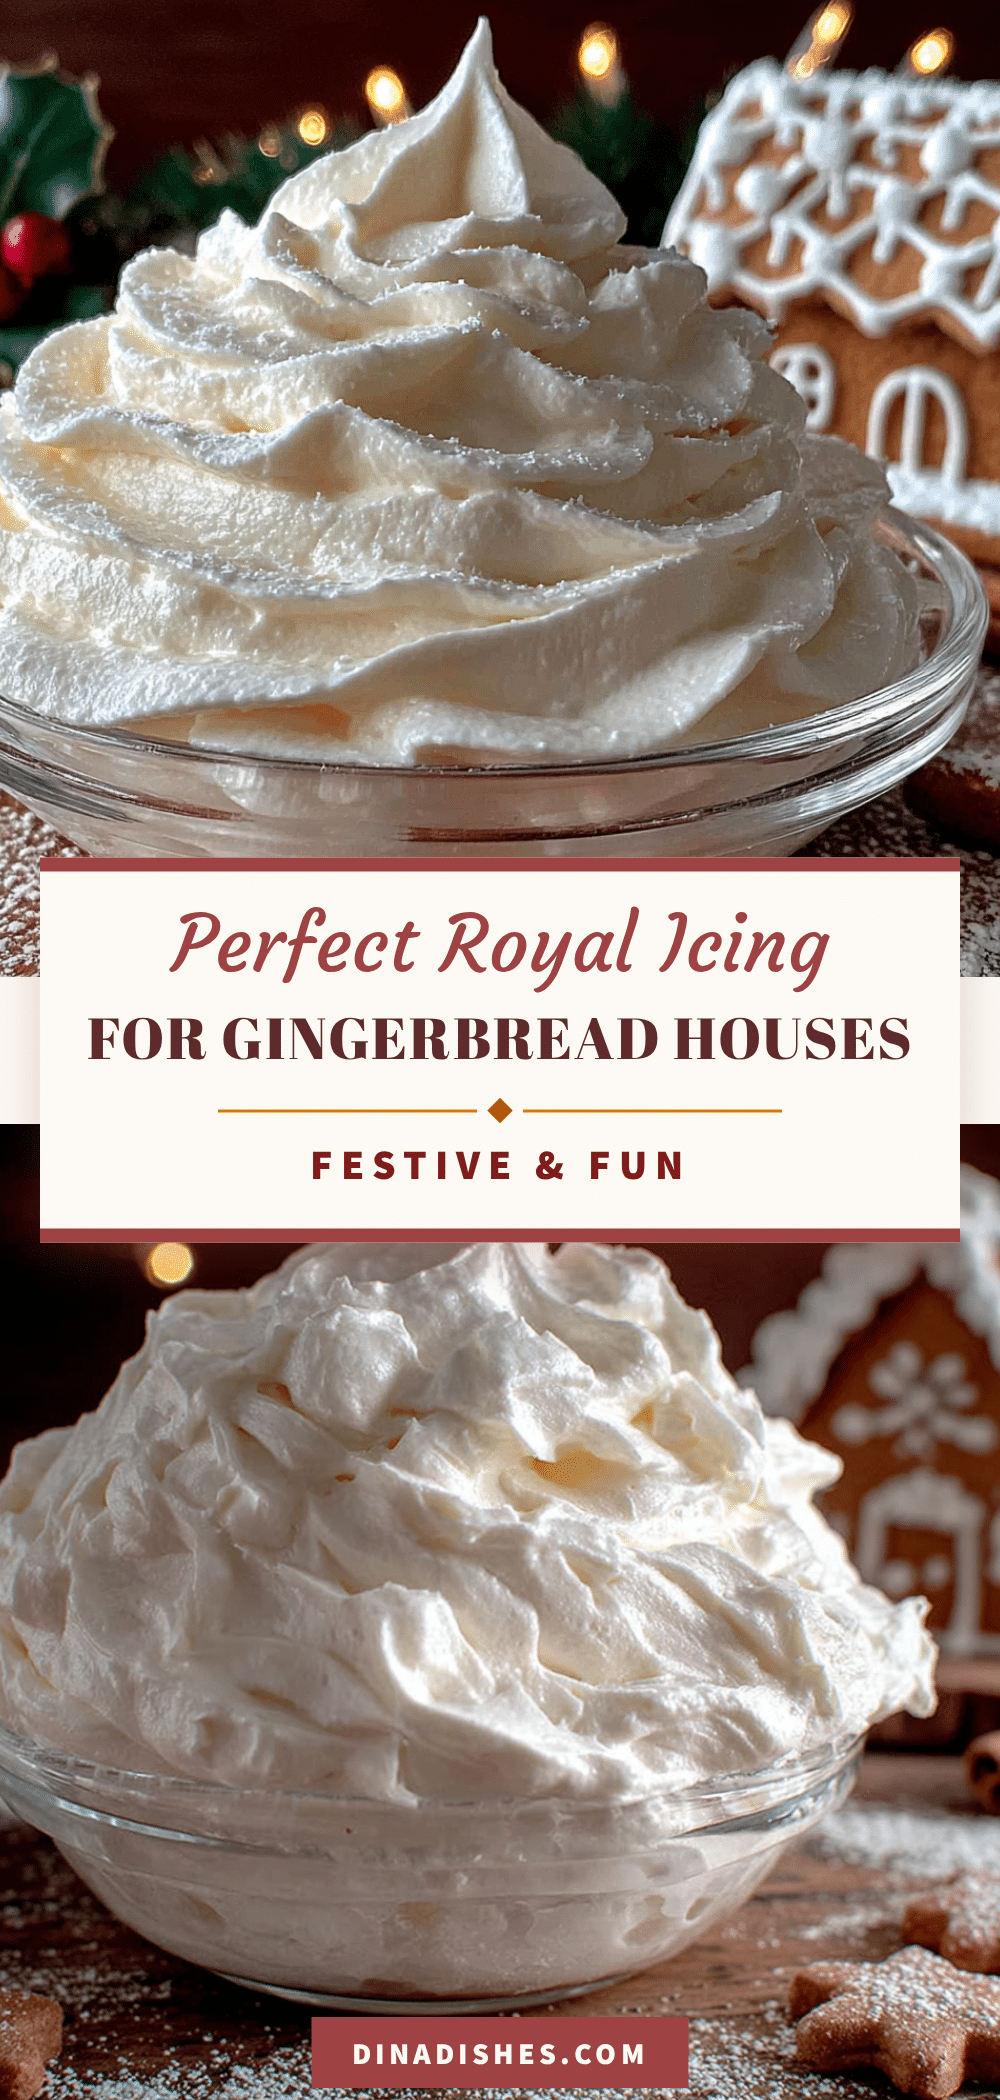
Perfect Royal Icing for Gingerbread Houses: Easy Recipe

This royal icing recipe is the key to building sturdy, beautiful gingerbread houses. It dries hard and strong, holds even the heaviest candy decorations, and comes together in just 10 minutes with simple ingredients.
- Prep Time: 10 minutes
- Cook Time: 0 minutes
- Total Time: 10 minutes
- Yield: 2 cups of icing 1x
- Category: Dessert
- Cuisine: American
Ingredients
- 3 tablespoons meringue powder
- 4 cups powdered sugar, sifted
- 5–6 tablespoons warm water
- 1/2 teaspoon vanilla extract
- 1/4 teaspoon cream of tartar (optional)
Instructions
- Prep your bowl: Make sure your mixing bowl and beaters are completely clean and dry. Any trace of grease or oil will prevent the meringue from whipping up. Wipe them down with a little lemon juice on a paper towel to be safe.
- Combine dry ingredients: In your mixing bowl, whisk together the meringue powder, sifted powdered sugar, and cream of tartar (if using). This helps distribute the meringue powder evenly before you add liquid.
- Add water and vanilla: Pour in 4 tablespoons of warm water and the vanilla extract. Start mixing on low speed to avoid a cloud of powdered sugar. Once the sugar is incorporated, increase to medium-high speed.
- Whip until stiff peaks form: Beat the mixture for 4-5 minutes. You’re looking for stiff, glossy peaks—when you lift the beaters, the icing should stand up straight without drooping. If it’s too stiff, add water 1 teaspoon at a time, beating for 30 seconds after each addition. If it’s too thin, add more sifted powdered sugar, 1 tablespoon at a time.
- Test the consistency: Dip a spoon into the icing and lift it up. The icing should form a firm peak that holds its shape. For gingerbread house assembly, you want a stiff consistency—like toothpaste. For piping details, you might want it slightly softer, like thick honey.
- Color the icing (optional): If you’re using gel food coloring, add it now. Gel colors are concentrated, so start with a tiny drop and mix thoroughly. Add more until you get the shade you want. Avoid liquid food coloring—it thins the icing and can ruin the consistency.
- Transfer to piping bags: Fit your piping bags with the desired tips. Fold down the top of the bag over your hand, fill it halfway with icing, then twist the top to seal. Use a twist tie or a rubber band to keep the bag closed.
- Keep icing covered: Any icing you’re not using immediately should be covered with a damp paper towel or plastic wrap pressed directly onto the surface. Royal icing forms a crust within minutes, and that crust can clog your piping tip.
Notes
Start with a stiff consistency for gluing gingerbread walls. Let the icing rest for 5 minutes after whipping to allow air bubbles to rise. Keep a damp paper towel over the bowl of icing at all times to prevent crusting. Practice on parchment paper before piping on the gingerbread house. Work on one side of the house at a time and let the icing dry completely before moving to the next side.
Nutrition
- Serving Size: 2 tablespoons
- Calories: 120
- Sugar: 29
- Sodium: 5
- Carbohydrates: 30
- Protein: 0.5
Keywords: royal icing, gingerbread house icing, cookie icing, easy royal icing, gingerbread house glue, Christmas icing, holiday baking