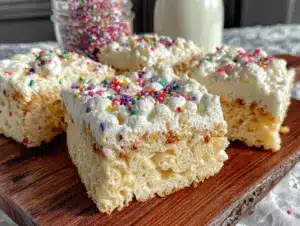
There used to be a tiny bakery in the back of a vintage shop on Main Street called The Larkspur Pantry. It was the kind of place that smelled like butter and old paper, and they made these ridiculous, oversized rice krispie treats that were somehow both chewy and delicate. When they closed their doors three years ago, I honestly felt a little lost. They had this one spring version—piled high with pastel sprinkles and a faint, almost imperceptible sugar cookie flavor—that I craved every single year as the weather turned warm. After about seven tries (and one truly disastrous batch that turned into a sugary brick), I finally cracked the code. These Spring Sugar Cookie Rice Krispie Treats with Sprinkles are the exact, spot-on recreation of that lost bakery treat. They are soft, buttery, and absolutely loaded with that nostalgic sugar cookie taste. Honest to goodness, they taste like the first day of spring feels.
I know what you are thinking—it is just a rice krispie treat. But let me tell you, the magic is in the details. The Larkspur Pantry version had this secret weapon: a splash of almond extract that turned a simple marshmallow treat into something that tasted like a frosted sugar cookie. That specific, floral note is what makes these so unforgettable. I spent a whole afternoon trying to get the ratio right, and I cannot even tell you how many bags of marshmallows I went through. My kitchen looked like a glitter bomb went off from all the sprinkles. But when I took that first bite of the final version? I actually closed my eyes. It was that good. Maybe you have been there—chasing a ghost recipe from a place that no longer exists. This is your win. This is the one that brings it back.
Why You’ll Love This Recipe
These are not your average, run-of-the-mill rice krispie treats. These are a full-on experience. They are the dessert you bring to the Easter brunch that disappears in five minutes flat. They are the thing you make on a random Tuesday because the sun is shining and you need a little bit of joy. Let me break down exactly why this recipe is going to become your new springtime staple.
- Quick & Easy : From start to finish, these come together in under 20 minutes. You do not need a mixer, a stand mixer, or any fancy equipment. Just a pot, a spatula, and a baking dish. Perfect for a last-minute potluck or when a sugar craving hits hard.
- Simple Ingredients : You probably have everything in your pantry right now. Marshmallows, butter, rice krispies cereal, and a few pantry staples. The only “special” ingredient is a little almond extract, and I promise it is worth the trip to the store.
- Perfect for Spring & Easter : The pastel sprinkles and the delicate sugar cookie flavor make these the ultimate holiday dessert. They look stunning on a dessert table, and kids go absolutely nuts for them. Plus, they are no-bake, so you are not heating up the oven when the weather gets nice.
- Crowd-Pleaser : I have brought these to three different Easter gatherings now, and every single time, someone asks for the recipe. They are familiar enough to be comforting, but different enough to be exciting. It is the perfect balance.
- Unbelievably Delicious : The texture is where these really shine. They are soft and chewy, not hard and crunchy. The butter and extracts create a flavor that is deeply nostalgic, like the best sugar cookie you ever had, but in bar form. It is next-level comfort food.
What makes this recipe different from every other rice krispie treat out there is the technique. Most recipes just melt the butter and marshmallows together and call it a day. For these, we are adding a touch of vanilla bean paste or a high-quality vanilla extract, a splash of almond extract, and a pinch of salt to balance the sweetness. It is a small tweak, but it transforms the entire flavor profile. This is not just a dessert; it is a memory. It is the kind of treat that makes you stop, take a bite, and just smile. Perfect for making a simple spring afternoon feel a little more special.
What Ingredients You Will Need
This recipe uses simple, wholesome pantry staples to deliver a big, bold flavor. There is nothing complicated here, but the quality of your ingredients will make a difference. I have tested this with generic brands and with fancier options, and here is what I have found works best.
- For the Base:
- 6 tablespoons (85g) unsalted butter (I use Plugrá or Kerrygold for the richest flavor; the higher fat content makes the treats extra tender)
- 1 (10 oz / 280g) bag of marshmallows (Jet-Puffed are my go-to for consistent melting; do not use mini marshmallows, they melt too fast)
- 6 cups (180g) crispy rice cereal (the classic name brand works best here; generic brands can sometimes be too dense)
- 1/2 teaspoon fine sea salt (this is non-negotiable; it cuts the sweetness and makes the sugar cookie flavor pop)
- For the Sugar Cookie Flavor:
- 1 teaspoon vanilla bean paste (or 2 teaspoons of pure vanilla extract; vanilla bean paste gives you those beautiful little specks)
- 1/2 teaspoon almond extract (this is the secret ingredient! Do not skip it. It gives that unmistakable sugar cookie taste)
- 1/4 cup (60g) powdered sugar (adds a subtle sweetness and helps create that soft, bakery-style texture)
- For the Decorations:
- 1/3 cup (60g) pastel sprinkles (jimmies work best; they hold their color and do not bleed like nonpareils can)
- Extra sprinkles for the top (about 2 tablespoons)
Ingredient selection tips are important here. For the butter, I really recommend using a European-style butter if you can find it. It has a higher butterfat content, which means less water, and that translates to a richer, more tender treat. For the marshmallows, make sure they are fresh. Stale marshmallows do not melt as smoothly and can lead to a grainy texture. If your bag has been open for a while, just go buy a new one. It is worth it. For a gluten-free option, this recipe is naturally gluten-free as long as you use certified gluten-free crispy rice cereal. I have also made these with a dairy-free butter substitute (I like Miyoko’s for baking), and they turn out beautifully.
Equipment Needed
You do not need a lot of fancy tools for this recipe, which is honestly one of the best things about it. Here is what you will need to make these Spring Sugar Cookie Rice Krispie Treats with Sprinkles come out perfectly.
- Large Pot (4-5 quart): You need a pot that is big enough to hold all the marshmallows and cereal with room to stir. I use my trusty 5-quart Dutch oven. A non-stick pot is ideal, but a regular stainless steel one works fine if you are quick.
- Heatproof Spatula: A silicone spatula is your best friend here. It will not scratch your pot, and it is flexible enough to get into the corners. A wooden spoon works in a pinch, but the marshmallows can stick to it.
- 9×13-inch Baking Dish: This is the standard size for a thick, satisfying bar. If you want them extra thick, you can use a 9×9-inch dish, but you will need to adjust the baking time (they will just need a little more time to set).
- Parchment Paper: This is non-negotiable for easy removal. Line your dish with parchment paper, leaving a little overhang on two sides. This creates handles that let you lift the whole block out cleanly.
- Sharp Knife: A long, sharp chef’s knife is best for cutting clean squares. A serrated knife can also work, but it might tear the treats a bit. Spray your knife with a little non-stick spray for the cleanest cuts.
I have made these in a cheap aluminum baking dish before, and honestly, they turned out just fine. The key is the parchment paper. Do not skip it. I learned that the hard way when I had to chisel a batch out of a glass dish. Not fun. Also, if you do not have a large pot, you can do this in a large microwave-safe bowl. Just melt the butter and marshmallows in 30-second intervals, stirring in between. It is a little more hands-on, but it works perfectly.
Preparation Method
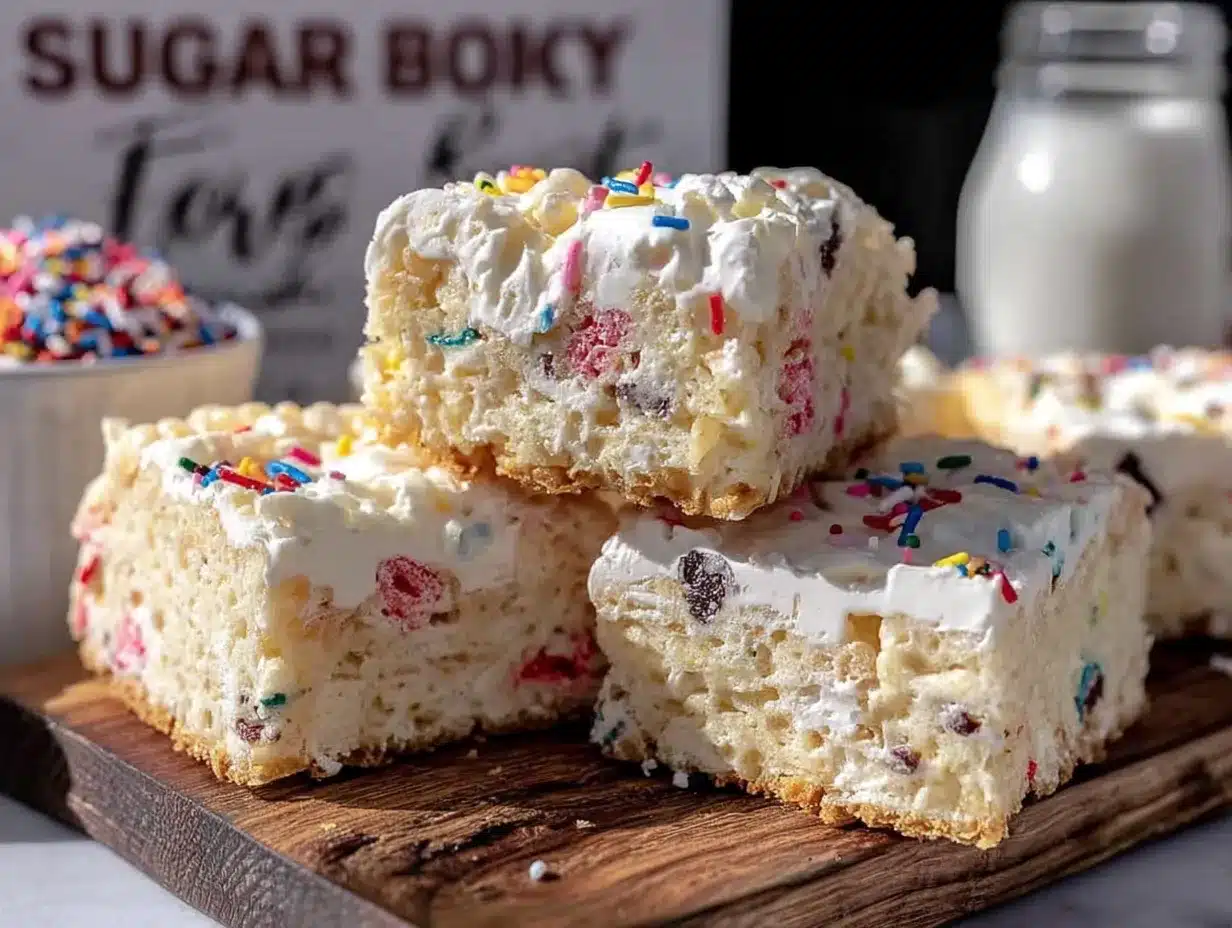
Okay, let us get to the fun part. This process is incredibly straightforward, but there are a few little tricks that make the difference between a good treat and a great one. Follow these steps, and you will be snacking in no time.
- Prepare Your Pan (5 minutes): Line a 9×13-inch baking dish with parchment paper. Make sure you leave about 2 inches of overhang on the two long sides. This will act as handles later. Lightly spray the parchment paper with a little non-stick cooking spray. This is a small step, but it ensures the treats do not stick to the paper.
- Melt the Butter (2-3 minutes): Place your large pot over medium-low heat. Add the 6 tablespoons of unsalted butter and let it melt completely. Do not rush this step. You want the butter to melt slowly so it does not brown. Swirl the pot occasionally.
- Add the Marshmallows (4-5 minutes): Once the butter is fully melted, pour in the entire bag of marshmallows. Stir constantly with your silicone spatula. The marshmallows will start to puff up and then collapse. Keep stirring until the mixture is completely smooth and silky. You should not see any lumps of unmelted marshmallow. This usually takes about 4-5 minutes over medium-low heat. Do not turn the heat up high, or the sugar will scorch.
- Add the Flavorings (30 seconds): Remove the pot from the heat immediately. This is crucial. If you leave it on the heat, the sugar can seize. Now, stir in the 1/2 teaspoon of fine sea salt, the 1 teaspoon of vanilla bean paste, and the 1/2 teaspoon of almond extract. Then, sift in the 1/4 cup of powdered sugar. Stir until everything is fully incorporated. The mixture will look glossy and smell absolutely incredible.
- Fold in the Cereal (1-2 minutes): Pour in the 6 cups of crispy rice cereal and the 1/3 cup of pastel sprinkles. Use a folding motion to combine everything. Start from the bottom and lift the mixture over itself. Be gentle but thorough. You want every piece of cereal to be coated in the marshmallow mixture, but you do not want to crush the cereal. Over-mixing will result in dense, hard treats.
- Press into the Pan (2 minutes): Scrape the mixture into your prepared baking dish. Now, here is a pro tip: lightly spray your hands or a piece of parchment paper with non-stick spray. Use this to press the mixture firmly and evenly into the pan. Do not press too hard, or the treats will be dense. Just a gentle, even pressure. You want them to be compact but still have a little airiness.
- Add the Topping (1 minute): While the mixture is still warm and slightly tacky, sprinkle the remaining 2 tablespoons of pastel sprinkles over the top. Gently press them in with your hand or the parchment paper so they stick. If you wait too long, the surface will set, and the sprinkles will just fall off.
- Cool and Set (30 minutes minimum): Let the treats cool completely at room temperature. Do not put them in the fridge to speed this up, as it can make them hard. They need to cool slowly to maintain that perfect, soft, chewy texture. Once they are completely cool, use the parchment paper handles to lift the whole block out of the pan. Place it on a cutting board.
- Cut and Serve (5 minutes): Using a sharp knife, cut the block into 12-16 squares. For the cleanest cuts, spray your knife with a little non-stick spray between cuts. Wipe the blade clean with a paper towel after each cut. This prevents the treats from sticking and tearing.
A quick note on timing: The entire process from start to finish is about 15-20 minutes of active work, plus 30 minutes of cooling. It is one of the fastest desserts you can make. The hardest part is waiting for them to cool! I have definitely burned my tongue trying to sneak a warm piece. They are good warm, but they are absolutely perfect once they have set.
Cooking Tips & Techniques
I have made this recipe more times than I care to count, and I have learned a few things the hard way. Here are my best tips for making sure your Spring Sugar Cookie Rice Krispie Treats with Sprinkles turn out perfectly every single time.
- Low and Slow is the Way to Go: The biggest mistake people make is using high heat to melt the marshmallows. You want to keep the heat on medium-low. High heat will cause the sugar in the marshmallows to caramelize and scorch, giving your treats a bitter, burnt flavor. I speak from experience. I once tried to rush the process, and I ended up with a pot of brown, sad marshmallow goo. Patience is key.
- The Almond Extract Trap: Almond extract is potent. It is wonderful, but a little goes a long way. I use exactly 1/2 teaspoon for this batch. I once had a friend who thought “a little more is better” and added a full teaspoon. The treats tasted like cherry cough syrup. Stick to the measurement. It is the perfect amount to get that sugar cookie flavor without overpowering everything.
- Fresh is Best: This applies to both the marshmallows and the cereal. Stale marshmallows do not melt as smoothly. Stale cereal is soft and will turn your treats into a dense, chewy mess. Always use fresh ingredients. If your box of cereal has been open for a month, just buy a new one. It makes a huge difference.
- The Powdered Sugar Trick: Sifting the powdered sugar is not just for show. If you dump it in without sifting, you will end up with little clumps of dry sugar in your otherwise smooth marshmallow mixture. A fine-mesh sieve takes two seconds and prevents this problem entirely. It is a small step with a big payoff.
- Don’t Over-Press: When you are pressing the mixture into the pan, you want it to be even, but you do not want to compress it into a brick. A gentle, even pressure is all you need. Think of it like tucking a child into bed—firm enough to stay put, but gentle enough to let them breathe. Over-pressed treats are dense and hard.
Variations & Adaptations
One of the best things about this recipe is how easy it is to adapt. I love playing around with different flavors and colors. Here are a few variations I have tried and loved.
- Lemon Sugar Cookie Treats: This is my personal favorite spring variation. Add the zest of one large lemon to the marshmallow mixture along with the vanilla. Replace the almond extract with 1/2 teaspoon of lemon extract. Use yellow and white sprinkles. The bright, citrusy flavor is absolutely divine and pairs perfectly with the buttery base.
- Chocolate-Dipped Spring Treats: For a more decadent version, let the treats cool and set completely. Then, melt 1 cup of white chocolate chips with 1 tablespoon of coconut oil. Dip the bottom of each treat into the melted chocolate, or just drizzle it over the top. Let the chocolate set on a piece of parchment paper. The combination of the sweet, buttery treat with the creamy white chocolate is incredible.
- Gluten-Free & Dairy-Free Adaptation: This recipe is very easy to make allergy-friendly. Use a certified gluten-free crispy rice cereal (like the one from Nature’s Path). For the dairy-free version, substitute the butter with a high-quality vegan butter stick (I like Miyoko’s or Country Crock Plant Butter). The texture will be slightly different, but the flavor will still be amazing. I have made this for a friend with celiac disease, and she could not tell the difference.
- Easter Egg Nest Variation: For a fun holiday twist, press the mixture into the pan as directed. While it is still warm, use the back of a spoon to create little “nests” in the top of the warm mixture. Fill each nest with a few mini candy eggs (like Cadbury Mini Eggs). It makes the cutest, most festive Easter dessert you have ever seen. Kids absolutely love helping with this step.
Serving & Storage Suggestions
These treats are best served at room temperature. The texture is at its peak—soft, chewy, and perfectly tender. I like to cut them into squares and arrange them on a large platter or cake stand. They look beautiful on a spring brunch table or an Easter dessert spread. For a fun presentation, you can press some extra sprinkles onto the sides of the cut bars. It gives them a finished, bakery-style look.
These treats pair wonderfully with a cold glass of milk, a cup of hot coffee, or a tall glass of iced tea. For an adult twist, they are fantastic with a scoop of vanilla ice cream. The warm, soft treat with the cold, creamy ice cream is a match made in heaven.
Storage Instructions
Storing these treats is simple, but there is a trick. Place them in an airtight container at room temperature. They will stay fresh for up to 3 days. The key is to layer them with pieces of parchment paper between the layers. If you stack them directly on top of each other, they will stick together and become a giant, sugary blob. I learned this the hard way when I tried to store a batch in a single layer in a zip-top bag. It was a disaster.
You can also freeze these treats for up to 3 months. Wrap each square individually in plastic wrap, then place them in a freezer-safe bag or container. To thaw, simply leave them at room temperature for about 30 minutes. The texture is still excellent after freezing. I often make a double batch and freeze half for unexpected guests or a sudden sweet craving.
Nutritional Information & Benefits
Let’s be honest, these are a treat. They are not a health food, and that is perfectly okay. Sometimes, you just need a little joy. That said, here is a rough estimate of the nutritional information per serving (based on 16 servings).
- Calories: Approximately 220-250 calories per bar
- Fat: 8-10g (mostly from the butter)
- Carbohydrates: 35-40g
- Sugar: 20-25g
- Protein: 2-3g
From a wellness perspective, the butter provides a small amount of fat-soluble vitamins, and the rice cereal is fortified with iron and B vitamins. But honestly, the biggest benefit here is the emotional one. This is a dessert that brings people together. It is a recipe that creates memories. It is the thing you make for a holiday brunch that makes everyone smile. And sometimes, that is exactly what we need. For those with dietary restrictions, please note that this recipe contains dairy (butter) and gluten (cereal, unless certified gluten-free). It is also free from common allergens like nuts and eggs.
Conclusion
So there you have it. These Spring Sugar Cookie Rice Krispie Treats with Sprinkles are my little victory over a lost bakery and a beloved memory. They are soft, they are buttery, and they taste exactly like springtime should taste. I love that they are so simple to make, yet they feel so special. They are the kind of dessert that makes you look like a hero with almost no effort.
I really hope you give these a try. Do not be afraid to make them your own. Add more sprinkles, switch up the extract, or dip them in chocolate. The recipe is a starting point, but your kitchen is your playground. If you do make them, I would love to hear about it. Leave a comment below and let me know how they turned out. Did you try a fun variation? Did your kids help you press them into the pan? Share your stories with me. And if you loved them, please share this post with a friend who needs a little spring sweetness in their life. Happy baking, friends!
Frequently Asked Questions
Can I use mini marshmallows instead of a whole bag?
I actually recommend against it. Mini marshmallows melt much faster and can sometimes lead to a grainy texture. A standard 10-ounce bag of large marshmallows gives you the best, smoothest melt. Stick with the big ones for the best results.
My treats turned out hard and crunchy. What did I do wrong?
This usually happens from over-cooking the marshmallow mixture. You want to melt them just until they are smooth. If you cook them too long, the sugar crystallizes and hardens. Also, make sure you are not pressing the mixture into the pan too hard. Gentle pressure is all you need.
Can I use a different extract?
Absolutely! This recipe is very versatile. You can use lemon extract, orange extract, or even a little coconut extract for a different flavor profile. Just keep the total amount of extract the same (1/2 teaspoon) so you do not overpower the treat.
How do I get clean cuts without the treats sticking to the knife?
This is a common problem! The trick is to spray your knife with a little non-stick cooking spray before each cut. Wipe the blade clean with a paper towel between cuts. This prevents the sticky marshmallow from clinging to the knife and tearing the bars.
Can I make these ahead of time for a party?
Yes! These are perfect for making a day ahead. Store them in an airtight container at room temperature. They actually taste even better the next day after the flavors have had a chance to meld together. Just add the extra sprinkles on top right before serving for the prettiest presentation.
Pin This Recipe!
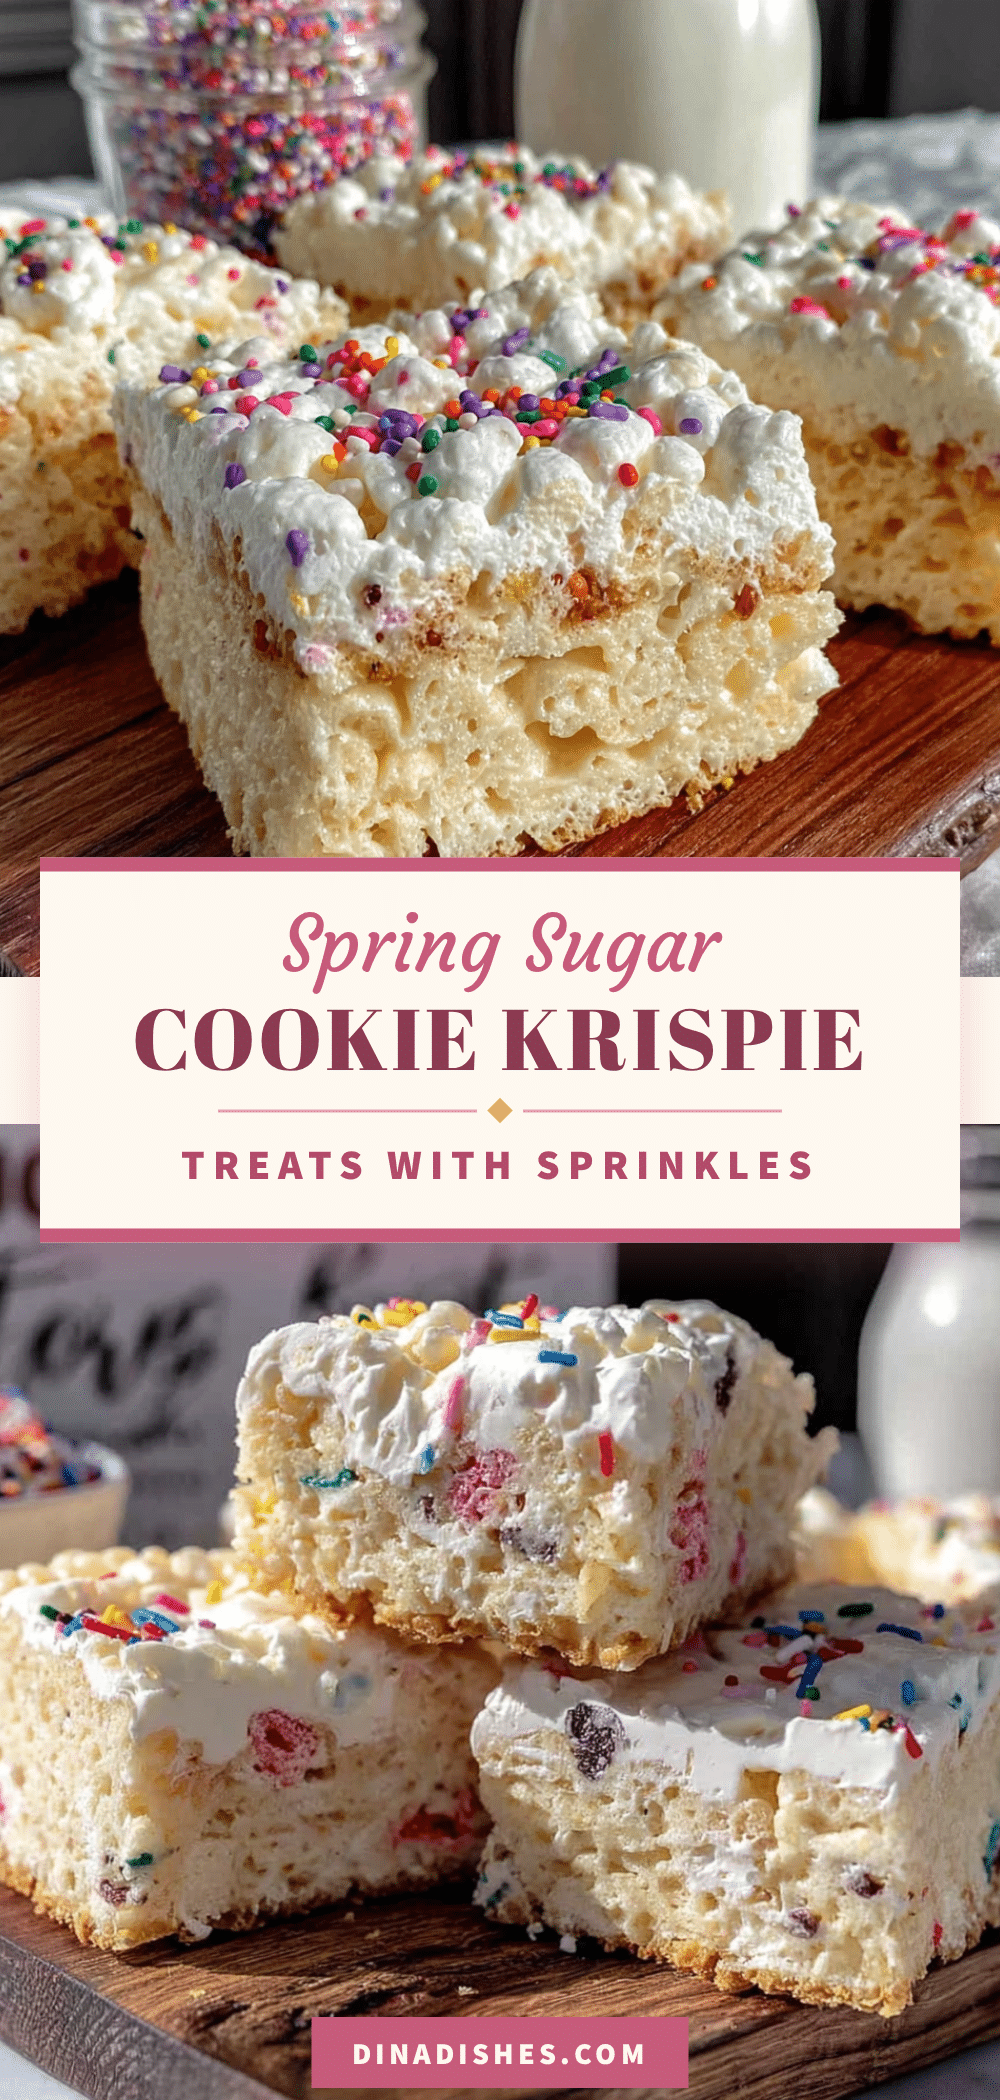
Spring Sugar Cookie Rice Krispie Treats: Best Easter Dessert
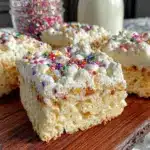
These soft, buttery rice krispie treats taste exactly like a frosted sugar cookie, thanks to a secret splash of almond extract. They are the perfect, no-bake Easter dessert that comes together in under 20 minutes.
- Prep Time: 15 minutes
- Cook Time: 5 minutes
- Total Time: 20 minutes (plus 30 minutes cooling)
- Yield: 12-16 servings 1x
- Category: Dessert
- Cuisine: American
Ingredients
- 6 tablespoons (85g) unsalted butter (preferably European-style like Plugrá or Kerrygold)
- 1 (10 oz / 280g) bag of marshmallows (Jet-Puffed recommended)
- 6 cups (180g) crispy rice cereal (classic name brand works best)
- 1/2 teaspoon fine sea salt
- 1 teaspoon vanilla bean paste (or 2 teaspoons pure vanilla extract)
- 1/2 teaspoon almond extract
- 1/4 cup (60g) powdered sugar, sifted
- 1/3 cup (60g) pastel sprinkles (jimmies style)
- 2 tablespoons pastel sprinkles for topping
Instructions
- Line a 9×13-inch baking dish with parchment paper, leaving about 2 inches of overhang on the two long sides. Lightly spray the parchment with non-stick cooking spray.
- Place a large pot (4-5 quart) over medium-low heat. Add the 6 tablespoons of unsalted butter and melt completely, swirling occasionally. Do not let it brown.
- Pour the entire bag of marshmallows into the melted butter. Stir constantly with a silicone spatula until the marshmallows are completely melted and the mixture is smooth and silky, about 4-5 minutes. Keep the heat on medium-low.
- Remove the pot from the heat immediately. Stir in the 1/2 teaspoon fine sea salt, 1 teaspoon vanilla bean paste, and 1/2 teaspoon almond extract. Then, sift in the 1/4 cup powdered sugar and stir until fully incorporated.
- Pour in the 6 cups crispy rice cereal and 1/3 cup pastel sprinkles. Fold gently with a spatula until every piece of cereal is coated, being careful not to crush the cereal.
- Scrape the mixture into the prepared baking dish. Lightly spray your hands or a piece of parchment paper with non-stick spray, then gently press the mixture firmly and evenly into the pan. Do not press too hard.
- While the mixture is still warm, sprinkle the remaining 2 tablespoons of pastel sprinkles over the top. Gently press them in so they stick.
- Let the treats cool completely at room temperature, at least 30 minutes. Do not refrigerate.
- Once cool, use the parchment paper handles to lift the block out of the pan. Place on a cutting board. Using a sharp knife sprayed with non-stick spray, cut into 12-16 squares. Wipe the knife clean between cuts.
Notes
For the best texture, use fresh marshmallows and cereal. Do not use high heat to melt the marshmallows, or they will scorch. The almond extract is the secret ingredient for the sugar cookie flavor; do not skip it. For clean cuts, spray your knife with non-stick spray between each cut. Store in an airtight container at room temperature for up to 3 days, layering with parchment paper. Can be frozen for up to 3 months.
Nutrition
- Serving Size: 1 bar
- Calories: 235
- Sugar: 23
- Sodium: 180
- Fat: 9
- Saturated Fat: 5
- Carbohydrates: 38
- Protein: 2
Keywords: rice krispie treats, sugar cookie, Easter dessert, spring dessert, no-bake, sprinkles, marshmallow treats