My neighbor, Mrs. Kowalski, wasn’t trying to impress anyone. I’d stopped by to borrow a cup of sugar—how cliché, right?—and the smell hit me before I even got to her front door. It was a mix of rich chocolate and something cool and minty, like winter had decided to bake itself into a pan. She opened the door with flour on her cheek and a spatula in her hand, completely nonchalant about the fact that she was, apparently, a holiday baking wizard.
“Oh, those?” she said when I asked, pointing her spatula back toward the kitchen. “Just some brownies. The grandkids go crazy for them.” She said it like it was nothing. Like she hadn’t just created the most incredible-smelling thing I’d ever encountered in a suburban kitchen on a random Tuesday afternoon in December. I stood there holding my borrowed sugar, honestly a little offended by her casualness. I mean, these weren’t just brownies. They were peppermint brownies, and they smelled like Christmas had exploded in the best possible way.
She cut me a piece to take home, still warm, with a crinkly top and these little flecks of candy cane melting into the fudgy center. I took one bite sitting in my car—judge me if you want—and I knew I had to figure out how she did it. She eventually shared the method, all shrugs and “it’s really nothing,” but let me tell you, it was everything. Maybe you’ve been there, right? That moment when a recipe stops you cold and you realize you’ve been doing holiday baking all wrong.
This Best Christmas Peppermint Brownies recipe is now the star of my own holiday table. It’s the kind of treat that makes kids’ eyes go wide and adults sneak an extra piece when they think no one’s looking. And honestly, the best part? It’s almost as easy as Mrs. Kowalski made it look.
Why You’ll Love This Recipe
Let me be straight with you—I’ve tested a lot of brownie recipes over the years. Some were too cakey, some were too dry, and some just didn’t have that holiday oomph. These peppermint brownies? They hit every single note. Here’s why they’ve become my go-to for Christmas baking:
- Quick & Easy: From start to finish, these come together in about 45 minutes. Most of that is baking time, so you’re not stuck in the kitchen all day. Perfect for those busy December afternoons when you’ve got a million things to do.
- Simple Ingredients: You probably have most of this stuff in your pantry already. No weird extracts or specialty flours. The only “special” thing is the candy canes, and let’s be honest, you probably have a box of those lurking somewhere.
- Perfect for Christmas: These are the ultimate holiday treat. They look festive with the red and white peppermint on top, and they taste like Christmas in every bite. Great for cookie exchanges, school parties, or just keeping the kids entertained while you wrap presents.
- Crowd-Pleaser: I’ve brought these to three different holiday gatherings this year, and every single time, the pan was empty before anything else. Kids love the crunch of the candy cane, and adults appreciate that they’re not overly sweet.
- Unbelievably Delicious: The combo of fudgy chocolate and cool peppermint is honestly next-level. The brownie itself is rich and moist, with that perfect crackly top, and the peppermint adds this freshness that cuts through the chocolate perfectly.
What makes this recipe different from all the other peppermint brownies out there? It’s the texture. I spent weeks getting the ratio right—enough cocoa for deep chocolate flavor, but not so much that it overpowers the mint. And the candy cane topping? It’s not just for looks. The little bits melt slightly into the warm brownie, creating these pockets of peppermint goodness that surprise you with every bite.
This is the kind of recipe that makes you close your eyes after the first bite. It’s comfort food reimagined for the holidays—faster than making a whole layer cake, but with the same soul-soothing satisfaction. Perfect for impressing guests without stress, or turning a simple Tuesday night into something memorable.
What Ingredients You Will Need
This recipe uses simple, wholesome ingredients to deliver bold flavor and satisfying texture without the fuss. Most of these are pantry staples, so you might not even need a trip to the store.
For the Brownies
- 1 cup (226g) unsalted butter, melted and slightly cooled (I use Land O’Lakes—it gives the best flavor)
- 2 cups (400g) granulated sugar (adds sweetness and helps create that crackly top)
- 4 large eggs, room temperature (cold eggs can seize the batter, so let them sit out for 30 minutes)
- 1 teaspoon vanilla extract (pure, not imitation, for the best flavor)
- 1 teaspoon peppermint extract (be careful with this—a little goes a long way)
- 1 cup (120g) all-purpose flour (spoon and level it—don’t scoop straight from the bag)
- 3/4 cup (65g) unsweetened cocoa powder (I prefer Ghirardelli for its deep, rich flavor)
- 1/2 teaspoon salt (balances the sweetness and enhances the chocolate)
- 1/2 teaspoon baking powder (gives a slight lift without making them cakey)
For the Topping
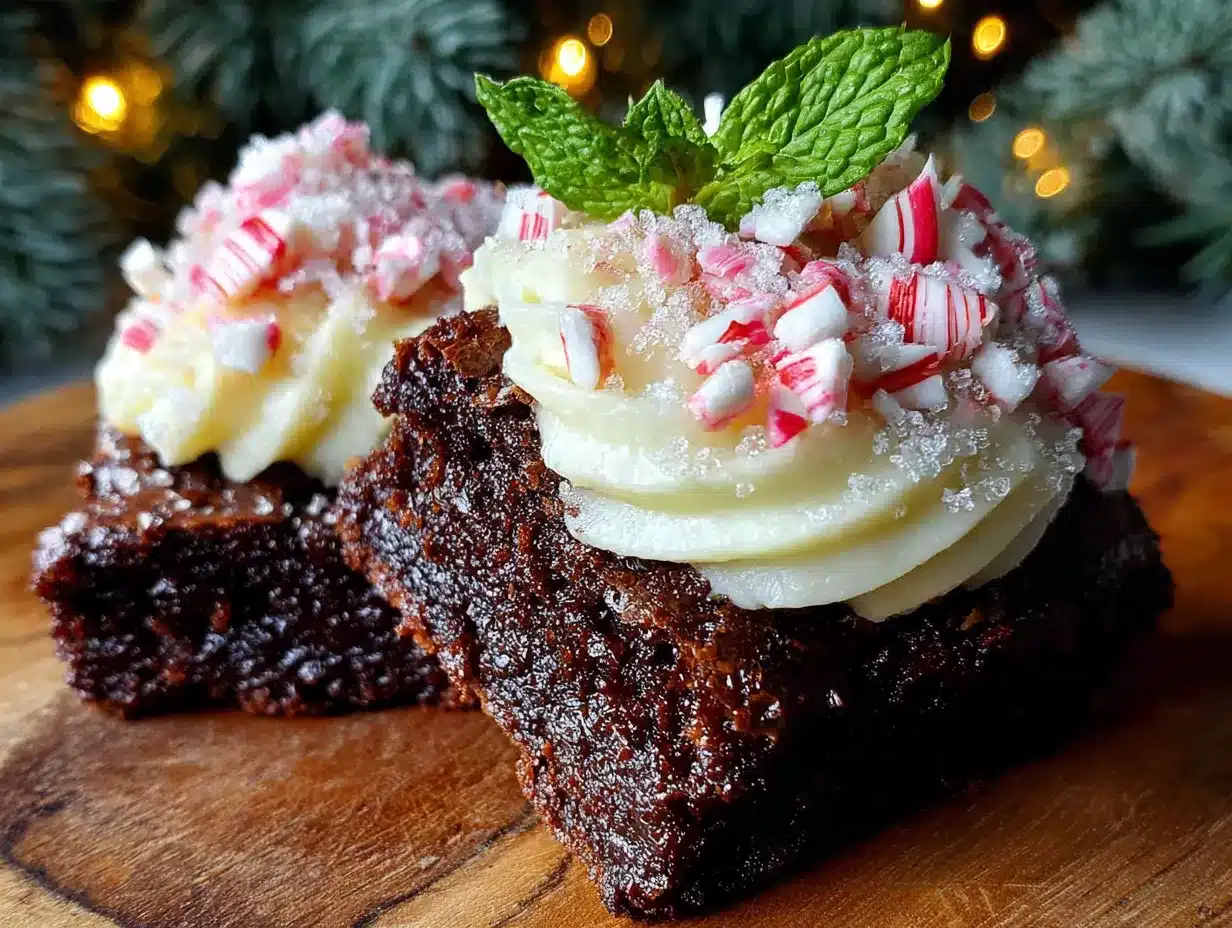
- 1 cup (about 6-8) crushed candy canes or peppermint candies (crush them in a zip-top bag with a rolling pin—the kids love helping with this)
- 1/2 cup (85g) semi-sweet chocolate chips (I like Nestlé Toll House for melting)
- 1 tablespoon coconut oil or vegetable oil (helps the chocolate drizzle smoothly)
Quick note on the peppermint extract: brands vary in strength. I’ve found that McCormick is pretty reliable, but if you’re using a store brand, start with 3/4 teaspoon and taste the batter. You can always add more, but you can’t take it out.
For the candy canes, I recommend using the classic red-and-white striped ones. The flavored ones (like blue raspberry or green apple) taste weird with chocolate. Trust me on this—I learned the hard way one year.
If you’re feeding a crowd with dietary restrictions, you can swap the all-purpose flour for a 1:1 gluten-free baking flour. I’ve used Bob’s Red Mill with good results. Just don’t overmix the batter, or they’ll turn out tough.
Equipment Needed
You don’t need a fancy kitchen to make these brownies. Here’s what you’ll need:
- 9×13-inch baking pan (metal pans work best for even baking; glass can work but you might need to add 5 minutes to the bake time)
- Parchment paper (non-negotiable—it makes lifting the brownies out so much easier)
- Large mixing bowl (any bowl will do, but a wide one makes mixing easier)
- Whisk (for the wet ingredients) and rubber spatula (for folding in the dry ingredients)
- Rolling pin or meat mallet (for crushing the candy canes—a food processor works too, but it can turn them into dust)
- Small microwave-safe bowl (for melting the chocolate drizzle)
- Cooling rack (helps the brownies cool evenly)
If you don’t have parchment paper, you can grease the pan well with butter and dust it with cocoa powder. But honestly, parchment is worth the few cents it costs. I’ve ruined too many brownies trying to get them out of a greased pan.
Preparation Method
Alright, let’s get baking. These steps are simple, but I’ve added some notes from my own trial-and-error so you don’t make the same mistakes I did.
- Preheat your oven to 350°F (175°C). Line your 9×13-inch pan with parchment paper, leaving a little overhang on two sides. This creates “handles” for lifting the brownies out later.
- Melt the butter in a large microwave-safe bowl. I do this in 30-second bursts, stirring between each, until it’s just melted. You don’t want it boiling hot—let it cool for a couple minutes while you gather the other ingredients.
- Whisk in the sugar until it’s well combined. The mixture will look a little grainy, and that’s fine. I use a whisk for this step because it breaks up any lumps.
- Add the eggs one at a time, whisking well after each one. The batter should look smooth and glossy. This is where most of the structure comes from, so don’t rush it.
- Stir in the vanilla extract and peppermint extract. Give it a good mix. At this point, the batter should smell amazing—like a peppermint patty in a bowl.
- In a separate bowl, whisk together the flour, cocoa powder, salt, and baking powder. I like to sift the cocoa powder if it looks clumpy. Nobody wants a pocket of dry cocoa in their brownie.
- Gradually add the dry ingredients to the wet ingredients, folding gently with a rubber spatula. Mix just until you can’t see any more streaks of flour. Overmixing will make the brownies tough—stop as soon as it comes together.
- Pour the batter into the prepared pan and spread it evenly with the spatula. The batter will be thick, so take your time. Give the pan a couple of gentle taps on the counter to release any air bubbles.
- Bake for 25-30 minutes, or until a toothpick inserted into the center comes out with a few moist crumbs. If it comes out clean, you’ve overbaked them. I start checking at 23 minutes because every oven runs a little different.
- Let the brownies cool in the pan for 10 minutes, then use the parchment paper handles to lift them out onto a cooling rack. Let them cool completely before adding the topping—about 45 minutes to an hour. I know it’s hard to wait, but warm brownies will melt the chocolate drizzle into a puddle.
- For the topping: Melt the chocolate chips and coconut oil together in a small microwave-safe bowl. Use 30-second bursts, stirring each time, until smooth. Drizzle the melted chocolate over the cooled brownies with a spoon or a fork.
- Immediately sprinkle the crushed candy canes over the chocolate drizzle before it sets. Press them in gently with your fingers so they stick. Let the chocolate set completely before cutting—about 30 minutes at room temperature, or 15 minutes in the fridge.
A note on cutting: use a sharp knife and wipe it clean between cuts. This gives you those clean, beautiful edges that look so good on a dessert plate. If the chocolate cracks a little, don’t stress—it adds character.
Cooking Tips & Techniques
I’ve made these brownies at least a dozen times now, and I’ve learned a few things the hard way. Here are my best tips:
Don’t overbake. This is the number one mistake people make. Brownies continue to cook from residual heat even after you pull them out of the oven. If you wait until the toothpick comes out clean, you’ll end up with dry, cakey brownies. Aim for a few moist crumbs—that’s the sweet spot for fudgy texture.
Room temperature eggs matter. I learned this one after a particularly frustrating batch where the batter looked curdled. Cold eggs can seize the melted butter, creating a grainy texture. Let your eggs sit on the counter for 30 minutes, or if you’re in a hurry, place them in a bowl of warm water for 5 minutes.
Crush candy canes carefully. Put them in a zip-top bag and go at them with a rolling pin. You want a mix of small pieces and a little bit of powder—the powder dissolves into the chocolate drizzle and adds peppermint flavor throughout. But don’t crush them too fine, or you’ll lose that satisfying crunch.
Timing is everything. While the brownies are cooling, I like to get the candy canes crushed and the chocolate measured out. That way, when the brownies are ready, I can do the topping in one smooth motion. Multitasking makes the whole process feel effortless.
Use good cocoa powder. I know it’s tempting to grab the cheap stuff, but the cocoa is the star of the show here. A good-quality cocoa powder makes a noticeable difference in depth of flavor. My personal favorite is Ghirardelli, but Hershey’s Special Dark works well too.
Variations & Adaptations
One of the best things about this recipe is how easy it is to tweak. Here are some variations I’ve tried and loved:
Double Chocolate Peppermint Brownies: Fold 1/2 cup of mini chocolate chips into the batter before baking. The extra pockets of melted chocolate make these even more decadent. My kids beg for this version every year.
Gluten-Free Version: Substitute the all-purpose flour with a 1:1 gluten-free baking flour blend. I’ve used King Arthur Flour’s measure-for-measure blend with great results. Just be careful not to overmix, as gluten-free batters can get gummy.
White Chocolate Peppermint: Swap the semi-sweet chocolate drizzle for white chocolate. The sweetness pairs beautifully with the peppermint, and the white color looks extra festive against the dark brownies. Use good-quality white chocolate—the cheap stuff doesn’t melt smoothly.
Mint Chocolate Chip Twist: Add 1/2 cup of Andes mint chips to the batter along with the chocolate chips. These little green-and-white chips add another layer of mint flavor and a pretty speckled look.
Dairy-Free Option: Use a plant-based butter substitute and dairy-free chocolate chips. I’ve tried this with Earth Balance butter and Enjoy Life chocolate chips, and honestly, you can’t tell the difference. Just make sure your candy canes are also dairy-free—most are, but check the label.
Serving & Storage Suggestions
These brownies are best served at room temperature, but they’re also delicious slightly warm. If you’re reheating, pop a piece in the microwave for 10-15 seconds—the chocolate drizzle gets a little melty, and the brownie softens up beautifully.
For presentation, I like to cut them into squares and arrange them on a festive platter. A sprinkle of powdered sugar on top makes them look even more holiday-ready. They’re perfect alongside a cup of hot cocoa or a glass of cold milk—my kids swear by the milk pairing.
Storage: Store leftover brownies in an airtight container at room temperature for up to 5 days. I layer them with parchment paper between each row so the chocolate drizzle doesn’t stick. If your kitchen runs warm, you can store them in the fridge, but let them come to room temperature before serving for the best texture.
Freezing: These freeze beautifully. Wrap individual brownies in plastic wrap, then place them in a freezer-safe bag. They’ll keep for up to 3 months. To thaw, just leave them on the counter for about an hour. I always make a double batch around Thanksgiving—one for now, one for Christmas Eve.
One thing I love about these brownies is that the flavors actually get better after a day. The peppermint mellows out and blends with the chocolate, creating a more balanced taste. So if you can resist eating them all on day one, you’re in for a treat on day two.
Nutritional Information & Benefits
I’m not going to pretend these are health food—they’re brownies, after all. But here’s the breakdown for one serving (assuming 24 servings per batch):
| Nutrient | Amount per Serving |
|---|---|
| Calories | 210 |
| Total Fat | 11g |
| Saturated Fat | 7g |
| Cholesterol | 45mg |
| Sodium | 95mg |
| Total Carbohydrates | 28g |
| Dietary Fiber | 1g |
| Sugars | 21g |
| Protein | 3g |
Now, here’s the good news: dark chocolate is rich in antioxidants, and peppermint can aid digestion. So there’s that! Plus, making these with your kids is a great way to build happy holiday memories—and that’s good for the soul.
If you’re watching your sugar intake, you can reduce the sugar to 1 3/4 cups without affecting the texture too much. The brownies will be slightly less sweet, but the chocolate flavor shines through more.
Conclusion
These Best Christmas Peppermint Brownies have become a non-negotiable part of my holiday baking. They’re the recipe I turn to when I want something that looks impressive but doesn’t require hours in the kitchen. The fudgy chocolate, the cool peppermint, the satisfying crunch of candy cane—it’s everything a holiday treat should be.
I love that this recipe is forgiving enough for beginners but special enough to bring to any Christmas gathering. Whether you’re baking with your kids, bringing a dish to a party, or just treating yourself after a long day of wrapping presents, these brownies deliver every single time.
So go ahead—crush some candy canes, melt some chocolate, and make your kitchen smell like Christmas. And when you take that first bite and close your eyes, remember that Mrs. Kowalski was right: sometimes the best recipes are the ones that don’t try to be anything special. They just are.
I’d love to hear how yours turn out! Drop a comment below and let me know if your family loved them as much as mine does. And if you come up with your own twist on the recipe, share that too—I’m always looking for new ideas.
Happy baking, and Merry Christmas!
Frequently Asked Questions
Can I use mint extract instead of peppermint extract?
You can, but be aware that mint extract has a slightly different flavor profile—it’s more like spearmint, which you might recognize from toothpaste or gum. Peppermint extract has that classic candy cane taste that works better for Christmas baking. If you only have mint extract, use 1/2 teaspoon and add a drop of vanilla to round it out.
Why did my brownies turn out cakey instead of fudgy?
This usually happens for one of two reasons: overbaking or overmixing. Brownies are done when a toothpick inserted in the center comes out with moist crumbs, not clean. And when you add the dry ingredients, fold gently until just combined—no vigorous stirring. If you want extra insurance, reduce the flour by 2 tablespoons for a denser texture.
Can I make these brownies ahead of time?
Absolutely! These actually taste better the next day. Bake the brownies, let them cool, and store them in an airtight container. Add the chocolate drizzle and candy cane topping on the day you plan to serve them—the candy canes can get sticky if they sit too long. You can also freeze the undecorated brownies for up to 3 months.
How do I get clean cuts without the chocolate cracking?
Use a sharp chef’s knife and wipe it clean with a damp paper towel between each cut. For the cleanest edges, let the chocolate drizzle set completely—at least 30 minutes at room temperature. If you’re in a hurry, pop the pan in the fridge for 15 minutes. And cut with a gentle sawing motion rather than pressing down hard.
Can I use pre-crushed candy canes from a store?
You can, but I don’t recommend it. Pre-crushed candy canes are often too fine—almost like dust—and they don’t give you that satisfying crunch. Plus, they can clump together in the package. It’s way better to crush your own. Just put whole candy canes in a zip-top bag and go at them with a rolling pin. It takes two minutes, and the kids love helping.
Pin This Recipe!

Best Christmas Peppermint Brownies Recipe

Fudgy chocolate brownies with a cool peppermint kick, topped with a crunchy candy cane and chocolate drizzle. This easy holiday recipe comes together in about 45 minutes and is perfect for Christmas gatherings, cookie exchanges, or a cozy night in.
- Prep Time: 15 minutes
- Cook Time: 30 minutes
- Total Time: 45 minutes
- Yield: 24 servings 1x
- Category: Dessert
- Cuisine: American
Ingredients
- 1 cup (226g) unsalted butter, melted and slightly cooled
- 2 cups (400g) granulated sugar
- 4 large eggs, room temperature
- 1 teaspoon vanilla extract
- 1 teaspoon peppermint extract
- 1 cup (120g) all-purpose flour
- 3/4 cup (65g) unsweetened cocoa powder
- 1/2 teaspoon salt
- 1/2 teaspoon baking powder
- 1 cup (about 6-8) crushed candy canes or peppermint candies
- 1/2 cup (85g) semi-sweet chocolate chips
- 1 tablespoon coconut oil or vegetable oil
Instructions
- Preheat your oven to 350°F (175°C). Line your 9×13-inch pan with parchment paper, leaving a little overhang on two sides.
- Melt the butter in a large microwave-safe bowl in 30-second bursts, stirring between each, until just melted. Let cool for a couple minutes.
- Whisk in the sugar until well combined. The mixture will look a little grainy.
- Add the eggs one at a time, whisking well after each one. The batter should look smooth and glossy.
- Stir in the vanilla extract and peppermint extract.
- In a separate bowl, whisk together the flour, cocoa powder, salt, and baking powder. Sift the cocoa powder if clumpy.
- Gradually add the dry ingredients to the wet ingredients, folding gently with a rubber spatula. Mix just until no streaks of flour remain.
- Pour the batter into the prepared pan and spread evenly. Tap the pan gently on the counter to release air bubbles.
- Bake for 25-30 minutes, or until a toothpick inserted into the center comes out with a few moist crumbs. Start checking at 23 minutes.
- Let the brownies cool in the pan for 10 minutes, then use the parchment paper handles to lift them out onto a cooling rack. Cool completely (about 45 minutes to 1 hour).
- For the topping: Melt the chocolate chips and coconut oil together in a small microwave-safe bowl using 30-second bursts, stirring each time, until smooth. Drizzle over the cooled brownies.
- Immediately sprinkle the crushed candy canes over the chocolate drizzle before it sets. Press them in gently. Let the chocolate set completely before cutting (about 30 minutes at room temperature or 15 minutes in the fridge).
Notes
Don’t overbake—brownies are done when a toothpick comes out with moist crumbs, not clean. Room temperature eggs are important to prevent the batter from curdling. Crush candy canes in a zip-top bag with a rolling pin for a mix of small pieces and powder. Use good-quality cocoa powder for the best flavor. The flavors improve after a day. Store in an airtight container at room temperature for up to 5 days, or freeze for up to 3 months.
Nutrition
- Serving Size: 1 brownie
- Calories: 210
- Sugar: 21
- Sodium: 95
- Fat: 11
- Saturated Fat: 7
- Carbohydrates: 28
- Fiber: 1
- Protein: 3
Keywords: peppermint brownies, Christmas brownies, holiday brownies, fudgy brownies, candy cane brownies, easy brownie recipe