The elementary school Thanksgiving potluck was in twelve hours and I’d completely forgotten. Not just forgotten—I’d signed up for “dessert for 24” and then promptly buried the reminder under a mountain of laundry and work emails. I remember staring into my pantry at 10 PM, feeling that familiar panic rising. Everyone else would be bringing those gorgeous homemade pies they’d probably spent all day on, or those perfect little cupcakes with piped frosting turkeys. I had a box of cake mix that was about to expire, a bag of pretzel sticks from a party three weeks ago, and some candy melts I’d bought on a whim.
Honestly, I almost just grabbed a store-bought pie and called it a day. But then my eye caught that bag of pretzel sticks, and something clicked. I mean, they kind of looked like turkey feathers, didn’t they? It was one of those desperate, middle-of-the-night ideas that you’re not sure will work, but you’re too tired to come up with anything better. I ended up pulling an all-nighter, covered in melted chocolate, muttering to myself while trying to get those little candy eyes to stay put. Let me tell you, my kitchen looked like a confetti bomb had gone off in a candy shop.
But here’s the thing—those little turkey cake pops? They were the first thing to disappear at the potluck. People were taking pictures, asking for the recipe, and I’m standing there in my slightly flour-dusted sweater, completely surprised. The kids went crazy for them, and even the adults couldn’t resist grabbing one (or three). That’s the thing about this recipe—it looks like you spent hours planning and perfecting, when really it was a happy accident born from procrastination and a well-stocked snack drawer. Now I make them every year, and honestly, they’ve become more of a tradition than the turkey itself. Maybe you’ve been there—needing a showstopper with zero time to actually be a showstopper. These cake pops are your saving grace.
Why You’ll Love This Recipe
Let me tell you why these little guys are absolute game-changers for any fall gathering. I’ve tested this recipe about six times now (the sacrifices I make for you all), and each batch just gets better. Here’s what makes them special:
- Quick & Easy: From start to finish, you can have these done in under an hour. The cake base comes together fast, and the decorating is surprisingly forgiving.
- Simple Ingredients: Cake mix, frosting, candy melts, and pretzels. That’s basically it. No weird specialty items you’ll never use again.
- Perfect for Hosting: These are made for parties. They’re portable, individual-sized, and they look incredible on a dessert table. Your guests will think you’re a culinary genius.
- Crowd-Pleaser: Kids love them, adults love them, and they spark that “oh my god, how cute!” reaction every single time.
- Unbelievably Delicious: The combination of soft cake, creamy coating, and salty crunch from the pretzels? It’s honestly addictive. I’ve caught myself eating the “broken” ones before guests even arrive.
What really sets these apart is the texture. Most cake pops are just soft all the way through, but the pretzel feathers add this incredible salty crunch that balances the sweetness perfectly. It’s not just another cake pop recipe—it’s the one that makes people stop and ask for the details. Plus, they’re impossible to mess up in a way that doesn’t still look cute. A little lopsided? That’s character. Some chocolate drips? Adds charm. Trust me on this one.
These cake pops are the kind of recipe that makes you feel like a hosting superstar without the stress. Perfect for impressing guests who think you spent all day, when really you whipped them up while binge-watching your favorite show. That’s my kind of cooking.
What Ingredients You Will Need
This recipe uses simple, everyday ingredients that you probably already have in your kitchen. I’ve kept it straightforward because the last thing you need before a party is a complicated grocery list. Here’s what you’ll need to gather:
For the Cake Base
- 1 box yellow cake mix (I prefer Betty Crocker or Duncan Hines for consistent results)
- Ingredients listed on the box (typically eggs, oil, and water)
- 1/2 cup canned cream cheese frosting (store-bought is fine, but homemade works too)
For the Turkey Decorations
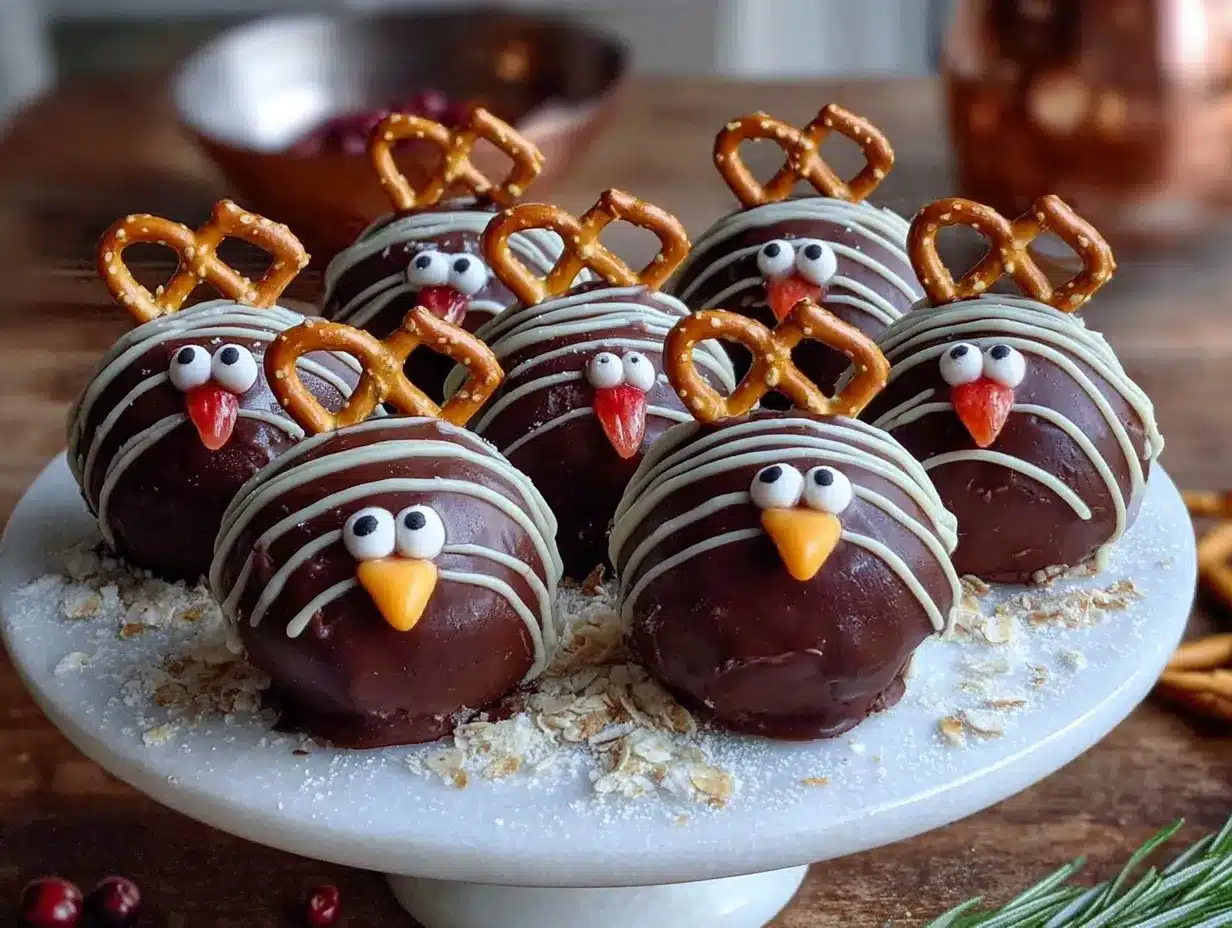
- 1 bag pretzel sticks (the thin, crunchy kind work best—look for the 10-ounce bag)
- 1 bag (12 oz) candy melts in brown or chocolate (Ghirardelli or Wilton are my go-to brands)
- 1 bag (12 oz) candy melts in orange (for the beaks and feet)
- 1 bag (12 oz) candy melts in red (for the snoods—yes, that’s the proper turkey term!)
- Candy eyes (small, about 6mm size works best)
- Orange sprinkles or nonpareils (for extra detail if you’re feeling fancy)
- Lollipop sticks (optional, but they make the pops easier to handle)
Ingredient Tips & Substitutions
For the cake mix, you can absolutely use a chocolate or vanilla mix instead of yellow cake. I’ve tried both, and they work great—chocolate gives it a richer flavor that pairs beautifully with the salty pretzels. If you’re gluten-free, look for a gluten-free cake mix and gluten-free pretzels. I’ve tested this with King Arthur’s gluten-free yellow cake mix, and honestly, nobody noticed the difference.
When it comes to the frosting, don’t skip it. The frosting is what holds the cake crumbs together and gives the pops that soft, fudgy texture. Cream cheese frosting is my favorite because it adds a subtle tang, but vanilla buttercream works too. Just don’t use anything too runny—you want it thick enough to bind the crumbs.
For the candy melts, I’ve learned the hard way that white chocolate chips don’t work the same way. Candy melts are formulated to set firmly at room temperature, while chocolate chips can get soft and messy. Stick with the melts—your fingers will thank you later.
One last thing—if you can’t find candy eyes at the store, you can use small white chocolate chips with a dot of black icing. Or honestly, just skip the eyes and call them “abstract turkeys.” I’ve done that in a pinch, and they still got devoured.
Equipment Needed
You don’t need a fancy kitchen to pull these off. Here’s what I use every time:
- Large baking sheet (for baking the cake—any 9×13 pan works)
- Large mixing bowl (for crumbling the cake and mixing with frosting)
- Small microwave-safe bowls (for melting the candy melts—one per color)
- Parchment paper or silicone baking mat (for setting the finished cake pops)
- Lollipop sticks (optional, but they make for easier dipping and handling)
- Fork or dipping tool (for coating the cake balls in melted candy)
- Spoon (for drizzling the orange and red candy melts)
- Small cookie scoop (for portioning the cake mixture—about 1.5 tablespoons)
If you don’t have lollipop sticks, don’t worry. You can skip them entirely and just shape the cake mixture into balls, dip them, and place them directly on the parchment. They’ll look like little turkey truffles instead of pops, and honestly, that’s even easier. I’ve done it both ways, and the stickless version is my preferred method when I’m in a hurry.
For the melting bowls, I use those cheap little glass prep bowls from the dollar store. They’re perfect for small amounts of candy melts, and if I mess one up, it’s not a big deal. Just make sure everything is completely dry before you start melting—even a drop of water can seize up your candy melts and turn them into a grainy mess. Trust me, I’ve learned that lesson the hard way.
Preparation Method
Alright, let’s get to the fun part. I’ll walk you through this step by step, including all the little tricks I’ve picked up along the way.
- Bake the cake. Preheat your oven to 350°F (175°C). Prepare the cake mix according to the package directions and bake in a 9×13 pan. Let it cool completely—this is important. Warm cake will make the frosting melt and turn into a sticky mess. I usually bake mine the night before and let it cool overnight.
- Crumble the cake. Once the cake is completely cool, break it into chunks and place them in a large bowl. Use your hands to crumble it into fine crumbs. You want it to look like sand—no big chunks left. This takes about 2-3 minutes of rubbing the cake between your fingers.
- Add the frosting. Add 1/2 cup of cream cheese frosting to the cake crumbs. Start mixing with a spatula, then use your hands to work it all together. The mixture should feel like damp sand and hold together when you squeeze it. If it’s too dry, add a tablespoon more frosting. If it’s too wet, add a few more cake crumbs.
- Shape the cake balls. Scoop out about 1.5 tablespoons of the mixture and roll it into a ball. Place each ball on a parchment-lined baking sheet. You should get about 20-24 balls from one batch. Pop the tray in the fridge for 15-20 minutes to firm up—this makes them much easier to dip.
- Prepare the pretzel feathers. While the cake balls chill, break your pretzel sticks into thirds. You’ll need about 5-6 pieces per turkey. Set them aside in a small bowl.
- Melt the brown candy melts. Place the brown candy melts in a microwave-safe bowl. Microwave in 30-second intervals, stirring between each, until completely smooth. Be careful not to overheat—candy melts burn easily and get thick and clumpy.
- Dip the cake balls. Remove the cake balls from the fridge. Using a fork or dipping tool, lower one cake ball into the melted brown candy. Gently tap the fork on the edge of the bowl to let excess drip off. Place the coated ball back on the parchment paper.
- Add the pretzel feathers. While the coating is still wet, insert 5-6 pretzel stick pieces into the back of the cake ball, fanning them out like turkey feathers. Work quickly—the coating sets fast. If it starts to harden, pop the bowl back in the microwave for 10 seconds.
- Add the eyes. Press two candy eyes into the front of each cake pop while the coating is still wet. They should stick on their own.
- Melt the orange candy melts. In a small bowl, melt the orange candy melts using the same 30-second interval method. Transfer to a small piping bag or a zip-top bag with the corner snipped off.
- Add the beak. Pipe a small triangle for the beak directly below the eyes. It should look like a little orange diamond.
- Melt the red candy melts. Repeat the melting process with the red candy melts. Pipe a small squiggly line or teardrop shape hanging down from the beak—this is the snood (the red dangly bit on a turkey’s face).
- Let them set. Allow the cake pops to set completely at room temperature, about 15-20 minutes. Don’t put them in the fridge or the coating might get blotchy.
- Add final touches. If you want, sprinkle a few orange nonpareils around the base for little “turkey feet.” It’s optional, but it adds a nice touch.
One thing I learned the hard way—don’t overcrowd your pretzels. Five or six pieces is perfect. More than that and they start looking like a porcupine instead of a turkey. Less is definitely more here.
Cooking Tips & Techniques
After making these about a dozen times (and messing up plenty of batches), I’ve gathered some hard-won wisdom. Let me share the good stuff.
Temperature is everything. If your cake balls are too warm when you dip them, they’ll fall apart in the melted candy. If they’re too cold, the coating will crack. I’ve found that 15 minutes in the fridge is the sweet spot. Not the freezer—the fridge. Freezer-cold cake balls cause the warm candy to seize up and get lumpy.
Thin your candy melts if needed. Sometimes candy melts are thicker than you want. Add a teaspoon of coconut oil or vegetable shortening to thin them out. It makes dipping much smoother and gives you a thinner, more even coating. I learned this after my first batch came out looking like lumpy snowballs.
Work in small batches. Don’t melt all your candy at once. Melt half the bag, use it up, then melt the rest. Candy that sits too long gets thick and hard to work with. Plus, if you accidentally burn it (which I’ve done more times than I’d like to admit), you haven’t ruined the whole batch.
Use a fork for dipping. A regular dinner fork works better than a spoon. Place the cake ball on the fork, lower it into the melted candy, and use another fork to help coat the top. Lift it out, tap gently, and slide it off onto the parchment using a toothpick. This technique took me three batches to figure out, and now it’s the only way I do it.
Prep your pretzels ahead. Break all your pretzel sticks into thirds before you start dipping. Once you have a coated cake ball in your hand, you don’t want to be fumbling with breaking pretzels. Have everything laid out and ready to go—it makes the process so much smoother.
One of my biggest failures was trying to pipe the beaks and snoods with melted candy that had cooled too much. The orange came out in thick, gloppy blobs instead of neat triangles. Now I keep a cup of hot water nearby and set the piping bag in it for a few seconds if the candy starts to thicken. Works like a charm.
Variations & Adaptations
These turkey cake pops are surprisingly versatile. Here are some variations I’ve tried and loved:
Chocolate Turkey Cake Pops
Use a chocolate cake mix and chocolate frosting instead of yellow cake. Coat them in milk chocolate candy melts and use dark chocolate for the eyes. The combination is richer and feels a little more decadent—perfect for chocolate lovers.
Pumpkin Spice Turkey Cake Pops
Add 1 teaspoon of pumpkin pie spice to the cake crumb mixture before adding the frosting. Use orange candy melts for the coating instead of brown. The warm spices make them taste like fall in every bite. I made these for a Friendsgiving last year and they were gone in minutes.
Gluten-Free Version
Use a gluten-free cake mix and gluten-free pretzels. I’ve tested this with King Arthur’s gluten-free yellow cake mix and Schar gluten-free pretzel sticks. The texture is slightly different—a bit more crumbly—but the taste is spot on. Just be extra gentle when dipping.
Vegan Adaptation
Use a vegan cake mix (many boxed mixes are accidentally vegan) and vegan frosting. Replace the eggs with flax eggs (1 tablespoon ground flaxseed + 3 tablespoons water per egg). Use vegan candy melts—Enjoy Life brand works well. The pretzels are already vegan, so you’re good there.
Mini Turkey Bites
Instead of making cake pops, roll the mixture into 1-inch balls and skip the lollipop sticks. Coat them in melted candy and add just two small pretzel pieces per ball for tiny “baby turkeys.” These are perfect for kids or for a lighter dessert option.
My personal favorite variation is the pumpkin spice version. I stumbled on it by accident when I grabbed the wrong cake mix from the pantry, and honestly, it might be better than the original. The warm spices with the salty pretzels create this incredible sweet-and-savory thing that I can’t get enough of.
Serving & Storage Suggestions
These turkey cake pops are best served at room temperature. The coating stays firm and snappy, and the cake inside is soft and fudgy. If you’re serving them at a party, arrange them on a platter with the pretzel feathers facing outward for maximum visual impact. I like to place them on a bed of orange and brown sprinkles to look like fall leaves.
For a truly impressive presentation, stick each cake pop into a small styrofoam block covered with decorative paper or a hollowed-out pumpkin. It creates a “turkey in the garden” look that always gets compliments. I did this for a Thanksgiving potluck once, and people were taking pictures before they even tasted them.
These pair beautifully with warm apple cider, pumpkin spice lattes, or even a glass of cold milk. If you’re serving them as part of a dessert table, they look great next to pumpkin bars, pecan pie bites, or caramel apples.
Storage: Store leftover cake pops in an airtight container at room temperature for up to 5 days. Do not refrigerate—the moisture will make the coating sticky and the cake dry. If you need to store them longer, freeze them in a single layer on a baking sheet, then transfer to a freezer bag. They’ll keep for up to 3 months. Thaw at room temperature for about 30 minutes before serving.
One thing I’ve noticed—these actually taste better the next day. The flavors meld together overnight, and the cake gets even more fudgy. So don’t stress about making them fresh the day of your party. Make them a day ahead and thank me later.
If you’re traveling with them, pack them in a single layer in a sturdy container with parchment paper between layers. The pretzels are surprisingly sturdy, but they can break if jostled too much. I’ve transported these to three different potlucks now, and as long as you’re gentle, they arrive in one piece.
Nutritional Information & Benefits
Let’s be real—these are a treat, not a health food. But here’s the breakdown if you’re curious:
| Nutrient | Per Cake Pop (approx.) |
|---|---|
| Calories | 210 |
| Total Fat | 9g |
| Saturated Fat | 5g |
| Carbohydrates | 31g |
| Sugar | 22g |
| Protein | 2g |
| Sodium | 210mg |
On the bright side, the pretzels add a little bit of iron and B vitamins. And if you use dark chocolate candy melts, you’ll get some antioxidants. But honestly? These are about joy, not nutrition. They’re a once-a-year treat for Thanksgiving or fall gatherings, and there’s nothing wrong with that.
If you’re watching your sugar intake, you can use a sugar-free cake mix and sugar-free frosting. I’ve tried this, and while the texture is a bit different, it still works. The taste is slightly less sweet, which some people actually prefer.
For those with dietary concerns, these contain wheat, dairy, and soy (from the candy melts). They’re not suitable for nut-free diets unless you verify all your ingredients. Always check labels if you’re serving guests with allergies.
Conclusion
These adorable turkey cake pops have become my secret weapon for fall gatherings. They look like you spent hours crafting them, when really they come together in about an hour with ingredients you probably already have. The combination of soft cake, creamy coating, and crunchy pretzels is honestly irresistible—I’ve seen grown adults grab three at a party without shame.
What I love most about this recipe is how forgiving it is. Your first few might look a little wonky, but that’s part of the charm. Each turkey has its own personality, and that imperfection is what makes them so endearing. Plus, they’re a great project to do with kids—my niece helped me make a batch last year, and she was so proud of her “turkey family” that she didn’t want anyone to eat them.
I’d love to hear how yours turn out! Did you try any fun variations? Did your guests go crazy for them? Drop a comment below and share your creations—I read every single one and love seeing your photos. And if you’re looking for more fall dessert ideas, check out my pumpkin bars with cream cheese frosting or these easy caramel apple bites for another crowd-pleasing option.
Happy Thanksgiving, and happy baking! Remember—even if your turkeys look a little lopsided, they’ll taste amazing. That’s the beauty of homemade.
Frequently Asked Questions
Can I make these turkey cake pops ahead of time?
Absolutely! You can make them up to 2 days ahead and store them in an airtight container at room temperature. They actually taste better the next day as the flavors meld together. Just don’t refrigerate them, or the coating might get sticky.
My candy melts are too thick. What should I do?
Add a teaspoon of coconut oil or vegetable shortening to thin them out. Microwave for 10 seconds and stir until smooth. Avoid adding water—even a drop will cause the candy to seize up and become unusable.
Can I use homemade cake instead of box mix?
Yes, you can! Use your favorite homemade cake recipe, but make sure it’s completely cool before crumbling. Homemade cake tends to be more moist, so you might need slightly less frosting to get the right consistency. Start with 1/3 cup and add more as needed.
How do I keep the pretzels from falling off?
Insert the pretzel pieces while the candy coating is still wet. Press them in gently but firmly. If they still fall off, let the coating set for about 30 seconds until it’s tacky but not hard, then try again. The coating acts as glue once it sets.
Can I freeze these turkey cake pops?
Yes! Freeze them in a single layer on a baking sheet, then transfer to a freezer bag. They’ll keep for up to 3 months. Thaw at room temperature for about 30 minutes before serving. Don’t microwave them to thaw—the coating will melt and get messy.
Pin This Recipe!
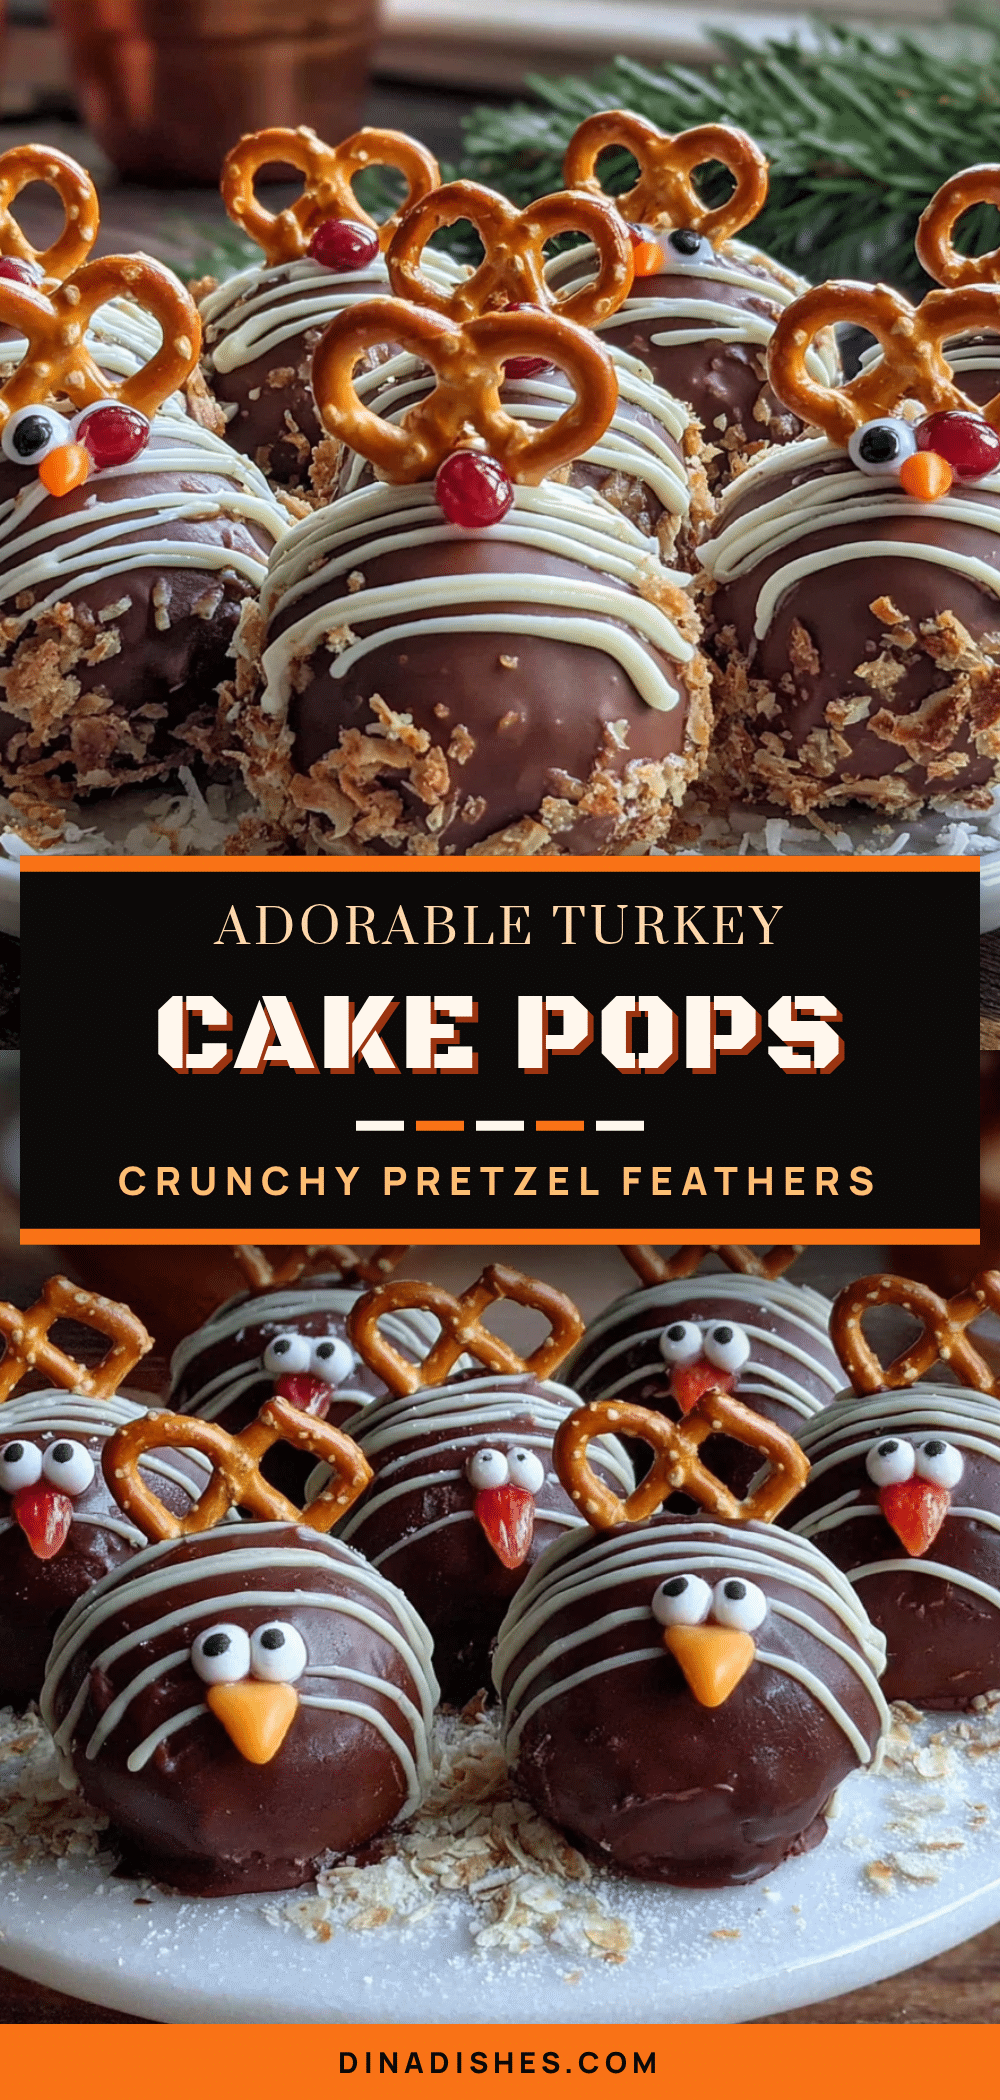
Best Easy Homemade Turkey Cake Pops with Crunchy Pretzel Feathers

These adorable turkey cake pops are a showstopper for any fall gathering. Made with simple ingredients like cake mix, frosting, candy melts, and pretzel sticks, they come together in under an hour and are perfect for Thanksgiving potlucks or parties.
- Prep Time: 30 minutes
- Cook Time: 30 minutes
- Total Time: 1 hour
- Yield: 20-24 servings 1x
- Category: Dessert
- Cuisine: American
Ingredients
- 1 box yellow cake mix (Betty Crocker or Duncan Hines preferred)
- Ingredients listed on the box (typically eggs, oil, and water)
- 1/2 cup canned cream cheese frosting
- 1 bag pretzel sticks (thin, crunchy kind, 10-ounce bag)
- 1 bag (12 oz) candy melts in brown or chocolate (Ghirardelli or Wilton)
- 1 bag (12 oz) candy melts in orange
- 1 bag (12 oz) candy melts in red
- Candy eyes (small, about 6mm size)
- Orange sprinkles or nonpareils (optional)
- Lollipop sticks (optional)
Instructions
- Preheat oven to 350°F (175°C). Prepare the cake mix according to package directions and bake in a 9×13 pan. Let cool completely.
- Once the cake is completely cool, break it into chunks and place in a large bowl. Crumble into fine crumbs using your hands, about 2-3 minutes.
- Add 1/2 cup cream cheese frosting to the cake crumbs. Mix with a spatula, then use your hands to work it together until the mixture feels like damp sand and holds together when squeezed. Add more frosting if too dry, or more cake crumbs if too wet.
- Scoop out about 1.5 tablespoons of the mixture and roll into balls. Place on a parchment-lined baking sheet. You should get about 20-24 balls. Refrigerate for 15-20 minutes to firm up.
- While the cake balls chill, break pretzel sticks into thirds. You’ll need about 5-6 pieces per turkey. Set aside.
- Melt the brown candy melts in a microwave-safe bowl in 30-second intervals, stirring between each, until completely smooth.
- Remove cake balls from the fridge. Using a fork or dipping tool, lower one cake ball into the melted brown candy. Tap the fork on the edge of the bowl to let excess drip off. Place the coated ball back on the parchment paper.
- While the coating is still wet, insert 5-6 pretzel stick pieces into the back of the cake ball, fanning them out like turkey feathers. Work quickly as the coating sets fast.
- Press two candy eyes into the front of each cake pop while the coating is still wet.
- Melt the orange candy melts using the same 30-second interval method. Transfer to a small piping bag or zip-top bag with the corner snipped off.
- Pipe a small triangle for the beak directly below the eyes.
- Melt the red candy melts. Pipe a small squiggly line or teardrop shape hanging down from the beak for the snood.
- Allow the cake pops to set completely at room temperature, about 15-20 minutes. Do not refrigerate.
- Optional: Sprinkle orange nonpareils around the base for turkey feet.
Notes
Temperature is key: cake balls should be chilled but not frozen. If candy melts are too thick, add a teaspoon of coconut oil or vegetable shortening. Work in small batches to avoid candy hardening. Prep pretzels ahead of time. These taste even better the next day as flavors meld.
Nutrition
- Serving Size: 1 cake pop
- Calories: 210
- Sugar: 22
- Sodium: 210
- Fat: 9
- Saturated Fat: 5
- Carbohydrates: 31
- Protein: 2
Keywords: turkey cake pops, Thanksgiving dessert, cake pops, easy dessert, fall dessert, pretzel feathers, holiday treats