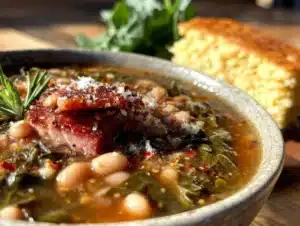
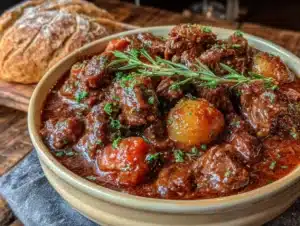
I was standing in the canned goods aisle at the grocery store last Tuesday when the smell of frozen puff pastry being thawed in the deli section hit me — and suddenly I was twenty-two, standing in my college roommate Jenna’s tiny kitchen, watching her pull a bubbling, golden mini pot pie out of a toaster oven that was older than both of us combined. She’d made them for our first ever Friendsgiving, the one where we had eight people crammed into a living room that could comfortably fit four, and everyone brought whatever they could afford on a student budget. I remember thinking, how did she make these look so fancy? The answer, I later learned, was puff pastry and sheer determination — and maybe a little bit of luck that the toaster oven didn’t catch fire. I tried to recreate that moment last week for my own Friendsgiving, and honestly, the first batch was a disaster. I forgot to thaw the puff pastry properly, and the bottoms got soggy. But the second batch? That’s the recipe I’m sharing today. It’s the one that finally tasted like that night in Jenna’s apartment — warm, buttery, and full of that feeling you get when you’re surrounded by people who feel like family.
These mini chicken pot pies are the perfect solution for Friendsgiving, especially when you’re short on time and oven space. They come together in under an hour, use simple ingredients you probably already have, and they’re just the right size for everyone to grab their own. No carving, no fuss, just pure comfort food that makes you feel like you’ve got it all together — even if you’re running on three hours of sleep and a questionable amount of coffee.
Why You’ll Love This Recipe
Let me tell you why these mini chicken pot pies have become my go-to for Friendsgiving, and honestly, for any weeknight when I need a little comfort food therapy.
- Quick & Easy: These come together in about 45 minutes, start to finish. The secret? Store-bought puff pastry and a simple stovetop filling. You don’t need to be a pastry chef to pull these off.
- Simple Ingredients: No fancy grocery trips needed. You likely already have chicken, frozen veggies, butter, and flour in your kitchen. The puff pastry is the only “special” ingredient, and it’s in the freezer section of every grocery store.
- Perfect for Friendsgiving: These are individual servings, which means no fighting over the last piece. They’re also easy to transport if you’re bringing them to a potluck, and they reheat beautifully.
- Crowd-Pleaser: I’ve made these for picky eaters, vegetarians (using mushrooms instead of chicken), and even my dad who “doesn’t do fancy food.” Every single person has asked for the recipe.
- Unbelievably Delicious: The combination of flaky, golden puff pastry and creamy, savory filling is next-level comfort food. It’s the kind of dish that makes you close your eyes after the first bite.
What makes this recipe different from the rest? It’s the technique. Instead of making a complicated pie crust from scratch, I use pre-made puff pastry and a clever trick to ensure the bottom stays crispy. I also add a splash of white wine to the filling — it’s a small touch that adds a ton of depth without making it taste boozy. This isn’t just another chicken pot pie recipe; it’s my best version, tested through trial and error (and a few soggy bottoms) so you don’t have to go through the same struggle.
What Ingredients You Will Need
This recipe uses simple, wholesome ingredients to deliver bold flavor and satisfying texture without the fuss. Most of these are pantry staples, which is exactly what you want when you’re cooking for a crowd on a weeknight.
- For the Filling:
- 2 tablespoons unsalted butter
- 1 medium yellow onion, diced (about 1 cup)
- 2 medium carrots, peeled and diced (about 1 cup)
- 2 stalks celery, diced (about 1/2 cup)
- 2 cloves garlic, minced
- 1/3 cup all-purpose flour (this thickens the sauce)
- 2 cups low-sodium chicken broth (I prefer Swanson or Kitchen Basics)
- 1 cup whole milk (or half-and-half for extra richness)
- 1/4 cup dry white wine (like Sauvignon Blanc — optional but highly recommended)
- 3 cups cooked chicken, shredded or diced (rotisserie chicken works perfectly)
- 1 cup frozen peas and carrots mix (no need to thaw)
- 1/2 teaspoon dried thyme
- 1/2 teaspoon dried rosemary
- Salt and black pepper to taste
- For the Pastry:
- 1 package (17.3 ounces) frozen puff pastry sheets (like Pepperidge Farm), thawed according to package directions
- 1 large egg, beaten with 1 tablespoon water (for egg wash)
- Flaky sea salt for sprinkling (optional)
Ingredient Tips: For the best texture, look for puff pastry that’s made with real butter — it makes a huge difference in flavor and flakiness. If you’re using rotisserie chicken, remove the skin and shred the meat while it’s still warm; it’s easier to handle and the meat stays juicier. You can swap the white wine with an equal amount of additional chicken broth if you prefer, but honestly, the wine adds a subtle complexity that really makes the filling sing. For a dairy-free version, use olive oil instead of butter and unsweetened oat milk instead of whole milk — it works surprisingly well.
Equipment Needed
You don’t need a ton of fancy equipment for this recipe, which is part of why I love it so much.
- Large skillet or sauté pan (12-inch is ideal)
- Wooden spoon or silicone spatula
- Measuring cups and spoons
- Chef’s knife and cutting board
- Muffin tin (12-cup standard size)
- Rolling pin (optional, but helps if the puff pastry is a bit stiff)
- Pastry brush (for egg wash)
- Small round cutter or a drinking glass (about 3 inches in diameter)
- Baking sheet (to catch any drips from the muffin tin)
Alternative Tools: If you don’t have a muffin tin, you can use ramekins or even a small baking dish — just adjust the baking time slightly. I’ve also used a biscuit cutter in place of a round cutter, and it works perfectly. If you don’t have a pastry brush, a clean, unused paintbrush works in a pinch (I learned that from my grandmother).
Preparation Method

Let’s get cooking! Here’s how to make these mini chicken pot pies step by step. I’ve included all the little tricks I’ve learned along the way.
- Preheat and Prep: Preheat your oven to 400°F (200°C). Lightly grease a 12-cup muffin tin with butter or non-stick spray. Set it aside.
- Cook the Vegetables: In a large skillet over medium heat, melt the butter. Add the diced onion, carrots, and celery. Cook, stirring occasionally, for about 5-7 minutes, until the vegetables have softened and the onion is translucent. The smell at this point is incredible — it’s the smell of comfort food in the making.
- Add Garlic and Flour: Add the minced garlic and cook for another 30 seconds until fragrant. Sprinkle the flour over the vegetables and stir constantly for 1-2 minutes. This cooks the raw flour taste out and helps thicken the sauce later. The mixture will look like a thick, pasty mess — that’s exactly what you want.
- Make the Sauce: Slowly pour in the chicken broth while whisking constantly to prevent lumps. Then add the milk and white wine (if using). Continue whisking until the sauce comes to a gentle simmer and thickens, about 3-4 minutes. It should coat the back of a spoon. Pro tip: If the sauce seems too thick, add a splash more broth. Too thin? Let it simmer a minute longer.
- Add the Chicken and Seasonings: Stir in the shredded chicken, frozen peas and carrots, thyme, and rosemary. Season with salt and pepper to taste. Let the filling simmer for 2 minutes to warm through, then remove from heat. Taste it here — it should be rich, creamy, and well-seasoned. Adjust if needed.
- Prepare the Puff Pastry: On a lightly floured surface, unfold the thawed puff pastry sheets. Roll them out just slightly to smooth the seams, if necessary. Using a 3-inch round cutter or a drinking glass, cut out 12 rounds. You might need to re-roll the scraps to get all 12.
- Assemble the Pot Pies: Divide the filling evenly among the 12 muffin cups — about 1/3 cup each. Place a puff pastry round on top of each cup, gently pressing the edges down around the filling. The pastry doesn’t need to be sealed perfectly; it will puff up and create a beautiful dome as it bakes. Cut a small slit in the top of each pastry to let steam escape.
- Egg Wash and Bake: Brush the tops of the pastries with the beaten egg wash. Sprinkle with a pinch of flaky sea salt if desired. Place the muffin tin on a baking sheet to catch any drips, then bake for 18-22 minutes, until the pastry is golden brown and puffed, and the filling is bubbling.
- Cool and Serve: Let the pot pies cool in the tin for 5 minutes before carefully removing them with a small spatula or butter knife. Serve warm. The first bite will be flaky, creamy, and everything you hoped for.
Cooking Tips & Techniques
I’ve made this recipe more times than I can count, and I’ve definitely made my share of mistakes. Here’s what I’ve learned so you don’t have to repeat my errors.
Don’t Overwork the Puff Pastry: Puff pastry is delicate. Handle it as little as possible, and keep it cold. If it gets too warm and sticky, pop it in the fridge for 10 minutes. Warm pastry won’t puff up as well, and nobody wants a flat, sad pot pie top.
Prevent Soggy Bottoms: The biggest mistake I made the first time was not pre-cooking the filling enough. The sauce needs to be thick before it goes into the oven, or the liquid will soak into the pastry. Also, make sure the filling is hot when you pour it into the muffin cups — this helps the pastry start cooking immediately.
Multitask Like a Pro: While the vegetables are cooking, you can shred the chicken and cut the pastry rounds. This saves a ton of time. I usually prep all my ingredients before I start cooking — it makes the whole process smoother and less stressful.
Check for Doneness: The pot pies are done when the pastry is deep golden brown and the filling is bubbling up through the steam vents. If the tops are browning too quickly but the filling isn’t bubbling, tent the muffin tin loosely with foil and continue baking.
Variations & Adaptations
One of the best things about this recipe is how easy it is to adapt. Here are a few variations I’ve tried and loved.
- Vegetarian Version: Swap the chicken for 2 cups of diced mushrooms and an extra cup of frozen mixed vegetables. Sauté the mushrooms with the onions until they release their liquid and start to brown. The result is just as hearty and satisfying.
- Gluten-Free Option: Use a gluten-free all-purpose flour blend for the roux, and substitute the puff pastry with a gluten-free pie crust or even mashed potatoes on top. It’s not exactly the same, but it’s still delicious.
- Spicy Twist: Add 1/2 teaspoon of red pepper flakes or a diced jalapeño with the onions. The heat cuts through the creamy sauce beautifully and gives it a nice kick.
- Cheesy Upgrade: Stir in 1/2 cup of shredded cheddar or Gruyère cheese into the filling just before assembling. It adds a whole new layer of richness that’s absolutely divine.
- Herb Swap: If you have fresh herbs on hand, use 1 tablespoon each of fresh thyme and rosemary instead of dried. The flavor is brighter and more aromatic.
I once made a version with leftover Thanksgiving turkey and cranberry sauce mixed into the filling — it was a total experiment, and honestly, it was incredible. Don’t be afraid to play around with what you have.
Serving & Storage Suggestions
These mini pot pies are best served warm, straight from the oven. The contrast between the flaky, golden crust and the creamy, steaming filling is pure magic. I like to serve them on a platter with a simple green salad on the side — the freshness balances out the richness.
For Friendsgiving: Arrange the pot pies on a large wooden board or platter. They look beautiful and rustic. You can also serve them in the muffin tin if you’re keeping things casual. Pair them with roasted Brussels sprouts, mashed potatoes, or a simple cranberry sauce.
Storage: Leftover pot pies can be stored in an airtight container in the refrigerator for up to 3 days. The pastry will soften slightly, but they’re still delicious.
Reheating: To reheat, place the pot pies on a baking sheet and warm them in a 350°F (175°C) oven for about 10-15 minutes. This helps restore some of the pastry’s crispness. You can also microwave them for 1-2 minutes, but the pastry won’t be as flaky.
Freezing: You can assemble the pot pies (unbaked) and freeze them in the muffin tin. Once frozen solid, pop them out and store in a freezer bag for up to 3 months. Bake directly from frozen, adding 5-10 minutes to the baking time.
Nutritional Information & Benefits
Here’s a rough estimate of the nutritional content per mini pot pie (based on 12 servings):
| Nutrient | Amount per Serving |
|---|---|
| Calories | ~320 |
| Total Fat | 18g |
| Saturated Fat | 7g |
| Cholesterol | 55mg |
| Sodium | 450mg |
| Total Carbohydrates | 28g |
| Dietary Fiber | 2g |
| Sugars | 4g |
| Protein | 16g |
Health Benefits: This recipe provides a good source of protein from the chicken, which helps keep you full and satisfied. The vegetables add fiber, vitamins A and C, and antioxidants. Using low-sodium broth helps keep the salt content in check. While it’s not a low-calorie dish, it’s a balanced meal that includes protein, carbs, and vegetables — perfect for a comforting dinner.
Dietary Considerations: This recipe contains gluten and dairy. For a gluten-free version, see the variations section above. For a dairy-free version, use olive oil and unsweetened oat milk. It’s also easy to make lower in sodium by using no-salt-added broth and omitting the added salt.
Conclusion
These mini chicken pot pies are more than just a recipe — they’re a little piece of warmth you can share with the people you love. Whether you’re hosting a big Friendsgiving or just need a comforting dinner on a busy weeknight, they deliver every single time. They’re quick enough for a Tuesday but special enough for a celebration, and that’s a rare combination in my book.
I hope you give them a try and make them your own. Maybe you’ll add a little extra thyme, or swap in turkey instead of chicken, or even make a vegetarian version with mushrooms. Whatever you do, I’d love to hear about it. Drop a comment below and tell me how your Friendsgiving went, or share a photo of your mini pot pies — there’s nothing that makes me happier than seeing someone else fall in love with a recipe I’ve poured my heart into.
Now go on, get in that kitchen. Your Friendsgiving table is waiting.
Frequently Asked Questions
Can I use pre-cooked rotisserie chicken for this recipe?
Absolutely! In fact, I recommend it. Rotisserie chicken is already seasoned and cooked, which saves you time and adds extra flavor. Just remove the skin and shred the meat while it’s still warm for the best texture.
Can I make these ahead of time?
Yes, you can assemble the pot pies completely (without baking) and refrigerate them for up to 24 hours. When you’re ready to bake, just add 5-10 minutes to the baking time. You can also freeze them unbaked for up to 3 months.
What if I don’t have a muffin tin?
No problem! You can use ramekins, small oven-safe bowls, or even a standard 8×8 baking dish. Just adjust the baking time — larger dishes will need about 25-30 minutes. Keep an eye on the pastry and the filling.
Can I use pie crust instead of puff pastry?
Definitely. If you prefer a more traditional pot pie crust, use a store-bought or homemade pie crust. Roll it out and cut rounds just like the puff pastry. The texture will be more like a traditional pie crust — flaky but not as puffy — and it’s still delicious.
How do I prevent the filling from being too runny?
The key is to cook the sauce until it’s thick enough to coat the back of a spoon before adding the chicken and vegetables. Also, make sure the filling is hot when you pour it into the muffin cups — this helps the pastry start cooking immediately and prevents sogginess. If your sauce still seems thin, let it simmer an extra minute or two.
Pin This Recipe!
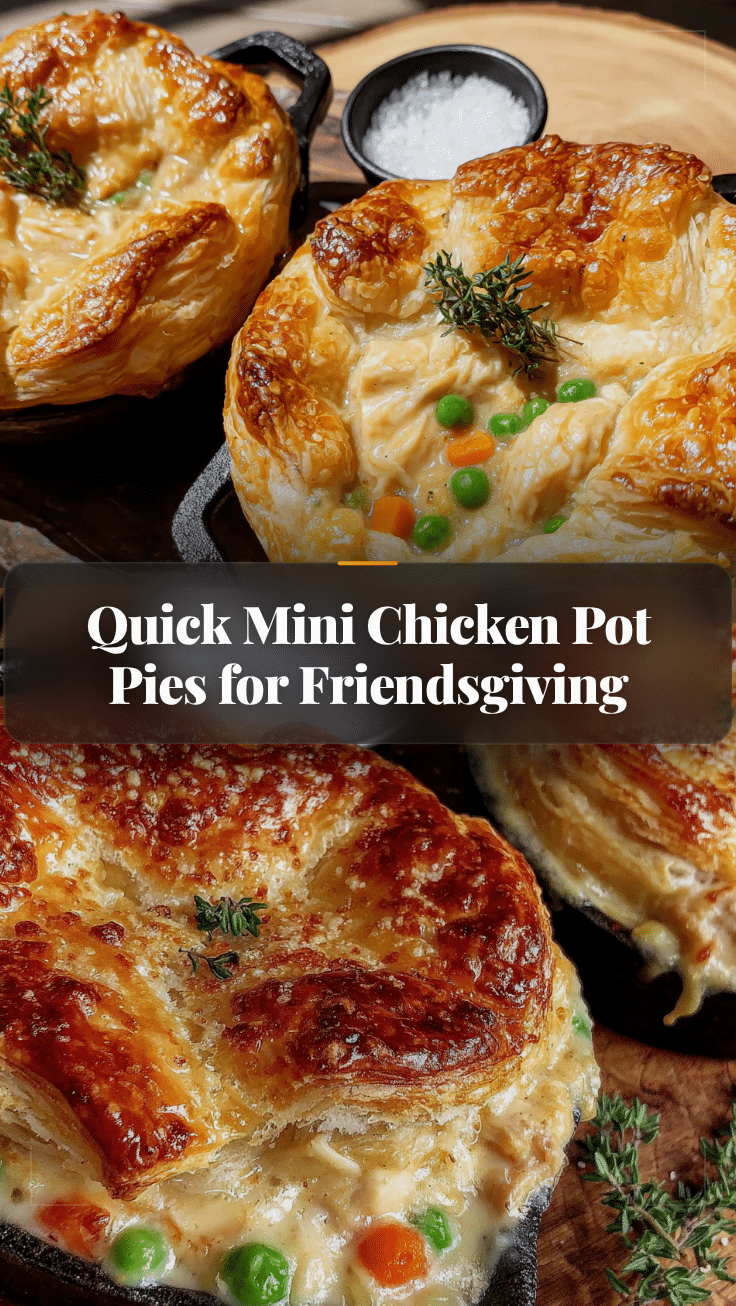
Best Easy Mini Chicken Pot Pies for Friendsgiving

These mini chicken pot pies are the perfect solution for Friendsgiving, especially when you’re short on time and oven space. They come together in under an hour, use simple ingredients you probably already have, and they’re just the right size for everyone to grab their own.
- Prep Time: 15 minutes
- Cook Time: 30 minutes
- Total Time: 45 minutes
- Yield: 12 servings 1x
- Category: Main Course
- Cuisine: American
Ingredients
- 2 tablespoons unsalted butter
- 1 medium yellow onion, diced (about 1 cup)
- 2 medium carrots, peeled and diced (about 1 cup)
- 2 stalks celery, diced (about 1/2 cup)
- 2 cloves garlic, minced
- 1/3 cup all-purpose flour
- 2 cups low-sodium chicken broth
- 1 cup whole milk (or half-and-half for extra richness)
- 1/4 cup dry white wine (like Sauvignon Blanc — optional but highly recommended)
- 3 cups cooked chicken, shredded or diced (rotisserie chicken works perfectly)
- 1 cup frozen peas and carrots mix (no need to thaw)
- 1/2 teaspoon dried thyme
- 1/2 teaspoon dried rosemary
- Salt and black pepper to taste
- 1 package (17.3 ounces) frozen puff pastry sheets (like Pepperidge Farm), thawed according to package directions
- 1 large egg, beaten with 1 tablespoon water (for egg wash)
- Flaky sea salt for sprinkling (optional)
Instructions
- Preheat your oven to 400°F (200°C). Lightly grease a 12-cup muffin tin with butter or non-stick spray. Set it aside.
- In a large skillet over medium heat, melt the butter. Add the diced onion, carrots, and celery. Cook, stirring occasionally, for about 5-7 minutes, until the vegetables have softened and the onion is translucent.
- Add the minced garlic and cook for another 30 seconds until fragrant. Sprinkle the flour over the vegetables and stir constantly for 1-2 minutes.
- Slowly pour in the chicken broth while whisking constantly to prevent lumps. Then add the milk and white wine (if using). Continue whisking until the sauce comes to a gentle simmer and thickens, about 3-4 minutes.
- Stir in the shredded chicken, frozen peas and carrots, thyme, and rosemary. Season with salt and pepper to taste. Let the filling simmer for 2 minutes to warm through, then remove from heat.
- On a lightly floured surface, unfold the thawed puff pastry sheets. Roll them out just slightly to smooth the seams, if necessary. Using a 3-inch round cutter or a drinking glass, cut out 12 rounds.
- Divide the filling evenly among the 12 muffin cups — about 1/3 cup each. Place a puff pastry round on top of each cup, gently pressing the edges down around the filling. Cut a small slit in the top of each pastry to let steam escape.
- Brush the tops of the pastries with the beaten egg wash. Sprinkle with a pinch of flaky sea salt if desired. Place the muffin tin on a baking sheet to catch any drips, then bake for 18-22 minutes, until the pastry is golden brown and puffed, and the filling is bubbling.
- Let the pot pies cool in the tin for 5 minutes before carefully removing them with a small spatula or butter knife. Serve warm.
Notes
For the best texture, look for puff pastry made with real butter. If using rotisserie chicken, remove the skin and shred the meat while it’s still warm. To prevent soggy bottoms, make sure the filling is thick and hot before assembling. You can assemble the pot pies (unbaked) and freeze them for up to 3 months; bake directly from frozen, adding 5-10 minutes to the baking time.
Nutrition
- Serving Size: 1 mini pot pie
- Calories: 320
- Sugar: 4
- Sodium: 450
- Fat: 18
- Saturated Fat: 7
- Carbohydrates: 28
- Fiber: 2
- Protein: 16
Keywords: mini chicken pot pies, Friendsgiving, comfort food, puff pastry, easy dinner