My cousin Leo asked why I couldn’t just skip the chilling step and scoop the dough straight onto the baking sheet. I was in the middle of explaining—with what I thought was admirable patience—that cookie dough needs to firm up in the fridge to prevent spreading, when I stopped mid-sentence. Honestly, I have no idea what made me pause. Maybe it was the way he was already holding the cookie scoop, looking so certain. I handed him the bowl. “Fine,” I said. “You try it.”
And let me tell you, watching those first batch of pumpkin snickerdoodle cookies come out of the oven—puffy, perfectly crackled, not a flat cookie in sight—was a humbling moment. I mean, I’d been making snickerdoodles for years. I had a system. I believed in the chill. But Leo, who had never baked a cookie from scratch in his life, had just called my bluff. The kitchen smelled like cinnamon and nutmeg and a little bit of my shattered pride. That was a Tuesday afternoon in late October, and the leaves were falling outside the window while we stood there, grinning at these perfect little pumpkin-spiced beauties.
Maybe you’ve been there—you think you know a recipe inside and out, and then someone comes along and accidentally improves it. That’s exactly what happened here. These pumpkin snickerdoodle cookies are soft, chewy, and rolled in a cinnamon-sugar coating that gives them that signature crackled top. The pumpkin keeps them tender without making them cakey, and the warm spices hit that cozy fall note we all crave. I’ve made them for every gathering since that afternoon—Thanksgiving, Friendsgiving, random Tuesday night dinners where someone inevitably asks for the recipe. They’re the kind of cookie that makes people close their eyes after the first bite. And honestly? I’m glad Leo didn’t listen to me.
Why You’ll Love This Recipe
These aren’t just another pumpkin cookie recipe. They’re the result of a happy accident and a whole lot of testing to make sure that accident works every single time. Here is why these cookies deserve a spot on your baking rotation:
- No Chilling Required: That’s right—you can scoop and bake immediately. The dough is sturdy enough to hold its shape without spending an hour in the fridge.
- Perfectly Soft and Chewy: The pumpkin puree adds moisture without making the cookies dense or gummy. Each bite has that tender, slightly pillowy texture that snickerdoodles are famous for.
- Simple Pantry Ingredients: You probably have everything you need already. No fancy extracts, no hard-to-find spices—just good old-fashioned baking staples.
- Guest-Approved Presentation: The cinnamon-sugar coating gives these cookies a beautiful crackled top that looks like you spent hours perfecting them. They’re a showstopper on any dessert table.
- Perfect for Fall Gatherings: Whether it’s a Halloween party, a cozy Friendsgiving, or a casual potluck, these cookies fit right in. They’re sturdy enough to transport and stay soft for days.
- Crowd-Pleasing Flavor: The combination of pumpkin, cinnamon, and nutmeg is universally loved. Even people who claim they don’t like pumpkin desserts end up reaching for seconds.
What sets this recipe apart from the dozens of other pumpkin cookie recipes out there is the texture. Most pumpkin cookies turn out cakey—almost muffin-like. These are different. The butter-to-pumpkin ratio is carefully balanced so you get a cookie that’s soft but still has structure. It’s the kind of cookie that makes you pause after the first bite and think, “Okay, this is the one.”
And honestly, these cookies are perfect for the host who wants to impress without stress. You can prep the dough in under 15 minutes, bake them while guests are mingling, and serve them warm with a cup of coffee. They make your kitchen smell incredible, and they disappear fast. I’ve never brought a batch home—not once.
What Ingredients You Will Need
This recipe uses simple, wholesome ingredients that work together to create that perfect snickerdoodle texture with a fall twist. Here’s everything you need and why each ingredient matters:
- Unsalted Butter (1/2 cup, softened): Butter is the backbone of these cookies. Using unsalted lets you control the salt level. Make sure it’s truly softened—not melted, not cold—so it creams properly with the sugar.
- Granulated Sugar (1 cup): This provides sweetness and helps create that slightly crispy edge. You’ll also use extra sugar for the cinnamon coating.
- Pumpkin Puree (1/2 cup): Not pumpkin pie filling—make sure you grab 100% pure pumpkin puree. It adds moisture, color, and a subtle earthy sweetness. I prefer Libby’s for consistent results.
- Large Egg (1): The egg binds everything together and adds structure. Room temperature works best if you remember to take it out ahead of time.
- Vanilla Extract (1 teaspoon): A good-quality vanilla rounds out the spices and adds warmth. Pure vanilla extract is worth the splurge here.
- All-Purpose Flour (1 3/4 cups): Standard AP flour gives these cookies the perfect structure. Spoon and level your flour—don’t scoop directly from the bag, or you’ll end up with dry cookies.
- Cream of Tartar (1 teaspoon): This is the secret ingredient that gives snickerdoodles their signature tangy flavor and chewy texture. Don’t skip it—baking soda alone won’t give you the same result.
- Baking Soda (1/2 teaspoon): Helps the cookies spread slightly and become tender.
- Salt (1/4 teaspoon): Balances the sweetness and enhances all the flavors. I use fine sea salt for baking.
- Ground Cinnamon (1 1/2 teaspoons): The star spice of snickerdoodles. You’ll use some in the dough and more for the coating.
- Ground Nutmeg (1/4 teaspoon): Adds that classic pumpkin pie warmth. Freshly grated nutmeg is amazing if you have it.
- Ground Ginger (1/4 teaspoon): A tiny amount adds depth without being overpowering. It’s the secret to making these taste bakery-quality.
- For the Cinnamon-Sugar Coating:
- Granulated Sugar (3 tablespoons): For that sparkly, crunchy exterior.
- Ground Cinnamon (1 tablespoon): The coating is generous—don’t skimp.
If you want to swap the butter for a dairy-free option, I’ve had good luck with plant-based butter sticks (not the spreadable kind in a tub). For a gluten-free version, use a 1:1 gluten-free baking flour blend that contains xanthan gum. The texture will be slightly different but still delicious.
Equipment Needed
You don’t need any fancy gadgets for these pumpkin snickerdoodle cookies, which is part of their charm. Here’s what you’ll need:
- Large Mixing Bowls (2): One for the wet ingredients, one for the dry. I use glass or stainless steel bowls because they don’t retain odors.
- Electric Hand Mixer or Stand Mixer: A hand mixer works perfectly. A stand mixer is great if you have one, but honestly, the dough comes together so quickly that it’s not necessary.
- Baking Sheets (2): Standard half-sheet pans work best. If you only have one, let it cool completely between batches.
- Parchment Paper or Silicone Baking Mats: These prevent sticking and make cleanup a breeze. Silicone mats also help the cookies bake evenly.
- Cookie Scoop (1.5-tablespoon size): This ensures uniform cookies that bake evenly. A regular spoon works in a pinch, but the scoop is worth the few dollars it costs.
- Cooling Rack: Essential for letting the cookies cool properly so they don’t get soggy on the bottom.
- Small Bowl for Coating: A shallow bowl or plate for the cinnamon-sugar mixture.
I’ve made these cookies with a cheap baking sheet from the grocery store, and they still turned out great. The only thing I wouldn’t compromise on is the parchment paper—it really does make a difference in how evenly the bottoms brown.
Preparation Method
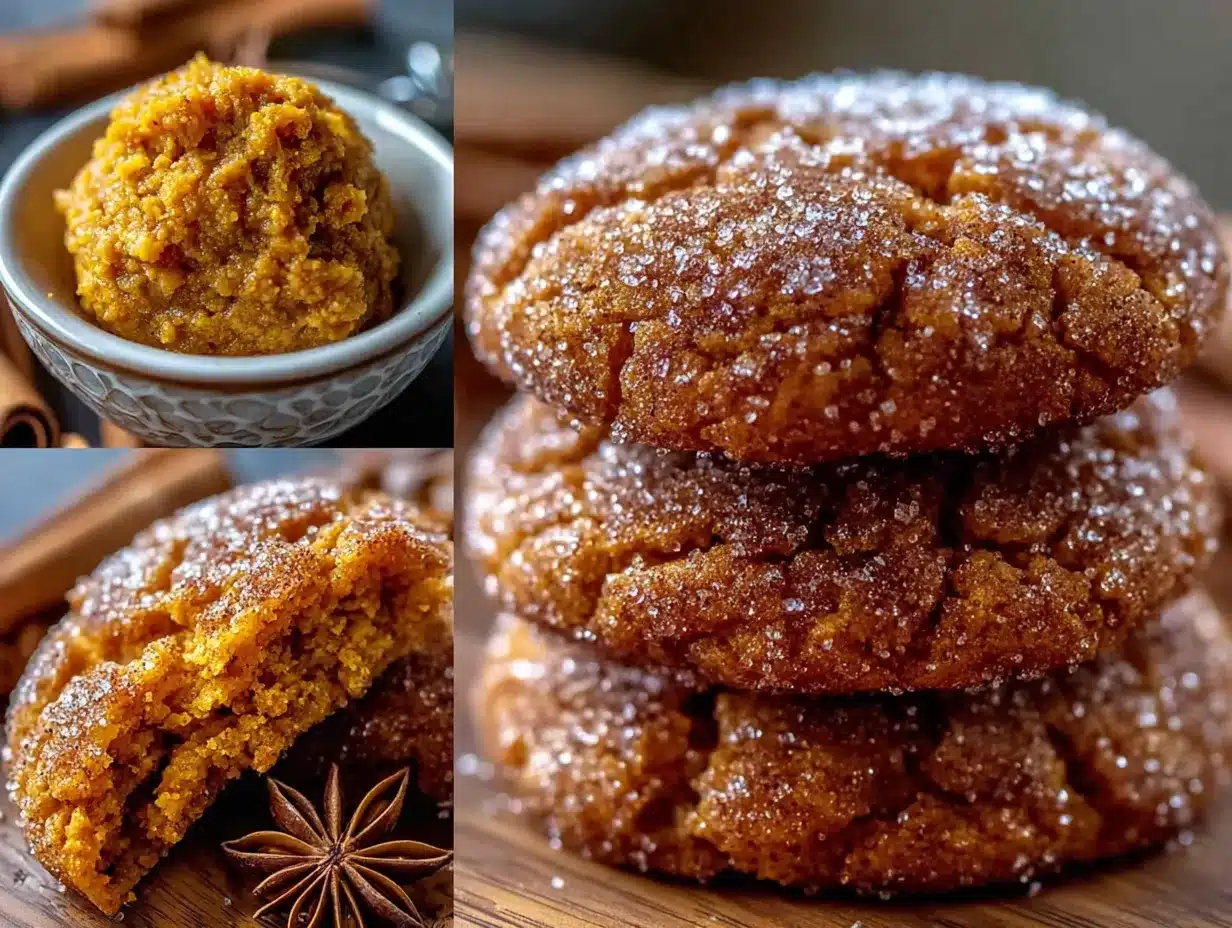
Follow these steps carefully, and you’ll have perfect pumpkin snickerdoodle cookies every time. The key is not to overmix the dough once you add the flour.
- Preheat and Prepare: Preheat your oven to 350°F (175°C). Line two baking sheets with parchment paper or silicone baking mats. This ensures the cookies don’t stick and the bottoms bake evenly.
- Make the Cinnamon-Sugar Coating: In a small bowl, whisk together 3 tablespoons of granulated sugar and 1 tablespoon of ground cinnamon. Set this aside—you’ll use it right before baking.
- Cream the Butter and Sugar: In a large mixing bowl, beat the softened butter and 1 cup of granulated sugar together until light and fluffy, about 2-3 minutes. You want the mixture to look pale and airy. Scrape down the sides of the bowl halfway through.
- Add the Wet Ingredients: Beat in the pumpkin puree, egg, and vanilla extract until everything is well combined. The mixture might look slightly separated at this point—that’s totally normal. Don’t worry, the dry ingredients will bring it all together.
- Combine the Dry Ingredients: In a separate bowl, whisk together the all-purpose flour, cream of tartar, baking soda, salt, cinnamon, nutmeg, and ginger. Whisking ensures the spices and leavening agents are evenly distributed, so you don’t end up with one cookie that’s extra spicy and another that’s bland.
- Mix Wet and Dry: Gradually add the dry ingredients to the wet mixture, mixing on low speed or stirring by hand. Stop as soon as the flour disappears—overmixing develops gluten and makes the cookies tough. The dough will be soft but not sticky.
- Scoop and Coat: Using a 1.5-tablespoon cookie scoop, portion out the dough. Roll each portion into a smooth ball between your palms. Drop each ball into the cinnamon-sugar mixture and roll it around until fully coated. Place the coated dough balls on the prepared baking sheets, spacing them about 2 inches apart. You should get about 24 cookies total.
- Bake: Bake one sheet at a time in the center of the oven for 10-12 minutes. The cookies will look puffy and slightly cracked on top. The edges should be set but the centers will still look soft—that’s exactly what you want. Overbaking will make them dry.
- Cool on the Pan: Let the cookies cool on the baking sheet for 5 minutes. This allows them to set up properly. After 5 minutes, transfer them to a wire cooling rack to cool completely. If you try to move them too soon, they’ll fall apart.
- Repeat: Let the baking sheet cool completely before scooping the next batch onto it. A hot pan will cause the dough to spread too much.
One thing I learned the hard way—don’t flatten the dough balls before baking. The cookies will spread on their own in the oven, and flattening them ruins that beautiful crackled top. Let them do their thing.
Cooking Tips & Techniques
After making these pumpkin snickerdoodle cookies more times than I can count, I’ve picked up a few tricks that make a real difference. Here’s what I wish I’d known from the start:
Don’t Overmix the Dough. This is the number one mistake I see in comments on other recipes. Once you add the flour, mix just until it’s incorporated. A few streaks of flour are fine—they’ll disappear as you scoop. Overmixing activates the gluten and gives you tough, dense cookies instead of tender, soft ones.
Use a Cookie Scoop for Uniform Size. I know it seems like a small thing, but cookies that are the same size bake at the same rate. If you’re scooping by hand and one ball is bigger than another, you’ll end up with some cookies that are overdone and some that are underdone. A $5 cookie scoop solves this completely.
Rotate the Pan Halfway Through. Ovens have hot spots—it’s just a fact. Halfway through baking, rotate the pan 180 degrees. This ensures even browning and prevents the cookies on the back edge from getting too dark.
Let Them Cool on the Pan. I know it’s tempting to move them immediately, but those 5 minutes on the hot baking sheet are crucial. The cookies continue to bake gently and set their structure. If you move them too soon, they’ll fall apart or become misshapen.
Check for Doneness by Look, Not Time. Ovens vary wildly. Start checking at 10 minutes. The cookies are done when the edges are set and lightly golden, and the tops are puffy with visible cracks. The centers will look slightly underdone—that’s the goal. They’ll continue cooking from residual heat as they cool.
I once forgot to add the cream of tartar—don’t do that. The cookies still tasted fine, but they lost that signature snickerdoodle tang and were flatter than usual. It’s not an ingredient you can skip.
Variations & Adaptations
One of the best things about these pumpkin snickerdoodle cookies is how easily they adapt to different tastes and dietary needs. Here are some variations I’ve tried and loved:
Gluten-Free Version: Substitute the all-purpose flour with a 1:1 gluten-free baking flour blend that contains xanthan gum. I’ve had great results with Bob’s Red Mill and King Arthur brands. The cookies will be slightly more tender but still hold together beautifully.
Dairy-Free Version: Use plant-based butter sticks instead of dairy butter. Make sure it’s the stick form, not the spreadable kind in a tub, which has too much water. I’ve used Miyoko’s and Country Crock Plant Butter with excellent results.
Extra Spicy: If you love warm spices, increase the cinnamon to 2 teaspoons and add 1/4 teaspoon of ground cloves or allspice. This turns them into more of a pumpkin pie cookie—absolutely delicious for fall.
Chocolate Chip Twist: Fold in 1/2 cup of white chocolate chips or butterscotch chips after mixing the dough. The sweetness of the chips pairs beautifully with the warm spices. I made this version for a potluck and they disappeared in minutes.
Maple Glaze Drizzle: For an extra-special presentation, whisk together 1/2 cup of powdered sugar, 1 tablespoon of maple syrup, and 1-2 teaspoons of milk. Drizzle over the cooled cookies. It adds a beautiful finishing touch for holiday gatherings.
Less Sweet Option: Reduce the sugar in the dough to 3/4 cup instead of 1 cup. The cinnamon-sugar coating still provides plenty of sweetness on the outside. This works well if you’re serving them with a sweet drink like hot chocolate.
My personal favorite variation is the white chocolate chip version. I made it for a Friendsgiving gathering last year, and someone actually asked if they could take the leftovers home. I said yes, but only because I had already stashed a few in the freezer for myself.
Serving & Storage Suggestions
These pumpkin snickerdoodle cookies are incredibly versatile when it comes to serving. Here’s how to get the most out of them:
Serving Temperature: They’re delicious at room temperature, but I honestly prefer them slightly warm. If you’ve stored them, pop one in the microwave for 8-10 seconds—it makes the center soft and almost gooey. Serve them on a pretty plate or a wooden board for a rustic presentation that looks great on a dessert table.
What to Serve Alongside: These cookies pair beautifully with a hot cup of coffee, spiced chai latte, or a tall glass of cold milk. For a dessert spread, arrange them next to other fall favorites like pumpkin bread, apple cider donuts, or a simple vanilla ice cream. They also make an excellent addition to a cookie exchange or holiday gift box.
Storage Instructions: Store the cookies in an airtight container at room temperature for up to 5 days. Place a piece of bread in the container—it absorbs excess moisture and keeps the cookies soft. Change the bread every other day if they last that long.
Freezer Instructions: These cookies freeze beautifully. You can freeze the baked cookies in a freezer-safe bag or container for up to 3 months. Thaw at room temperature for about 30 minutes before serving. Alternatively, freeze the unbaked dough balls on a baking sheet until solid, then transfer to a freezer bag. Bake from frozen, adding 2-3 minutes to the baking time.
Flavor Development: Here’s a little secret—these cookies actually taste better the day after baking. The spices have time to meld and mellow out, and the texture becomes even more tender. If you’re planning for a party, bake them a day ahead. Your future self will thank you.
I’ve also found that these cookies travel exceptionally well. I’ve taken them on road trips, to office parties, and even mailed them to friends across the country. Pack them in a sturdy container with parchment paper between layers, and they’ll arrive intact.
Nutritional Information & Benefits
While these pumpkin snickerdoodle cookies are definitely a treat, they do offer some nutritional upsides thanks to the pumpkin puree. Here’s a rough estimate per cookie (based on 24 cookies):
- Calories: Approximately 130-140
- Fat: 5g
- Carbohydrates: 20g
- Protein: 2g
- Fiber: 1g
- Sugar: 12g
The pumpkin puree is the real hero here. It’s packed with vitamin A (from beta-carotene), which supports eye health and immune function. It also adds fiber and moisture, which means you can use less butter than in a traditional snickerdoodle recipe. Plus, the cinnamon in the coating has anti-inflammatory properties and may help regulate blood sugar levels.
These cookies are vegetarian and can easily be made dairy-free or gluten-free with the substitutions mentioned earlier. They do contain eggs and wheat (unless you use a gluten-free flour blend), so keep that in mind if you’re baking for someone with allergies.
Let’s be real—these are cookies, not health food. But if you’re going to indulge, I’d rather reach for one of these than a store-bought version with preservatives and artificial flavors. At least you know exactly what’s in them, and the pumpkin adds a tiny nutritional boost that makes me feel slightly better about having two.
Conclusion
These pumpkin snickerdoodle cookies have become my go-to fall recipe for a reason. They’re simple enough to whip up on a random Tuesday but impressive enough to bring to any gathering. The texture is spot-on—soft, chewy, with that perfect cinnamon-sugar crunch on the outside. And the fact that you don’t have to chill the dough? That’s a game-changer when you’re hosting and time is tight.
I love that this recipe came from a moment of being proven wrong. It reminds me that sometimes the best things happen when you let go of the rules and just try something. Leo still brings up that afternoon every time I make these cookies. “Remember when you thought I was crazy?” he says, grabbing a third one off the plate. I do remember. And I’m grateful he pushed back.
I’d love to hear how these turn out for you! Leave a comment below and let me know if you tried any variations—especially the white chocolate chip version. Tag me in your photos on social media so I can see your beautiful cookies. Happy baking, and don’t forget to save one for yourself before they disappear!
Frequently Asked Questions
Can I use pumpkin pie filling instead of pumpkin puree?
No, you should use 100% pure pumpkin puree, not pumpkin pie filling. Pumpkin pie filling has added sugar and spices, which will throw off the balance of the recipe and make the cookies too sweet and dense. Stick with plain puree for the best results.
Why did my cookies turn out flat?
Flat cookies usually mean one of three things: your butter was too soft or melted, you skipped the cream of tartar, or your baking soda is expired. Make sure your butter is softened but still holds its shape, and check the expiration date on your baking soda. The cream of tartar is essential for structure.
Can I make the dough ahead of time?
Absolutely! You can prepare the dough and refrigerate it for up to 2 days before baking. Just let it sit at room temperature for about 10 minutes to soften slightly before scooping and coating. If the dough is too cold, it won’t hold the cinnamon-sugar coating as well.
How do I know when the cookies are done baking?
Look for set edges that are lightly golden and tops that are puffy with visible cracks. The centers should still look soft and slightly underdone—they’ll continue baking from residual heat as they cool on the pan. Overbaked cookies will be dry and crumbly.
Can I double this recipe?
Yes, this recipe doubles beautifully. Just make sure you have enough baking sheets to avoid overcrowding, and bake one sheet at a time in the center of the oven. If you’re making a large batch for a party, the dough also freezes well for baking later.
PrintBest Easy Pumpkin Snickerdoodle Cookies Recipe
These soft and chewy pumpkin snickerdoodle cookies are rolled in cinnamon-sugar and require no chilling. They’re the perfect fall treat with a crackled top and warm spices.
- Prep Time: 15 minutes
- Cook Time: 12 minutes
- Total Time: 27 minutes
- Yield: 24 cookies 1x
- Category: Dessert
- Cuisine: American
Ingredients
- 1/2 cup unsalted butter, softened
- 1 cup granulated sugar
- 1/2 cup pumpkin puree (100% pure, not pie filling)
- 1 large egg
- 1 teaspoon vanilla extract
- 1 3/4 cups all-purpose flour
- 1 teaspoon cream of tartar
- 1/2 teaspoon baking soda
- 1/4 teaspoon salt
- 1 1/2 teaspoons ground cinnamon
- 1/4 teaspoon ground nutmeg
- 1/4 teaspoon ground ginger
- For the cinnamon-sugar coating:
- 3 tablespoons granulated sugar
- 1 tablespoon ground cinnamon
Instructions
- Preheat oven to 350°F (175°C). Line two baking sheets with parchment paper or silicone baking mats.
- In a small bowl, whisk together 3 tablespoons granulated sugar and 1 tablespoon ground cinnamon for the coating. Set aside.
- In a large mixing bowl, beat softened butter and 1 cup granulated sugar together until light and fluffy, about 2-3 minutes.
- Beat in pumpkin puree, egg, and vanilla extract until well combined.
- In a separate bowl, whisk together flour, cream of tartar, baking soda, salt, cinnamon, nutmeg, and ginger.
- Gradually add dry ingredients to wet mixture, mixing on low speed or stirring by hand until just combined. Do not overmix.
- Using a 1.5-tablespoon cookie scoop, portion dough and roll into smooth balls. Roll each ball in cinnamon-sugar mixture until fully coated.
- Place coated dough balls on prepared baking sheets, spacing about 2 inches apart.
- Bake one sheet at a time in the center of the oven for 10-12 minutes, until edges are set and tops are puffy with cracks.
- Let cookies cool on baking sheet for 5 minutes, then transfer to a wire cooling rack to cool completely.
Notes
Do not skip the cream of tartar—it gives snickerdoodles their signature tang and chewy texture. For best results, use 100% pure pumpkin puree, not pumpkin pie filling. Cookies can be stored in an airtight container at room temperature for up to 5 days. Freeze baked cookies for up to 3 months.
Nutrition
- Serving Size: 1 cookie
- Calories: 135
- Sugar: 12
- Sodium: 85
- Fat: 5
- Saturated Fat: 3
- Carbohydrates: 20
- Fiber: 1
- Protein: 2
Keywords: pumpkin snickerdoodle cookies, easy pumpkin cookies, no chill cookies, fall cookies, snickerdoodle recipe


