I was standing in the dairy aisle last December, honestly just trying to grab a quart of milk without my toddler having a meltdown over a cartoon on the yogurt cups, when a guy in a heavy coat walked past me. The cold air clung to him, and with it came this faint, unmistakable whiff of nutmeg and something sweet and boozy—eggnog, obviously, but not just any eggnog. It was the specific, slightly waxy smell of the store-bought kind my mom used to pour into a ceramic punch bowl at her holiday parties when I was maybe six. And just like that, I wasn’t in the grocery store anymore. I was perched on a wobbly barstool in her kitchen, my chin barely clearing the counter, watching her pull a tray of misshapen cookies out of the oven. She’d let me lick the spatula—a reward for “helping”—and the taste was a blur of sugar, cinnamon, and that same nutmeg that now hung in the air. She passed away a few years ago, and I haven’t had her eggnog cookies since. Honestly, I didn’t even have her recipe. But standing there, with my kid starting to whimper, I knew I had to try and chase that feeling. This is my attempt—a cookie that tastes like a memory you can almost, but not quite, hold onto.
These Eggnog Snickerdoodle Cookies are my love letter to that moment. They’re soft, chewy, and rolled in a cozy blanket of cinnamon and nutmeg sugar. The eggnog in the dough gives them a subtle, custardy richness that’s perfect for the holidays, but they’re simple enough to whip up on a random Tuesday. Maybe you’ve been there—chasing a taste from your past, hoping to recreate it for the people you love now. Let me tell you, these cookies are worth the chase.
Why You’ll Love This Recipe
Look, I’ve tested a lot of cookie recipes in my time. Some are too fussy, some fall flat, and some just don’t deliver that *feeling*. This one is different. It’s the kind of cookie that makes you close your eyes after the first bite, and honestly, it’s a total win for the whole family. Here’s why I keep coming back to it, and why I think you will too.
- Quick & Easy: From start to finish, these cookies come together in about 25 minutes. No chilling the dough, no complicated steps—just mix, roll, and bake. Perfect for when the kids are begging for something sweet or you need a last-minute treat for a school party.
- Simple Ingredients: You probably have most of these in your pantry right now. Butter, sugar, flour, eggs, and a little eggnog. No fancy extracts or hard-to-find spices. This recipe respects your grocery budget.
- Perfect for the Holidays: These cookies are a natural fit for Christmas cookie swaps, cozy family movie nights, or leaving out for Santa. The eggnog and nutmeg scream “holiday cheer” without being overwhelming.
- Crowd-Pleaser: I’ve brought these to playdates and potlucks, and they disappear fast. Kids love the soft, chewy texture and the cinnamon-sugar coating, and adults appreciate that nostalgic eggnog flavor. It’s a rare treat that makes everyone happy.
- Unbelievably Delicious: The secret is in the balance. The eggnog adds moisture and a subtle tang, while the nutmeg and cinnamon create that warm, spiced hug. They’re not too sweet, not too plain—just right.
What makes this recipe *my* best version? It’s the technique. I use a tiny bit more eggnog than most recipes call for, which gives the cookies a softer, almost cake-like center without making them spread into pancakes. Plus, I roll them in a spiced sugar mix that includes a pinch of freshly grated nutmeg. That little touch makes all the difference—it’s the flavor that hits you first and lingers. This isn’t just another snickerdoodle; it’s comfort food reimagined for the holiday season, faster and easier, but with the same soul-soothing satisfaction.
What Ingredients You Will Need
This recipe uses simple, wholesome ingredients to deliver that bold, festive flavor without any fuss. Most of these are pantry staples, especially during the holiday season. Let’s break down what you’ll need and why each one matters.
- For the Cookies:
- 1 cup (2 sticks) unsalted butter, softened: Butter is the foundation of a good cookie. I prefer unsalted so I can control the salt level. Make sure it’s truly softened to room temperature—if it’s too cold, the dough won’t cream properly; too melted, and your cookies will spread like crazy.
- 1 cup granulated sugar: This provides sweetness and helps with that soft, chewy texture. You can use organic cane sugar if you prefer.
- 1/2 cup packed light brown sugar: Brown sugar adds moisture and a hint of molasses flavor that complements the eggnog beautifully. Don’t skip it—it’s key for that soft texture.
- 1 large egg, room temperature: The egg binds everything together and adds richness. A room-temperature egg incorporates more easily into the butter-sugar mixture, creating a smoother dough.
- 1/2 cup eggnog: This is the star of the show! Use full-fat eggnog for the best flavor and texture. I’ve tested this with store-brand and name-brand eggnog—both work fine, but I personally prefer a slightly thicker, creamier brand like Hood or Organic Valley. The eggnog adds moisture and that signature custard flavor.
- 1 teaspoon vanilla extract: A good vanilla enhances all the other flavors. I use pure vanilla extract, not imitation, for a cleaner taste.
- 3 cups all-purpose flour: Spoon and level your flour—don’t scoop directly from the bag, or you’ll end up with dry, dense cookies. Too much flour is a common mistake.
- 1 teaspoon baking soda: This helps the cookies rise and spread just the right amount. Make sure it’s fresh—old baking soda won’t give you the lift you need.
- 1/2 teaspoon salt: Salt balances the sweetness and enhances the spices. I use fine sea salt.
- 1 teaspoon ground cinnamon: Cinnamon is a classic snickerdoodle spice. It adds warmth and pairs perfectly with the nutmeg.
- 1/2 teaspoon ground nutmeg: Nutmeg is essential for that eggnog flavor. I recommend freshly grating a whole nutmeg if you can—the flavor is so much more vibrant. But pre-ground works in a pinch.
- For the Coating:
- 1/4 cup granulated sugar: This is for rolling the cookies. It gives them that signature crackly, sparkly look.
- 2 teaspoons ground cinnamon: The coating is where the snickerdoodle magic happens. Adjust the amount to your taste—I like a generous coating.
- 1/2 teaspoon freshly grated nutmeg: This extra touch of nutmeg in the coating is what sets these cookies apart. It’s the first flavor you taste, and it’s incredible.
Ingredient Tips: If you’re out of eggnog, you can substitute with a mixture of milk and a splash of heavy cream, plus an extra 1/4 teaspoon of nutmeg. But honestly, it’s not the same. For a dairy-free version, use a plant-based eggnog (like oat or almond-based) and a vegan butter stick. The texture will be slightly different, but still delicious. Also, if you want a stronger eggnog flavor, you can add a tablespoon of rum extract (skip the real booze if baking for kids).
Equipment Needed
You don’t need any fancy gadgets for these cookies, which is part of their charm. Here’s what you’ll need to get the job done.
- Electric hand mixer or stand mixer: A mixer makes creaming the butter and sugar a breeze. I’ve made these with a hand mixer and my trusty KitchenAid—both work perfectly. If you’re feeling strong, you can do it by hand with a wooden spoon, but your arm will get a workout.
- Large mixing bowls: You’ll need one for the wet ingredients and one for the dry. I prefer glass or stainless steel bowls.
- Measuring cups and spoons: Accurate measurements are key for baking. Use dry measuring cups for flour and sugar, and a liquid measuring cup for the eggnog.
- Whisk: For combining the dry ingredients evenly.
- Rubber spatula: For scraping down the sides of the bowl and folding in the flour.
- Baking sheets: I use two standard half-sheet pans. Line them with parchment paper for easy cleanup and to prevent sticking. Silicone baking mats also work great.
- Cookie scoop or two spoons: A 1.5-tablespoon cookie scoop ensures uniform cookies that bake evenly. If you don’t have one, just use two spoons to portion the dough.
- Cooling rack: Essential for letting the cookies cool properly so they don’t get soggy on the bottom.
- Small bowl: For mixing the cinnamon-sugar coating.
Budget-Friendly Tip: If you don’t have a mixer, you can absolutely cream the butter and sugar by hand. Just make sure the butter is very soft. It takes a few extra minutes, but it’s totally doable. And parchment paper is cheap—don’t skip it, or you’ll be scrubbing cookie residue off your pans.
Preparation Method
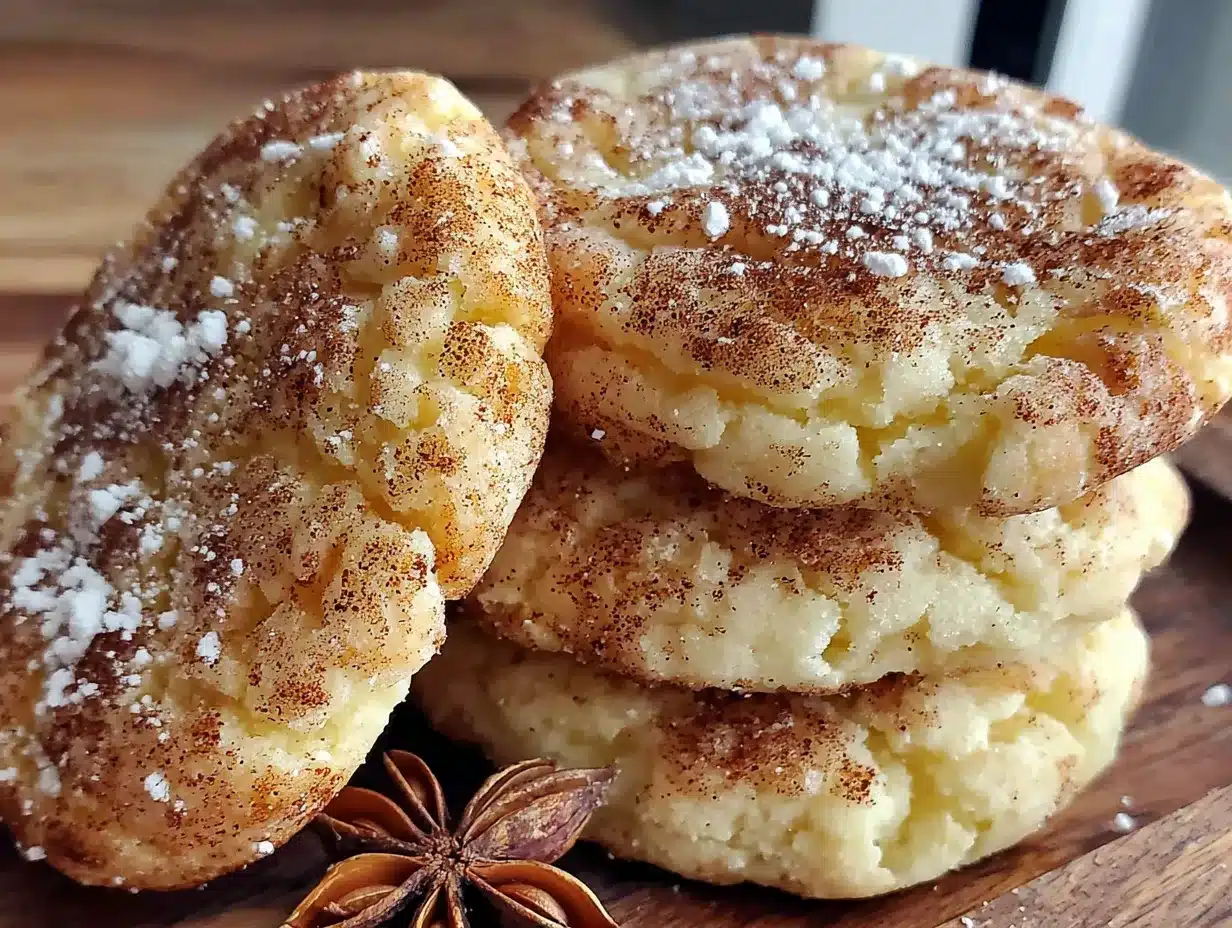
Alright, let’s get baking! This method is straightforward, but I’ve included some notes from my own trials (and a few failures) to help you nail it on the first try.
- Preheat and Prep: Preheat your oven to 375°F (190°C). Line two baking sheets with parchment paper. This ensures the cookies won’t stick and makes cleanup a breeze.
- Cream the Butter and Sugars: In a large mixing bowl, beat the softened butter, 1 cup granulated sugar, and the packed brown sugar together with an electric mixer on medium speed until light and fluffy. This should take about 2-3 minutes. Scrape down the sides of the bowl with a spatula halfway through. Don’t rush this step—proper creaming incorporates air, which helps the cookies rise.
- Add the Wet Ingredients: Beat in the egg, eggnog, and vanilla extract until well combined. The mixture might look slightly curdled at this point—don’t panic! That’s just the cold egg and eggnog reacting with the butter. It will come together once you add the flour.
- Whisk the Dry Ingredients: In a separate medium bowl, whisk together the all-purpose flour, baking soda, salt, 1 teaspoon cinnamon, and 1/2 teaspoon ground nutmeg. Whisking ensures the baking soda and spices are evenly distributed, so you don’t get a pocket of baking soda in one cookie.
- Combine Wet and Dry: Gradually add the dry ingredients to the wet mixture, mixing on low speed or folding with a spatula until just combined. Be careful not to overmix—overworking the dough develops gluten and makes the cookies tough. Stop as soon as you don’t see any more streaks of flour. The dough will be soft and slightly sticky, which is perfect.
- Make the Coating: In a small bowl, stir together the 1/4 cup granulated sugar, 2 teaspoons cinnamon, and 1/2 teaspoon freshly grated nutmeg. Set aside.
- Shape the Cookies: Using a 1.5-tablespoon cookie scoop or two spoons, portion out the dough. Roll each portion into a smooth ball between your palms. The dough is sticky, so lightly wetting your hands can help. Roll each ball generously in the cinnamon-sugar coating, making sure it’s fully covered. Place the coated balls on the prepared baking sheets, leaving about 2 inches of space between them—they will spread a little.
- Bake: Bake one sheet at a time in the preheated oven for 9-11 minutes. The cookies should look puffed and slightly crackly on top, with the edges just beginning to set. The centers will look soft and slightly underdone—that’s exactly what you want. Overbaking will give you dry, crunchy cookies. I usually pull mine out at the 10-minute mark.
- Cool: Let the cookies cool on the baking sheet for 5 minutes. This allows them to finish setting up without falling apart. Then, transfer them to a wire cooling rack to cool completely. If you try to move them too soon, they’ll crumble. Trust me, I’ve learned this the hard way.
Troubleshooting Tip: If your cookies spread too much into flat discs, your butter was likely too soft or melted. Next time, start with butter that’s still cool to the touch but gives slightly when pressed. Also, make sure your baking soda is fresh—it loses potency over time.
Cooking Tips & Techniques
I’ve made these Eggnog Snickerdoodle Cookies more times than I can count, and I’ve definitely had my share of flops. Here are the lessons I’ve learned so you can skip the mistakes.
Don’t Overmix the Dough. This is the number one mistake home bakers make. Once you add the flour, mix only until it disappears. Overmixing develops gluten, which makes cookies tough and cakey instead of soft and chewy. I once got distracted and kept mixing, and the resulting cookies were dense and unappealing. Learn from my fail.
Use Freshly Grated Nutmeg. I know, it’s an extra step. But the difference is night and day. Pre-ground nutmeg loses its volatile oils over time and tastes flat. A whole nutmeg keeps for months in your spice drawer, and a quick grate over a microplane or fine grater takes 10 seconds. The aroma alone is worth it—it fills your kitchen with that holiday magic.
Chill the Dough If Needed. The dough is soft and sticky, which is normal. But if your kitchen is particularly warm or your butter was on the verge of melting, the dough might be too soft to roll into balls. If that happens, pop the bowl in the fridge for 15-20 minutes. It will firm up nicely and be much easier to handle.
Bake One Sheet at a Time. I know it’s tempting to cram both sheets in the oven to save time, but it’s a bad idea. The heat circulates unevenly, and you’ll end up with some cookies overbaked and others underbaked. Patience pays off here. While one batch bakes, I roll the next batch of dough balls and get them ready.
Rotate the Pan Halfway Through. Every oven has hot spots. To ensure even baking, I rotate the baking sheet 180 degrees at the 5-minute mark. This is especially important if your oven runs hot on one side.
Let Them Cool on the Pan. Those 5 minutes on the hot baking sheet are crucial. The cookies continue to bake from the residual heat, setting the centers without drying them out. If you move them to a cooling rack too soon, they’ll deflate and become dense.
Variations & Adaptations
One of the best things about this recipe is how flexible it is. I’ve played around with it quite a bit, and here are some of my favorite variations.
- Gluten-Free Version: Substitute the all-purpose flour with a 1:1 gluten-free baking blend that contains xanthan gum. I’ve had great results with Bob’s Red Mill 1-to-1 Baking Flour. The texture is slightly more tender, but the flavor is spot on.
- Dairy-Free Version: Use a vegan butter stick (like Earth Balance) and a dairy-free eggnog. Oat-based eggnog works best because it has a creamy consistency similar to regular eggnog. The cookies will be a touch less rich, but still delicious.
- Spiced-Up Version: Add 1/4 teaspoon of ground cloves or allspice to the dough for an extra layer of warmth. I tried this last Christmas, and it gave the cookies a chai-like flavor that was a huge hit with my book club.
- Eggnog Glaze: For a sweeter, more decadent cookie, whisk together 1 cup powdered sugar, 2 tablespoons eggnog, and 1/4 teaspoon nutmeg until smooth. Drizzle over the cooled cookies. It takes them from snack to dessert in seconds.
- Kid-Friendly No-Nutmeg Coating: If your kids are picky about nutmeg (mine were at first), you can roll the cookies in plain cinnamon sugar. They’ll still taste like classic snickerdoodles with a hint of eggnog in the background. It’s a great way to introduce the flavor gradually.
- Freeze the Dough: This is my favorite hack for busy weeks. Roll the dough into balls, coat them in the cinnamon sugar, and place them on a parchment-lined baking sheet. Freeze until solid, then transfer to a freezer bag. You can bake them straight from frozen—just add 2-3 minutes to the baking time.
Serving & Storage Suggestions
These cookies are best served warm, when the centers are still soft and the cinnamon-sugar coating is perfectly set. But they’re also fantastic at room temperature, which makes them perfect for holiday platters and lunchboxes.
Serving Temperature: I love serving these slightly warm with a cold glass of milk or a warm mug of spiced tea. For an extra indulgent treat, serve them alongside a scoop of vanilla ice cream or a dollop of whipped cream. The contrast of warm cookie and cold ice cream is heavenly.
Presentation: Arrange the cookies on a festive platter, dusted with a little extra cinnamon sugar. They look beautiful on a red or green plate. For cookie swaps, I pack them in a tin lined with wax paper—they travel well and stay fresh for days.
Storage: Store the cooled cookies in an airtight container at room temperature for up to 5 days. To keep them soft, add a slice of bread to the container—the bread absorbs excess moisture and releases it slowly, keeping the cookies from drying out. Replace the bread slice every other day.
Freezing: Baked cookies freeze beautifully for up to 3 months. Place them in a single layer in a freezer-safe container or bag, separated by parchment paper. Thaw at room temperature for about 30 minutes before serving. The flavor actually seems to deepen after freezing—the spices meld together even more.
Reheating: To revive that just-baked warmth, pop a cookie in the microwave for 10-15 seconds. Or, place them on a baking sheet in a 300°F (150°C) oven for 5 minutes. They’ll come out smelling like you just baked them.
Flavor Development: Honestly, these cookies taste even better the next day. The eggnog and spices have time to meld, creating a more complex flavor. So don’t be afraid to bake them a day ahead.
Nutritional Information & Benefits
I’m not a nutritionist, but I do like to know what’s in my food. Here’s a rough estimate per cookie (based on 36 cookies). Keep in mind that actual values will vary based on specific ingredients and portion sizes.
| Nutrient | Per Cookie |
|---|---|
| Calories | ~130 |
| Total Fat | 6g |
| Saturated Fat | 3.5g |
| Carbohydrates | 18g |
| Sugar | 10g |
| Protein | 2g |
| Sodium | 90mg |
Health Benefits: While these are definitely a treat, they’re not without some redeeming qualities. The cinnamon and nutmeg are both anti-inflammatory spices that can help regulate blood sugar. The eggnog provides a small amount of calcium and vitamin D, especially if you use a fortified brand. And hey, a little sweetness can be good for the soul, right?
Dietary Considerations: This recipe contains gluten, dairy, and eggs. For a gluten-free option, use a 1:1 gluten-free flour blend. For a dairy-free option, use vegan butter and dairy-free eggnog. The cookies are nut-free as written, making them safe for school bake sales.
Allergen Note: Always check your eggnog label—some brands may contain traces of nuts or other allergens. If you’re baking for someone with severe allergies, it’s best to make your own eggnog or use a trusted brand.
Frequently Asked Questions
Can I use store-bought eggnog for this recipe?
Absolutely! Store-bought eggnog works perfectly. I recommend a full-fat version for the best texture and flavor. Light or low-fat eggnog can be used, but the cookies may be slightly less tender.
Why did my cookies spread too much?
This is usually due to butter that was too soft or melted. Make sure your butter is softened but still cool to the touch. Also, check that your baking soda is fresh—old baking soda can cause spreading. Chilling the dough for 15-20 minutes before baking can also help.
Can I make the dough ahead of time?
Yes! You can refrigerate the dough (without the coating) for up to 3 days. When you’re ready to bake, roll it into balls, coat in the cinnamon sugar, and bake as directed. You may need to add 1-2 minutes to the baking time if the dough is cold.
Can I use rum or rum extract in these cookies?
For an adults-only version, you can substitute 1-2 tablespoons of dark rum for an equal amount of eggnog. The alcohol will mostly bake off, leaving a deeper, more complex flavor. For a kid-friendly version, use 1/2 teaspoon of rum extract instead.
How do I get that perfect crackly top?
The crackly top comes from rolling the dough balls generously in the cinnamon-sugar coating. Make sure each ball is fully covered. Also, using a slightly higher oven temperature (375°F) helps the cookies set quickly, creating that signature crackled look.
Conclusion
These Eggnog Snickerdoodle Cookies are more than just a recipe—they’re a little piece of holiday magic you can hold in your hand. They’re the cookie I make when I want to feel close to my mom, when I want to fill my house with that warm, spicy aroma, and when I want to see my kids’ faces light up over something simple and sweet. They’re affordable, easy, and guaranteed to please even the pickiest eaters at your table.
I hope you give them a try and make them your own. Maybe you’ll add a little extra cinnamon, or skip the nutmeg for the kids, or drizzle on that eggnog glaze I mentioned. Whatever you do, don’t stress over perfection. The best cookies are the ones made with love and a little bit of imperfection—just like the memories they come from.
I’d love to hear how yours turn out! Drop a comment below and let me know if your family loved them as much as mine does. And if you have a favorite holiday cookie memory, share that too—I’m always looking for new inspiration. Happy baking, friend!
Pin This Recipe!
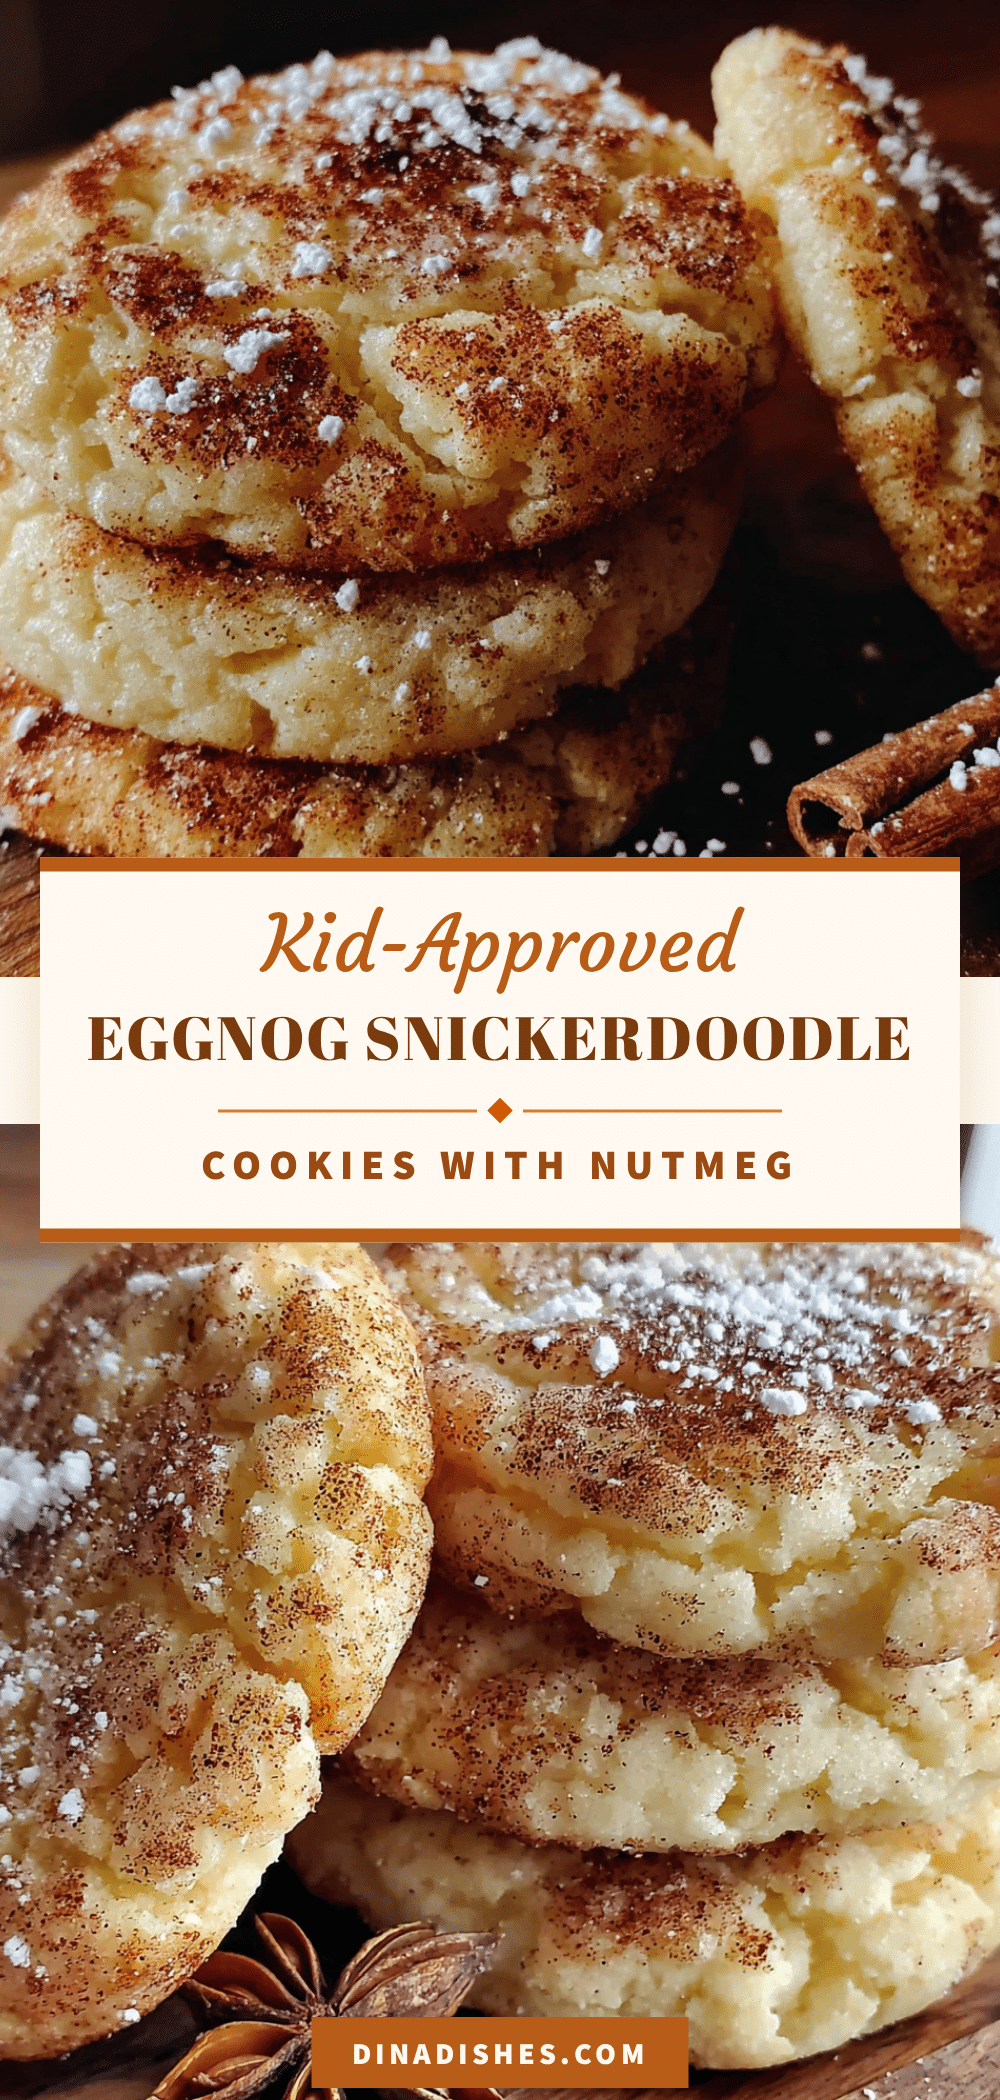
Best Eggnog Snickerdoodle Cookies: Easy Kid-Approved Recipe

These soft and chewy Eggnog Snickerdoodle Cookies are rolled in a cozy blanket of cinnamon and nutmeg sugar, with a subtle custardy richness from the eggnog. They’re quick, easy, and perfect for holiday cookie swaps or cozy family nights.
- Prep Time: 15 minutes
- Cook Time: 10 minutes
- Total Time: 25 minutes
- Yield: 36 cookies 1x
- Category: Dessert
- Cuisine: American
Ingredients
- 1 cup (2 sticks) unsalted butter, softened
- 1 cup granulated sugar
- 1/2 cup packed light brown sugar
- 1 large egg, room temperature
- 1/2 cup eggnog (full-fat recommended)
- 1 teaspoon vanilla extract
- 3 cups all-purpose flour (spooned and leveled)
- 1 teaspoon baking soda
- 1/2 teaspoon salt
- 1 teaspoon ground cinnamon
- 1/2 teaspoon ground nutmeg
- For the coating:
- 1/4 cup granulated sugar
- 2 teaspoons ground cinnamon
- 1/2 teaspoon freshly grated nutmeg
Instructions
- Preheat oven to 375°F (190°C). Line two baking sheets with parchment paper.
- In a large mixing bowl, beat the softened butter, 1 cup granulated sugar, and packed brown sugar together with an electric mixer on medium speed until light and fluffy, about 2-3 minutes. Scrape down the sides of the bowl halfway through.
- Beat in the egg, eggnog, and vanilla extract until well combined. The mixture may look slightly curdled; this is normal.
- In a separate medium bowl, whisk together the all-purpose flour, baking soda, salt, 1 teaspoon cinnamon, and 1/2 teaspoon ground nutmeg.
- Gradually add the dry ingredients to the wet mixture, mixing on low speed or folding with a spatula until just combined. Do not overmix. The dough will be soft and slightly sticky.
- In a small bowl, stir together the 1/4 cup granulated sugar, 2 teaspoons cinnamon, and 1/2 teaspoon freshly grated nutmeg for the coating.
- Using a 1.5-tablespoon cookie scoop or two spoons, portion out the dough. Roll each portion into a smooth ball between your palms. Lightly wet your hands if the dough is too sticky. Roll each ball generously in the cinnamon-sugar coating, ensuring full coverage.
- Place the coated balls on the prepared baking sheets, leaving about 2 inches of space between them.
- Bake one sheet at a time for 9-11 minutes. The cookies should look puffed and slightly crackly on top, with edges just beginning to set. The centers will look soft and slightly underdone.
- Let the cookies cool on the baking sheet for 5 minutes, then transfer to a wire cooling rack to cool completely.
Notes
For best results, use full-fat eggnog and freshly grated nutmeg. If dough is too soft, chill for 15-20 minutes before rolling. Bake one sheet at a time for even baking. Cookies taste even better the next day as flavors meld.
Nutrition
- Serving Size: 1 cookie
- Calories: 130
- Sugar: 10
- Sodium: 90
- Fat: 6
- Saturated Fat: 3.5
- Carbohydrates: 18
- Protein: 2
Keywords: eggnog snickerdoodle cookies, easy holiday cookies, kid-approved cookies, soft snickerdoodle, Christmas cookies


