I wasn’t expecting cooking advice from a plumber, but there I was, standing in the hardware aisle at the grocery store on a random Tuesday, listening to a man named Jerry explain exactly how to make the best gluten-free green bean casserole. My kitchen sink had been dripping for days, and I was just trying to find the right washer. Jerry, who was helping me look, somehow got onto the topic of Thanksgiving sides. He told me his wife had celiac disease, and for years, she couldn’t eat the classic green bean casserole at family dinners. So he took it upon himself to fix it. No canned soup, he said firmly. You have to start from scratch. It tastes better, and she deserves a real casserole.
Honestly, I was a little skeptical at first. A plumber giving me a recipe? But there was something about the way he described the homemade mushroom sauce—slowly simmered with fresh thyme and a splash of coconut milk—that made my stomach growl right there in the checkout line. I scribbled his instructions on the back of a receipt. That was three years ago, and I haven’t looked back since. This casserole has become my go-to for every holiday gathering, potluck, and even those random cozy Tuesday nights when I need a little comfort food. It’s rich, creamy, and topped with the most satisfyingly crispy fried onions you’ve ever had—all without a single can of soup or a speck of gluten.
Maybe you’ve been there, searching for a holiday side dish that actually tastes homemade and doesn’t make anyone feel left out. Or maybe you just want a vegetable dish that feels indulgent and nourishing at the same time. Either way, this recipe is for you. Let me tell you, it’s the kind of dish that makes you close your eyes after the first bite. The kind that gets requested year after year. And the best part? It comes together in about 45 minutes, with ingredients you can actually pronounce.
Why You’ll Love This Recipe
This gluten-free green bean casserole isn’t just another holiday side dish—it’s the one everyone will ask for seconds of. I’ve tested this recipe at least a dozen times, tweaking the seasoning and the texture until it was just right. My family, who are not gluten-free by the way, absolutely devour it every single time. Here’s why you’ll love it too:
- Quick & Easy: Comes together in about 45 minutes from start to finish, perfect for busy holiday prep or a cozy weeknight dinner.
- Simple Ingredients: No fancy grocery trips needed. You likely already have most of these in your kitchen—fresh green beans, mushrooms, onions, and a few pantry staples.
- Perfect for Holidays & Gatherings: Great for Thanksgiving, Christmas, Easter, potlucks, and Sunday dinners. It’s a crowd-pleaser that fits right in with any spread.
- Crowd-Pleaser: Always gets rave reviews from kids and adults alike. Even the pickiest eaters go back for more.
- Unbelievably Delicious: The texture and flavor combo is next-level comfort food. The creamy, savory sauce pairs perfectly with the tender-crisp green beans and the crunchy onion topping.
What makes this recipe different from the rest? It’s the homemade mushroom sauce, made with fresh herbs and a touch of coconut milk for richness, without any gluten or processed ingredients. It’s not just another version—it’s your new best version. This recipe is comfort food reimagined: healthier, faster, but with the same soul-soothing satisfaction that makes you feel warm inside. Perfect for impressing guests without stress, or turning a simple meal into something memorable.
What Ingredients You Will Need
This recipe uses simple, wholesome ingredients to deliver bold flavor and satisfying texture without the fuss. Most of these are pantry staples, and I’ve included easy swaps for common dietary needs.
- Fresh green beans: 1 ½ pounds, trimmed and cut into 2-inch pieces. I recommend using fresh green beans for the best texture and flavor. Look for bright, firm beans without any brown spots.
- Olive oil or avocado oil: 2 tablespoons, for sautéing the vegetables. Avocado oil has a higher smoke point, but olive oil works great too.
- Yellow onion: 1 medium, finely chopped. Adds a savory base to the sauce.
- Cremini mushrooms: 8 ounces, sliced. These add an earthy, umami flavor. White button mushrooms work too, but cremini have more depth.
- Garlic: 3 cloves, minced. Fresh garlic is best for that aromatic punch.
- Gluten-free all-purpose flour: 3 tablespoons. I recommend King Arthur Measure for Measure or Bob’s Red Mill 1-to-1. They thicken beautifully without any grittiness.
- Unsalted butter or dairy-free butter: 3 tablespoons. For the roux. If you’re dairy-free, Miyoko’s or Earth Balance works wonderfully.
- Chicken or vegetable broth: 1 ½ cups, low-sodium. Use vegetable broth to keep it vegetarian.
- Coconut milk (full-fat): ½ cup, from a can. This adds richness without any dairy. You can also use heavy cream if you’re not dairy-free.
- Fresh thyme: 1 teaspoon, chopped. Dried thyme works too, but fresh is better. Use ½ teaspoon dried.
- Salt and black pepper: To taste. I use about ½ teaspoon salt and ¼ teaspoon pepper.
- Gluten-free crispy fried onions: For the topping. Look for brands like French’s (they have a gluten-free version) or make your own by tossing thinly sliced onions in gluten-free flour and baking until crispy.
Substitution guidance: For a nut-free option, use sunflower seed milk instead of coconut milk. For a lower-carb version, replace the gluten-free flour with arrowroot powder (use 2 tablespoons). If you can’t find gluten-free crispy onions, you can easily make them at home—I’ll share a quick method in the tips section.
Equipment Needed
You don’t need any fancy gadgets for this recipe. Here’s what you’ll need:
- Large pot: For blanching the green beans. A 6-quart pot works perfectly.
- Colander: For draining the beans after blanching.
- Large skillet or sauté pan: A 12-inch skillet with high sides is ideal for making the sauce. I love my cast iron skillet for this—it distributes heat evenly.
- Wooden spoon or spatula: For stirring the sauce without scratching your pan.
- 9×13-inch baking dish: For assembling and baking the casserole. A 2-quart dish works too.
- Small bowl: For mixing the crispy onion topping, if you’re making your own.
- Chef’s knife and cutting board: For prepping the vegetables.
If you don’t have a 9×13-inch dish, you can use a 10-inch cast iron skillet for a more rustic presentation. Just make sure it’s oven-safe. Budget-friendly tip: I found my favorite baking dish at a thrift store for $3—it works just as well as the expensive ones!
Preparation Method
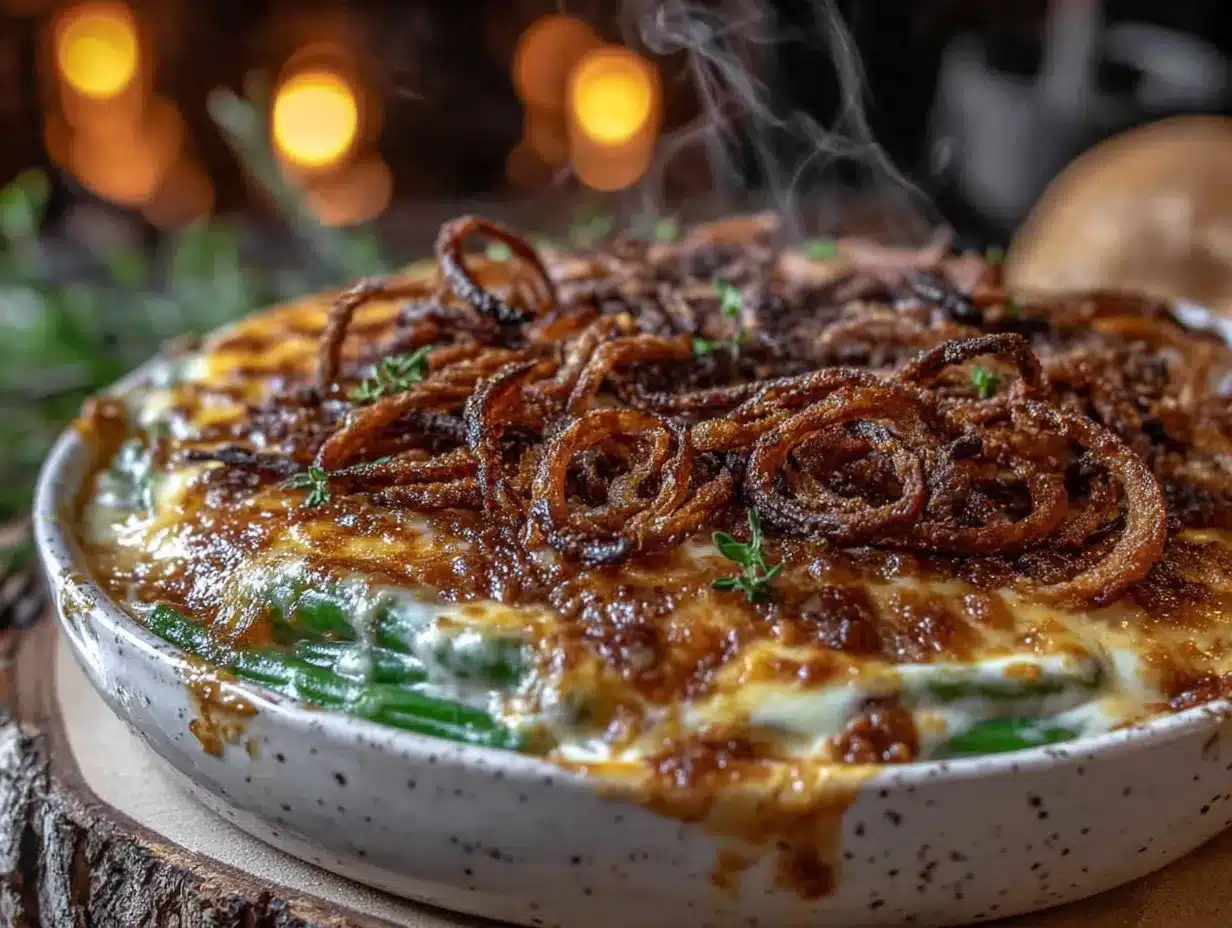
Let’s get cooking! This recipe comes together in a few simple steps. I’ve included time estimates and sensory cues to help you nail it every time.
- Preheat your oven to 375°F (190°C). This gives it time to come to temperature while you prep.
- Blanch the green beans: Bring a large pot of salted water to a boil. Add the trimmed green beans and cook for 3-4 minutes, until they’re bright green and tender-crisp. You want them to still have a slight bite—they’ll cook more in the oven. Drain immediately and transfer to a bowl of ice water to stop the cooking process. Drain again and set aside. This step takes about 10 minutes total.
- Sauté the aromatics: In a large skillet, heat 2 tablespoons of olive oil over medium heat. Add the chopped onion and cook for 4-5 minutes, until softened and translucent. Add the sliced mushrooms and cook for another 5-6 minutes, stirring occasionally, until they release their moisture and start to brown. You’ll hear a gentle sizzle—that’s a good sign. Add the minced garlic and cook for 1 minute more, until fragrant.
- Make the roux: Reduce the heat to medium-low. Add the 3 tablespoons of butter to the skillet and let it melt. Sprinkle the gluten-free flour over the vegetables and stir constantly for 1-2 minutes. The mixture will look thick and pasty. This cooks out the raw flour taste. It should smell nutty and toasty.
- Build the sauce: Slowly pour in the chicken broth while whisking constantly to prevent lumps. Bring the mixture to a gentle simmer—you’ll see small bubbles around the edges. Cook for 3-4 minutes, stirring often, until the sauce thickens enough to coat the back of a spoon. Add the coconut milk, fresh thyme, salt, and pepper. Stir to combine. Taste and adjust seasoning—you want it well-seasoned because the green beans will absorb some of the salt.
- Combine and assemble: Add the blanched green beans to the skillet and stir gently to coat them evenly with the sauce. Transfer the entire mixture to your greased 9×13-inch baking dish. Spread it out in an even layer.
- Add the topping: Sprinkle the gluten-free crispy fried onions evenly over the top. If you’re making your own, now’s the time to add them. I like to use about 1 ½ cups for a generous, crunchy layer.
- Bake: Place the dish in the preheated oven and bake for 20-25 minutes, until the sauce is bubbly and the topping is golden brown. The kitchen will smell absolutely incredible at this point—earthy, creamy, and a little bit toasty.
- Rest and serve: Let the casserole rest for 5 minutes before serving. This allows the sauce to set slightly, making it easier to serve. It will be piping hot, so be careful!
Pro tip: If you’re short on time, you can skip the blanching step and use frozen green beans instead. Just thaw them first and pat them dry to avoid excess water in the sauce.
Cooking Tips & Techniques
Over the years, I’ve made this casserole more times than I can count, and I’ve learned a few things the hard way. Here are my best tips for success:
- Don’t overcook the green beans. Blanching them for just 3-4 minutes keeps them tender-crisp. If you cook them too long, they’ll turn mushy in the oven. I learned this after making a sad, soggy casserole for a Friendsgiving once. Never again.
- Whisk the sauce constantly when adding the broth. Gluten-free flour can be a bit stubborn about lumping up. A good whisking ensures a silky smooth sauce. If you see lumps, don’t panic—just keep whisking, and they’ll dissolve.
- Taste as you go. The seasoning is crucial. I always taste the sauce before adding the green beans and adjust the salt and pepper. Remember, the beans and onions will absorb some of the salt, so don’t be shy.
- Make the crispy onions from scratch for an extra-special touch. Slice 1 large onion very thin, toss with ¼ cup gluten-free flour and a pinch of salt, then bake at 400°F (200°C) for 15-18 minutes, flipping halfway. They’re so much better than store-bought, and you can control the salt.
- Multitask wisely. While the green beans are blanching, you can start sautéing the onions and mushrooms. This shaves off about 10 minutes from the total prep time. I always set a timer for the beans so I don’t forget them in the ice bath.
- For extra creaminess, add a splash more coconut milk or broth if the sauce seems too thick before baking. It will thicken more in the oven, so you want it a little looser than you think.
Variations & Adaptations
This recipe is incredibly versatile. Here are some of my favorite ways to change it up:
- Add protein: Stir in 1 cup of cooked, shredded rotisserie chicken or ½ cup of cooked bacon bits for a heartier main dish. I did this for a potluck once, and it disappeared in minutes.
- Make it vegan: Use dairy-free butter, vegetable broth, and a plant-based milk like oat or cashew instead of coconut milk. The sauce will still be creamy and delicious.
- Seasonal twist: In the fall, add ½ cup of roasted butternut squash cubes or a handful of fresh cranberries for a pop of color and sweetness. In spring, swap the mushrooms for asparagus tips—just blanch them with the green beans.
- Cheesy version: Stir in ½ cup of shredded Parmesan or sharp cheddar cheese into the sauce before baking. It adds a lovely savory depth. My kids love this version.
- Low-carb adaptation: Replace the gluten-free flour with 2 tablespoons of arrowroot powder or xanthan gum (use ½ teaspoon). The sauce will be slightly thinner but still satisfying.
- Spicy kick: Add ¼ teaspoon of red pepper flakes or a dash of hot sauce to the sauce for a little heat. I tried this on a whim one night, and now it’s my secret weapon for weeknight dinners.
Each of these variations keeps the soul of the recipe intact while letting you play with flavors. Don’t be afraid to experiment—that’s half the fun of cooking!
Serving & Storage Suggestions
This casserole is best served warm, straight from the oven. The contrast between the creamy sauce and the crispy topping is absolutely magical. Here’s how to serve and store it:
- Serving temperature: Let it rest for 5 minutes after baking, then serve while it’s still hot and bubbly. It’s perfect alongside roasted turkey, mashed potatoes, or a simple green salad.
- Complementary dishes: Pair it with gluten-free stuffing for a classic holiday combo, or serve it with roasted chicken for a cozy weeknight dinner. A glass of crisp white wine or sparkling water with lemon rounds out the meal beautifully.
- Storage: Leftovers keep well in an airtight container in the refrigerator for up to 4 days. The topping will lose some of its crunch, but the flavor will still be fantastic.
- Reheating: To reheat, place the casserole in a 350°F (175°C) oven for 10-15 minutes, until warmed through. You can also use the microwave, but the oven helps restore some crispiness to the topping. If you’re in a rush, the microwave works in 1-2 minutes.
- Freezing: This casserole freezes beautifully. Assemble it completely (without the topping), cover tightly with foil, and freeze for up to 3 months. When ready to bake, thaw overnight in the fridge, add the crispy onions, and bake as directed. The sauce may be a little thinner after freezing, but it’s still delicious.
I’ve found that the flavors actually deepen overnight, making leftovers even more satisfying. Honestly, I sometimes make a double batch just so I can enjoy it for lunch the next day!
Nutritional Information & Benefits
This gluten-free green bean casserole is not only delicious but also packed with good-for-you ingredients. Here’s a quick breakdown per serving (based on 8 servings):
- Calories: Approximately 220 kcal
- Protein: 5g
- Carbohydrates: 18g
- Fiber: 4g
- Fat: 14g
- Saturated Fat: 7g
- Sodium: 480mg
Health benefits: Green beans are a great source of vitamins A, C, and K, as well as fiber and folate. Mushrooms provide immune-boosting beta-glucans and B vitamins. The use of coconut milk adds healthy medium-chain triglycerides (MCTs) that can support energy metabolism. This recipe is naturally gluten-free and can easily be made dairy-free or vegan with simple swaps.
Dietary considerations: This dish is gluten-free, nut-free (if you use sunflower seed milk), and can be vegetarian or vegan. Potential allergens include dairy (if using butter) and coconut (if using coconut milk). Always check labels on store-bought crispy onions to ensure they’re certified gluten-free.
I love that this casserole lets me enjoy comfort food without the guilt. It’s hearty enough to be a main dish but light enough to leave room for dessert—which is always a win in my book.
Conclusion
This gluten-free green bean casserole is proof that you don’t need canned soup or processed ingredients to make something truly comforting and delicious. It’s the kind of dish that brings people together, whether it’s for a holiday feast or a simple Tuesday dinner. I still think about Jerry the plumber every time I make it, and I smile. Who knew that a dripping sink would lead to my favorite holiday side dish?
I encourage you to make this recipe your own. Add a little extra cheese, throw in some bacon, or keep it classic—it’s all good. The beauty of cooking from scratch is that you’re in control. So go ahead, give it a try, and don’t forget to share your creations with me. I’d love to hear how it turns out for you!
If you loved this recipe, please leave a comment below or share it with a friend who needs a little comfort food in their life. And if you have your own twist on green bean casserole, I’m all ears—drop it in the comments. Until next time, happy cooking!
Frequently Asked Questions
Can I use frozen green beans instead of fresh?
Absolutely! Just thaw them first and pat them dry with a paper towel to remove excess moisture. This prevents the sauce from becoming watery. Blanching isn’t necessary for frozen beans since they’ve already been par-cooked.
Can I make this casserole ahead of time?
Yes, you can assemble the casserole (without the topping) up to 24 hours in advance. Cover and refrigerate, then add the crispy onions just before baking. You may need to add 5-10 minutes to the baking time since it will be cold from the fridge.
How do I make gluten-free crispy onions from scratch?
Slice 1 large onion very thin, toss with ¼ cup gluten-free all-purpose flour and a pinch of salt. Spread on a parchment-lined baking sheet and bake at 400°F (200°C) for 15-18 minutes, flipping halfway, until golden and crispy. Keep an eye on them—they burn quickly!
Can I use a different milk instead of coconut milk?
Yes, you can use heavy cream, half-and-half, or a dairy-free milk like oat or cashew. Full-fat coconut milk adds richness, but any milk will work. Just avoid skim milk as it may make the sauce too thin.
How do I prevent the sauce from being lumpy?
The key is to whisk constantly while adding the broth. Pour it in slowly, and don’t stop whisking until the sauce is smooth. If lumps do form, you can use an immersion blender to smooth them out, or simply strain the sauce through a fine-mesh sieve.
Pin This Recipe!

Best Gluten-Free Green Bean Casserole (No Canned Soup)

This gluten-free green bean casserole features a rich, creamy homemade mushroom sauce with fresh thyme and coconut milk, topped with crispy fried onions. It’s a crowd-pleasing holiday side dish that comes together in about 45 minutes with simple, wholesome ingredients.
- Prep Time: 15 minutes
- Cook Time: 30 minutes
- Total Time: 45 minutes
- Yield: 8 servings 1x
- Category: Side Dish
- Cuisine: American
Ingredients
- 1 ½ pounds fresh green beans, trimmed and cut into 2-inch pieces
- 2 tablespoons olive oil or avocado oil
- 1 medium yellow onion, finely chopped
- 8 ounces cremini mushrooms, sliced
- 3 cloves garlic, minced
- 3 tablespoons gluten-free all-purpose flour (e.g., King Arthur Measure for Measure or Bob’s Red Mill 1-to-1)
- 3 tablespoons unsalted butter or dairy-free butter
- 1 ½ cups low-sodium chicken or vegetable broth
- ½ cup full-fat coconut milk (from a can)
- 1 teaspoon fresh thyme, chopped (or ½ teaspoon dried)
- ½ teaspoon salt (or to taste)
- ¼ teaspoon black pepper (or to taste)
- 1 ½ cups gluten-free crispy fried onions (store-bought or homemade)
Instructions
- Preheat your oven to 375°F (190°C).
- Blanch the green beans: Bring a large pot of salted water to a boil. Add the trimmed green beans and cook for 3-4 minutes until bright green and tender-crisp. Drain and transfer to a bowl of ice water to stop cooking. Drain again and set aside.
- Sauté the aromatics: In a large skillet, heat 2 tablespoons of olive oil over medium heat. Add the chopped onion and cook for 4-5 minutes until softened. Add the sliced mushrooms and cook for 5-6 minutes until they release moisture and start to brown. Add the minced garlic and cook for 1 minute until fragrant.
- Make the roux: Reduce heat to medium-low. Add 3 tablespoons of butter to the skillet and let it melt. Sprinkle the gluten-free flour over the vegetables and stir constantly for 1-2 minutes until the mixture is thick and pasty.
- Build the sauce: Slowly pour in the chicken broth while whisking constantly to prevent lumps. Bring to a gentle simmer and cook for 3-4 minutes, stirring often, until the sauce thickens enough to coat the back of a spoon. Stir in the coconut milk, fresh thyme, salt, and pepper. Taste and adjust seasoning.
- Combine and assemble: Add the blanched green beans to the skillet and stir gently to coat evenly. Transfer the mixture to a greased 9×13-inch baking dish and spread in an even layer.
- Add the topping: Sprinkle the gluten-free crispy fried onions evenly over the top.
- Bake: Place the dish in the preheated oven and bake for 20-25 minutes until the sauce is bubbly and the topping is golden brown.
- Rest and serve: Let the casserole rest for 5 minutes before serving.
Notes
For a nut-free option, use sunflower seed milk instead of coconut milk. For a lower-carb version, replace gluten-free flour with 2 tablespoons arrowroot powder. To make homemade crispy onions: slice 1 large onion very thin, toss with ¼ cup gluten-free flour and a pinch of salt, then bake at 400°F (200°C) for 15-18 minutes, flipping halfway. The casserole can be assembled (without topping) up to 24 hours in advance; add topping just before baking and increase baking time by 5-10 minutes if cold. Leftovers keep in the fridge for up to 4 days and freeze well (without topping) for up to 3 months.
Nutrition
- Serving Size: 1 serving (about 1 c
- Calories: 220
- Sugar: 5
- Sodium: 480
- Fat: 14
- Saturated Fat: 7
- Carbohydrates: 18
- Fiber: 4
- Protein: 5
Keywords: gluten-free green bean casserole, no canned soup, homemade mushroom sauce, holiday side dish, Thanksgiving, Christmas, gluten-free, dairy-free option, vegetarian option