My sister-in-law Rachel wasn’t trying to impress anyone that Tuesday afternoon. I’d stopped by to drop off a book she’d lent me, and the smell of butter and brown sugar hit me before I even got through the front door. She had flour on her cheek, a toddler on her hip, and she was scooping dough onto a baking sheet like it was no big deal.
“Oh, those are just cookies,” she said when I asked what smelled so good. “The kids wanted something warm after school.” Just cookies. She made it sound like she’d boiled water for tea. But let me tell you, that first bite stopped me mid-sentence. The edges were perfectly crisp, the centers were soft and chewy, and the chocolate was still melted in that dangerous, burn-your-tongue kind of way.
I asked for the recipe right there, standing in her messy kitchen with toys scattered on the floor and a half-empty coffee mug on the counter. She shrugged and told me it was nothing special—just a handful of ingredients and a bowl. No mixer. No chilling the dough for hours. No fuss. Honestly, I didn’t believe her until I tried making them myself the next day.
Maybe you’ve been there—standing in your kitchen at 3 PM with a cookie craving and no energy for a complicated baking project. That’s exactly where these small-batch chocolate chip cookies come in. They’re the kind of recipe that makes you wonder why you ever bothered with the fancy stuff. Rachel’s casual, no-nonsense approach is the whole point. She wasn’t trying to be a hero. She was just making cookies for her kids.
And honestly? That’s why I keep coming back to this recipe. It’s not about perfection. It’s about warm cookies in under 30 minutes, made with ingredients you probably already have, and the kind of simple joy that makes a regular Tuesday feel like a little celebration.
Why You’ll Love This Recipe
Let’s face it—most cookie recipes are a production. They call for a stand mixer, softened butter that you forgot to take out of the fridge, and enough dough to feed a small army. These small-batch chocolate chip cookies are the exact opposite. They’re designed for real life, when you want something warm and homemade without the cleanup that usually follows.
- No Mixer Required : You don’t need any fancy equipment. Just a bowl, a whisk, and a spatula. That’s it. I’ve made these in a hotel room with a plastic fork before, and they still came out great.
- Small Batch, Big Flavor : This recipe makes exactly 8 cookies. No more, no less. Perfect for when you want a treat without a week’s worth of leftovers tempting you from the counter.
- Kid-Approved and Parent-Friendly : My niece helped Rachel make these. She stirred the dough with her hands, ate half the chocolate chips, and the cookies still turned out perfect. If a toddler can help, you can definitely handle this.
- Budget-Friendly Ingredients : Butter, sugar, flour, eggs, chocolate chips—all pantry staples that won’t break the bank. No fancy extracts, no specialty flours, no trips to three different stores.
- Ready in Under 30 Minutes : From the moment you start measuring ingredients to the first bite, you’re looking at about 25 minutes. That’s faster than driving to the store to buy a pack of cookies.
What makes these cookies different from every other chocolate chip cookie recipe out there? It’s the ratio. Rachel figured out the perfect balance of butter to brown sugar to get that chewy center and crispy edge without any complicated techniques. The dough comes together in one bowl, and you don’t even need to chill it. I mean, you can if you want to, but honestly, who has time for that?
These cookies are the kind that make you close your eyes after the first bite. They’re comfort food at its simplest—the kind of treat that reminds you why homemade is always better than store-bought, even when you’re short on time and patience.
What Ingredients You Will Need
This recipe uses simple, wholesome ingredients that you probably already have in your kitchen. No strange additions, no hard-to-find items. Just the basics, done right.
- ½ cup unsalted butter, melted and slightly cooled (I prefer Kerrygold for its rich flavor, but any unsalted butter works fine)
- ⅓ cup granulated sugar (adds that slight crunch to the edges)
- ⅓ cup packed light brown sugar (this is the secret to chewy cookies—don’t skip it)
- 1 large egg yolk (save the white for scrambled eggs tomorrow; the yolk gives richness without making the dough too wet)
- 1 teaspoon vanilla extract (pure vanilla is best, but imitation works in a pinch)
- 1 cup all-purpose flour (spoon and level it—don’t scoop directly from the bag or you’ll get too much)
- ½ teaspoon baking soda (make sure it’s fresh; test it by dropping a bit in vinegar—it should fizz)
- ½ teaspoon salt (I use fine sea salt; if you use kosher, add a bit more)
- ½ cup semi-sweet chocolate chips (I like Ghirardelli for the best melt, but store brands work too)
- Optional: flaky sea salt for sprinkling on top before baking (this takes them from good to incredible)
A few notes on ingredients: The melted butter is what makes this recipe so easy. You don’t need to wait for it to come to room temperature or cream it with sugar. Just melt it, let it cool for a minute, and you’re good to go. The brown sugar is non-negotiable for that chewy texture—it adds moisture and a hint of caramel flavor that granulated sugar alone can’t match.
If you’re out of all-purpose flour, you can substitute with bread flour for a slightly chewier cookie. Just know that the texture will be a bit different. For a gluten-free version, use a 1:1 gluten-free flour blend, but add an extra tablespoon of milk to compensate for the dryness.
And about those chocolate chips—feel free to use dark chocolate, milk chocolate, or even chop up a chocolate bar if that’s what you have. The recipe is forgiving that way. I’ve made these with white chocolate and dried cranberries before, and they were fantastic. But for the classic version, stick with semi-sweet. It balances the sweetness of the dough perfectly.
Equipment Needed
One of the best things about this recipe is how little equipment you need. Here’s what you’ll need:
- Large mixing bowl (any size works, but bigger is better for mixing without making a mess)
- Whisk (for combining the wet ingredients and breaking up any lumps)
- Rubber spatula or wooden spoon (for folding in the flour and chocolate chips)
- Measuring cups and spoons (if you have a kitchen scale, even better for accuracy)
- Baking sheet (a standard half-sheet pan works perfectly)
- Parchment paper or silicone baking mat (parchment paper is cheaper and works just as well)
- Cookie scoop or two spoons (I use a 1.5-tablespoon scoop for even cookies)
- Cooling rack (optional but recommended for crisp edges)
If you don’t have a cookie scoop, don’t worry. Just use two spoons to drop the dough onto the baking sheet. The cookies will be slightly uneven, but that’s part of the homemade charm. I’ve also used a measuring cup in a pinch—just spray it with cooking spray first so the dough doesn’t stick.
For the baking sheet, avoid using dark non-stick pans if possible. They absorb more heat and can cause the bottoms of the cookies to brown too quickly. A light-colored aluminum sheet is ideal. If all you have is a dark pan, reduce the oven temperature by 25°F.
Preparation Method
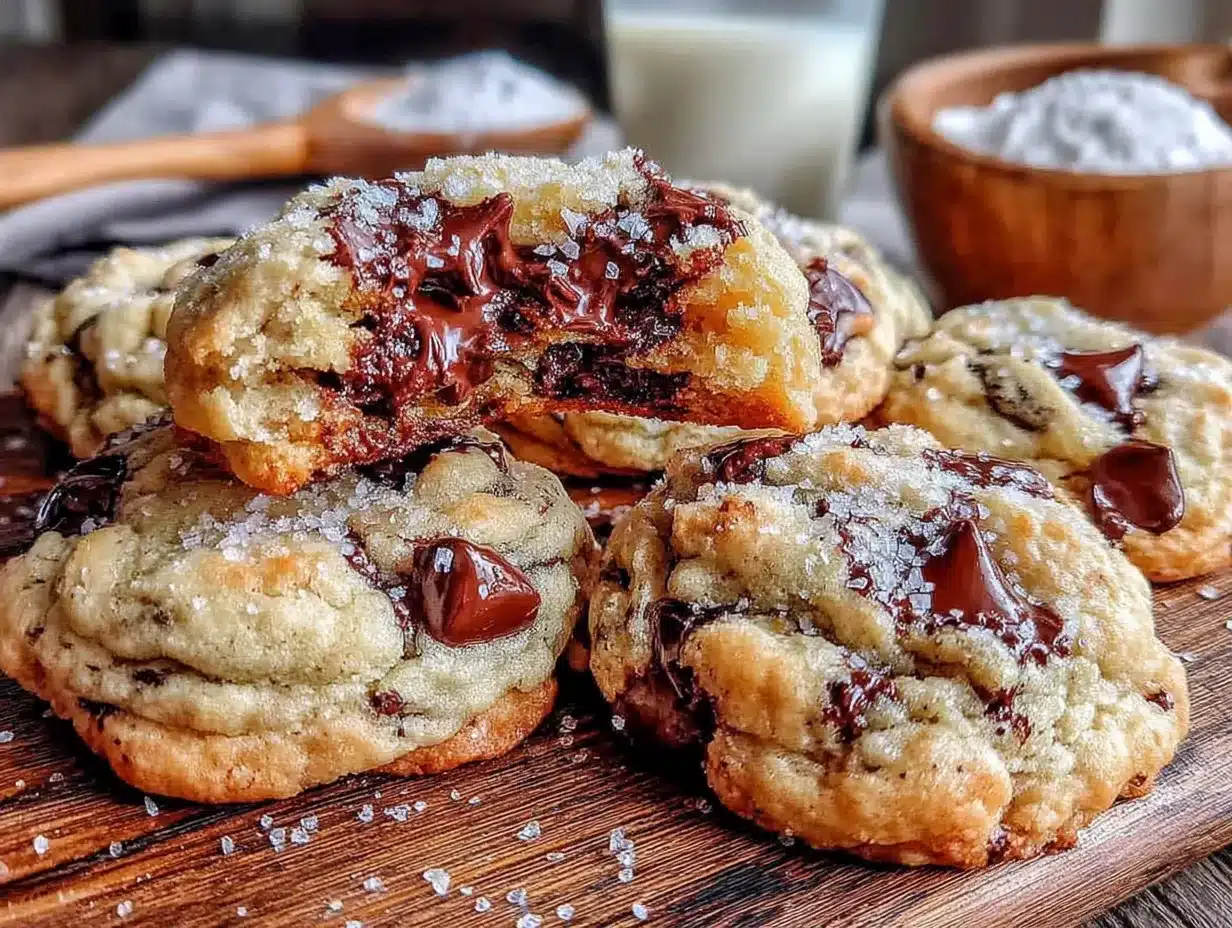
Let’s get to the fun part. This whole process takes about 10 minutes of active work and 12 minutes of baking. Here’s how to do it:
- Preheat your oven to 350°F (175°C). Line a baking sheet with parchment paper or a silicone mat. This ensures the cookies don’t stick and makes cleanup a breeze.
- Melt the butter in a microwave-safe bowl or in a small saucepan over low heat. If using the microwave, heat in 20-second bursts until just melted. Let it cool for 2-3 minutes—you don’t want it hot enough to cook the egg.
- In your large mixing bowl, combine the melted butter, granulated sugar, and brown sugar. Whisk vigorously for about 30 seconds until the mixture looks smooth and slightly thickened. This is called “blooming” the sugar, and it helps create that crackly top.
- Add the egg yolk and vanilla extract. Whisk again until everything is well combined and the mixture looks glossy. Don’t overmix at this stage—just until it’s smooth.
- In a separate small bowl, whisk together the flour, baking soda, and salt. This ensures the baking soda is evenly distributed so you don’t end up with one cookie that tastes like metal.
- Add the dry ingredients to the wet ingredients. Use your rubber spatula to fold them together gently. Stir just until you can’t see any more streaks of flour. Overmixing at this point will make the cookies tough.
- Fold in the chocolate chips. Reserve a few chips to press into the tops of the dough balls before baking—this makes them look bakery-worthy.
- Scoop the dough into 8 equal portions. I use a 1.5-tablespoon cookie scoop, but you can also use two spoons. Roll each portion into a ball and place them on the prepared baking sheet, spaced about 2 inches apart. These cookies spread, so give them room.
- Press a few extra chocolate chips into the tops of each dough ball. This is optional but makes the cookies look gorgeous.
- Bake for 10-12 minutes. The cookies should look golden brown around the edges but still soft and slightly underdone in the center. They will continue to bake on the hot baking sheet after you take them out.
- Let the cookies cool on the baking sheet for 5 minutes. This is crucial—if you try to move them right away, they’ll fall apart. After 5 minutes, transfer them to a cooling rack.
- If using flaky sea salt, sprinkle it on top while the cookies are still warm. The salt sticks better when they’re slightly sticky.
A few things to watch for: If your dough seems too dry, add a teaspoon of milk. If it seems too wet (which can happen if your butter was too hot), refrigerate it for 10 minutes before scooping. The dough should be soft but hold its shape when rolled into a ball.
The smell when these are baking is absolutely incredible. Your kitchen will smell like a bakery, and anyone in the house will magically appear asking what you’re making. That’s the power of these small-batch chocolate chip cookies.
Cooking Tips & Techniques
I’ve made this recipe at least two dozen times, and I’ve learned a few things along the way. Here are my best tips:
Don’t skip the cooling step. I know it’s tempting to eat them right out of the oven, but letting them rest on the baking sheet for 5 minutes is what gives them that perfect texture. The first time I made these, I tried to move one immediately and ended up with a chocolate-chip-flavored pancake. Learn from my mistake.
Use room temperature ingredients. I know the butter is melted, but the egg yolk should be at room temperature. If you forgot to take it out of the fridge, put it in a bowl of warm water for 5 minutes. Cold egg yolk can seize the melted butter and make the dough greasy.
Weigh your flour if you can. 120 grams is the magic number for one cup of all-purpose flour. If you scoop directly from the bag, you can end up with 150 grams or more, which makes dry, cakey cookies. Spoon the flour into your measuring cup and level it off with a knife.
Bake one test cookie first. If you’re unsure about your oven or your dough, bake a single cookie first. See how it spreads and how long it takes. Then adjust the rest of the batch accordingly. This saved me when I used a new brand of flour that absorbed more liquid.
Underbake slightly. The perfect cookie is golden on the edges and pale in the center when it comes out of the oven. It should look slightly underdone. The residual heat will finish the job. If you wait until the center looks set, you’ll have crunchy cookies.
Rotate the pan halfway through. Most ovens have hot spots. Halfway through baking, spin the baking sheet 180 degrees. This ensures even browning and prevents one side of the cookies from getting too dark.
Variations & Adaptations
This recipe is incredibly versatile. Here are some of my favorite variations:
Double Chocolate Chip Cookies : Replace 2 tablespoons of flour with 2 tablespoons of unsweetened cocoa powder. Use white chocolate chips instead of semi-sweet for a beautiful contrast. My kids go crazy for these.
Peanut Butter Chocolate Chip : Reduce the butter to ¼ cup and add ¼ cup of creamy peanut butter. Melt it together with the butter. These are richer and have a slightly different texture, but they’re absolutely delicious.
Gluten-Free Version : Use a 1:1 gluten-free flour blend that contains xanthan gum. Add 1 tablespoon of milk to the dough since gluten-free flours tend to be more absorbent. The cookies will be slightly more delicate but still tasty.
Vegan Adaptation : Use vegan butter (I like Miyoko’s) and replace the egg yolk with 1 tablespoon of ground flaxseed mixed with 3 tablespoons of water. Let it sit for 5 minutes to gel before adding. The texture will be slightly different—more cake-like—but still delicious.
Add-In Ideas : Swap half the chocolate chips for chopped nuts (walnuts or pecans work great), dried cherries, or even broken pretzel pieces for a salty-sweet combo. I once added crushed potato chips and it was surprisingly amazing.
Spiced Version : Add ½ teaspoon of cinnamon and ¼ teaspoon of nutmeg to the dry ingredients. These taste like snickerdoodles met chocolate chip cookies. Perfect for fall baking.
Serving & Storage Suggestions
These cookies are best served warm, about 10 minutes after they come out of the oven. The chocolate is still melted, the edges are crisp, and the centers are soft and gooey. Pair them with a cold glass of milk for the ultimate experience, or serve them with a scoop of vanilla ice cream for dessert.
If you’re serving them at a party or gathering, arrange them on a nice plate or a wooden board. They look beautiful as-is, but a light dusting of powdered sugar or a drizzle of melted chocolate takes them to the next level.
Storage Instructions: Store leftover cookies in an airtight container at room temperature for up to 3 days. To keep them soft, add a slice of bread to the container—the cookies will absorb the moisture from the bread and stay chewy. Replace the bread slice every day.
Freezing Instructions: These cookies freeze beautifully. You can freeze the baked cookies for up to 3 months. Just wrap them individually in plastic wrap and place them in a freezer bag. Thaw at room temperature for about 30 minutes, or pop them in the microwave for 10 seconds.
For the best results, freeze the raw dough balls instead. Scoop the dough onto a baking sheet and freeze until solid, then transfer to a freezer bag. When you’re ready to bake, just place frozen dough balls on a baking sheet and add 2-3 minutes to the baking time. Fresh cookies in 15 minutes, any time you want them.
The flavors actually develop over time. Day-old cookies are still delicious, but they’ll be slightly softer and the flavors will have melded together more. Some people prefer them this way. Personally, I think they’re perfect fresh from the oven, but I won’t judge you for eating them cold from the fridge at midnight.
Nutritional Information & Benefits
Let’s be real—these are cookies, not health food. But here’s the nutritional breakdown for one cookie (based on 8 cookies per batch):
- Calories: Approximately 280
- Fat: 16g
- Carbohydrates: 33g
- Protein: 3g
- Sugar: 20g
- Sodium: 180mg
The good news is that since this is a small batch, you’re not faced with a week’s worth of temptation. One or two cookies is a reasonable treat, and the portion control is built right in.
The butter provides a small amount of vitamin A, and the dark chocolate chips contain antioxidants called flavonoids, which have been linked to heart health. The brown sugar adds a touch of molasses, which contains small amounts of calcium, potassium, and iron. It’s not a lot, but every little bit counts.
For those watching their sugar intake, you can reduce the sugar by 2 tablespoons without significantly affecting the texture. The cookies will be slightly less sweet and a bit more cake-like, but still delicious. You can also use sugar-free chocolate chips to cut down on sugar further.
These cookies are not suitable for those with celiac disease unless you use the gluten-free adaptation. They also contain dairy and eggs, so keep that in mind for any allergies.
My take on it? Food is meant to be enjoyed. These cookies are a small pleasure that brings joy without derailing your entire week. One batch makes 8 cookies—share them with your family, enjoy one yourself, and don’t stress about it.
Conclusion
These small-batch chocolate chip cookies are proof that you don’t need fancy equipment, complicated techniques, or hours of time to make something truly delicious. They came from a regular Tuesday afternoon in my sister-in-law’s kitchen, and they’ve become a staple in mine ever since.
What I love most about this recipe is how forgiving it is. You can use whatever chocolate you have on hand, adjust the sugar to your taste, and even let your kids help with the mixing. It’s the kind of recipe that builds confidence in the kitchen, whether you’re a seasoned baker or someone who’s never made cookies from scratch before.
I hope you give these cookies a try. Make them on a rainy afternoon, for a after-school snack, or just because you need a little something sweet. Customize them with your favorite add-ins, share them with the people you love, and don’t forget to save a couple for yourself.
If you make them, I’d love to hear how they turned out. Drop a comment below and let me know what variations you tried, or tag me in your photos on social media. Happy baking, friend. You’ve got this.
Frequently Asked Questions
Can I make these cookies with salted butter?
Yes, you can. Just reduce the added salt to ¼ teaspoon instead of ½ teaspoon. Salted butter contains about ¼ teaspoon of salt per stick, so this adjustment keeps the overall salt level balanced.
Why are my cookies flat and spread out?
This usually happens if the butter was too warm when you mixed the dough, or if you used too much sugar. Make sure your melted butter has cooled for at least 2-3 minutes before adding the other ingredients. If your kitchen is very warm, refrigerate the dough balls for 10 minutes before baking.
Can I double this recipe?
Absolutely. Just double all the ingredients. You’ll get 16 cookies instead of 8. The baking time stays the same, but you may need to bake in batches depending on the size of your oven and baking sheets.
How do I know when the cookies are done baking?
Look for golden brown edges and a center that still looks slightly soft and underdone. The cookies will continue to bake on the hot baking sheet for another 5 minutes after you take them out. If the center looks fully set, they’re overbaked.
Can I use margarine instead of butter?
You can, but the texture will be different. Margarine has a higher water content than butter, which can make the cookies spread more and become less tender. If you must use margarine, choose a stick variety (not the spreadable kind in a tub) and expect slightly flatter cookies.
Pin This Recipe!
Best Small-Batch Chocolate Chip Cookies (Kid-Approved, No Mixer)

These small-batch chocolate chip cookies are made with simple ingredients, no mixer required, and ready in under 30 minutes. Perfect for a quick, kid-approved treat with crispy edges and soft, chewy centers.
- Prep Time: 10 minutes
- Cook Time: 12 minutes
- Total Time: 22 minutes
- Yield: 8 cookies 1x
- Category: Dessert
- Cuisine: American
Ingredients
- ½ cup unsalted butter, melted and slightly cooled
- ⅓ cup granulated sugar
- ⅓ cup packed light brown sugar
- 1 large egg yolk
- 1 teaspoon vanilla extract
- 1 cup all-purpose flour
- ½ teaspoon baking soda
- ½ teaspoon salt
- ½ cup semi-sweet chocolate chips
- Optional: flaky sea salt for sprinkling
Instructions
- Preheat your oven to 350°F (175°C). Line a baking sheet with parchment paper or a silicone mat.
- Melt the butter in a microwave-safe bowl or small saucepan. Let it cool for 2-3 minutes.
- In a large mixing bowl, combine the melted butter, granulated sugar, and brown sugar. Whisk vigorously for about 30 seconds until smooth and slightly thickened.
- Add the egg yolk and vanilla extract. Whisk until well combined and glossy.
- In a separate small bowl, whisk together the flour, baking soda, and salt.
- Add the dry ingredients to the wet ingredients. Fold gently with a rubber spatula until just combined.
- Fold in the chocolate chips. Reserve a few chips to press into the tops of the dough balls.
- Scoop the dough into 8 equal portions (about 1.5 tablespoons each). Roll into balls and place on the prepared baking sheet, spaced about 2 inches apart.
- Press a few extra chocolate chips into the tops of each dough ball.
- Bake for 10-12 minutes, until golden brown around the edges but still soft in the center.
- Let the cookies cool on the baking sheet for 5 minutes, then transfer to a cooling rack.
- If using flaky sea salt, sprinkle on top while the cookies are still warm.
Notes
For best results, use room temperature egg yolk. Spoon and level the flour to avoid dry cookies. Underbake slightly for chewy centers. Rotate the pan halfway through baking for even browning. Store in an airtight container for up to 3 days; add a slice of bread to keep them soft. Freeze baked cookies for up to 3 months or raw dough balls for up to 3 months.
Nutrition
- Serving Size: 1 cookie
- Calories: 280
- Sugar: 20
- Sodium: 180
- Fat: 16
- Saturated Fat: 10
- Carbohydrates: 33
- Fiber: 1
- Protein: 3
Keywords: small-batch chocolate chip cookies, no mixer cookies, kid-approved cookies, easy chocolate chip cookies, quick cookies


