The holiday cookie swap was in twenty-four hours and I’d completely forgotten. Everyone else would be bringing those elaborate, multi-day projects—the kind with laminated doughs, homemade caramel centers, or powdered sugar dusted into intricate stenciled snowflakes. I had a half-empty jar of molasses, some butter that was definitely not at room temperature, and a sinking feeling in my stomach. I stood in my kitchen on a Tuesday night, staring at the pantry like it owed me an answer, and honestly, I almost just grabbed a box of store-bought shortbread and called it a day.
But then I remembered these soft iced gingerbread cookies my neighbor Mrs. Gable used to bring to our building’s holiday party. They weren’t fancy—no royal icing masterpieces or three-day chilling processes. They were just… perfect. Soft in the middle, a little chewy on the edges, with that deep, warm molasses flavor that tastes like Christmas in a single bite. And the icing? A simple, glossy white drizzle that set just enough to stack them without sticking. I called her that night, slightly panicked, and she laughed and said, “Honey, those things come together in under an hour. You’ve got this.”
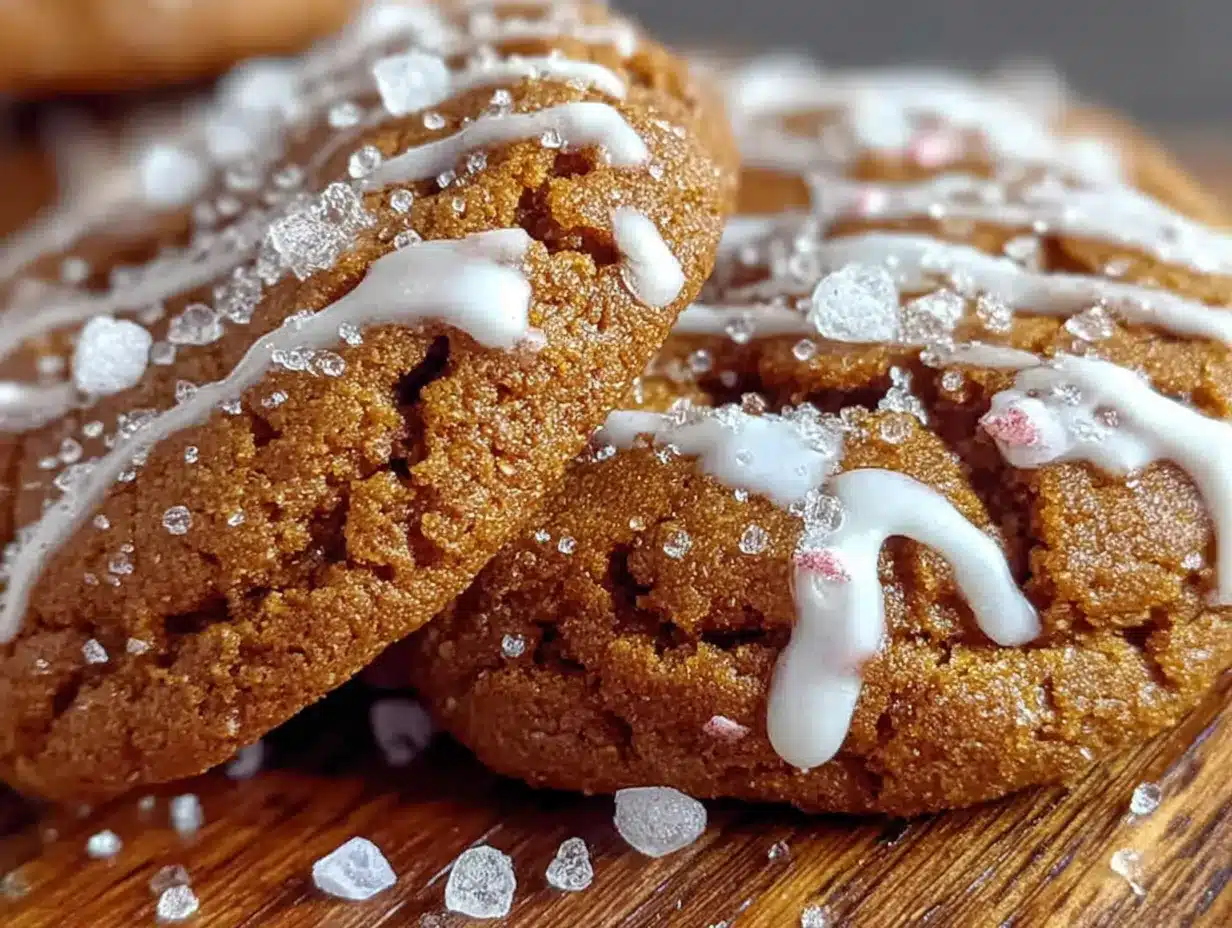
So I threw myself into it. I melted butter on the stove because I didn’t have time to soften it properly. I measured molasses with a greased measuring cup because I learned the hard way that stuff sticks to everything. I dropped a spoonful of dough on the floor and my dog, Milo, looked at me like I’d just handed him a winning lottery ticket. It was chaos, honestly. But thirty-five minutes later, my kitchen smelled like a bakery, and I had a cooling rack full of the most beautifully puffy, fragrant gingerbread cookies I’d ever made. The icing came together in two minutes flat—powdered sugar, milk, a splash of vanilla—and I drizzled it over the cookies in lazy zigzags while they were still slightly warm, so it seeped into the cracks just a little.
The next day at the swap, I set my container down next to a tower of macarons and a display of perfectly striped peppermint bark. I felt like the kid who brought cupcakes to a Michelin-starred picnic. But then people started trying them. And then they came back for seconds. And then someone actually asked me for the recipe—which, let me tell you, has never happened with any of my other baking attempts. The soft iced gingerbread cookies were the first thing to disappear. Not the macarons. Not the bark. The humble, slightly lopsided cookies from a panicked Tuesday night. I’ve made them every year since, and they’ve never let me down.
Why You’ll Love This Recipe
Let me be straight with you—I’ve tested a lot of gingerbread cookie recipes over the years. Some were too hard, some were too dry, and some tasted more like cinnamon dust than actual gingerbread. This one? It’s the Goldilocks of gingerbread cookies. And here’s why I think you’re going to love it just as much as I do.
- Perfectly Soft & Chewy: These cookies stay soft for days. No crumbling, no cracking, no disappointment. The secret is the molasses-to-butter ratio and not overbaking them by even a minute.
- Simple Ingredients, Big Flavor: You don’t need fancy extracts or hard-to-find spices. Just good old molasses, pantry spices, and a few basics. I bet you have most of this in your kitchen right now.
- Quick Enough for a Weeknight Craving: No chilling required. No complicated shaping. Mix, scoop, bake, ice. You can have warm cookies in your hand in under an hour.
- Holiday Magic Without the Stress: These are perfect for cookie swaps, classroom parties, or just cozying up on the couch with a mug of tea. They look impressive but they’re secretly low-effort.
- Kid-Approved and Adult-Adored: The spice level is warm but not overpowering, and the icing adds just the right amount of sweetness. I’ve watched grown adults sneak three of these in a row without blinking.
What makes this recipe different from all the other gingerbread recipes out there? It’s the texture, honestly. Most soft gingerbread cookies end up tasting more like cake—fluffy and light, but missing that satisfying chew. This one uses melted butter instead of creamed, which gives you a denser, more tender crumb. And the molasses isn’t just for flavor—it actually helps keep the cookies moist by attracting and retaining moisture as they sit. That’s not fancy food science talk, that’s just chemistry doing you a favor.
I also love that this recipe doesn’t require a rolling pin or cookie cutters. Don’t get me wrong, I love a good cut-out cookie, but sometimes you just want to scoop and go. These drop-style cookies have that rustic, homemade look that feels so much more inviting than perfectly uniform shapes. And when you drizzle that icing on top? It’s like they’re wearing little white scarves. Adorable and delicious.
What Ingredients You Will Need
This recipe uses simple, wholesome ingredients to deliver that deep, spiced molasses flavor and irresistibly soft texture. Most of these are pantry staples, which means you can make these cookies on a whim without a special trip to the store. Here’s what you’ll need and why each one matters.
For the Cookies
- Unsalted butter, melted (½ cup / 113g): Melting the butter instead of creaming it gives these cookies their signature soft, dense texture. It’s the key to that chewy-but-tender bite. I use Land O’Lakes or Kirkland, but any good-quality unsalted butter works.
- Dark brown sugar, packed (¾ cup / 150g): Brown sugar adds moisture and a subtle caramel note that pairs beautifully with molasses. The molasses content in brown sugar also helps keep the cookies soft. Pack it firmly into your measuring cup—don’t be shy.
- Molasses (⅓ cup / 110g): This is where the magic happens. Molasses gives these cookies their deep, complex sweetness and that unmistakable gingerbread flavor. I recommend Grandma’s Molasses or Brer Rabbit—both are reliable and widely available. Don’t use blackstrap molasses here; it’s too bitter and will throw off the sweetness balance.
- Large egg (1, room temperature): The egg binds everything together and adds structure. Room temperature egg incorporates more evenly into the melted butter, so take it out of the fridge 15 minutes before you start.
- Vanilla extract (1 teaspoon): A little vanilla rounds out the spices and adds warmth. Pure vanilla extract is best, but imitation works in a pinch.
- All-purpose flour (2 cups / 250g): Standard AP flour gives these cookies the perfect structure—not too cakey, not too dense. Spoon and level your flour for accuracy; scooping directly from the bag can pack in too much and make the cookies dry.
- Baking soda (1½ teaspoons): This helps the cookies spread just enough and gives them a slight lift. Don’t skip it, or you’ll end up with little pucks.
- Ground ginger (2 teaspoons): The star of the show. Freshly ground ginger from a recently opened jar has the most punch, but don’t stress if yours has been sitting around for a bit—it’ll still work.
- Ground cinnamon (1½ teaspoons): Cinnamon adds warmth and that classic holiday spice profile. It plays backup to the ginger without overpowering it.
- Ground cloves (½ teaspoon): Cloves bring a subtle, almost floral spiciness that makes gingerbread taste like gingerbread. A little goes a long way, so don’t overdo it.
- Salt (¼ teaspoon): Salt enhances all the other flavors and balances the sweetness. I use fine sea salt for baking.
For the Icing
- Powdered sugar (1½ cups / 180g): This is the base of the icing. Sift it if you can—lumps in powdered sugar are the enemy of smooth icing.
- Milk (2-3 tablespoons): Whole milk gives the creamiest texture, but 2% or even oat milk works fine. Add it slowly until you reach a drizzle-able consistency.
- Vanilla extract (½ teaspoon): A little vanilla in the icing keeps it from tasting like plain sugar. You could also use almond extract for a different twist.
Equipment Needed
You don’t need a fancy kitchen to make these cookies. Here’s what you’ll actually use:
- Mixing bowls (2 medium-sized): One for the wet ingredients, one for the dry. I use glass or stainless steel—they’re easy to clean and don’t retain odors.
- Whisk and wooden spoon: Whisk the dry ingredients together, then switch to a wooden spoon or sturdy spatula for combining the wet and dry.
- Measuring cups and spoons: Accurate measurements matter in baking. Use dry measuring cups for flour and sugar, and a liquid measuring cup for molasses. Pro tip: spray your measuring cup with nonstick spray before measuring molasses—it slides right out.
- Baking sheets (2): Standard half-sheet pans work perfectly. Line them with parchment paper or a silicone baking mat for easy cleanup and even baking.
- Cookie scoop (1.5 tablespoon size): This is my favorite tool for drop cookies. It gives you evenly sized cookies that bake at the same rate. If you don’t have one, use two spoons to scoop and drop.
- Cooling rack: Letting the cookies cool on a rack prevents soggy bottoms and helps the icing set properly. A simple wire rack from the dollar store works great.
- Small whisk or fork: For mixing the icing. A fork works surprisingly well if you don’t want to dirty another whisk.
I’ve made these cookies in a tiny apartment kitchen with a hand-me-down baking sheet that was older than I was, and they turned out perfect. Don’t overthink the equipment. If you have a bowl and an oven, you’re good to go.
Preparation Method
- Preheat and prep: Preheat your oven to 350°F (175°C). Line two baking sheets with parchment paper or silicone mats. This ensures the cookies don’t stick and makes cleanup a breeze.
- Melt the butter: In a medium microwave-safe bowl, melt the ½ cup of unsalted butter in 20-second intervals, stirring between each, until just melted. Don’t let it boil—you want it melted, not hot. Set it aside to cool for a minute or two while you gather the other ingredients.
- Mix the wet ingredients: To the melted butter, add the packed brown sugar and molasses. Whisk vigorously until smooth and well combined—about 30 seconds. The mixture should look thick and glossy. Add the egg and vanilla extract, and whisk again until everything is fully incorporated. The batter will look slightly separated at first, but keep whisking and it’ll come together.
- Combine the dry ingredients: In a separate bowl, whisk together the flour, baking soda, ginger, cinnamon, cloves, and salt. Whisking aerates the flour and distributes the spices evenly, so don’t skip this step. If you’re feeling fancy, you can sift them, but honestly, a good whisk works just fine.
- Bring it together: Gradually add the dry ingredients to the wet mixture, stirring with a wooden spoon or spatula until just combined. Stop as soon as you no longer see streaks of flour. Overmixing will make the cookies tough, so be gentle. The dough will be soft and slightly sticky—that’s exactly what you want.
- Scoop the dough: Using your cookie scoop or two spoons, drop rounded tablespoons of dough onto the prepared baking sheets, spacing them about 2 inches apart. These cookies spread moderately, so give them room to breathe. If you want perfectly round cookies, you can roll the dough balls between your palms, but I like the rustic look of scooped dough.
- Bake: Bake one sheet at a time on the center rack for 9-11 minutes. At 9 minutes, the cookies will look puffy, slightly cracked on top, and just set around the edges. The centers will look soft and slightly underdone—that’s perfect. For a chewier cookie, bake 10 minutes. For a slightly firmer cookie, go to 11. Remember, they continue to bake on the hot sheet after you pull them out, so err on the side of underbaking.
- Cool on the sheet: Let the cookies rest on the baking sheet for 5 minutes. They’ll be very soft right out of the oven, so this rest time is crucial for them to set up. After 5 minutes, transfer them to a wire cooling rack to cool completely before icing.
- Make the icing: While the cookies cool, make the icing. In a small bowl, whisk together the powdered sugar, 2 tablespoons of milk, and vanilla extract. Start with 2 tablespoons of milk and add the third only if needed. You’re looking for a consistency that’s thick but pourable—it should drizzle off the whisk in a steady ribbon and hold its shape for a second before melting back into the bowl.
- Ice the cookies: Once the cookies are completely cool (warm cookies will make the icing run right off), drizzle the icing over the tops in zigzag patterns. You can use a spoon, a small piping bag with the tip snipped off, or even a zip-top bag with a tiny corner cut off. I use a spoon because it’s one less thing to wash. Let the icing set for about 20-30 minutes before stacking or storing.
Cooking Tips & Techniques
I’ve made these cookies at least two dozen times, and I’ve learned a few things the hard way so you don’t have to. Here are my best tips for perfect soft iced gingerbread cookies every single time.
Don’t overbake them. This is the number one mistake people make with soft cookies. Pull them out when the centers still look slightly puffy and underdone. They’ll continue to set on the hot baking sheet. If you wait until the centers look fully baked, they’ll be dry by the time they cool. Trust me on this—I ruined my first batch by leaving them in an extra two minutes, and they turned into gingerbread hockey pucks.
Measure your molasses the easy way. Molasses is sticky and stubborn. Lightly spray your measuring cup with nonstick cooking spray before you pour in the molasses, and it will slide right out without leaving a sticky mess behind. You’re welcome.
Room temperature ingredients matter. I know it’s tempting to use a cold egg straight from the fridge, but it won’t incorporate as smoothly into the melted butter. Just set your egg on the counter while you preheat the oven, and by the time you’re ready to use it, it’ll be fine. Same goes for the butter—you’re melting it anyway, so that part’s easy.
Chill the dough if your kitchen is hot. If you’re baking on a warm day or your kitchen runs hot, the dough might spread too much in the oven. Pop the scooped dough balls in the fridge for 15-20 minutes before baking. This firms up the butter and helps the cookies hold their shape. I don’t usually need to do this, but it’s a good trick to have in your back pocket.
Use a cookie scoop for even baking. Uniform cookie sizes mean uniform baking times. A 1.5-tablespoon scoop is perfect for these cookies. If you don’t have one, use a measuring tablespoon to portion the dough and roll it into balls. It takes a little longer, but it’s worth it for consistent results.
Let the icing set completely. I know you’re excited to eat them, but if you stack the cookies before the icing is fully set, you’ll end up with a sticky, smudgy mess. Give it a full 30 minutes. Use that time to clean up your kitchen or make a cup of tea. Your patience will be rewarded.
Variations & Adaptations
One of the best things about this recipe is how easy it is to adapt. Here are some of my favorite variations, all tested and approved in my own kitchen.
Spice it up (or down): If you love a really spicy gingerbread, add an extra teaspoon of ginger and a pinch of black pepper. The pepper adds a subtle warmth that’s surprisingly good. For a milder version, reduce the ginger to 1 teaspoon and skip the cloves. The cookies will still be delicious—just a little more mellow.
Citrus twist: Add 1 tablespoon of finely grated orange zest to the wet ingredients. The orange brightens up the molasses and spices beautifully. You can also swap the vanilla in the icing for orange extract or add a drop of orange oil. I made this version for a friend who “doesn’t like gingerbread,” and she ate four of them.
Chocolate gingerbread: Fold ½ cup of mini chocolate chips into the dough after mixing. The chocolate melts into little pockets of richness that pair perfectly with the warm spices. Use dark chocolate chips for a more sophisticated flavor or milk chocolate for a sweeter treat.
Gluten-free option: Substitute the all-purpose flour with a 1:1 gluten-free baking flour blend that contains xanthan gum. I’ve tested this with King Arthur Measure for Measure and Cup4Cup, and both worked beautifully. The texture is slightly more delicate, but the flavor is spot on.
Vegan version: Use a flax egg (1 tablespoon ground flaxseed mixed with 3 tablespoons water, let sit for 5 minutes) instead of the regular egg, and substitute the butter with vegan butter or coconut oil. Use plant-based milk in the icing. The cookies will be a little less tender but still very good. I’ve brought these to a vegan potluck and they were a hit.
Bigger batch for gifting: This recipe doubles beautifully. Just make sure you have enough baking sheets and cooling racks, and bake in batches rather than crowding the oven. These cookies make wonderful homemade gifts—pack them in a tin with parchment paper between layers.
Serving & Storage Suggestions
These soft iced gingerbread cookies are best enjoyed at room temperature, with a cold glass of milk or a hot cup of spiced chai. The contrast between the creamy icing and the soft, spiced cookie is pure comfort. They’re also fantastic crumbled over vanilla ice cream for an impromptu dessert sundae—trust me, try it.
For storage, place the cookies in an airtight container at room temperature, with parchment paper between layers to prevent the icing from sticking. They’ll stay soft and fresh for up to 5 days. In fact, they actually get a little softer and more flavorful on day two as the molasses continues to work its magic. I’ve never had a batch last longer than three days in my house, but theoretically, they’re good for up to a week.
You can also freeze these cookies for up to 3 months. The best way to do it is to freeze the un-iced cookies in a single layer on a baking sheet, then transfer them to a freezer-safe bag or container. When you’re ready to serve, thaw them at room temperature, then make a fresh batch of icing and drizzle it on. The icing doesn’t freeze well, so always add it after thawing. This is actually my favorite method for holiday prep—I make the cookies weeks in advance and ice them the morning of the party.
If you’re taking these to a gathering, let the icing set completely before transporting. A single layer in a sturdy container is safest. If you need to stack them, use parchment or wax paper between layers. I learned this lesson the hard way when I showed up to a cookie swap with a container full of smeared, sad-looking cookies. Don’t be me.
Nutritional Information & Benefits
Per cookie (based on 24 cookies), here’s the estimated nutritional breakdown:
- Calories: 145
- Fat: 5g
- Carbohydrates: 24g
- Sugar: 16g
- Protein: 2g
- Fiber: 0.5g
Now, I’m not going to pretend these are health food—they’re cookies, after all. But molasses does have some surprising benefits. It’s a good source of iron, calcium, and magnesium, especially compared to refined sugar. One tablespoon of molasses contains about 20% of your daily recommended iron intake. So technically, you’re getting a little bit of nutrition with your treat. That’s my story and I’m sticking to it.
These cookies are also relatively low in saturated fat compared to many butter-heavy cookie recipes. And because they’re made with simple, recognizable ingredients, you can feel good about serving them to your family. If you’re watching your sugar intake, you can reduce the icing amount or skip it altogether—the cookies are still delicious on their own, just a little less sweet.
As always, please check for potential allergens. This recipe contains dairy (butter, milk) and gluten (flour). It also contains traces of egg. If you have specific dietary needs, refer to the variations section above for substitutions.
Conclusion
These soft iced gingerbread cookies have become my go-to holiday recipe for a reason. They’re forgiving, they’re delicious, and they make my kitchen smell like the best kind of nostalgia. Whether you’re baking for a cookie swap, a family gathering, or just because you need a little comfort on a cold afternoon, these cookies deliver every single time.
I love that this recipe doesn’t demand perfection. The cookies don’t have to be identical. The icing doesn’t have to be neat. In fact, the slightly messy, homemade look is part of their charm. They taste like someone actually made them with love, not like something from a bakery display case. And honestly? That’s the kind of cookie I want to eat.
So go ahead—preheat that oven, measure out that molasses (spray your cup first!), and make a batch of these cozy cookies. And when you do, I’d love to hear about it. Leave a comment below and tell me how they turned out, or share your own twist on the recipe. Did you add orange zest? Did you double the ginger? Did your dog also try to steal a spoonful of dough? I want to know. Happy baking, friends!
Frequently Asked Questions
Can I use blackstrap molasses instead of regular molasses?
I wouldn’t recommend it. Blackstrap molasses is much more bitter and less sweet than regular molasses, which will throw off the flavor balance of these cookies. Stick with regular unsulphured molasses—Grandma’s or Brer Rabbit are both great choices.
Why did my cookies turn out dry?
The most common culprit is overbaking. Remember to pull them out when the centers still look slightly soft and puffy. They’ll continue to bake on the hot sheet. Also, make sure you’re measuring your flour correctly—scooping directly from the bag can pack in too much flour, which leads to dry cookies.
Can I make the dough ahead of time?
Absolutely! You can refrigerate the dough for up to 3 days. Just scoop it into balls, place them on a parchment-lined baking sheet, cover with plastic wrap, and pop them in the fridge. Bake straight from the fridge, adding an extra minute or two to the baking time.
How do I get the icing to set faster?
If you’re in a hurry, you can pop the iced cookies in the refrigerator for 10-15 minutes. The cold helps the icing set quickly. Just make sure the cookies are completely cool before you ice them, or the icing will slide right off.
Can I freeze these cookies?
Yes, but freeze them without the icing. Place the un-iced cookies in a single layer in a freezer-safe bag or container, and they’ll keep for up to 3 months. When you’re ready to serve, thaw them at room temperature and make a fresh batch of icing. The texture stays perfect this way.
Pin This Recipe!
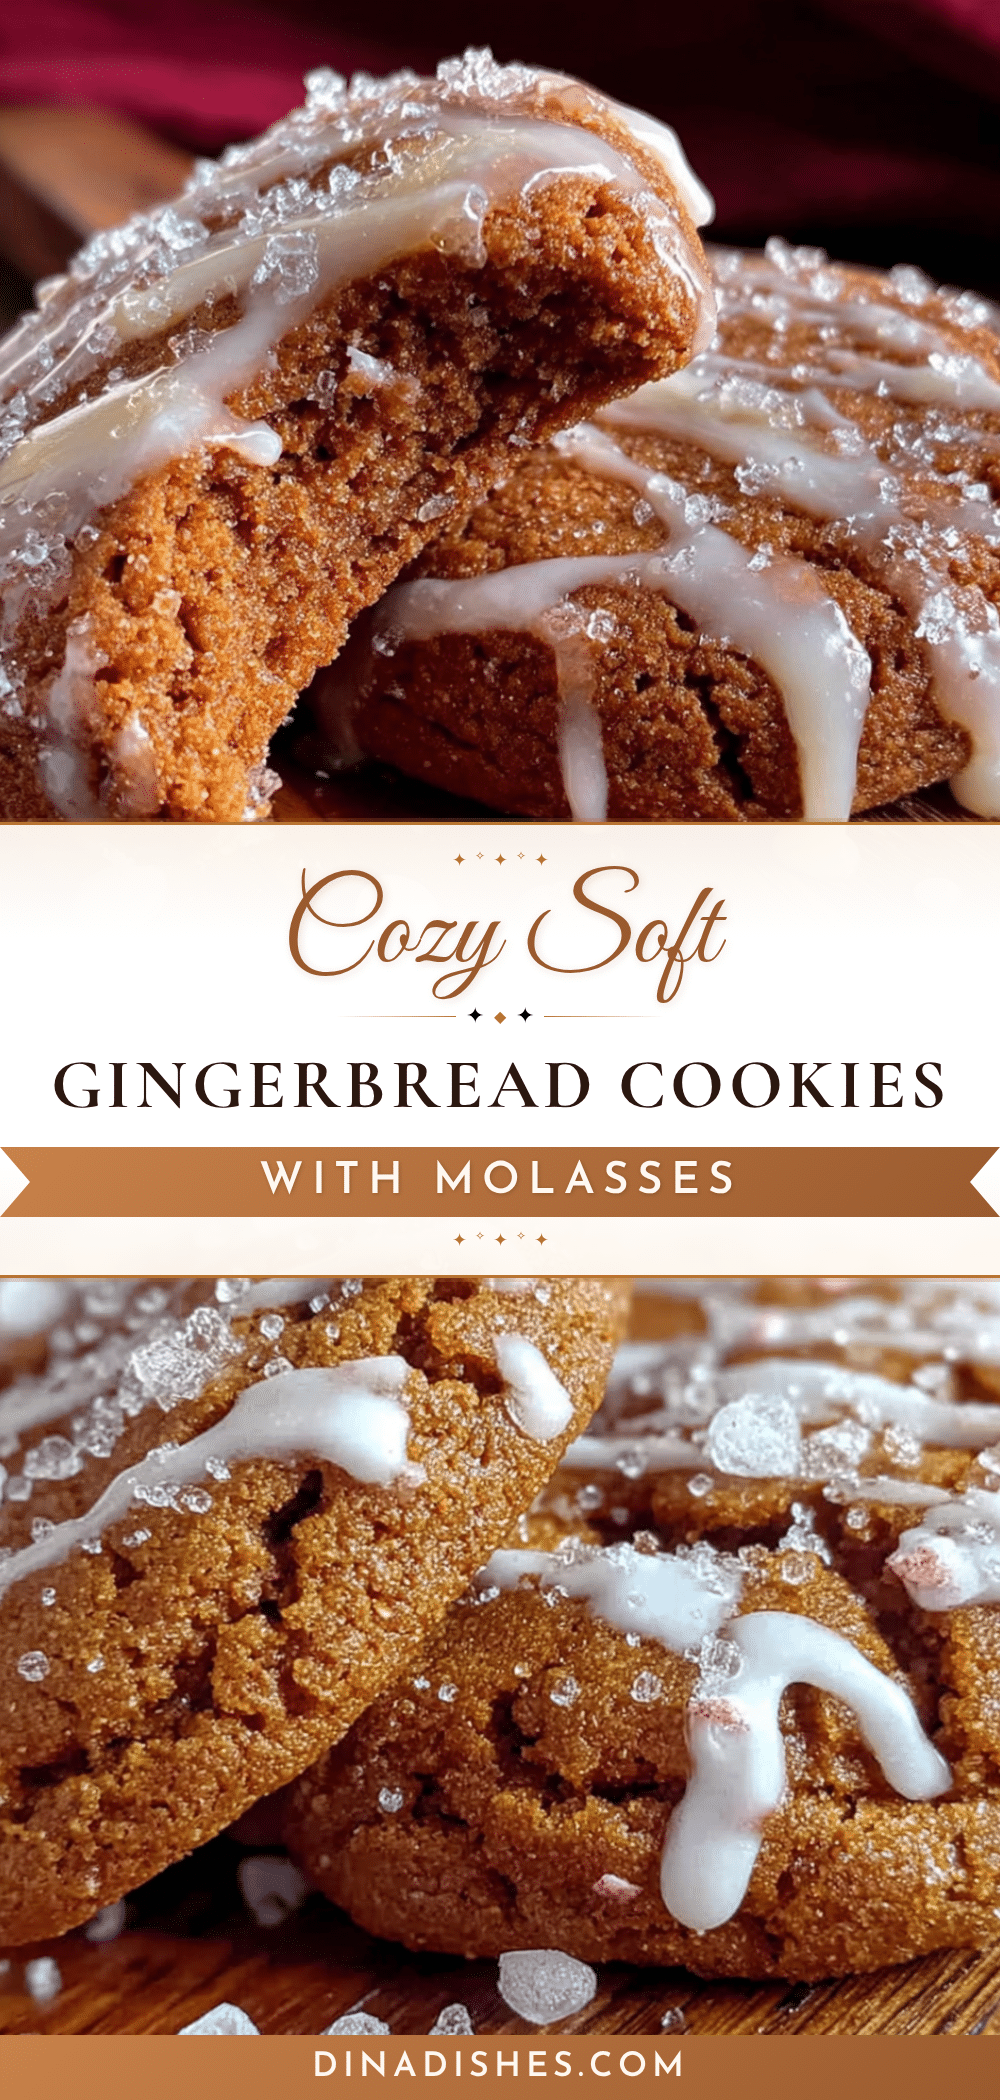
Best Soft Iced Gingerbread Cookies Made with Molasses

These soft iced gingerbread cookies are perfectly chewy with a deep molasses flavor and a simple glossy icing. They come together in under an hour with no chilling required, making them ideal for holiday cookie swaps or cozy weeknight baking.
- Prep Time: 15 minutes
- Cook Time: 10 minutes
- Total Time: 45 minutes
- Yield: 24 cookies 1x
- Category: Dessert
- Cuisine: American
Ingredients
- ½ cup (113g) unsalted butter, melted
- ¾ cup (150g) dark brown sugar, packed
- ⅓ cup (110g) molasses (not blackstrap)
- 1 large egg, room temperature
- 1 teaspoon vanilla extract
- 2 cups (250g) all-purpose flour
- 1½ teaspoons baking soda
- 2 teaspoons ground ginger
- 1½ teaspoons ground cinnamon
- ½ teaspoon ground cloves
- ¼ teaspoon fine sea salt
- 1½ cups (180g) powdered sugar
- 2–3 tablespoons milk (whole or 2%)
- ½ teaspoon vanilla extract (for icing)
Instructions
- Preheat oven to 350°F (175°C). Line two baking sheets with parchment paper or silicone mats.
- Melt the butter in a medium microwave-safe bowl in 20-second intervals until just melted. Set aside to cool slightly.
- To the melted butter, add the packed brown sugar and molasses. Whisk vigorously until smooth and glossy, about 30 seconds. Add the egg and vanilla extract, whisk until fully incorporated.
- In a separate bowl, whisk together the flour, baking soda, ginger, cinnamon, cloves, and salt.
- Gradually add the dry ingredients to the wet mixture, stirring with a wooden spoon or spatula until just combined. Do not overmix. The dough will be soft and slightly sticky.
- Using a 1.5-tablespoon cookie scoop or two spoons, drop rounded tablespoons of dough onto the prepared baking sheets, spacing them about 2 inches apart.
- Bake one sheet at a time on the center rack for 9-11 minutes. The cookies should look puffy, slightly cracked on top, and just set around the edges with soft centers. For chewier cookies, bake 10 minutes; for firmer, bake 11 minutes.
- Let the cookies rest on the baking sheet for 5 minutes, then transfer to a wire cooling rack to cool completely.
- While the cookies cool, make the icing: In a small bowl, whisk together the powdered sugar, 2 tablespoons of milk, and ½ teaspoon vanilla extract. Add the third tablespoon of milk only if needed to reach a thick but pourable consistency.
- Once the cookies are completely cool, drizzle the icing over the tops in zigzag patterns using a spoon or piping bag. Let the icing set for 20-30 minutes before stacking or storing.
Notes
Don’t overbake—pull cookies when centers still look soft. Spray measuring cup with nonstick spray before measuring molasses for easy release. Use room temperature egg for better incorporation. If kitchen is hot, chill scooped dough for 15-20 minutes before baking to prevent spreading. Let icing set completely before stacking.
Nutrition
- Serving Size: 1 cookie
- Calories: 145
- Sugar: 16
- Sodium: 120
- Fat: 5
- Saturated Fat: 3
- Carbohydrates: 24
- Fiber: 0.5
- Protein: 2
Keywords: soft gingerbread cookies, iced gingerbread cookies, molasses cookies, holiday cookies, drop cookies, easy gingerbread recipe