There used to be a little diner off Route 9 in Massachusetts called The Rusty Spoon that made the most unforgettable pumpkin pie. When they closed in 2017—the owner retired, the building got turned into a vape shop, of all things—I genuinely grieved that pie for months. It wasn’t just any pumpkin pie, you know? The filling had this velvety texture that felt almost like a custard, and the spices were balanced so perfectly that no single flavor shouted over the others. After twelve tries—twelve, let me tell you, some of them were straight-up disasters with soggy bottoms and cracked tops—I finally got it.
The thing that took me the longest to figure out was the maple whipped cream. The diner served theirs in a little silver bowl on the side, and it had this subtle maple flavor that didn’t overpower the pie. I kept adding too much maple syrup and ending up with a runny mess. Honestly, my kitchen counter looked like a maple syrup crime scene for a while there. But persistence pays off, and now I’ve got a version that actually tastes better than the original—if I do say so myself.
Maybe you’ve been there too, chasing a specific food memory that feels just out of reach. That’s what this recipe is for. It’s the kind of pie that makes you slow down, take a deep breath, and actually taste what you’re eating. The kind that fills your kitchen with the smell of cinnamon and nutmeg and makes everyone wander in asking, “What’s for dessert?”
Why You’ll Love This Recipe
This isn’t just another pumpkin pie recipe floating around the internet. I’ve tested this version more times than I care to count, and every single detail has been tweaked for maximum coziness and flavor. Let me break down what makes it special.
- Perfectly Spiced Filling: The spice blend here is chef-tested and family-approved. It’s warm without being overwhelming, with just a hint of ginger to keep things interesting.
- No Cracked Tops: I’ve figured out the exact baking temperature and timing to give you a smooth, crack-free surface every time. No more ugly pies that taste good but look like a mess.
- Easy Maple Whipped Cream: This comes together in under five minutes with a hand mixer. The trick is using a specific ratio of maple syrup to cream so it stays fluffy, not soupy.
- Simple Ingredients: You probably already have most of what you need in your pantry. No weird specialty items or expensive extracts required.
- Crowd-Pleaser: I’ve brought this to Thanksgiving dinners, potlucks, and casual get-togethers. It disappears every single time, and people always ask for the recipe.
- Make-Ahead Friendly: This pie actually tastes better the next day. The flavors meld together overnight, and the texture gets even creamier. Perfect for holiday prep.
This recipe is the kind that makes you close your eyes after the first bite. It’s comfort food in its purest form—warm, nostalgic, and deeply satisfying. Whether you’re serving it at a holiday gathering or just treating yourself on a chilly Tuesday night, it delivers that soul-soothing feeling we all need sometimes.
What Ingredients You Will Need
This recipe uses simple, wholesome ingredients to deliver that classic pumpkin pie flavor with a cozy twist. Most of these are pantry staples, which makes this perfect for last-minute baking urges.
For the Pie Filling
- 1 can (15 oz) pumpkin puree — Not pumpkin pie filling! Make sure you’re getting 100% pure pumpkin. I prefer Libby’s for consistent texture, but store brands work fine too.
- 1 can (14 oz) sweetened condensed milk — This is what gives the filling that silky, custard-like texture. Don’t substitute with evaporated milk; the sweetness and consistency are different.
- 2 large eggs — Room temperature eggs blend more smoothly into the filling. Take them out of the fridge about 30 minutes before you start.
- 1 teaspoon vanilla extract — Pure vanilla extract makes a difference here. The imitation stuff has a chemical aftertaste that you’ll notice in the final product.
- 1 ½ teaspoons ground cinnamon — This is the backbone of the spice blend. I use Saigon cinnamon for its stronger, sweeter flavor.
- ½ teaspoon ground ginger — Adds a subtle warmth that balances the sweetness.
- ½ teaspoon ground nutmeg — Freshly grated if you have it, but pre-ground works perfectly fine.
- ¼ teaspoon ground cloves — A little goes a long way. Too much clove can make the pie taste medicinal.
- ¼ teaspoon salt — Enhances all the other flavors and balances the sweetness.
For the Crust
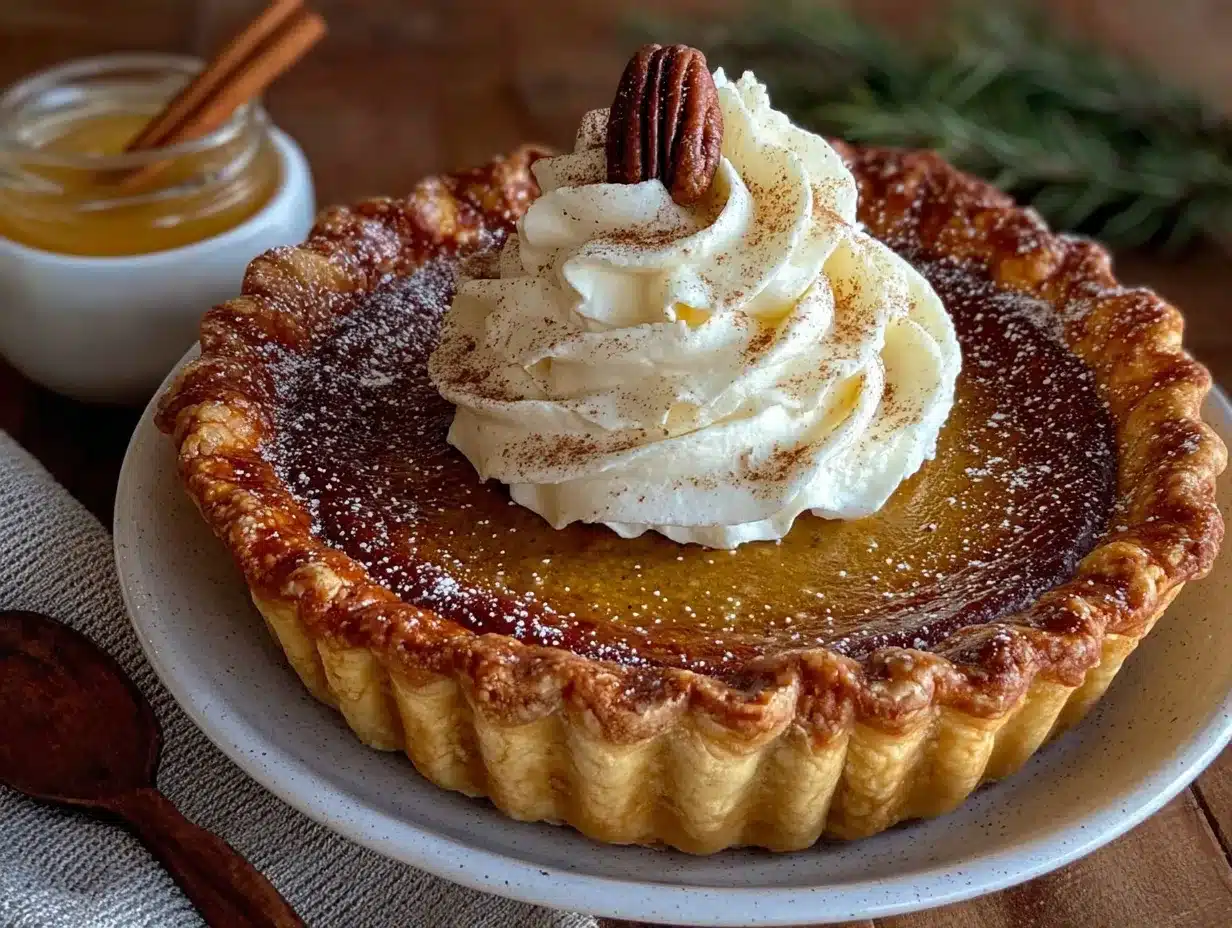
- 1 unbaked 9-inch pie crust — You can use homemade or store-bought. I’ll share my favorite store-bought option below, but homemade always tastes special.
- 1 tablespoon butter, melted — For brushing the crust edges before baking. This gives it that gorgeous golden color.
For the Maple Whipped Cream
- 1 cup heavy whipping cream — Must be cold straight from the fridge. Warm cream won’t whip properly.
- 2 tablespoons pure maple syrup — Grade A dark amber has the strongest maple flavor. Don’t use pancake syrup; it’s not the same thing.
- ½ teaspoon vanilla extract — Rounds out the maple flavor beautifully.
For the crust, I personally recommend the refrigerated Pillsbury pie crusts if you’re going store-bought. They roll out thin and bake up flaky without being greasy. If you’re making your own, a simple butter crust with a touch of sugar works wonderfully.
Equipment Needed
You don’t need a fancy kitchen to make this pie. Here’s what you’ll actually use:
- 9-inch pie dish — Glass or ceramic works best. Metal pie pans can cause the crust to brown too quickly. I use a Pyrex glass dish and love how evenly it bakes.
- Large mixing bowl — For whisking together the filling ingredients.
- Whisk — A good whisk prevents lumps better than a spoon. I’ve ruined a batch by using a fork in a hurry—learn from my mistake.
- Hand mixer or stand mixer — For the whipped cream. You can whisk by hand, but your arm will get tired, and it takes forever.
- Measuring cups and spoons — Accurate measurements matter in baking. Eyeballing it leads to inconsistent results.
- Pie crust shield or aluminum foil — To prevent the crust edges from burning. You can buy fancy silicone shields, or just fold a strip of foil around the edges like I do.
- Cooling rack — Essential for letting the pie cool evenly. Setting a hot pie on the counter can cause the bottom to get soggy.
If you don’t have a hand mixer, a whisk and some elbow grease will work for the whipped cream. Just make sure the cream is really cold, and be prepared for a mini arm workout. I’ve done it both ways, and honestly, the hand-whipped cream tastes even better—something about the effort makes it sweeter.
Preparation Method
Let me walk you through this step by step. I’ve included all the little details I wish someone had told me the first time I made pumpkin pie.
- Preheat your oven to 425°F (220°C). Position the rack in the lower third of the oven. This helps the bottom crust cook through properly.
- Prepare your pie crust. If using store-bought, let it sit at room temperature for about 15 minutes so it doesn’t crack when you unroll it. Gently press it into your pie dish, crimping the edges however you like. Brush the edges with melted butter—this gives them that beautiful golden color.
- Make the filling. In a large mixing bowl, whisk the eggs until they’re light and frothy, about 30 seconds. Add the pumpkin puree, sweetened condensed milk, vanilla extract, and all the spices. Whisk until everything is completely combined and smooth. You shouldn’t see any streaks of egg or pockets of spice.
- Pour the filling into the crust. Use a spatula to get every last drop—this filling is too good to waste. The pie dish will be quite full, but that’s okay. It settles as it bakes.
- Bake at 425°F for 15 minutes. This initial high heat helps set the crust and gives the filling a nice start. Don’t skip this step; it makes a difference in the final texture.
- Reduce the oven temperature to 350°F (175°C). After 15 minutes, lower the heat without opening the oven door. Continue baking for 40-50 minutes.
- Check for doneness. The pie is done when the edges are set and the center jiggles slightly—like Jell-O, not like liquid. If you insert a knife near the center, it should come out clean. I usually start checking at 40 minutes.
- Cool completely on a wire rack. This takes about 2 hours. Don’t rush this step! Cutting into a warm pie will give you a runny mess. Trust me, I’ve done it.
- Make the maple whipped cream. While the pie cools, pour the cold heavy cream into a chilled bowl. Add the maple syrup and vanilla extract. Beat with a hand mixer on medium speed until soft peaks form—about 2-3 minutes. Don’t overbeat, or you’ll end up with butter.
- Chill the pie. Once completely cool, refrigerate the pie for at least 4 hours, preferably overnight. This allows the filling to fully set and the flavors to meld together beautifully.
A quick note about the jiggle test: if the center wobbles like a wave, it needs more time. If it just trembles slightly, it’s perfect. I once pulled my pie out too early because I was impatient, and the filling was still liquid in the middle. Learn from my mistakes, friends.
Cooking Tips & Techniques
After twelve attempts at recreating that diner pie, I’ve picked up a few tricks that make all the difference. Here’s what I wish I’d known from the start.
Blind baking isn’t necessary. I know a lot of recipes tell you to pre-bake the crust, but for this particular filling, it’s not needed. The sweetened condensed milk creates a filling that bakes up perfectly without making the crust soggy. I’ve tested it both ways, and blind baking actually made the crust too dry and crumbly.
Watch your oven temperature. Ovens run differently, and that 350°F setting might actually be 325°F or 375°F in reality. I learned this the hard way when my first few pies came out with burnt edges and raw centers. An oven thermometer costs about ten bucks and saves you a lot of heartache.
Use a pie crust shield. Around the 25-minute mark of the reduced-temperature bake, check your crust edges. If they’re getting too brown, cover them with a pie crust shield or strips of aluminum foil. I forgot to do this once and ended up with crust that looked like it had been in a tanning bed too long.
Let the pie rest overnight. I know it’s hard to wait, but this pie genuinely tastes better the next day. The spices mellow out and blend together, and the texture becomes even creamier. If you’re making this for Thanksgiving, bake it the day before and thank me later.
Keep your cream cold. For the whipped cream, put your bowl and beaters in the freezer for 10 minutes before you start. Cold equipment helps the cream whip up faster and hold its shape longer. I learned this trick from a pastry chef friend, and it’s a game-changer.
Don’t overmix the filling. Whisk until just combined. Overmixing incorporates too much air, which can cause the filling to puff up and then crack as it cools. A few small bubbles are fine, but you don’t want a frothy mixture.
Variations & Adaptations
This recipe is pretty perfect as-is, but I’ve experimented with a few twists that turned out surprisingly well. Here are some ways to make it your own.
Gluten-Free Version: Swap the regular pie crust for a gluten-free one. I’ve had great results with the Wholly Gluten Free brand. The filling itself is naturally gluten-free, so you only need to change the crust. Just make sure to check your spices—some blends contain wheat starch as an anti-caking agent.
Dairy-Free Adaptation: Use a dairy-free sweetened condensed milk—Nature’s Charm makes a coconut-based version that works beautifully. For the whipped cream, chill a can of full-fat coconut milk overnight, scoop out the solid cream, and whip it with the maple syrup. It’s not exactly the same, but it’s delicious in its own right.
Spice It Up: If you’re feeling adventurous, add a pinch of cardamom or allspice to the filling. I tried cardamom on a whim last Christmas, and it added this unexpected floral note that everyone loved. Start with ¼ teaspoon and adjust from there.
Pumpkin Cheesecake Hybrid: For a richer version, replace half the pumpkin puree with softened cream cheese. Beat the cream cheese until smooth before adding the other ingredients. The texture becomes denser and more decadent—almost like a cheesecake and pumpkin pie had a baby.
Mini Pies: Use a muffin tin and pre-made tart shells for individual servings. Reduce the baking time to about 20-25 minutes at 350°F. These are perfect for parties or portion control. I made these for a Friendsgiving once, and they were gone in ten minutes.
Serving & Storage Suggestions
This pie is best served chilled or at room temperature—never warm. The filling needs to be fully set for the best texture, and the flavors are more pronounced when it’s not hot.
Serving: Slice the pie with a sharp knife, wiping it clean between cuts for neat slices. Top each piece with a generous dollop of maple whipped cream. For extra flair, sprinkle a tiny pinch of cinnamon or nutmeg on top of the cream. I like to serve it on small plates with a fork and a spoon—sometimes you want to scoop up every last bit of cream.
Pairings: This pie pairs beautifully with hot coffee, spiced chai, or a crisp apple cider. For a boozy option, a small glass of bourbon or dark rum complements the maple notes wonderfully. I’ve also served it alongside a scoop of vanilla bean ice cream, and that combination is pure magic.
Storage: Cover the pie loosely with plastic wrap or aluminum foil and store it in the refrigerator. It will keep for up to 5 days, though honestly, it never lasts that long in my house. The maple whipped cream should be stored separately in an airtight container and will keep for about 2 days.
Freezing: You can freeze the baked, cooled pie for up to 2 months. Wrap it tightly in plastic wrap, then a layer of foil. Thaw overnight in the refrigerator before serving. Don’t freeze the whipped cream—it doesn’t thaw well and will turn grainy.
Reheating: If you prefer your pie slightly warm, microwave individual slices for about 15 seconds. This takes the chill off without melting the filling. I wouldn’t recommend reheating the whole pie; it’s better to warm slices as needed.
The flavors actually deepen and improve over the first couple of days. That’s why I always recommend making this pie at least a day ahead. It’s like the spices need time to get to know each other, you know?
Nutritional Information & Benefits
Let’s be real—this is dessert, not health food. But there are some surprising nutritional highlights hidden in that slice of pie.
| Nutrient | Per Slice (1/8 of pie, with cream) |
|---|---|
| Calories | 385 |
| Total Fat | 22g |
| Saturated Fat | 13g |
| Carbohydrates | 44g |
| Protein | 7g |
| Fiber | 3g |
| Sugar | 32g |
| Vitamin A | 190% DV |
| Calcium | 15% DV |
Pumpkin is packed with vitamin A, which is great for eye health and immune function. The eggs add protein, and the sweetened condensed milk provides calcium. The maple syrup in the whipped cream contains antioxidants and minerals like zinc and manganese.
This recipe contains dairy, eggs, and gluten (from the crust). For those with dietary restrictions, check the variations section above for suitable substitutions. And as always, enjoy this in moderation—it’s meant to be a special treat, not an everyday indulgence.
I personally love that this pie feels indulgent but uses real, recognizable ingredients. No artificial flavors, no preservatives, just good old-fashioned comfort food made from scratch. There’s something satisfying about knowing exactly what went into your dessert.
Conclusion
This classic pumpkin pie with maple whipped cream is more than just a recipe—it’s a little piece of comfort that you can create in your own kitchen. After months of chasing that memory from The Rusty Spoon, I finally have a version that not only matches the original but, honestly, surpasses it. The filling is velvety smooth, the spices are perfectly balanced, and that maple whipped cream takes it to a whole new level.
I want you to make this recipe your own. Maybe you’ll add an extra pinch of cinnamon, or swap the maple syrup for honey, or serve it with a scoop of ice cream instead of whipped cream. That’s the beauty of baking—it’s personal, and it should reflect your tastes and your memories.
I’d love to hear how this pie turns out for you. Did you make any changes? Did it remind you of a favorite diner or a holiday from your past? Drop a comment below and share your experience. And if you’re looking for more cozy dessert recipes, be sure to check out my crispy garlic chicken for a savory option that balances out all that sweetness.
Now go ahead, preheat that oven, and make yourself a pie that tastes like a hug. You deserve it.
Frequently Asked Questions
Can I use pumpkin pie filling instead of pumpkin puree?
I wouldn’t recommend it. Pumpkin pie filling already has sugar and spices added, which will throw off the balance of this recipe. Stick with 100% pure pumpkin puree for the best results. The texture will also be different—pumpkin pie filling is thicker and more processed.
Why did my pie crack on top?
Cracks usually happen from overbaking or sudden temperature changes. Make sure you’re not baking the pie too long—remember, the center should still jiggle slightly when you take it out. Also, let the pie cool gradually on a wire rack, not in a drafty spot. If cracks do appear, just cover them with whipped cream. Nobody will ever know.
Can I make this pie ahead of time?
Absolutely! In fact, I recommend it. This pie tastes even better the next day after the flavors have had time to meld. Bake it a day ahead, let it cool completely, then refrigerate it covered. Add the whipped cream just before serving.
How do I know when the pie is fully baked?
The edges should be set and puffed slightly, while the center should jiggle like Jell-O when you gently shake the pan. If the entire pie wobbles like liquid, it needs more time. You can also insert a knife near the center—if it comes out clean, it’s done. The internal temperature should reach 175°F to 180°F.
Can I freeze leftover pumpkin pie?
Yes! Wrap the completely cooled pie tightly in plastic wrap, then a layer of aluminum foil. Freeze for up to 2 months. Thaw overnight in the refrigerator before serving. Don’t freeze the whipped cream—make a fresh batch when you’re ready to serve the pie.
Pin This Recipe!
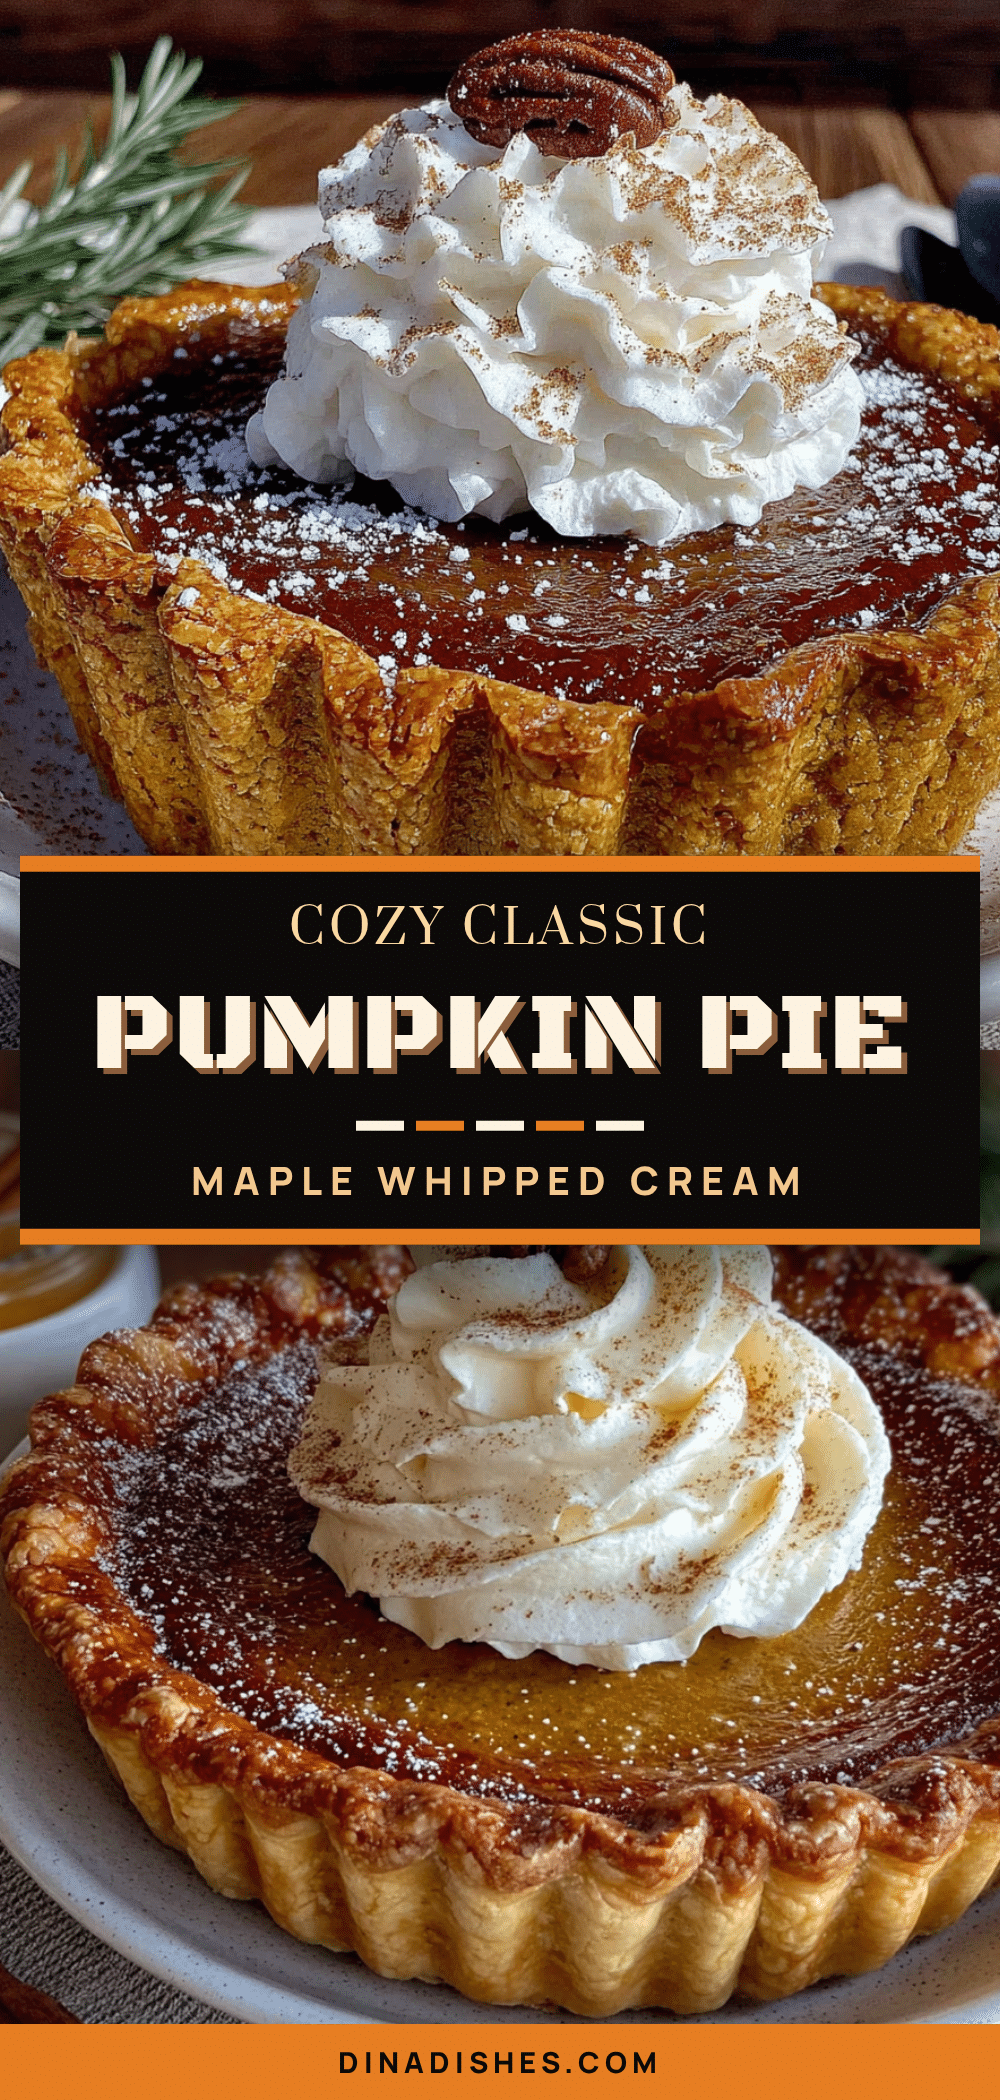
Classic Pumpkin Pie with Easy Maple Whipped Cream
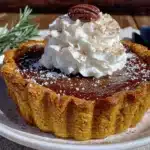
A velvety smooth pumpkin pie with perfectly balanced spices, topped with a light and fluffy maple whipped cream. This recipe recreates a beloved diner classic with a foolproof method for a crack-free top and rich, custard-like filling.
- Prep Time: 15 minutes
- Cook Time: 55 minutes
- Total Time: 2 hours 10 minutes (plus chilling time)
- Yield: 8 servings 1x
- Category: Dessert
- Cuisine: American
Ingredients
- 1 can (15 oz) pumpkin puree
- 1 can (14 oz) sweetened condensed milk
- 2 large eggs, room temperature
- 1 teaspoon vanilla extract
- 1 ½ teaspoons ground cinnamon
- ½ teaspoon ground ginger
- ½ teaspoon ground nutmeg
- ¼ teaspoon ground cloves
- ¼ teaspoon salt
- 1 unbaked 9-inch pie crust
- 1 tablespoon butter, melted
- 1 cup heavy whipping cream, cold
- 2 tablespoons pure maple syrup
- ½ teaspoon vanilla extract
Instructions
- Preheat your oven to 425°F (220°C). Position the rack in the lower third of the oven.
- Prepare your pie crust. If using store-bought, let it sit at room temperature for about 15 minutes. Gently press it into your pie dish, crimping the edges. Brush the edges with melted butter.
- In a large mixing bowl, whisk the eggs until light and frothy, about 30 seconds. Add the pumpkin puree, sweetened condensed milk, vanilla extract, and all the spices. Whisk until completely combined and smooth.
- Pour the filling into the crust. Use a spatula to get every last drop.
- Bake at 425°F for 15 minutes.
- Reduce the oven temperature to 350°F (175°C) without opening the oven door. Continue baking for 40-50 minutes.
- Check for doneness: the edges should be set and the center should jiggle slightly like Jell-O. A knife inserted near the center should come out clean.
- Cool completely on a wire rack, about 2 hours.
- While the pie cools, make the maple whipped cream: Pour the cold heavy cream into a chilled bowl. Add the maple syrup and vanilla extract. Beat with a hand mixer on medium speed until soft peaks form, about 2-3 minutes.
- Once completely cool, refrigerate the pie for at least 4 hours, preferably overnight. Serve with maple whipped cream.
Notes
Blind baking is not necessary for this recipe. The pie tastes even better the next day. For best results, keep the cream cold and do not overmix the filling. Use an oven thermometer to ensure accurate temperature.
Nutrition
- Serving Size: 1 slice (1/8 of pie
- Calories: 385
- Sugar: 32
- Fat: 22
- Saturated Fat: 13
- Carbohydrates: 44
- Fiber: 3
- Protein: 7
Keywords: pumpkin pie, maple whipped cream, Thanksgiving dessert, classic pumpkin pie, easy pumpkin pie, holiday dessert, pumpkin dessert