My neighbor Karen wasn’t trying to impress anyone. I’d stopped by to borrow a bundt pan—mine had gone missing after a particularly chaotic Thanksgiving—and the smell hit me before I even got to her screen door. Something warm, something sweet, something that smelled like a hug waiting to happen. I stood there on her porch, holding a forgotten bundt pan in my hands, just breathing it in.
She opened the door with flour on her cheek and a cookie sheet balanced on one hip. “Oh, hey,” she said, like it was nothing. Like she wasn’t standing there holding the most adorable little turkey cookies I’d ever seen. They were lined up on her counter, maybe two dozen of them, each one iced with these perfect little feather patterns in brown and orange and white. And the thing is, she wasn’t even making them for anything special. Just a Tuesday. Just because her grandkids were coming over after school.
“You want one?” she asked, already shoving a cookie toward me before I could answer. I mean, honestly, I’d come over for a pan and left with a new obsession. The cookie itself was soft and buttery—not too sweet, with just a hint of vanilla that made you want to close your eyes. But the royal icing? That was the real magic. It set up firm enough to stack but stayed soft when you bit into it, like a little pillow of happiness.
Maybe you’ve been there—you taste something and you just know you’re going to have to figure out how to make it yourself. That was me, standing in Karen’s kitchen, eating a turkey cookie on a random Tuesday in November. She laughed at me when I asked for the recipe. “It’s just sugar cookies,” she said, waving her hand. But it wasn’t just sugar cookies. It was the kind of cookie that makes you slow down, that makes you want to sit at the table a little longer, that makes a cold afternoon feel warm again.
So I asked her to show me how she does it. And now, I’m showing you.
Why You’ll Love This Recipe
Let me tell you why these cozy decorated turkey sugar cookies have become my go-to for fall baking. First off, they’re way easier than they look. I know, I know—decorated cookies with royal icing sound like something you need a pastry degree for. But honestly? If I can do this, you absolutely can. The trick is breaking it down into simple steps and not overthinking it.
- Perfect for Thanksgiving prep: These cookies can be made days ahead and actually taste better after the icing sets. Less stress, more enjoying the holiday.
- Simple ingredients: You probably have most of these in your pantry right now. Butter, sugar, flour, eggs—the usual suspects.
- Kid-approved decorating fun: My niece helped me with the last batch and let me tell you, her turkeys looked way more creative than mine. Imperfect is part of the charm here.
- Stays fresh for days: Royal icing seals in moisture, so these cookies keep beautifully for up to a week. Perfect for cookie exchanges or gift giving.
- Customizable to your style: Want googly eyes? Go for it. Prefer a more minimalist look? Just outline the feathers. There’s no wrong way to decorate a turkey.
What really sets this recipe apart is the texture. I tested this dough six times before I got it right—not too soft, not too firm, with just enough structure to hold a clean cookie cutter shape without spreading. The royal icing recipe I’m sharing is the one I’ve settled on after years of trial and error. It dries shiny, not dull. It doesn’t crack. And it tastes like vanilla, not like powdered sugar and sadness.
These cookies are the kind that make people stop and smile. The kind your kids will remember making with you. The kind that make a cold November afternoon feel like something special. Honestly, isn’t that what comfort food is all about?
What Ingredients You Will Need
This recipe uses simple, wholesome ingredients to deliver soft, buttery cookies and a smooth, glossy royal icing that sets perfectly. Most of these are pantry staples, but I’ve included a few notes to help you pick the best options.
For the Sugar Cookies
- Unsalted butter, softened (1 cup / 226g) – I prefer using European-style butter like Kerrygold for richer flavor, but any unsalted butter works. Let it sit at room temp for about 30 minutes before starting.
- Granulated sugar (1 cup / 200g) – Regular white sugar is perfect here. No need for anything fancy.
- Large egg (1) – Room temperature, please. Cold eggs can make your dough seize up.
- Vanilla extract (2 teaspoons) – Pure vanilla extract makes a real difference. I like Nielsen-Massey, but store brand is fine in a pinch.
- All-purpose flour (2 and 3/4 cups / 345g) – Spoon and level your flour. Scooping straight from the bag packs it down and gives you dry cookies.
- Baking powder (1/2 teaspoon) – Helps the cookies puff just slightly without losing their shape.
- Salt (1/4 teaspoon) – Fine sea salt or table salt. Balances the sweetness.
For the Royal Icing

- Powdered sugar (4 cups / 480g) – Sift it first. Trust me on this—lumps in royal icing are a nightmare to fix.
- Meringue powder (3 tablespoons) – This is what gives royal icing its structure. I recommend Wilton brand for consistent results.
- Warm water (5-6 tablespoons) – Start with less and add more as needed. The consistency should be thick but flowy.
- Vanilla extract (1/2 teaspoon) – Optional but recommended. Adds a subtle warmth to the icing.
- Gel food coloring (Brown, orange, yellow, red) – Gel colors are concentrated and won’t thin your icing like liquid drops will. Americolor and Wilton are my go-to brands.
For Decorating
- Turkey cookie cutter (about 3-4 inches) – Any shape works, but a classic turkey silhouette is easiest for beginners.
- Piping bags or squeeze bottles – I use disposable piping bags with a #2 tip for outlining and flooding. Squeeze bottles work great for flooding larger areas.
- Toothpicks or scribe tool – For popping air bubbles and spreading icing into tight corners.
- Edible markers (optional) – Great for drawing eyes or small details if piping feels tricky.
Equipment Needed
You don’t need a professional bakery setup for these cookies, but a few key tools make the process smoother. Here’s what I use and what you can substitute if needed.
- Stand mixer or hand mixer – A stand mixer with a paddle attachment is ideal for creaming butter and sugar, but a hand mixer works just fine. I’ve made these cookies with both.
- Rolling pin – I prefer a French rolling pin (no handles) for better control, but any rolling pin works. If you don’t have one, a wine bottle works in a pinch—I’ve done it.
- Turkey cookie cutter – Wilton and Ann Clark both make great turkey cutters. Look for one with a simple shape for easier decorating.
- Parchment paper – Line your baking sheets. Silicone mats work too, but parchment gives slightly crisper bottoms.
- Cooling rack – Essential for letting cookies cool completely before icing. Stacking warm cookies is a recipe for disaster.
- Piping bags and tips – I use #2 tips for outlining and #3 for flooding. If you’re new to piping, squeeze bottles are a great alternative for flooding.
- Small bowls or cups – For mixing your colored icings. I use ramekins for small batches.
- Damp paper towel – Keep it over your icing bowls to prevent drying out while you work.
Preparation Method
Alright, let’s get baking. I’ve broken this down into clear steps so you can follow along without feeling overwhelmed. Take your time—these cookies are meant to be a cozy project, not a race.
Make the Cookie Dough
- Cream the butter and sugar (5 minutes). In a large bowl, beat the softened butter and granulated sugar together until light and fluffy. Scrape down the sides halfway through. You’re looking for a pale, creamy texture—this is where the tenderness of your cookie starts.
- Add the egg and vanilla (1 minute). Beat in the egg and vanilla extract until fully combined. The mixture might look slightly curdled at this point—that’s normal, don’t panic.
- Mix the dry ingredients (30 seconds). In a separate bowl, whisk together the flour, baking powder, and salt. Gradually add this to the wet mixture, mixing on low speed until just combined. Overmixing here makes tough cookies, so stop as soon as you don’t see any more flour streaks.
- Chill the dough (1 hour). Divide the dough in half, flatten each into a disc, wrap in plastic wrap, and refrigerate for at least 1 hour. This step is non-negotiable—chilled dough holds its shape better and spreads less during baking.
Bake the Cookies
- Preheat and prep (10 minutes). Preheat your oven to 350°F (175°C). Line two baking sheets with parchment paper.
- Roll and cut (15 minutes). On a lightly floured surface, roll one disc of dough to about 1/4-inch thickness. Dust your rolling pin with flour if it sticks. Cut out turkey shapes and place them 2 inches apart on your prepared sheets. Gather scraps, re-roll, and repeat.
- Bake (8-10 minutes). Bake until the edges are just barely golden—you want them set but not browned. The centers should look dry but not dark. Let them cool on the baking sheet for 5 minutes, then transfer to a wire rack to cool completely. Do not ice warm cookies, or your royal icing will turn into a sad puddle.
Make and Color the Royal Icing
- Mix the icing (5 minutes). In a clean bowl, combine the powdered sugar and meringue powder. Add 5 tablespoons of warm water and beat on low speed for 1 minute. Increase to medium-high and beat for 3-4 minutes until the icing is thick, glossy, and holds stiff peaks. Add the vanilla extract at the end.
- Check consistency (2 minutes). For outlining, you want stiff peaks—icing that holds its shape. For flooding (filling in), thin the icing slightly by adding water a few drops at a time until it flows like honey and settles smooth within 10 seconds. This is called the “10-second rule.”
- Color the icing (5 minutes). Divide the icing into small bowls. Color one portion brown for the turkey body, one orange for the beak and feet, one yellow for the feathers, and leave some white. Use gel colors sparingly—a little goes a long way. Cover each bowl with a damp paper towel to prevent drying.
Decorate the Cookies
- Outline the turkey (15 minutes). Fit a piping bag with a #2 tip and fill with stiff consistency brown icing. Outline the turkey body shape. Let it dry for 5-10 minutes before flooding.
- Flood the body (10 minutes). Thin the brown icing to flood consistency. Pipe it inside the outline and use a toothpick to spread it into corners. Tap the cookie gently on the counter to settle the icing. Let dry for 30 minutes.
- Add the feathers (20 minutes). Using yellow, orange, and white flood-consistency icing, pipe small dots or lines for feathers. Use a toothpick to drag the colors together for a marbled effect if you’re feeling fancy.
- Draw the face (10 minutes). Once the body is dry, pipe a small orange triangle for the beak and a red wattle (that’s the dangly bit under the beak). Use white icing or an edible marker for the eyes. Let everything dry completely—at least 2 hours, ideally overnight.
Cooking Tips & Techniques
I’ve made plenty of mistakes with decorated cookies over the years, and let me tell you, I’ve learned from every single one. Here are the things I wish someone had told me when I started.
Chill your dough thoroughly. I skipped this once because I was in a hurry, and my turkeys came out looking like blobs with legs. The dough spreads when it’s warm, so don’t rush the chilling step. If your kitchen is warm, pop the cut-out cookies in the fridge for 10 minutes before baking.
Don’t overbake. Sugar cookies continue to bake from residual heat after they come out of the oven. Pull them when the edges are just barely golden. They should look pale in the center. Overbaked cookies are dry and crumbly, and they don’t hold icing as well.
Royal icing consistency is everything. If your icing is too thick, it won’t flow smoothly. Too thin, and it’ll run off the cookie. The 10-second rule is your best friend: lift your spatula and count how long it takes for the ribbon of icing to settle back into the bowl. Ten seconds is the sweet spot for flooding.
Work in batches. Don’t try to decorate all your cookies at once. Outline and flood a few at a time, letting each layer dry before adding details. I usually do six cookies at a time—any more and I start making mistakes.
Keep your icing covered. Royal icing dries out fast. Cover your bowls with damp paper towels or plastic wrap when you’re not using them. If your icing starts to get crusty, add a drop or two of water and stir well.
Use a scribe tool for details. A toothpick works, but a scribe tool (basically a long needle with a handle) gives you more control for dragging icing into tight spots and popping air bubbles. They’re cheap and worth every penny.
Variations & Adaptations
One of the best things about this recipe is how flexible it is. Here are some ways to make it your own.
Gluten-free version: Substitute the all-purpose flour with a 1:1 gluten-free baking blend that contains xanthan gum. I’ve had good luck with King Arthur’s Measure for Measure. The dough will be slightly more fragile, so handle it gently and chill it well.
Vegan adaptation: Use vegan butter (I like Miyoko’s) and a flax egg (1 tablespoon ground flaxseed mixed with 3 tablespoons water, let sit for 5 minutes). For the royal icing, use aquafaba (the liquid from a can of chickpeas) instead of meringue powder and water. It works surprisingly well.
Different shapes: Don’t limit yourself to turkeys. This dough works beautifully with any fall-themed cookie cutter—pumpkins, leaves, acorns, cornucopias. Adjust your icing colors accordingly.
Flavor variations: Add 1/2 teaspoon of cinnamon, nutmeg, or pumpkin pie spice to the dough for a warmer flavor profile. You can also swap the vanilla extract for almond extract (use 1 teaspoon instead of 2—it’s stronger).
No-icing option: If royal icing feels intimidating, skip it. Sprinkle the cookies with colored sanding sugar before baking, or drizzle with a simple powdered sugar glaze (1 cup powdered sugar plus 2-3 tablespoons milk) after cooling. Still cute, still delicious.
Mini cookie version: Use a smaller turkey cutter and reduce baking time to 6-7 minutes. These are perfect for kids’ lunchboxes or party platters.
Serving & Storage Suggestions
These cookies are best served at room temperature, ideally with a cup of hot apple cider or a cozy mug of coffee. The royal icing should be fully set and firm to the touch before serving—give it at least 2 hours, but overnight is better.
For presentation, I like to arrange them on a wooden board or a white platter, alternating colors so the turkeys really pop. A sprinkle of cinnamon or a few mini pumpkins around the edges makes for a beautiful Thanksgiving centerpiece. Kids love them on a plate with a side of apple slices or grapes.
Storage instructions: Place decorated cookies in a single layer in an airtight container, separating layers with parchment paper. They’ll keep at room temperature for up to 1 week. Do not refrigerate—the moisture in the fridge can make the icing sticky and cause the cookies to soften.
Freezer instructions: You can freeze undecorated baked cookies for up to 3 months. Wrap them tightly in plastic wrap and place in a freezer bag. Thaw at room temperature before decorating. I do not recommend freezing decorated cookies, as the icing can crack during thawing.
Flavor development: Here’s a little secret—these cookies actually taste better the day after decorating. The moisture from the icing seeps into the cookie slightly, making it softer and more tender. So don’t stress about making them the day before your event. They’ll be even better.
Nutritional Information & Benefits
Let’s be real—these are cookies, not health food. But here’s a rough estimate per cookie (based on a 3-inch turkey shape with royal icing):
| Nutrient | Amount per cookie |
|---|---|
| Calories | 180-200 |
| Total Fat | 8g |
| Saturated Fat | 5g |
| Carbohydrates | 28g |
| Sugar | 18g |
| Protein | 2g |
That said, there are a few redeeming qualities. The butter provides vitamin A, and the eggs add protein and B vitamins. If you use the gluten-free variation, you’ll also get some fiber from the alternative flour blend.
From a wellness perspective, I think these cookies serve a different kind of purpose. They’re about slowing down, connecting with loved ones, and creating memories. That matters too. So enjoy one (or two) without guilt, and focus on the joy of making something beautiful with your hands.
Conclusion
These cozy decorated turkey sugar cookies have become a staple in my fall baking rotation, and I hope they’ll become one in yours too. They remind me of that Tuesday afternoon at Karen’s house—the kind of moment that feels ordinary until you look back and realize it was actually pretty special.
The best part about this recipe is that it leaves room for you. You can keep it simple with just a few colors, or go all out with detailed feathers and googly eyes. You can make them with your kids, your friends, or just for yourself on a quiet afternoon. There’s no pressure to be perfect—honestly, the wonky ones are always the most charming.
I’d love to see how your turkeys turn out! Drop a comment below and let me know if you tried any variations, or share a photo on Pinterest and tag me. And if you’re looking for more cozy fall baking ideas, check out my classic pumpkin pie recipe or these soft apple cider donuts—they’re perfect companions for your Thanksgiving table.
Now go make some cookies. You’ve got this.
Frequently Asked Questions
Can I use a different type of icing?
Absolutely. If royal icing isn’t your thing, try a simple powdered sugar glaze (1 cup powdered sugar + 2 tablespoons milk + 1/2 teaspoon vanilla). It won’t be as firm for detailed decorating, but it’s delicious and easy. You can also use store-bought cookie icing in tubes for a no-mess option.
How do I prevent my cookies from spreading?
Chill your dough for at least 1 hour before rolling and cutting. If your kitchen is warm, pop the cut-out cookies in the fridge for 10 minutes before baking. Also, make sure your butter isn’t too soft—it should be at room temperature but still hold its shape slightly.
Can I make the dough ahead of time?
Yes! The dough can be refrigerated for up to 3 days or frozen for up to 3 months. Wrap it tightly in plastic wrap and place in a freezer bag. Thaw in the refrigerator overnight before rolling and cutting.
Why is my royal icing cracking?
Cracking usually happens when the icing dries too quickly or when you’ve added too much powdered sugar. Make sure your kitchen isn’t too dry, and cover your icing bowls with a damp paper towel while you work. If the icing is too thick, add a drop or two of water to thin it out.
How do I get clean edges on my cookies?
A sharp cookie cutter is key—dull edges can tear the dough. Dip the cutter in flour before each cut to prevent sticking. When transferring cut cookies to the baking sheet, use a thin metal spatula to lift them gently without distorting the shape.
Pin This Recipe!
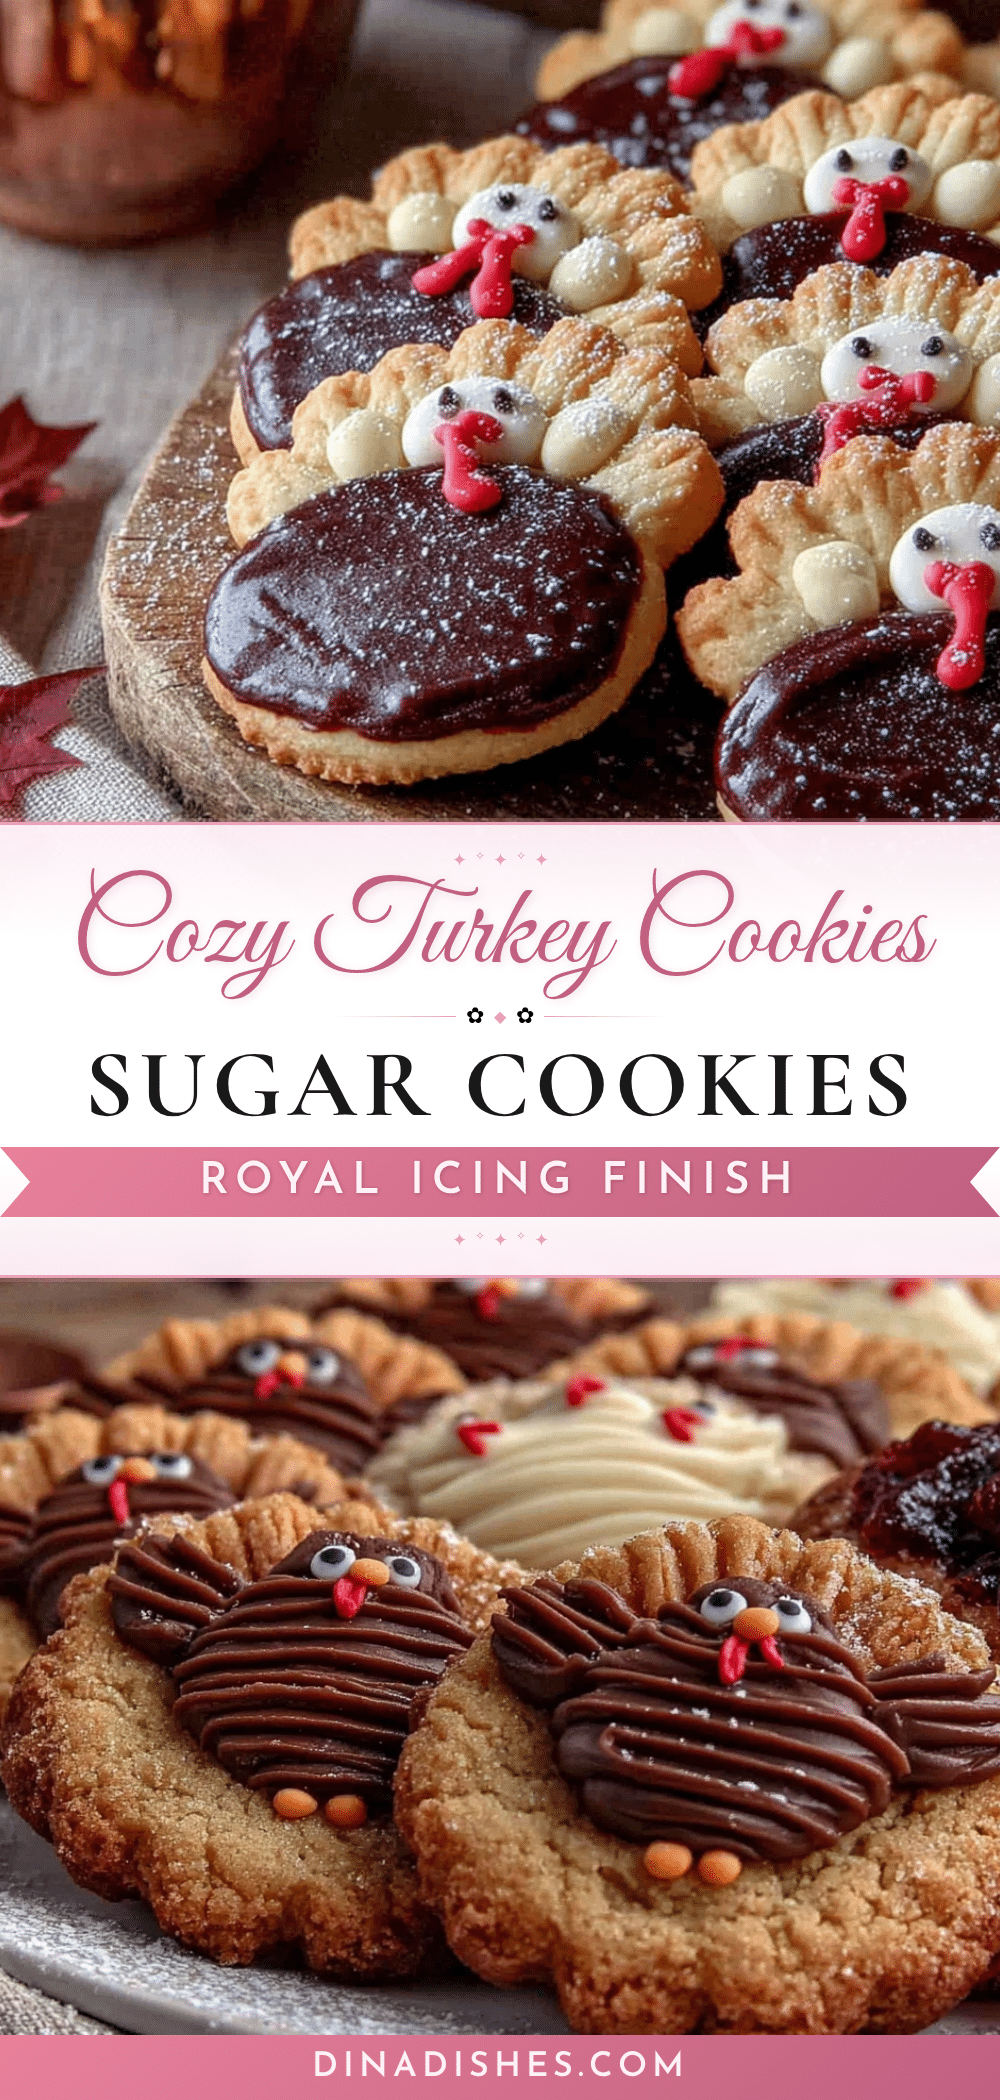
Cozy Decorated Turkey Sugar Cookies with Royal Icing

Soft, buttery sugar cookies shaped like turkeys and decorated with glossy royal icing. Perfect for Thanksgiving baking, these cookies are easy to make and fun to decorate with kids.
- Prep Time: 1 hour 30 minutes
- Cook Time: 10 minutes
- Total Time: 2 hours 40 minutes
- Yield: 24 servings 1x
- Category: Dessert
- Cuisine: American
Ingredients
- 1 cup (226g) unsalted butter, softened
- 1 cup (200g) granulated sugar
- 1 large egg, room temperature
- 2 teaspoons vanilla extract
- 2 and 3/4 cups (345g) all-purpose flour
- 1/2 teaspoon baking powder
- 1/4 teaspoon salt
- 4 cups (480g) powdered sugar, sifted
- 3 tablespoons meringue powder
- 5–6 tablespoons warm water
- 1/2 teaspoon vanilla extract (optional)
- Gel food coloring (brown, orange, yellow, red)
Instructions
- Cream the butter and sugar together until light and fluffy, about 5 minutes.
- Beat in the egg and vanilla extract until fully combined.
- In a separate bowl, whisk together flour, baking powder, and salt. Gradually add to wet mixture, mixing on low until just combined.
- Divide dough in half, flatten into discs, wrap in plastic, and refrigerate for at least 1 hour.
- Preheat oven to 350°F (175°C). Line baking sheets with parchment paper.
- On a lightly floured surface, roll dough to 1/4-inch thickness. Cut out turkey shapes and place 2 inches apart on prepared sheets.
- Bake for 8-10 minutes until edges are just golden. Cool on baking sheet for 5 minutes, then transfer to wire rack to cool completely.
- For royal icing: combine powdered sugar and meringue powder. Add 5 tablespoons warm water and beat on low for 1 minute, then medium-high for 3-4 minutes until thick and glossy. Add vanilla.
- Adjust icing consistency: for outlining, keep stiff; for flooding, thin with water until it flows like honey (10-second rule).
- Divide icing into bowls and color with gel food coloring: brown for body, orange for beak/feet, yellow for feathers, leave some white.
- Outline turkey body with stiff brown icing using a #2 tip. Let dry 5-10 minutes.
- Flood body with thinned brown icing, using toothpick to spread. Tap cookie to settle. Let dry 30 minutes.
- Pipe feather dots/lines with yellow, orange, and white flood icing. Use toothpick to marble if desired.
- Once body is dry, pipe orange beak and red wattle. Add eyes with white icing or edible marker. Let dry completely (2 hours to overnight).
Notes
Chill dough thoroughly to prevent spreading. Do not overbake; edges should be just golden. Royal icing consistency is key: use the 10-second rule for flooding. Keep icing covered with damp paper towel to prevent drying. Cookies taste better the day after decorating as moisture from icing softens them.
Nutrition
- Serving Size: 1 cookie
- Calories: 190
- Sugar: 18
- Sodium: 50
- Fat: 8
- Saturated Fat: 5
- Carbohydrates: 28
- Protein: 2
Keywords: turkey cookies, sugar cookies, royal icing, Thanksgiving cookies, decorated cookies, fall baking