There used to be a tiny bakery tucked between a laundromat and a thrift store in my old neighborhood that made the most incredible gingerbread cheesecake bars. When they closed three years ago—just a handwritten sign on the door saying “Thank you for the memories”—I honestly felt a little lost. Those bars were my go-to after a rough week, my celebration treat, my “I just need something cozy” fix. After twelve tries—twelve, let me tell you, some were downright sad—I finally got it. These cozy gingerbread cheesecake bars with cream cheese frosting are the exact recreation of that bakery magic, and I’m so excited to share them with you.
The first few attempts were rough. One batch was so dry it crumbled into dust. Another had a cheesecake layer that cracked like a desert floor. But the sixth try? That was the turning point. I remember standing in my kitchen at 10 PM, pulling a pan out of the oven, and knowing—just knowing—I was close. The smell alone brought me right back to that little bakery counter. Maybe you’ve been there, chasing a flavor from your past, determined to get it right.
These bars are the perfect blend of warm gingerbread spices and silky, creamy cheesecake, all topped with a tangy cream cheese frosting that ties everything together. They’re the kind of dessert that makes you slow down, take a deep breath, and actually enjoy the moment. And honestly? They taste even better than I remember.
Why You’ll Love This Recipe
I’ve tested this recipe more times than I care to count, and each time I learn something new. These bars are special because they solve the biggest problem with layered desserts—keeping the layers distinct while letting them complement each other perfectly. The gingerbread base is firm enough to hold the cheesecake, and the cheesecake is creamy without being too heavy.
- Quick & Easy : Comes together in about 45 minutes of active time, then the oven does the rest. Perfect for holiday baking without the all-day commitment.
- Simple Ingredients : You probably already have molasses, spices, cream cheese, and butter in your kitchen. No weird specialty items here.
- Perfect for Cozy Evenings : These bars are made for cold weather, slow weekends, or any time you need a little comfort. They’re also a showstopper at holiday gatherings.
- Crowd-Pleaser : I’ve brought these to three different parties, and every single time someone asks for the recipe. Kids love the frosting, adults love the spice depth.
- Unbelievably Delicious : The texture is what gets me—the slight crunch of the gingerbread crust, the velvety cheesecake, the smooth frosting on top. It’s next-level comfort food.
What makes these different from other cheesecake bars? It’s the technique. I press the gingerbread dough into the pan first, then pour the cheesecake filling over it, which creates a clean, beautiful layer every time. No swirling, no blending—just two distinct textures that work together. And the spice blend? I spent ages getting that ratio right. It’s warm without being overpowering, with just enough ginger to wake up your taste buds.
This recipe isn’t just good—it’s the kind that makes you close your eyes after the first bite. It’s comfort food reimagined: richer, spicier, and with that perfect tangy finish. Perfect for impressing guests without stress, or turning a simple evening into something memorable.
What Ingredients You Will Need
This recipe uses simple, wholesome ingredients to deliver bold flavor and satisfying texture. Most of these are pantry staples, which makes these bars perfect for spontaneous baking sessions when you need a little comfort.
For the Gingerbread Crust:
- 2 cups all-purpose flour (I prefer Gold Medal for consistent results)
- 1 teaspoon baking soda
- 1 tablespoon ground ginger
- 1 teaspoon ground cinnamon
- 1/2 teaspoon ground cloves
- 1/2 teaspoon ground nutmeg (freshly grated if you have it)
- 1/2 teaspoon salt
- 1/2 cup unsalted butter, softened (1 stick)
- 1/2 cup packed brown sugar (light or dark both work; dark gives deeper flavor)
- 1 large egg, room temperature
- 1/2 cup molasses (not blackstrap—use regular for best flavor)
- 1 teaspoon vanilla extract
For the Cheesecake Layer:
- 16 ounces cream cheese, softened (two 8-ounce blocks, full-fat for best texture)
- 1/2 cup granulated sugar
- 2 large eggs, room temperature
- 1 teaspoon vanilla extract
- 1/4 cup sour cream (adds richness and prevents cracking)
For the Cream Cheese Frosting:
- 4 ounces cream cheese, softened
- 1/4 cup unsalted butter, softened
- 1 1/2 cups powdered sugar
- 1 teaspoon vanilla extract
- 1-2 tablespoons milk (as needed for consistency)
Ingredient Tips: For the molasses, I recommend Grandma’s Original or Brer Rabbit. Stay away from blackstrap—it’s too bitter and will overpower the spices. For cream cheese, Philadelphia is my go-to because it’s consistently creamy and doesn’t have that artificial aftertaste some store brands have. Make sure everything is at room temperature before you start, or you’ll end up with lumpy cheesecake batter. Trust me, I learned that the hard way on attempt number three.
If you’re dairy-free, you can substitute vegan cream cheese and butter, but the texture will be slightly different. I’ve tried it with Kite Hill cream cheese, and it works okay, but the bars are a bit softer. For a gluten-free version, swap the all-purpose flour with a 1:1 gluten-free baking blend. I like King Arthur’s for this recipe.
Equipment Needed
You don’t need fancy equipment for these bars, which is part of what makes them so great. Here’s what you’ll need:
- 9×13-inch baking pan (glass or metal both work; I prefer metal for even baking)
- Electric hand mixer or stand mixer (you can do this by hand, but your arm will thank you for the mixer)
- Large mixing bowls (at least two)
- Medium mixing bowl
- Parchment paper (for easy lifting and clean-up)
- Measuring cups and spoons
- Spatula (silicone is best for scraping every bit of batter)
- Cooling rack
- Sharp knife (for clean cuts)
If you don’t have a 9×13 pan, you can use two 8×8 pans and adjust the baking time slightly. I’ve also made these in a 9-inch round springform pan, which works beautifully for a more traditional cheesecake presentation. Just note that the bars will be thicker and need about 5-10 extra minutes in the oven.
One tip: line your pan with parchment paper, leaving some overhang on the sides. This makes lifting the entire batch out for easy cutting a breeze. I learned this trick after struggling to get the first few pieces out of the pan without breaking them.
Preparation Method
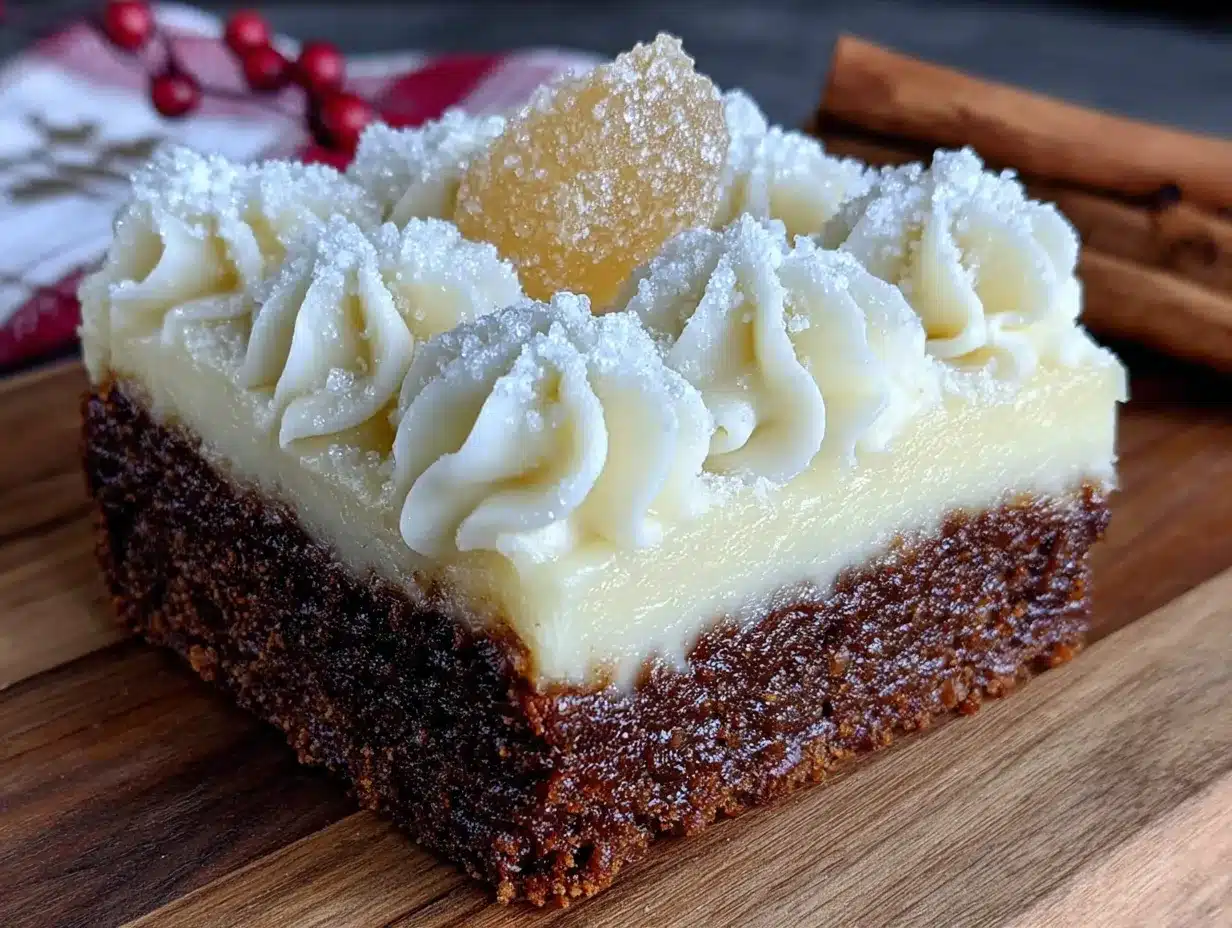
Let’s get baking. This recipe has three main components, but don’t let that intimidate you—each step is straightforward, and the result is absolutely worth it.
Step 1: Prepare the Gingerbread Crust
Preheat your oven to 350°F (175°C). Line your 9×13-inch baking pan with parchment paper, leaving about 2 inches of overhang on the long sides. In a medium bowl, whisk together the flour, baking soda, ginger, cinnamon, cloves, nutmeg, and salt. Set aside. In a large bowl, beat the softened butter and brown sugar together until light and fluffy—about 2-3 minutes with a hand mixer. Add the egg, molasses, and vanilla extract, and beat until combined. The mixture might look a little separated at this point, but that’s okay. Gradually add the dry ingredients to the wet ingredients, mixing on low speed until a soft dough forms. It should be slightly sticky but hold together when pressed.
Step 2: Press the Crust into the Pan
Transfer the gingerbread dough to your prepared pan. Using your hands or a spatula, press it evenly into the bottom of the pan. Make sure it’s an even layer—thick spots will be doughy, and thin spots might burn. I like to use the bottom of a measuring cup to really press it down flat. Bake the crust for 10 minutes at 350°F (175°C). It should be just set and slightly puffed, but not browned. Remove from the oven and let it cool slightly while you make the cheesecake layer.
Step 3: Make the Cheesecake Layer
In a large bowl, beat the softened cream cheese and granulated sugar together until smooth and creamy—about 2 minutes. Scrape down the sides of the bowl. Add the eggs one at a time, beating well after each addition. Mix in the vanilla extract and sour cream until just combined. Be careful not to overmix, or the cheesecake can become dense and crack during baking. The batter should be smooth and silky.
Step 4: Assemble and Bake
Pour the cheesecake batter over the pre-baked gingerbread crust. Spread it evenly with a spatula. Bake at 350°F (175°C) for 25-30 minutes, or until the edges are set and the center is just slightly jiggly—like a gentle wobble, not a wave. The cheesecake will continue to set as it cools. Remove from the oven and place the pan on a cooling rack. Let it cool completely at room temperature, then refrigerate for at least 4 hours, or overnight. This is crucial for clean slices.
Step 5: Make the Cream Cheese Frosting
Once the bars are fully chilled, make the frosting. In a medium bowl, beat the softened cream cheese and butter together until smooth and fluffy. Gradually add the powdered sugar, beating on low speed until incorporated. Add the vanilla extract and 1 tablespoon of milk. Beat on medium-high speed for 1-2 minutes until light and fluffy. If the frosting is too thick, add another tablespoon of milk. If it’s too thin, add a little more powdered sugar.
Step 6: Frost and Cut
Spread the frosting evenly over the chilled cheesecake layer. Use the parchment paper overhang to lift the entire block of bars out of the pan. Place it on a cutting board and use a sharp knife to cut into squares. For clean cuts, wipe the knife clean between each slice. I like to cut them into 12 large bars or 24 smaller bites, depending on the occasion.
Cooking Tips & Techniques
After a dozen attempts, I’ve picked up some tricks that make a real difference. Here are the ones that saved my sanity.
Room Temperature Ingredients Are Non-Negotiable
I know, I know—everyone says this. But it’s true. Cold cream cheese creates lumpy cheesecake batter, and cold eggs can make the mixture curdle. Leave your cream cheese, butter, and eggs on the counter for at least an hour before you start. If you’re in a hurry, you can microwave the cream cheese in 10-second bursts, but be careful not to melt it.
Don’t Overmix the Cheesecake
This was my biggest mistake early on. Overmixing incorporates too much air, which causes the cheesecake to puff up during baking and then crack as it cools. Mix just until the ingredients are combined and smooth. A few small lumps are better than a cracked top.
The Jiggle Test
The best way to know when your cheesecake is done is the jiggle test. Gently shake the pan. The edges should be firm and set, but the center should wobble slightly—like Jell-O, not like soup. If the whole pan ripples like liquid, it needs more time. If it’s completely firm, it’s overbaked.
Patience with Chilling
I know it’s hard to wait, but chilling is essential. The bars need at least 4 hours in the fridge to set properly. Overnight is even better. Cutting into warm cheesecake is a disaster—it’ll be a gooey mess. Trust the process.
Clean Cuts Every Time
Use a sharp knife and wipe it clean between each cut. I keep a damp paper towel nearby for this. It makes a huge difference in presentation. Also, cut the bars while they’re cold, then let them sit at room temperature for 10 minutes before serving. This softens the texture without making them messy.
Variations & Adaptations
One of the best things about this recipe is how adaptable it is. Here are some variations I’ve tried and loved.
Spiced Apple Gingerbread Bars
Fold 1 cup of finely diced apples (I like Granny Smith for tartness) into the cheesecake batter before pouring it over the crust. The apples add a juicy burst that pairs beautifully with the gingerbread. I tried this for a fall gathering, and it was gone in minutes.
Chocolate Gingerbread Cheesecake Bars
Melt 4 ounces of semi-sweet chocolate and swirl it into the cheesecake batter before baking. Use a knife to create gentle swirls—don’t overmix or you’ll lose the marbled effect. The chocolate adds a richness that feels extra decadent. Perfect for chocolate lovers.
Gluten-Free Version
Substitute the all-purpose flour with a 1:1 gluten-free baking blend. I’ve had great results with King Arthur’s Measure for Measure. The texture is slightly more crumbly, but the flavor is spot on. Make sure your baking soda is fresh for the best rise.
Vegan Adaptation
Use vegan cream cheese (Kite Hill or Violife work well), vegan butter, and a flax egg (1 tablespoon ground flaxseed mixed with 3 tablespoons water) for the crust. The texture will be softer, but the flavor is still wonderful. I’d recommend chilling the bars for at least 6 hours for the best results.
Pumpkin Spice Twist
Add 1/2 cup of pumpkin puree to the cheesecake batter along with an extra tablespoon of flour to absorb the moisture. Increase the cinnamon to 1 1/2 teaspoons and add 1/2 teaspoon of allspice. This version is perfect for Thanksgiving or any cozy fall day.
Serving & Storage Suggestions
These bars are best served chilled or at room temperature—both are delicious in different ways. Cold, the cheesecake layer is firm and almost mousse-like. At room temperature, it becomes luxuriously creamy. I personally love them straight from the fridge with a hot cup of coffee.
Presentation Ideas
Dust the top with a little ground cinnamon or nutmeg before serving for a pretty finish. You can also add a dollop of whipped cream and a sprinkle of candied ginger for extra flair. For holiday gatherings, arrange the bars on a platter with fresh rosemary sprigs and cranberries for a festive look.
What to Serve Alongside
These bars pair beautifully with a warm beverage. Try them with spiced chai latte for a cozy afternoon treat, or with a glass of cold milk for a classic combo. If you’re serving them as dessert after a meal, a scoop of vanilla ice cream is a lovely addition.
Storage Instructions
Store the bars in an airtight container in the refrigerator for up to 5 days. Layer them with parchment paper between each layer to prevent sticking. The flavors actually deepen after a day or two, so don’t be afraid to make them ahead.
Freezing Tips
These bars freeze beautifully. Wrap individual bars tightly in plastic wrap, then place them in a freezer-safe bag or container. They’ll keep for up to 3 months. To thaw, transfer to the refrigerator overnight or let sit at room temperature for about 30 minutes. I always keep a stash in my freezer for emergencies.
Reheating
If you prefer your bars warm, microwave a single bar for 10-15 seconds. The cheesecake will soften, and the gingerbread will become slightly warm and fragrant. Just don’t overheat, or the frosting will melt.
Nutritional Information & Benefits
These bars are a treat, so I won’t pretend they’re health food. But they do have some redeeming qualities worth mentioning.
Estimated Nutritional Values (per bar, based on 12 servings):
| Nutrient | Amount |
|---|---|
| Calories | 410 |
| Total Fat | 24g |
| Saturated Fat | 14g |
| Cholesterol | 105mg |
| Sodium | 320mg |
| Total Carbohydrates | 45g |
| Dietary Fiber | 1g |
| Sugars | 32g |
| Protein | 6g |
Health Highlights: Ginger is known for its anti-inflammatory properties and can help with digestion. Cinnamon may help regulate blood sugar levels. Cream cheese provides calcium and protein, though it’s also high in fat. These bars are not low-calorie, but they’re made with real ingredients and no artificial preservatives. I see them as a soul-nourishing indulgence—something to enjoy mindfully, not guiltily.
Dietary Considerations: This recipe contains gluten, dairy, and eggs. For gluten-free or vegan options, see the variations section above. The bars are nut-free as written, making them safe for school events or nut-free households.
Conclusion
These cozy gingerbread cheesecake bars with cream cheese frosting are more than just a dessert—they’re a little piece of comfort you can create in your own kitchen. After that little bakery closed, I thought I’d never taste those bars again. But now I can make them anytime I want, and honestly, they’re even better than I remember. The process of perfecting this recipe taught me that sometimes the best things come from chasing a memory.
I hope you give these bars a try and make them your own. Maybe you’ll add extra ginger, or skip the frosting, or serve them warm with ice cream. However you make them, they’re sure to bring a little warmth and sweetness to your day. That’s what cozy baking is all about, isn’t it?
If you make these, I’d love to hear about it. Drop a comment below and tell me how they turned out, or share your own twist on the recipe. And if you’re looking for more cozy treats, don’t miss my classic pumpkin roll or these soft gingerbread cookies—they’re perfect for holiday baking. Happy baking, friends!
Frequently Asked Questions
Can I use blackstrap molasses instead of regular?
I wouldn’t recommend it. Blackstrap molasses is much stronger and more bitter, which can overpower the spices and make the bars taste harsh. Stick with regular molasses for the best flavor.
Why did my cheesecake layer crack?
Cracking usually happens from overmixing the batter or overbaking. Make sure you mix just until combined, and don’t leave the bars in the oven too long. The center should still be slightly jiggly when you take them out. Also, cooling them gradually helps prevent cracks.
Can I make these bars ahead of time?
Absolutely! These bars actually taste better the next day. You can make them up to 2 days in advance and keep them in the refrigerator. Just add the frosting right before serving for the best presentation.
How do I get clean slices without the frosting smearing?
Chill the bars thoroughly before cutting. Use a sharp knife and wipe it clean between each cut with a damp paper towel. For the cleanest slices, you can even freeze the bars for 30 minutes before cutting.
Can I use a different pan size?
Yes, but you’ll need to adjust the baking time. An 8×8 pan will give you thicker bars that need about 5-10 extra minutes of baking. A 9-inch round springform pan works great for a more traditional cheesecake look. Just keep an eye on the center and use the jiggle test to determine doneness.
Pin This Recipe!
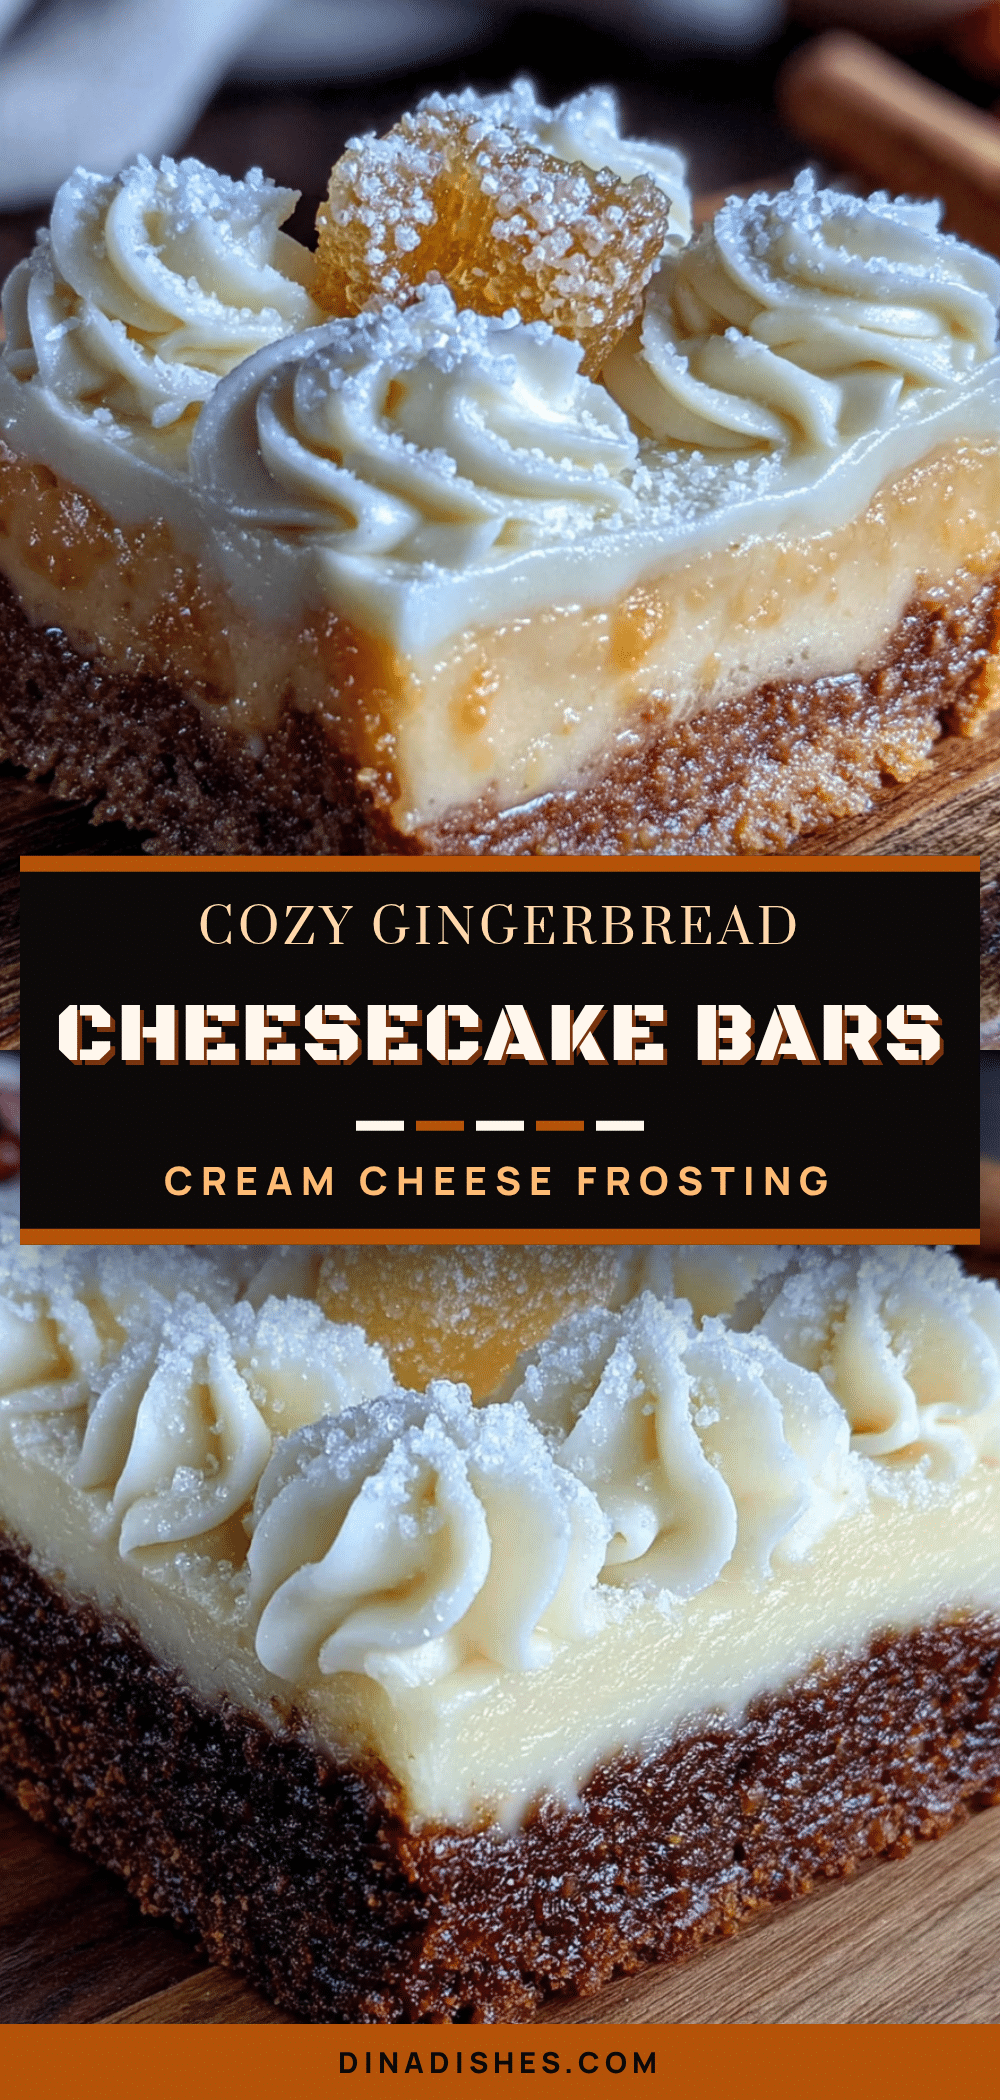
Cozy Gingerbread Cheesecake Bars with Cream Cheese Frosting
These cozy gingerbread cheesecake bars combine a warm, spiced gingerbread crust with a silky cheesecake layer, all topped with tangy cream cheese frosting. They’re the perfect comfort dessert for cold weather or holiday gatherings.
- Prep Time: 45 minutes
- Cook Time: 30 minutes
- Total Time: 5 hours 15 minutes (includes chilling)
- Yield: 12 servings 1x
- Category: Dessert
- Cuisine: American
Ingredients
- 2 cups all-purpose flour
- 1 teaspoon baking soda
- 1 tablespoon ground ginger
- 1 teaspoon ground cinnamon
- 1/2 teaspoon ground cloves
- 1/2 teaspoon ground nutmeg
- 1/2 teaspoon salt
- 1/2 cup unsalted butter, softened
- 1/2 cup packed brown sugar
- 1 large egg, room temperature
- 1/2 cup molasses (not blackstrap)
- 1 teaspoon vanilla extract
- 16 ounces cream cheese, softened
- 1/2 cup granulated sugar
- 2 large eggs, room temperature
- 1 teaspoon vanilla extract
- 1/4 cup sour cream
- 4 ounces cream cheese, softened
- 1/4 cup unsalted butter, softened
- 1 1/2 cups powdered sugar
- 1 teaspoon vanilla extract
- 1–2 tablespoons milk
Instructions
- Preheat oven to 350°F (175°C). Line a 9×13-inch baking pan with parchment paper, leaving overhang on the long sides.
- In a medium bowl, whisk together flour, baking soda, ginger, cinnamon, cloves, nutmeg, and salt.
- In a large bowl, beat softened butter and brown sugar until light and fluffy (2-3 minutes). Add egg, molasses, and vanilla extract; beat until combined.
- Gradually add dry ingredients to wet ingredients, mixing on low speed until a soft dough forms.
- Press dough evenly into the prepared pan. Bake for 10 minutes. Remove and let cool slightly.
- In a large bowl, beat cream cheese and granulated sugar until smooth (about 2 minutes). Add eggs one at a time, beating well after each. Mix in vanilla extract and sour cream until just combined.
- Pour cheesecake batter over pre-baked crust. Bake for 25-30 minutes until edges are set and center is slightly jiggly.
- Cool completely at room temperature, then refrigerate for at least 4 hours or overnight.
- For frosting: Beat softened cream cheese and butter until smooth. Gradually add powdered sugar, then vanilla extract and 1 tablespoon milk. Beat until fluffy, adding more milk if needed.
- Spread frosting over chilled cheesecake layer. Use parchment overhang to lift bars out. Cut into squares with a sharp knife, wiping clean between cuts.
Notes
Room temperature ingredients are crucial for a smooth cheesecake layer. Do not overmix the cheesecake batter to prevent cracking. Chill bars thoroughly before cutting for clean slices. For best results, refrigerate overnight.
Nutrition
- Serving Size: 1 bar
- Calories: 410
- Sugar: 32
- Sodium: 320
- Fat: 24
- Saturated Fat: 14
- Carbohydrates: 45
- Fiber: 1
- Protein: 6
Keywords: gingerbread cheesecake bars, cream cheese frosting, holiday dessert, cozy baking, gingerbread, cheesecake bars


